User Manual
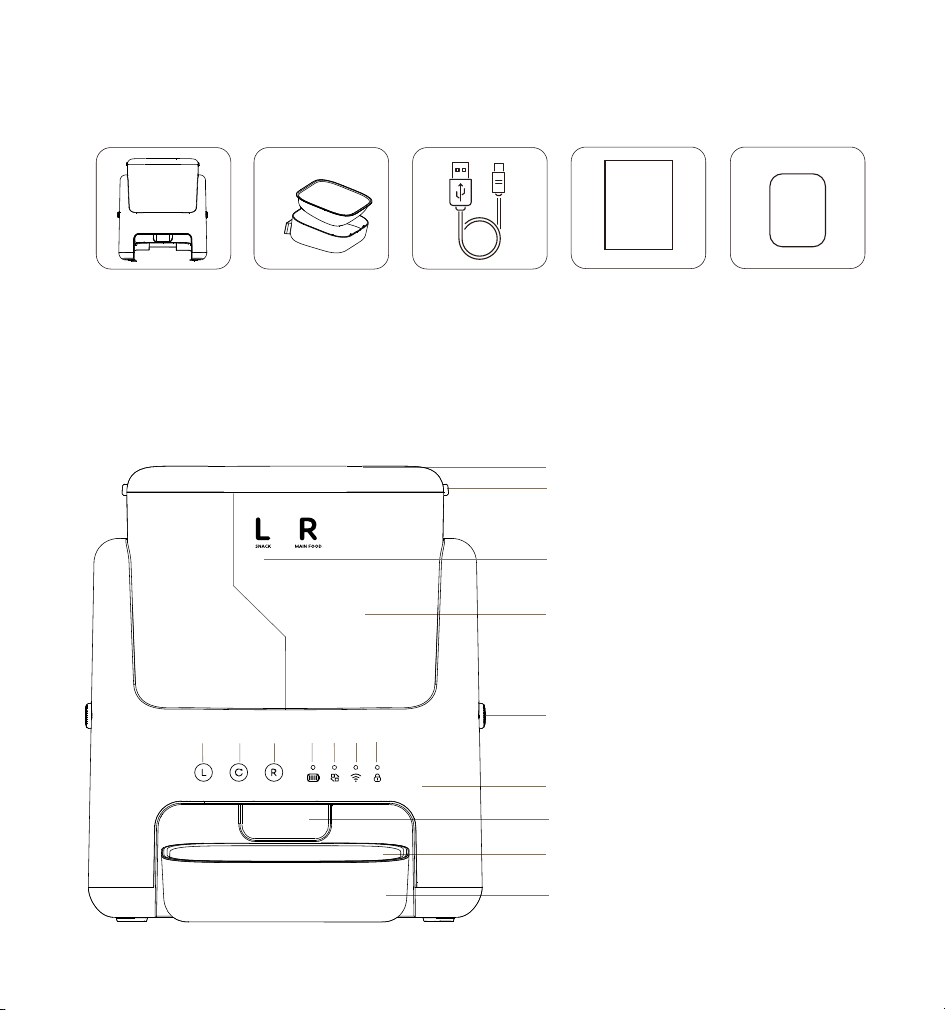
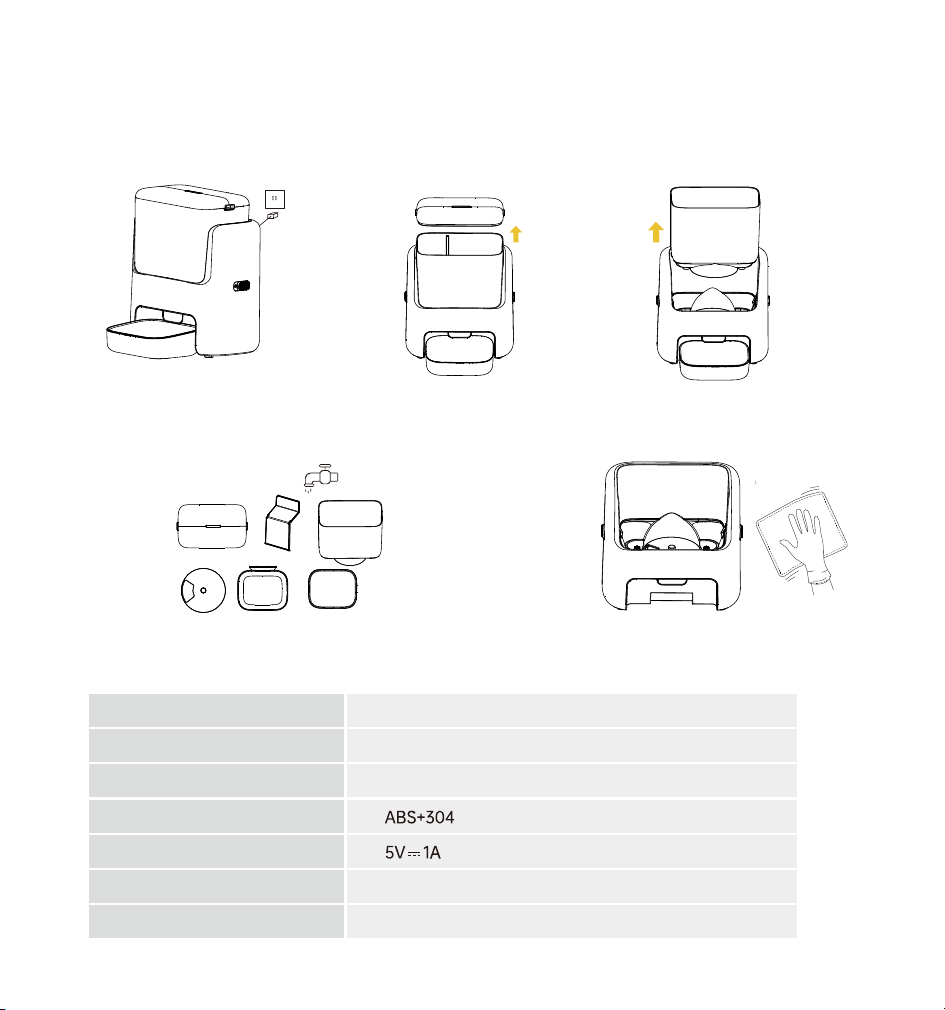
List of accessories
1*Smart pet feeder 1*Power cord
1*User manual
1*Desiccant
1*Stainless steel bowl
and plastic bowl
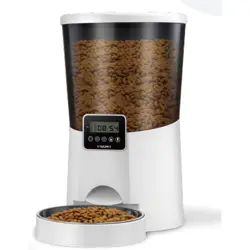
Product introduction
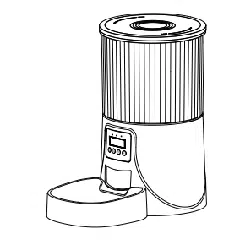
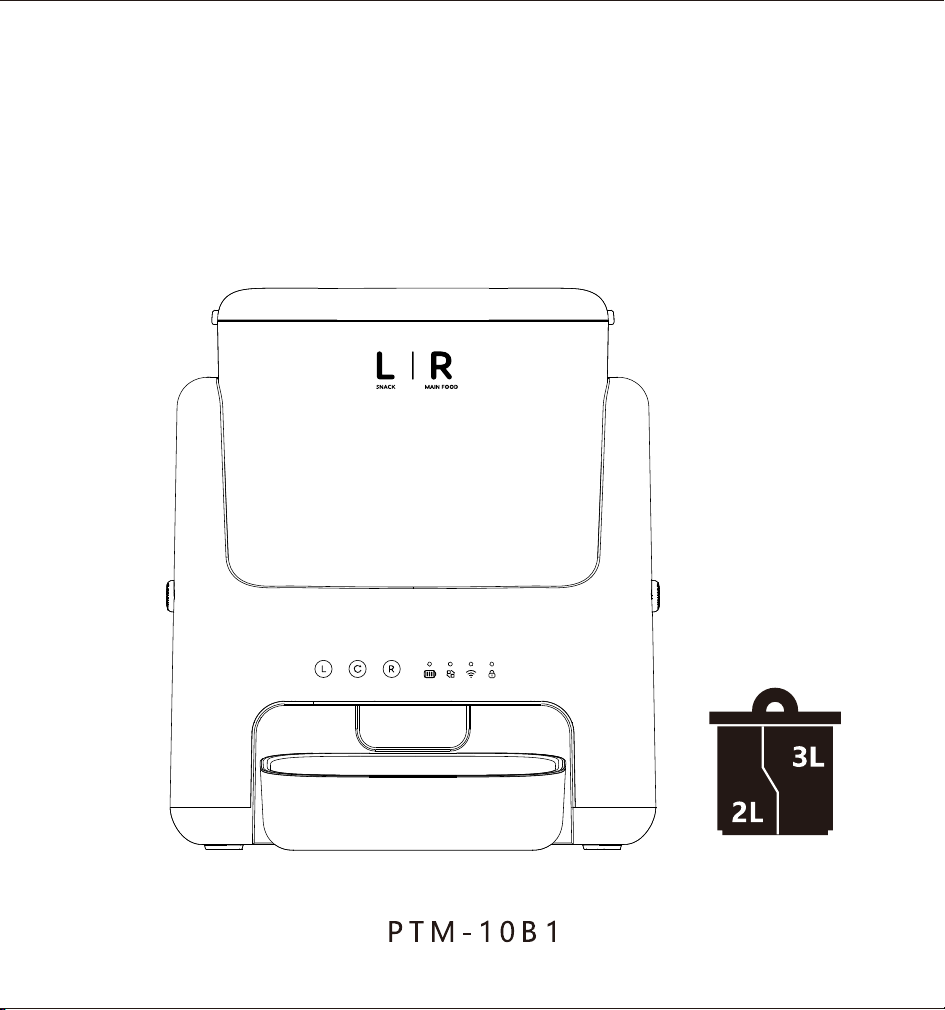
1. Grain Hopper Lid
2. Lid Latch
6. Main Unit
4. Grain Storage Bucket
3. Food Divider
9. Plastic Food Bowl
10. Child Lock Indicator
Operation Indicator
11. Wi-Fi Indicator
12. Feeding Indicator
13. Battery Indicator Light
14. Right Feeding Button
16. Left Feeding Button
15. Child Lock Button
8. Stainless Steel Food Bowl
7. Food Dispensing Outlet
5. Hopper Push-Button Lock
1
2
4
3
5
6
7
8
9
10111213141516
Product Accessories
Product assembly
1. Remove the feeder and all accessories.
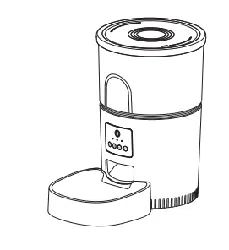
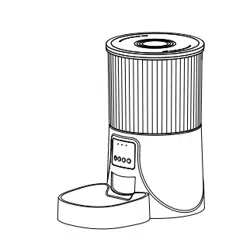
Indicator Light
2. Insert the charging cable into the bottom
of the device as shown in the figure. If battery
power is required, install 4 AA batteries as
shown in the figure.
Note: Battery power is only for emergency
use during power outages.It is recommended
to connect to a power source and WiFi to set
feeding schedules.
Wi-Fi Indicator
White light blinking
White light steady on
Red light blinking
White light steady on
White light blinking
Flashing white light
Flashing green light
Small portion dispensing
Large Portion Dispensing (Right Feeder)
White light steady on
White light off
Waiting for network connection
or offline mode
Network connected successfully
Locked State
Unlocked State
Full Charge
Battery critically low
Low battery
Indicator Light
Action Meaning
Feeding Indicator
Child Lock Indicator
Battery Indicator Light

4. Simply place the food mixing tray in its
corresponding position on the main unit.
7. Place the pet food container lid on the
container to complete the assembly.
5. Place the pet food container on the main
unit of the feeder as shown in the figure.
3. Assemble the food bowl and place
it in the corresponding position under
the food dispensing outlet.
6. Insert the food dividing partition into the
corresponding position in the middle of the
pet food container as shown in the figure.
How to set up a pet feeder
Preparation
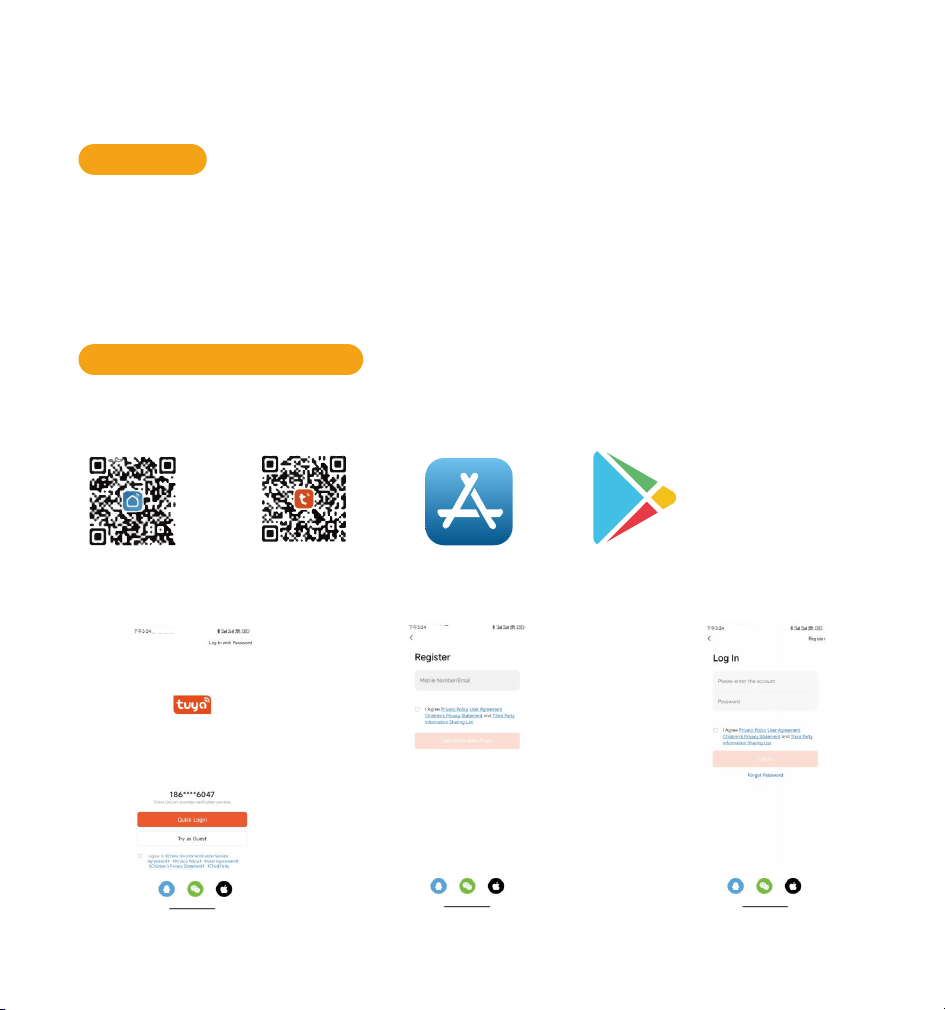
Download the app and log in
The feeder is compatible with iOS 9.0 or higher versions of iPhone and Android 4.4
or higher versions of smartphones.
The feeder supports 2.4G and 5G Wi-Fi.
Please place the feeder close to the WiFi router, with a distance of no more than 33
feet/10 meters between them, and there should be no wall barriers between them.
Scan the OR code or search for "TUYA Smart,Smart,Life" on App Store or Google Play to
download the app.
Sign up or Login your account.
Note: The language of the app depends on the default language of your phone.
App Store Google Play
Tuya Smart
Smart Life
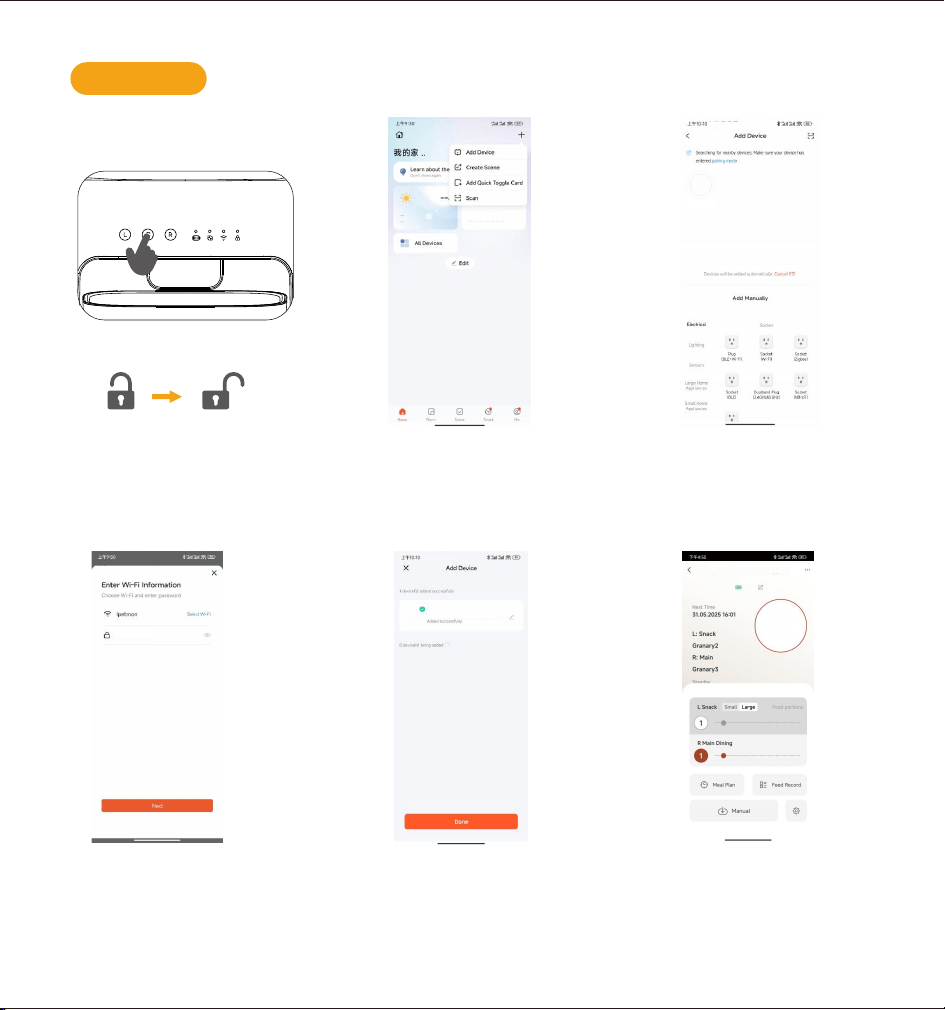
6. Enter the main page, s lide and select
the portion number of snacks or main
dinning and clik "Manual" to start
manual feeding.
1. Press the child lock button
for 3 seconds to unlock.
PPress and hold the L and R
buttons simultaneously for 5
seconds. The device will then
enter network configuration mode.
2. Ensure that the Bluetooth function
of the phone is turned on, connect
the phone to the WIFI network, and
enable the phone's GPS positioning.
On the top to right side, click the "+"
sign to add a new feeder.
3. When the "PTM-10B1" appears, click
on the corresponding icon to add it.
Add device
5. After clicking the "Finish"
and the connection is
successful, The wifi indicator
light which shown in the
display screen is on.
xxxxxxxx
4. When connecting to the network for
the first time or switching to a new WiFi
network,The system will prompt you
to enter the WiFi password. Please
Enter the password in the field
and then click "Next".
PTM-10B1
PTM-10B1
PTM-10B1
3S
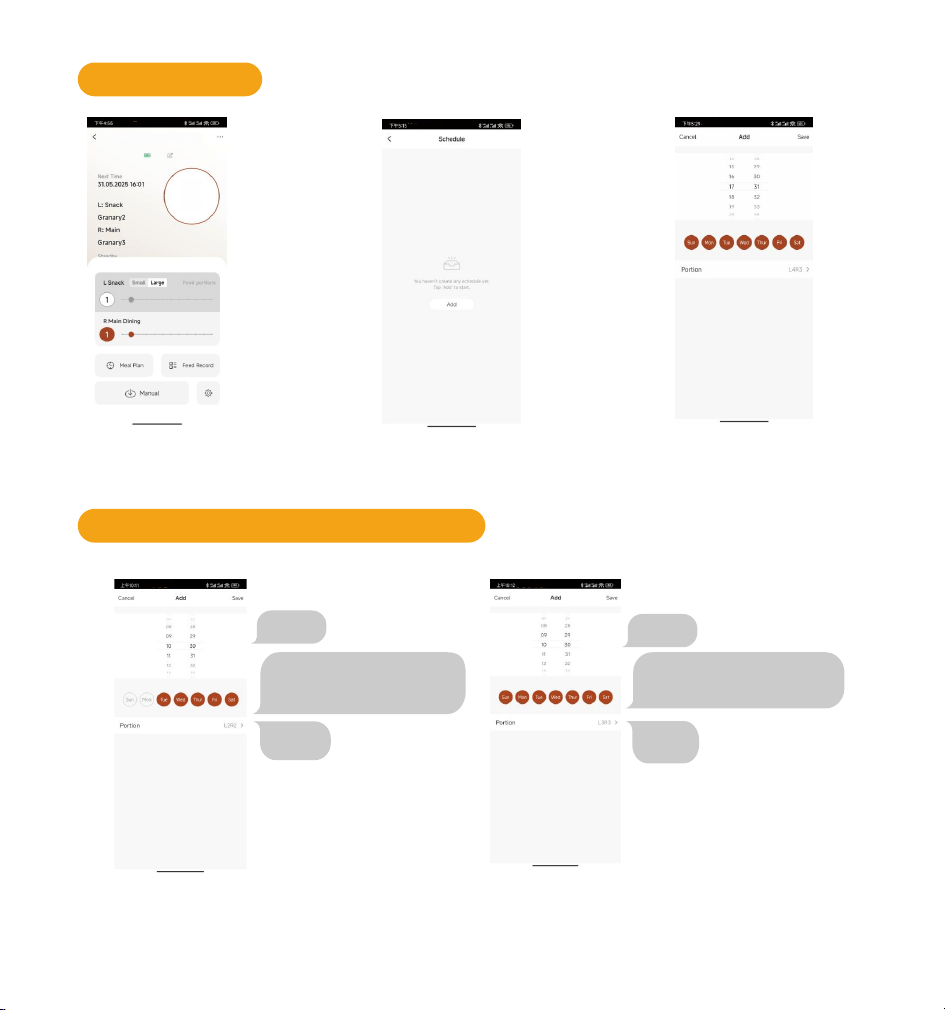
Add feeding plan
1. Click on "Feeding Plan" to
enter the settings page.
2. Click the "Add" button
to add a feeding plan.
3. Set the schedule & portion
based on needs. Click "Save"
to finish.
Add feeding plan interface instructions
10:30
Feeding dates: every Tuesday,
Wednesday, Thursday, Friday,
Saturday
10:30
Feeding dates: every Sunday,
Monday, Tuesday, Wednesday,
Thursday, Friday, Saturday
L Snack3
R Meal3
Plan 1
10:30 (Feeding dates: every Tuesday,
Wednesday, Thursday, Friday, Saturday)
L Snack2, R Meal2.
Plan 2
10:30 Everydat/L Snack3,RMeal3.
L Snack2
R Meal2
PTM-10B1
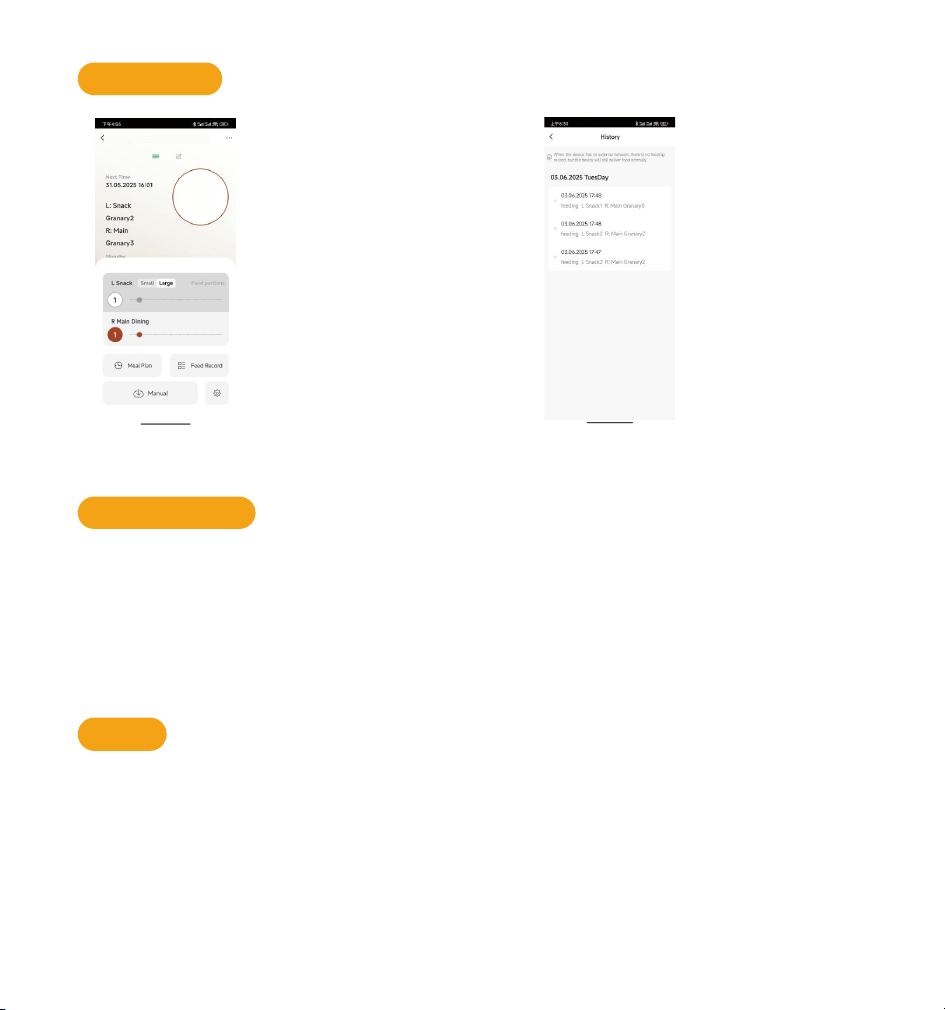
Feed record
1. Click "Feed Record". 2. Enter 'Feeding history' page
Press and hold the Child Lock Button for 3 seconds to unlock.
Press the Left Feeding Button once to dispense one small portion of food.
Press and hold the Child Lock Button and the Feeding Button simultaneously for
3 seconds until the feeding indicator flashes green to switch to large portion mode.
Press the Right Feeding Button once to dispense one large portion of food.
Turn the knob clockwise to the reset icon, press and hold it for 7 seconds
to restore the factory settings.
Note: When two beeps appear, it means the feeder restores the factory settings successfully.
Manual feeding
Reset
Note: Only left granary has the large portion available, right granary is not available.
PTM-10B1
Product maintenance instructions
Product parameters
Model
Size
Capacity
Material
Input
Food
Adapter
Stainless steel
Dry food with a diameter of less than 1.5CM
Type C Power cord/Spare battery
PTM-10B1
326X187X387mm
2L+3L
5. Do not immerse or rinse the main unit.
Simply wipe it with a clean cloth.
1. Ensure the device is powered
off before cleaning.
2. Press the buttons on both
sides of the hopper lid to
remove it, then pour out any
remaining food.
3.Push the buttons on both sides of
the main unit forward to remove the
pet food container.
4. Clean the food hopper, stainless steel food
bowl, food container lid, plastic food bowl,
food divider, and food agitator plate. Then, air
dry or wipe them dry.

Usage precautions
Fault and resolution
Fault
Solution
Check whether the power cord is properly connected.
The feeder doesn't work.
Unplug the power cord and try using a new battery to see if it works.
The screen doesn't respond.
Press and hold the child lock button for 3 seconds to unlock.
Check that the food hopper and food stirring plate remain dry.
Check that the food remains dry. Do not use wet food
The machine is stuck with
grain or the display screen
is not lit.
Suspend the use of the battery and use the charging cable
to see if it can continue to work.
Check whether the food outlet or the internal passage is blocked by
foreign objects.
1. This feeder is recommended for pets over 6 months.
2. This feeder is designed for indoor use. Please avoid placing it in direct sunlight and away
from any potential fire or heat sources.
3. Never immerse the host in water or other liquids. It is important to keep the host dry.
4. To prevent pets from knocking over the feeder, it is recommended to place it
against a wall or in a safe location.
5. When children use the feeder, they should be supervised and guided by adults to ensure safe
operation.
6. If the desiccant bag is found damaged, please replace it with a new desiccant immediately.
7. If you stop using the feeder, unplug the power cable and remove the batteries properly.
installed in the cover and store them properly.

FCC Warning Statement
Changes or modifications not expressly approved by the party responsi-
ble for compliance could void the user’s authority to operate the
equipment. This equipment has been tested and found to comply with
the limits for a Class B digital device, pursuant to Part 15 of the FCC
Rules. These limits are designed to provide reasonable protection
against harmful interference in a residential installation. This equip-
ment generates uses and can radiate radio frequency energy and, if
not installed and used in accordance with the instructions, may cause
harmful interference to radio communications. However, there is no
guarantee that interference will not occur in a particular installation. If
this equipment does cause harmful interference to radio or television
reception, which can be determined by turning the equipment off and
on, the user is encouraged to try to correct the interference by one or
more of the following measures:
‐‐ Reorient or relocate the receiving antenna.
‐‐ Increase the separation between the equipment and receiver.
‐‐ Connect the equipment into an outlet on a circuit different from that
to which the receiver is connected.
‐‐ Consult the dealer or an experienced radio/TV technician for help.
FCC Radiation Exposure Statement
The antennas used for this transmitter must be installed to provide a
separation distance of at least 20 cm from all persons and must not be
co‐located for operating in conjunction with any other antenna or
transmitter.
This device complies with Part 15 of the FCC Rules. Operation is
subject to the following two conditions:
(1)This device may not cause harmful interference, and
(2)This device must accept any interference received, including interfer-
ence that may cause undesired operation.