User Manual
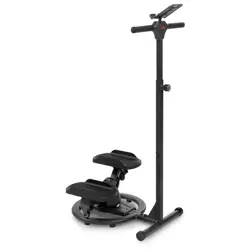
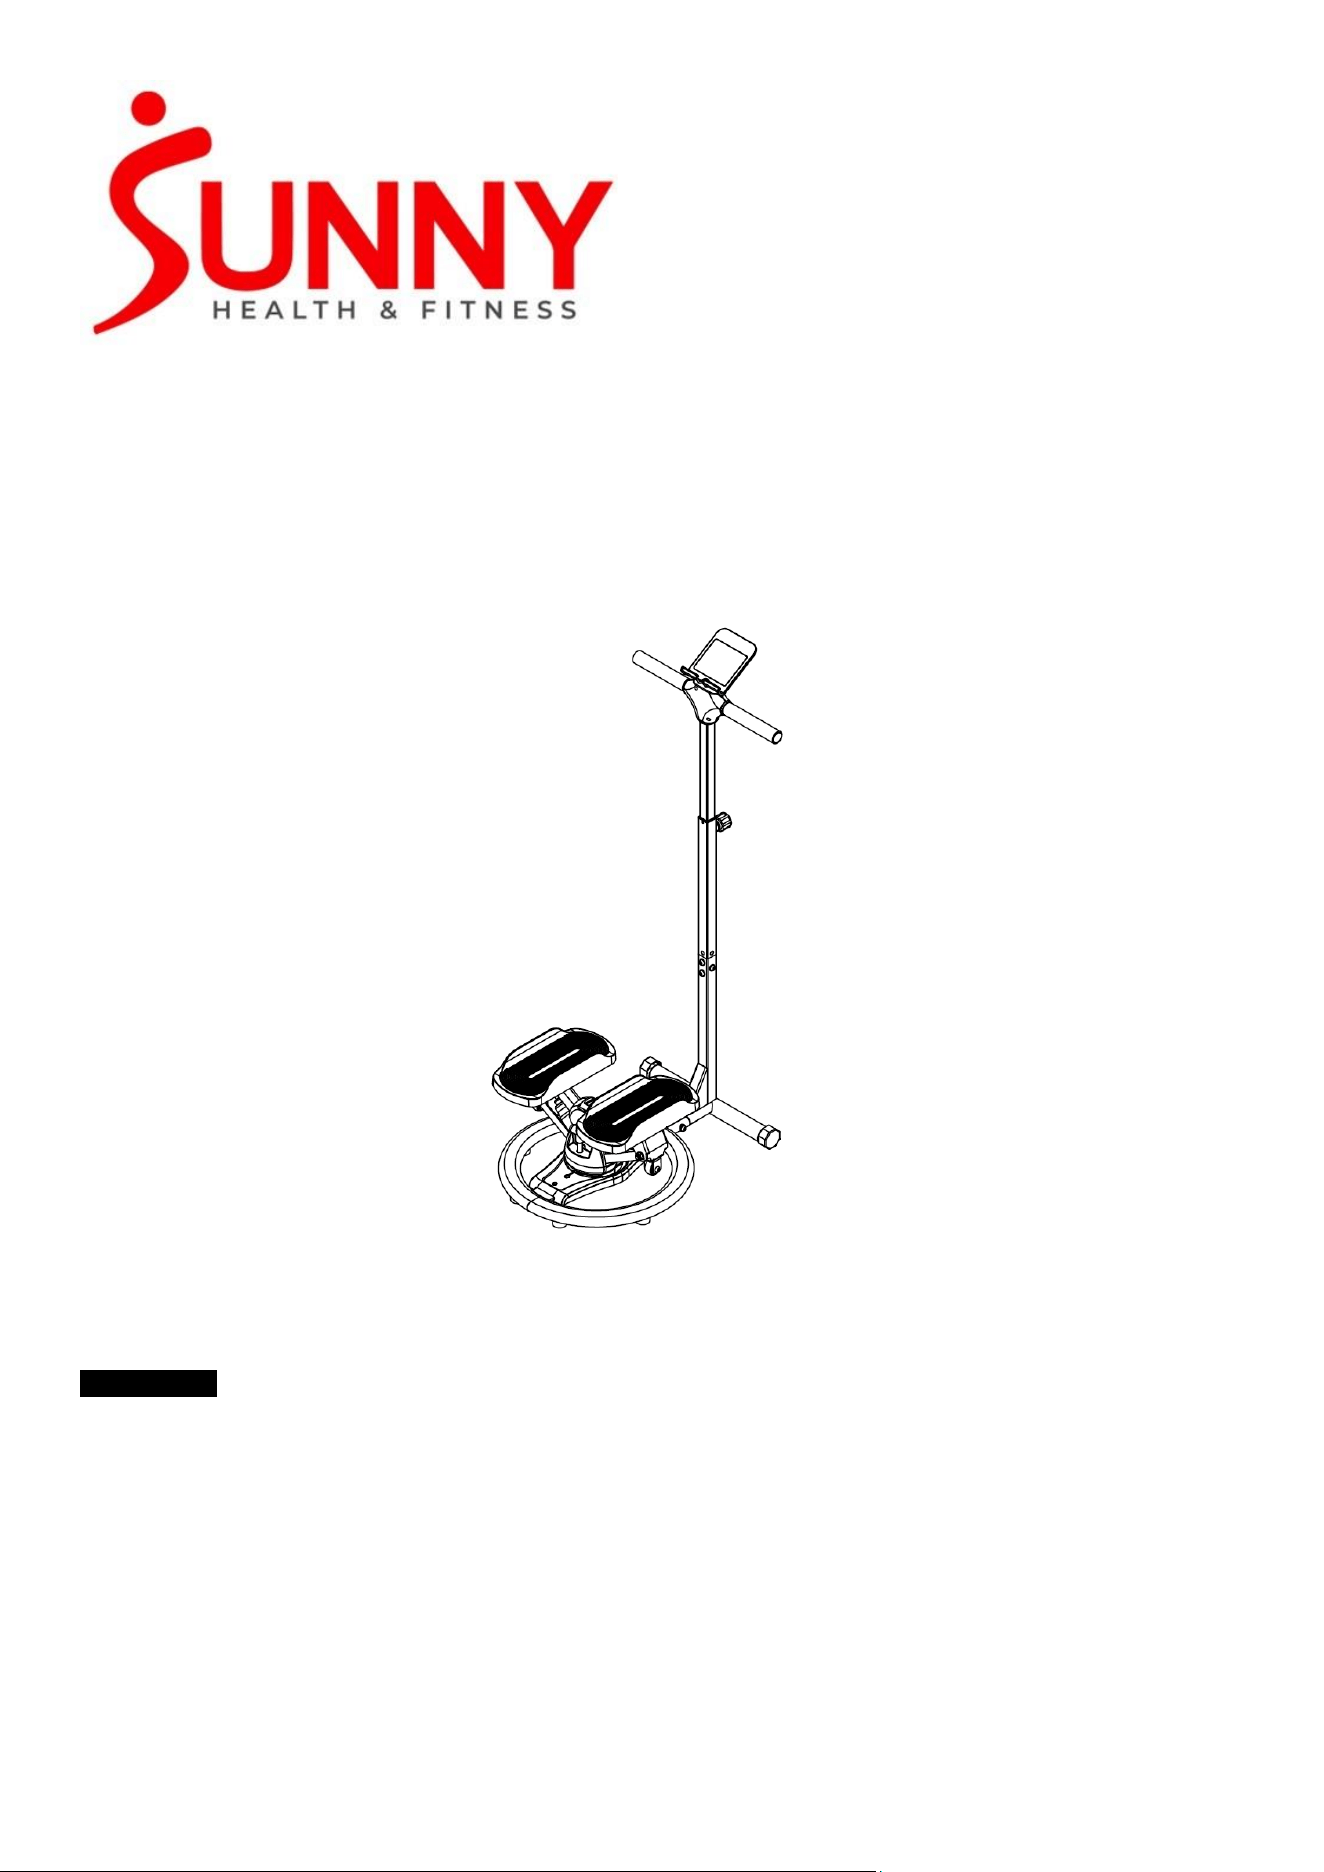
Swivel Stepper with Handlebar
SF-S026007
EN
IMPORTANT! Please retain owner’s manual for maintenance and adjustment instructions. Your
satisfaction is very important to us, PLEASE DO NOT RETURN UNTIL YOU HAVE CONTACTED US.
1
Important Safety Information
We thank you for choosing our product. To ensure your safety and health, please use this equipment
correctly. It is important to read this entire manual before assembling and using the equipment. Safe
and effective use can only be achieved if the equipment is assembled, maintained, and used properly.
It is your responsibility to ensure that all users of the equipment are informed of all warnings and
precautions.
1. Before starting any exercise program, you should consult your physician to determine if you have
any medical or physical conditions that could put your health and safety at risk or prevent you
from using the equipment properly. Your physician’s advice is essential if you are taking
medication that affects your heart rate, blood pressure, or cholesterol level.
2. Be aware of your body’s signals. Incorrect or excessive exercise can damage your health. Stop
exercising if you experience any of the following symptoms: pain, tightness in your chest, irregular
heartbeat, shortness of breath, lightheadedness, dizziness, or feelings of nausea. If you do
experience any of these conditions, you should consult your physician before continuing with your
exercise program.
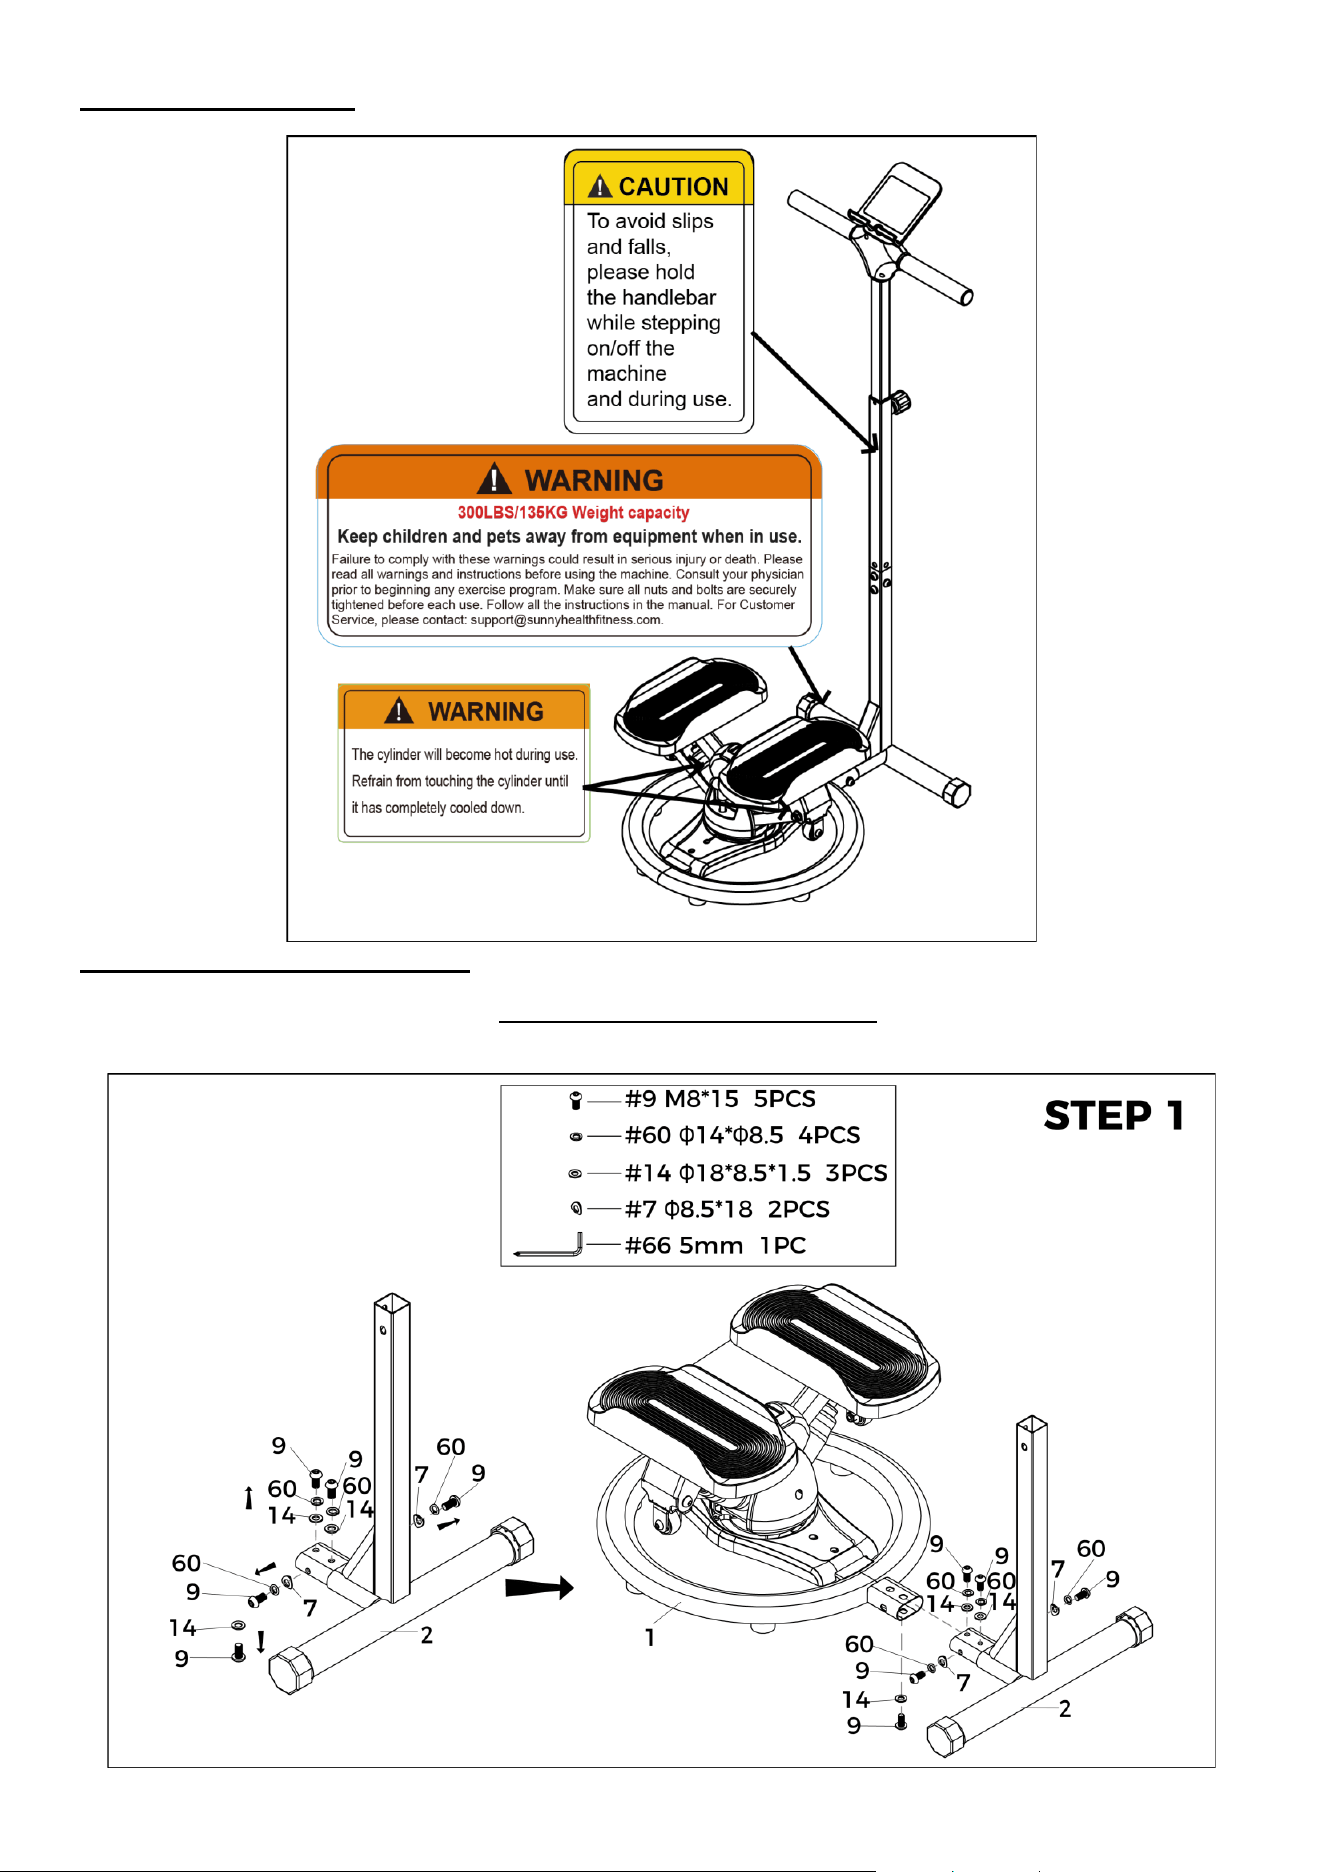
3. Keep children and pets away from the equipment. The equipment is designed for adult use only.
4. Use the equipment on a solid, flat level surface with a protective cover for your floor or carpet. To
ensure safety, the equipment should have at least 2 feet (60 cm) of free space all around it.
5. Ensure that all nuts and bolts are securely tightened before using the equipment. The safety of the
equipment can only be maintained if it is regularly examined for damage and/or wear and tear.
6. Always use the equipment as indicated. If you find any defective components while assembling or
checking the equipment, or if you hear any unusual noises coming from the equipment during
exercise, discontinue use of the equipment immediately and do not use until the problem has
been rectified.
7. Wear suitable clothing while using the equipment. Avoid wearing loose clothing that may become
entangled in the equipment.
8. Do not place fingers or objects into the moving parts of the equipment.
9. The maximum weight capacity of this unit is 300 lbs (135 kg).
10. This equipment is not suitable for therapeutic use.
11. To avoid bodily injury and/or damage to the product or property, proper lifting and moving are
required.
12. Your product is intended for use in cool and dry conditions. You should avoid storage in extreme
cold, hot or damp areas as this may lead to corrosion and other related problems.
13. This equipment is designed for indoor and home use only; it is not intended for commercial use.
Statement Of Purpose
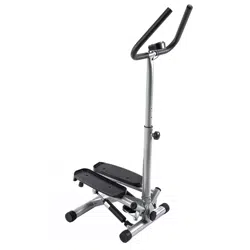
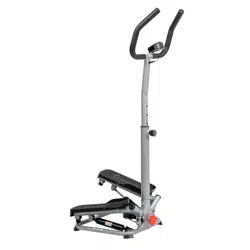
The Swivel Stepper with Handlebar is designed to simulate natural stepping movements while adding a
rotational component that increases workout intensity and promotes improved balance, coordination,
and core stability.
Waste Disposal
SUNNY HEALTH & FITNESS products are recyclable. At the end of its useful life please dispose of this
article correctly and safely (local refuse sites).
EU Declaration Of Conformity
You can find the declaration of conformity at the following link:
https://sunnyhealthfitness.com/pages/declaration-of-conformity
Technical Data
Connectivity: Bluetooth LE
Frequency Range: 2400~2483.5 Mhz
Transmitting Power: 0 dBm
2
Pre-Assembly Check List
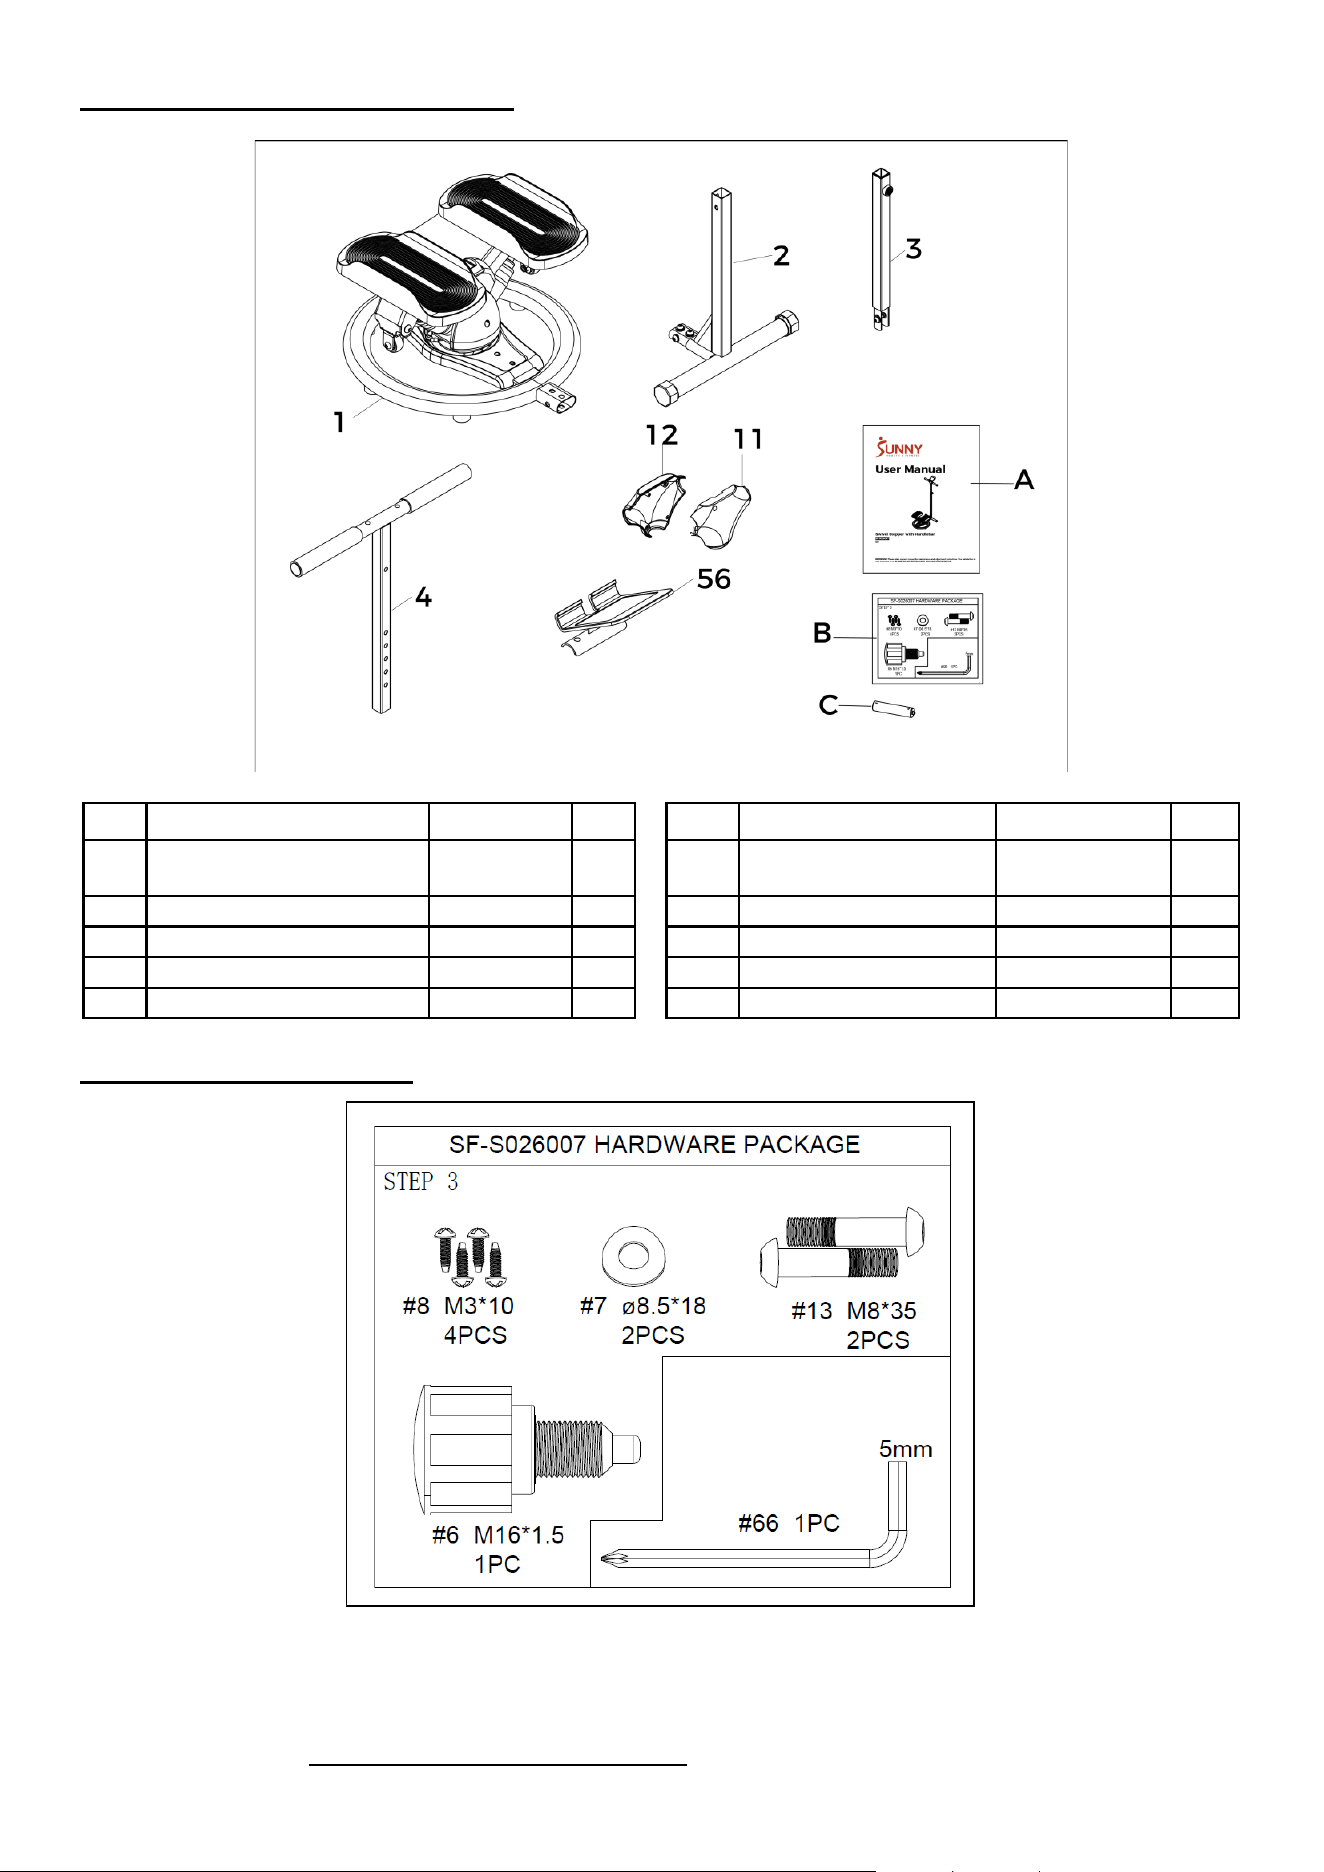
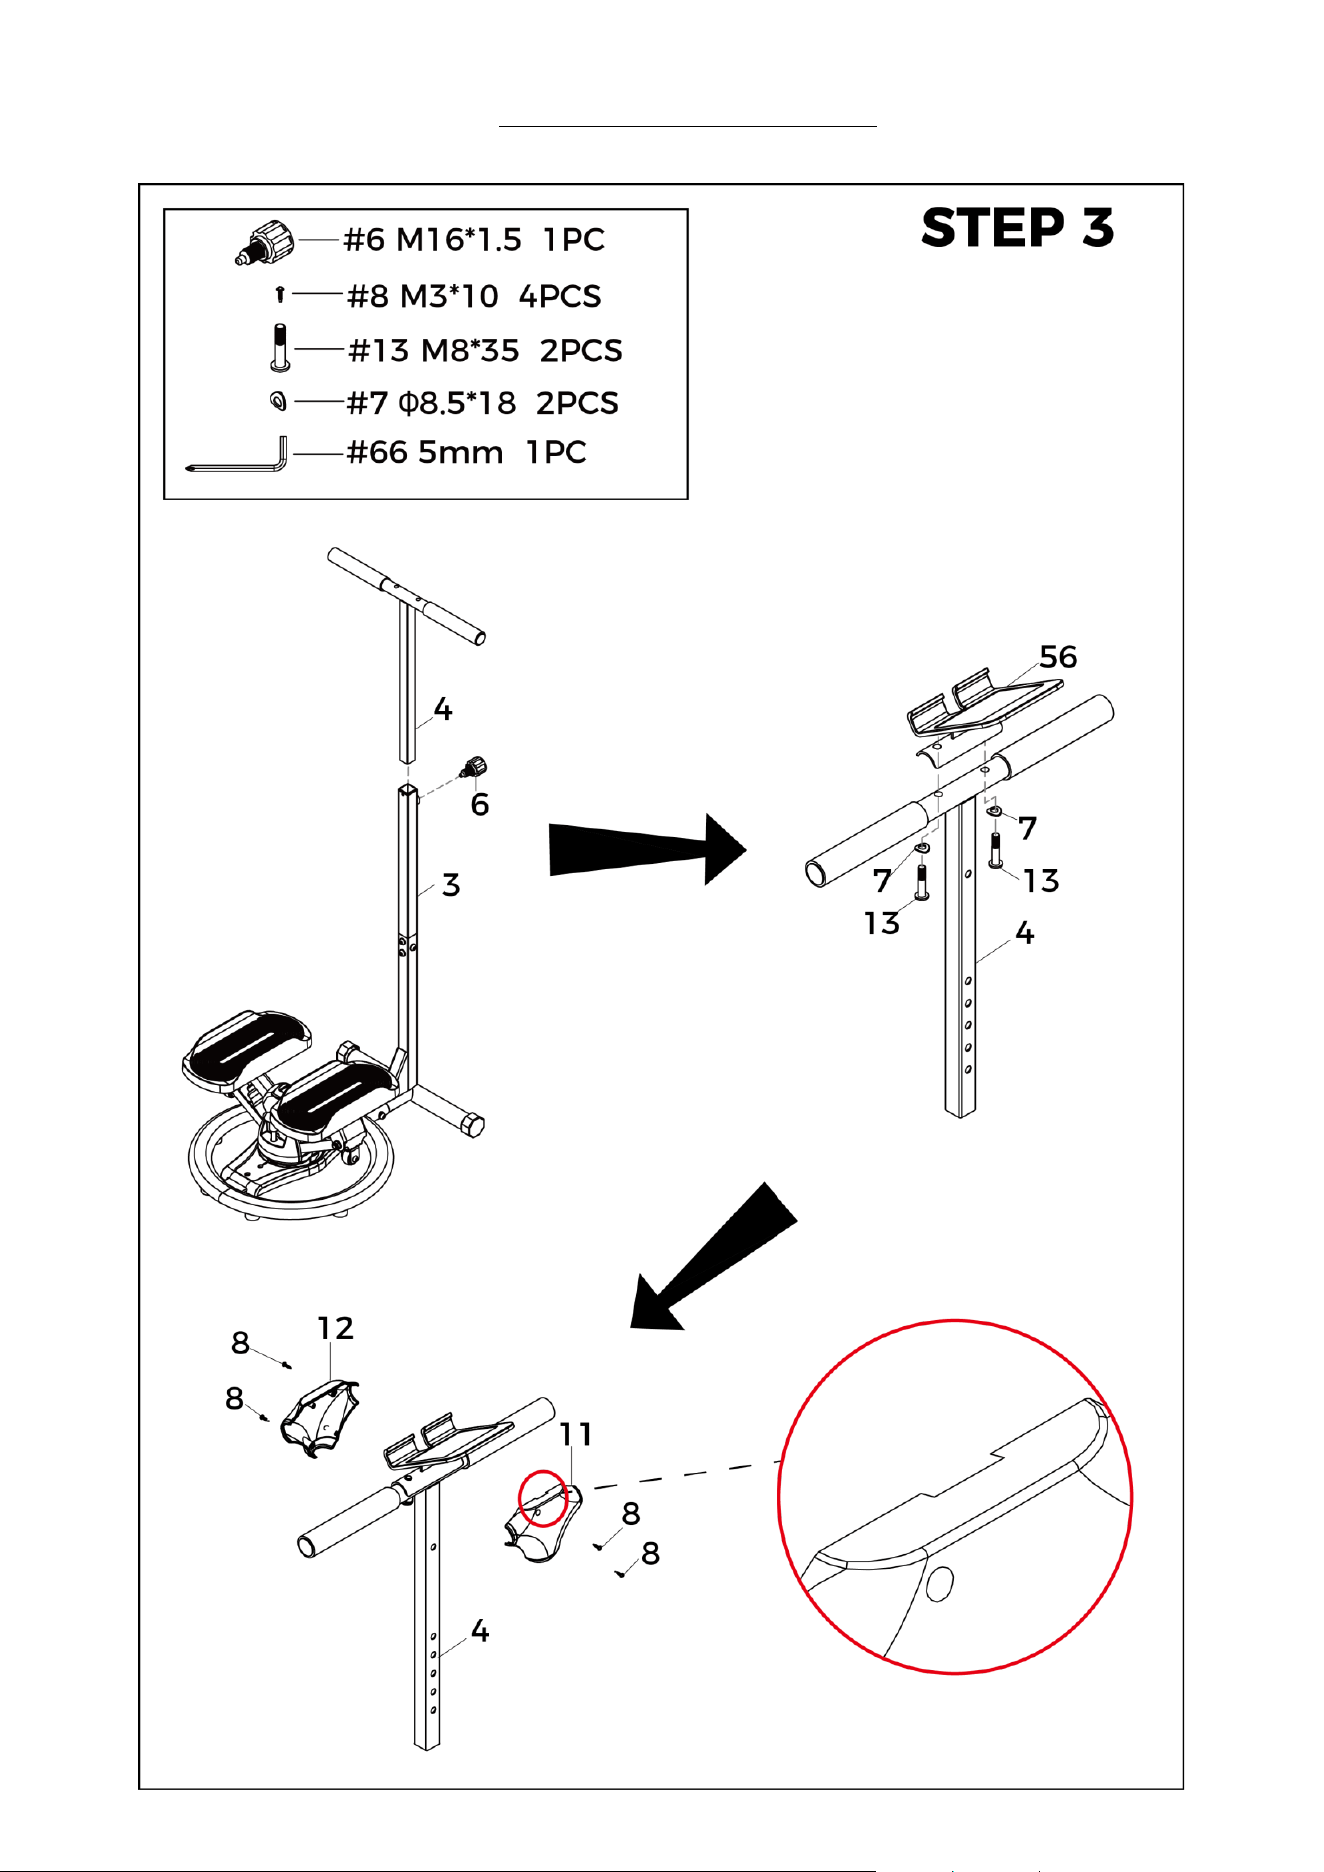
When you open the carton, you will find the following parts:
No.
Description
Spec.
Qty.
No.
Description
Spec.
Qty.
1
Main Frame
1
12
Rear Handlebar
Cover
1
2
Front Stabilizer
1
56
Tablet Holder
1
3
Nether Handlebar Post
1
A
Manual
1
4
Handlebar
1
B
Hardware Package
1
11
Front Handlebar Cover
1
C
Battery
AAA
1
Hardware Package
Ordering Replacement Parts
Please provide the following information in order for us to accurately identify the part(s) needed:
✓ The model number
✓ The product name
✓ The part number
Please contact us at support@sunnyhealthfitness.com or 1-877-90SUNNY (877-907-8669).
6
Modes
There are 3 swivel modes: fixed mode, 250°rotation mode, 360°rotation mode. You could change the
swivel mode by inserting the T-shape Pin (No. 64) into the corresponding hole.
FIXED MODE
250° ROTATION MODE
360° ROTATION MODE
Pull up on the T-shape Pin (No. 64),
then rotate the stepper to the fixed
hole side. Align the markings as Fig. 1
shows. Push down on the T-shape
Pin (No. 64) into the fixed hole fully
to secure the pedal in place.
Stepper will be locked and unable to
swivel.
Pull up on the T-shape Pin (No. 64),
then turn the stepper to the 250°
rotation side, and push down on the
T-shape Pin (No. 64) into the 250°
rotation side, as Fig. 2 showed.
Stepper will now be able to rotate
up to 250°.
Pull up on the T-shape Pin (No.
64) as Fig. 3 showed.
Now stepper will be able to rotate
360°.
Adjustment Guide
NOTE: The Cylinder (No. 29) may become excessively hot after prolonged use and may be dangerous to
touch. Allow the Cylinder (No. 29) to cool between uses.
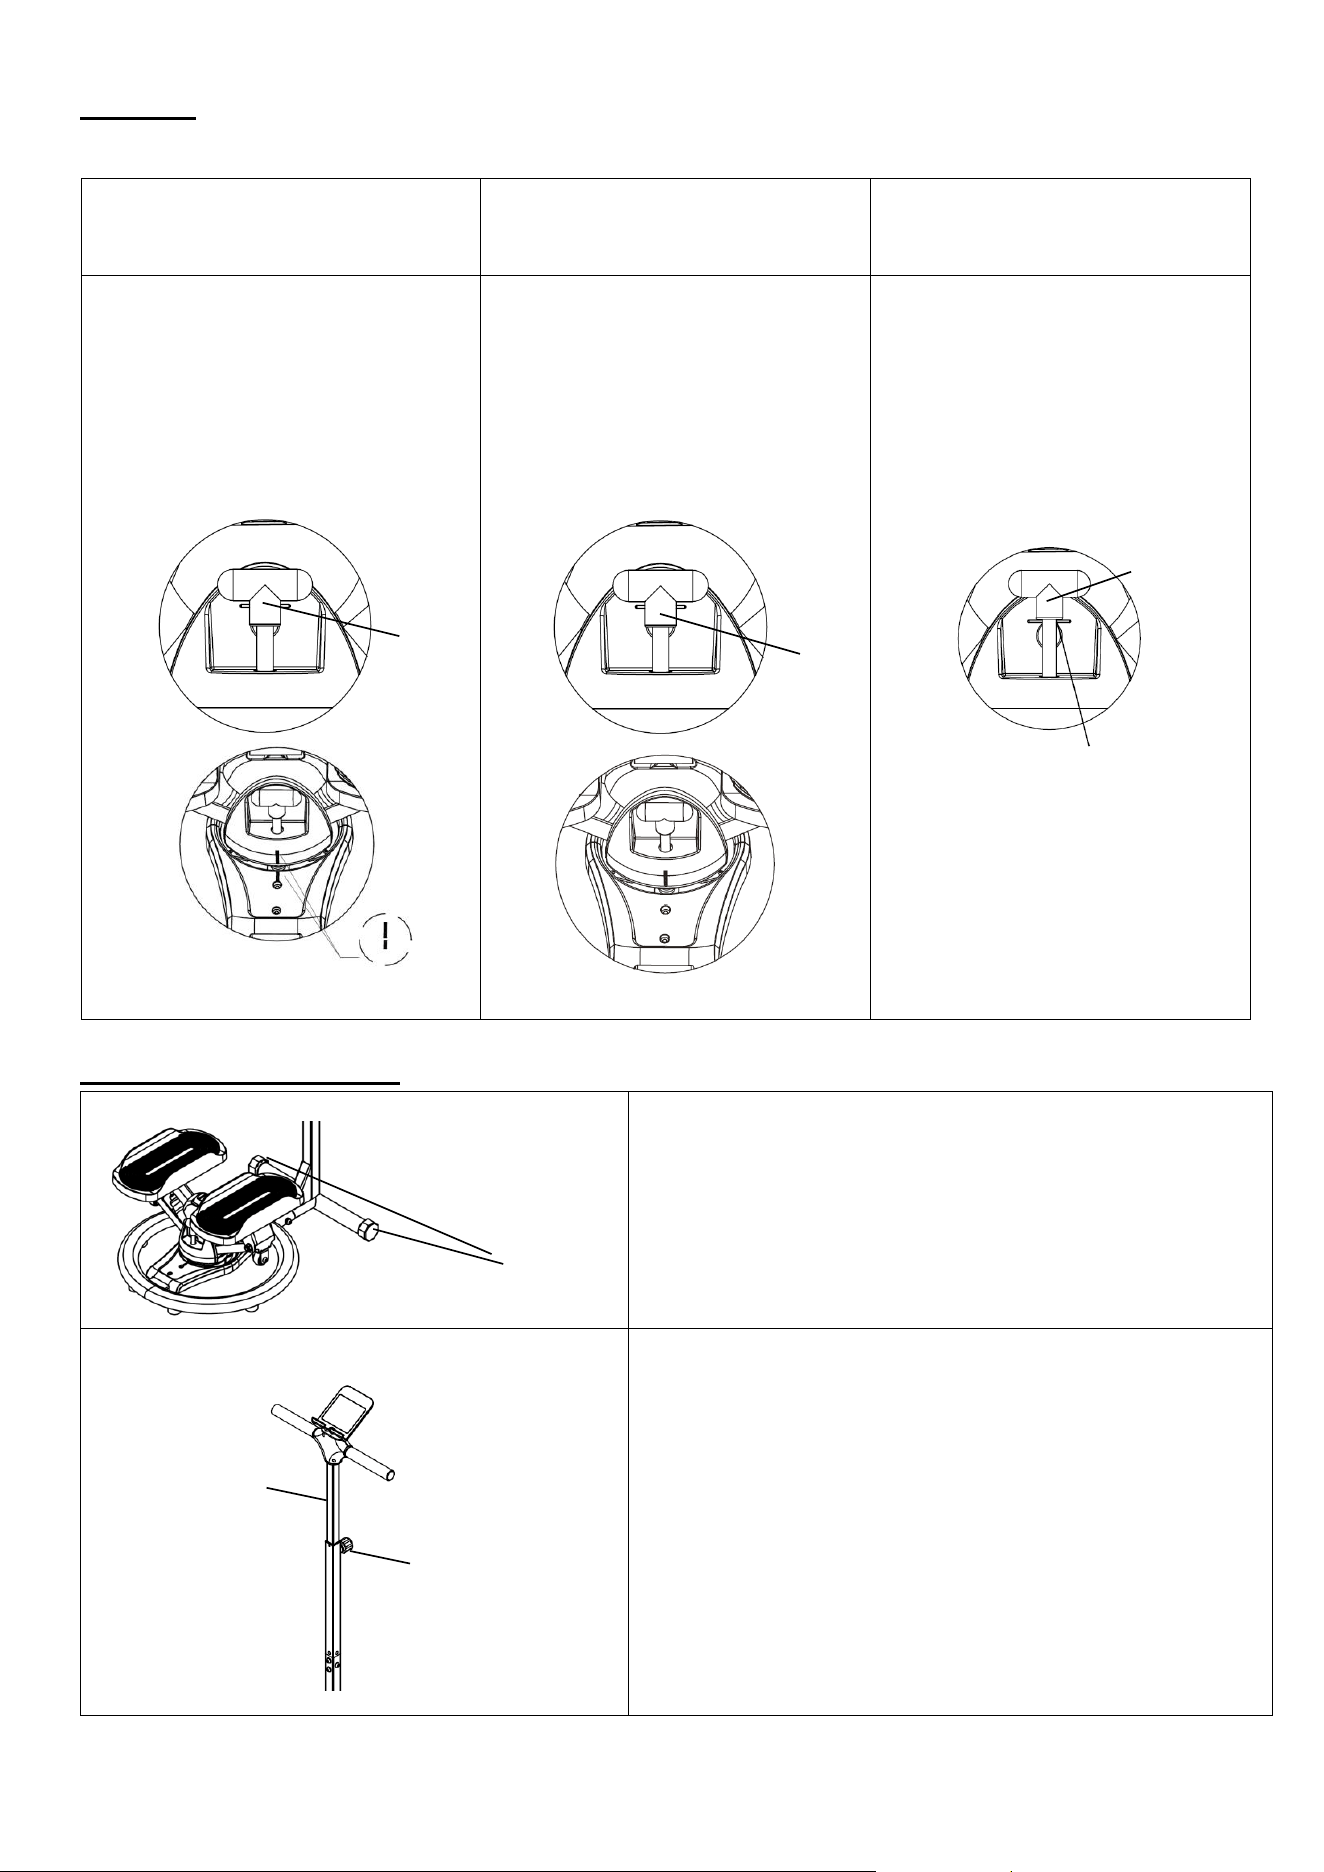
ADJUSTING THE BALANCE
To achieve a smooth and comfortable pedal, you must
ensure that the stepper is stable and secure. If you
notice that the stepper is unbalanced during use, you
should adjust the End Caps (No. 18) located on the
front stabilizer until the stepper becomes leveled with
the floor surface.
ADJUSTING THE HANDLEBAR
To adjust the height of the Handlebar (No. 4), loosen
and pull the Adjustment Knob (No. 6) outward, then
raise or lower the Handlebar (No. 4) to the desired
height. Once adjusted, re-insert and tighten the
Adjustment Knob (No. 6) to secure the Handlebar (No.
4) in place.
4
6
18
64
Fig. 1
Fixed Hole
250° Rotation
Hole
Fig. 2
64
Ensure it is flush here!
64
Fig. 3
7
Battery Installation & Replacement
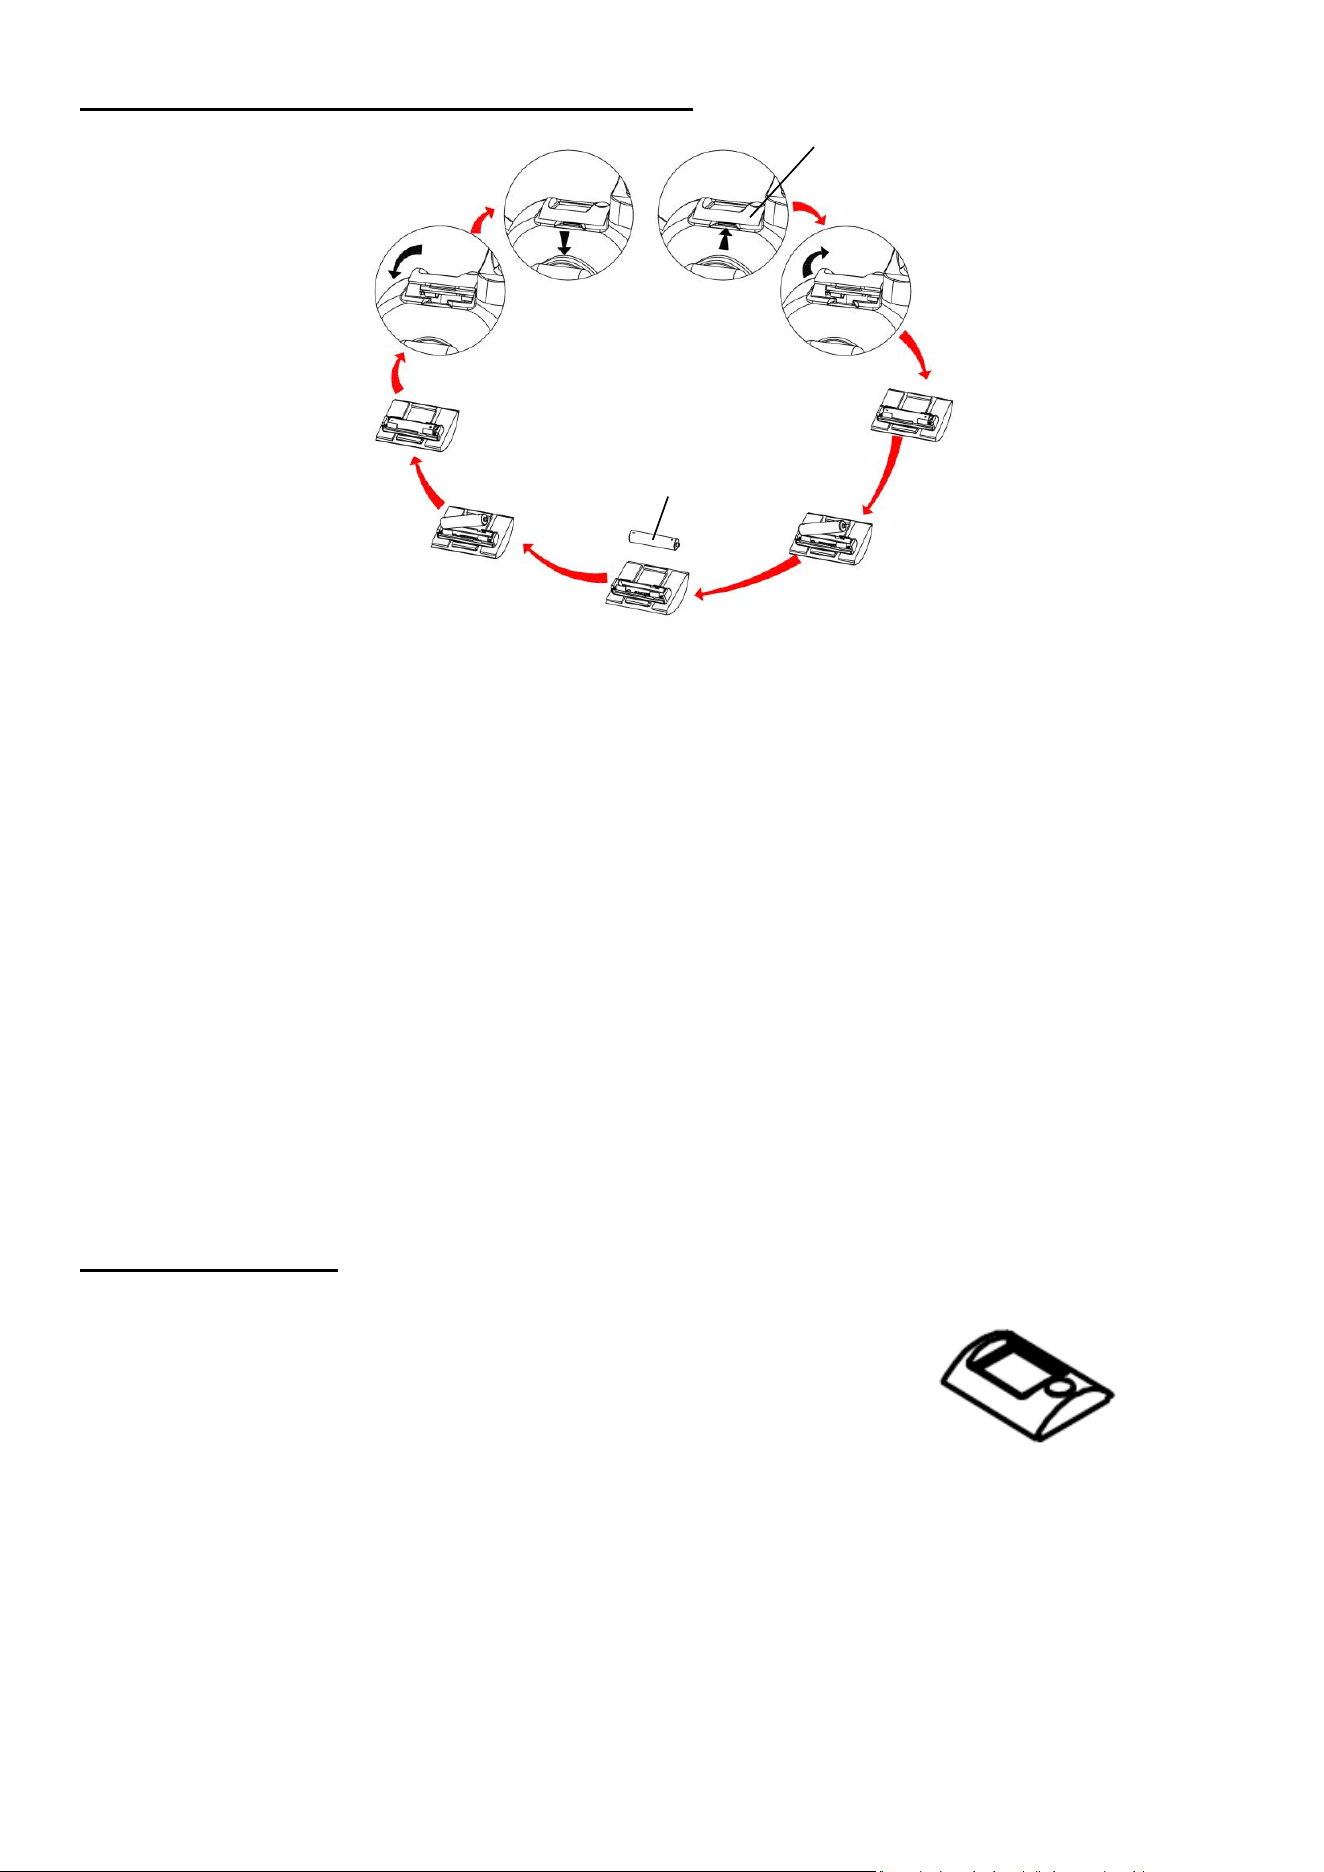
BATTERY INSTALLATION:
1. Remove Meter (No. 36) from Main Frame (No. 1).
2. Take out 1 AAA battery from the manual bag.
3. Insert the battery into the back of Meter (No. 36). Pay attention to the battery + and – poles before
installing.
4. Insert the Meter (No. 36) back into Main Frame (No. 1).
BATTERY REPLACEMENT:
1. Remove Meter (No. 36) from Main Frame (No. 1).
2. Remove the old battery from the back of Meter (No. 36).
3. Insert 1 new AAA battery into the back of Meter (No. 36). Pay attention to the battery + and – poles
before installing.
4. Insert the Meter (No. 36) back into Main Frame (No. 1).
The replacement is complete!
BATTERY DISPOSAL
Dispose the battery according to the laws and regulations of your local region. Some batteries may be
recycled. When disposing or recycling, do not mix battery types.
Exercise Meter
SPECIFICATIONS:
TIME ----------------------------------00:00~99:59 MIN: SEC
COUNT -------------------------------0~9999 TIMES
CALORIE -----------------------------0~9999 KCAL
SPM -----------------------------------0~9999 TIMES/MIN
PULSE ---------------------------------30~240 BPM
KEY FUNCTION:
MODE/RESET: Press the button for selection function display value on LCD.
When Bluetooth is not connected, press the button and hold for 3 seconds, all values
will reset to zero.
Press and hold the button for 6 seconds to disconnect from both the SunnyFit APP and
the heart rate monitor; then, the meter will enter sleep mode.
OPERATIONS:
AUTO ON/OFF: When the user begins to exercise or press the MODE key, the meter will turn on
automatically. Meter will turn off automatically if no sensor signal is detected after 4 minutes and when
Bluetooth is not connected.
36
Battery
8
FUNCTION
1. TIME: Display the workout time elapsed during exercise.
2. COUNT: Accumulate the count of steps taken while exercising. The meter counts 1 step after you step
once with each foot.
3. CALORIE: Display calories burned during exercise.
4. SPM: Display the count of steps per minute during exercise. In STOP mode, the value returns to zero.
5. PULSE: Display current heart rate value. The data comes from the matching Bluetooth heart rate
monitor.
6. SCAN: Autumatically scan each function in the following order: TIME- CALORIE- SPM- PULSE.
IMPORTANT NOTE: Values are counted only in STEP mode. When using the rotation function without
stepping, meter will stop counting and turn off after 4 minutes.
NOTE:
1. If the meter display is abnormal, please install new battery and try again.
2. Battery Spec: 1.5V AAA (1PC).
3. Dispose the battery safely, according to your state and regional guidelines.
4. The information displayed is an estimate only. Actual values may vary depending on factors such as
body weight, resistance level, workout intensity, and other individual conditions. The information is
provided for reference purposes only and should not be used for medical or dietary purposes.
✓
APP CONNECTION:
Connect Smart Equipment to SunnyFit App:
1. Scan to download SunnyFit from the app store:
2. Ensure that the Bluetooth function is turned on from your mobile device.
3. If this is your first time using the SunnyFit app, follow the in-app instructions to register for your
free SunnyFit account and log in.
4. Begin any workout activity that matches your smart equipment, then follow the onscreen
prompts to search for and connect to your smart equipment.
5. When connected, your stats and records will be displayed at the end of your course/session and
recorded in your account profile!
Troubleshooting:
⚫ If you are having trouble connecting your smart equipment, visit www.sunnyfit.com/guide or
scan the QR code below:
⚫ If you require additional support, please contact suppo[email protected].
BLUETOOTH
1. The Bluetooth icon will flash when the meter is on or wakes from sleep mode. If no Bluetooth
connection is established within 3 minutes, the Bluetooth icon will turn off.
2. The Bluetooth icon will stay on when it is connected.
9
WIRELESS HEART RATE
1. The wireless heart rate icon will flash when the meter is on. If the heart rate monitor is not connected
within 1 minute, the wireless heart rate icon will turn off.
2. After exercise resumes, the wireless heart rate icon will flash. If the heart rate monitor is not connected
within 1 minute, the wireless heart rate icon will turn off.
3. When the meter wakes from sleep mode, the wireless heart rate icon will flash. If the heart rate
monitor is not connected within 1 minute, the wireless heart rate icon will turn off.
4. The wireless heart rate icon will flash when the MODE key is pressed. If the heart rate monitor is not
connected within 1 minute, the wireless heart rate icon will turn off.
5. The wireless heart rate icon will stay on when the heart rate monitor is connected.
NOTE: The heart rate monitor is not included. Wireless heart rate function works with SunnyFit Heart
Rate Monitor HR200. HR200 can only connect to the meter when the wireless heart rate icon is flashing.
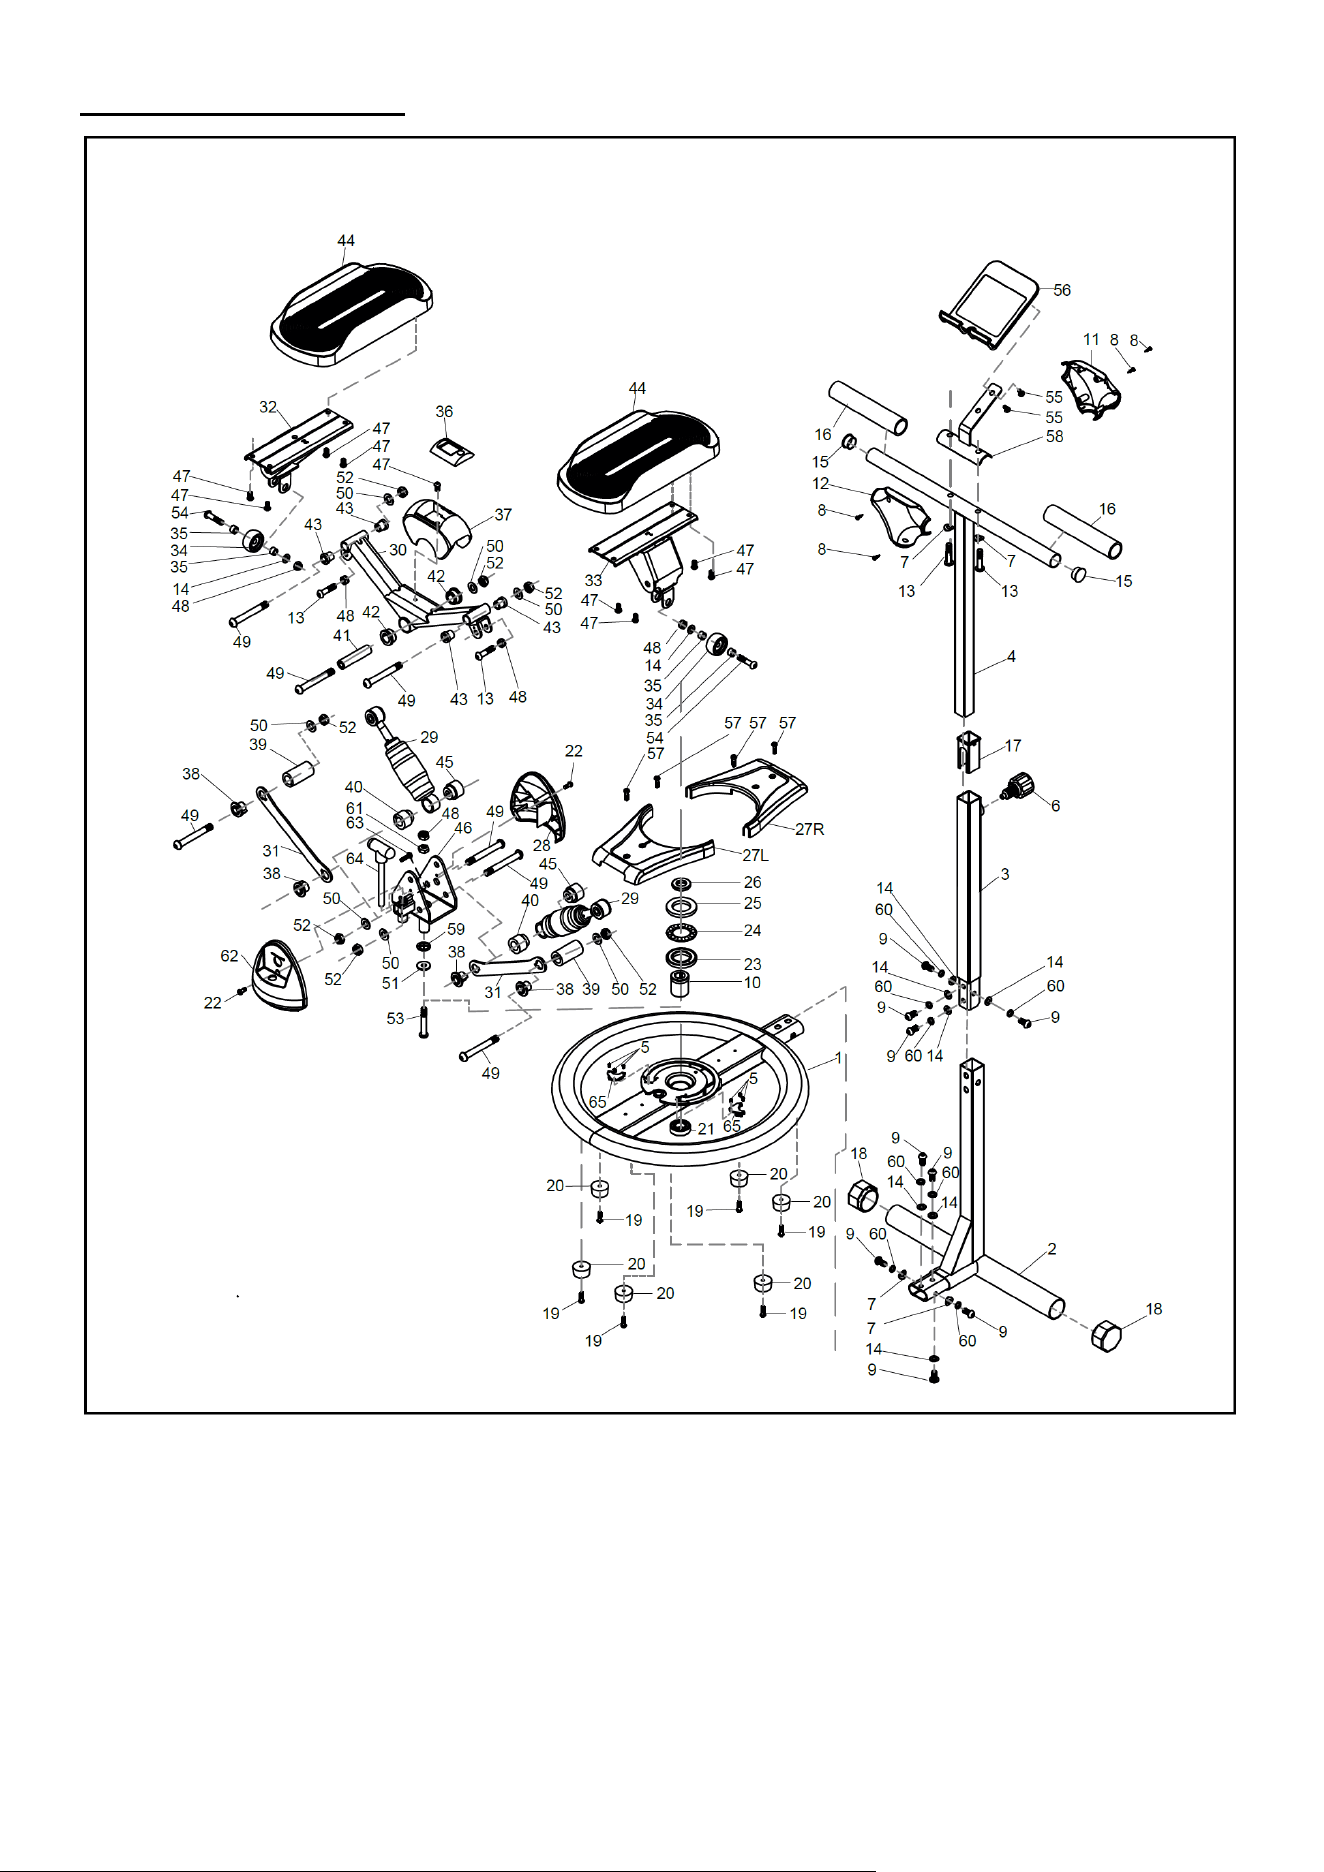
Parts List
No.
Description
Spec.
Qty.
No.
Description
Spec.
Qty.
1
Main Frame
1
34
Roller
6081Φ38*17mm
2
2
Front Stabilizer
1
35
Bushing
4
3
Nether Handlebar
Post
1
36
Meter
JJD2602-Sunny
1
4
Handlebar
1
37
Meter Cover
1
5
Screw
M3*5
6
38
Short Spacer
Φ26*10.1*18.5mm
4
6
Adjustment Knob
M16*1.5
1
39
Long Spacer
Φ28*4*24*10*14L
2
7
Curved Washer
Φ8.5*18
4
40
Left Cylinder Spacer
Φ28*25mm
2
8
Screw
M3*10
4
41
V-shape Axle
Φ60*16mm
1
9
Bolt
M8*15
9
42
Large Bushing
Φ28*13mm
2
10
Long Bearing
Spacer
Φ30*27mm
1
43
Small Bushing
Φ19*18mm
4
11
Front Handlebar
Cover
1
44
Pedal
305*140*52mm
2
12
Rear Handlebar
Cover
1
45
Right Cylinder
Spacer
Φ27*28mm
2
13
Bolt
M8*35
4
46
Rotation Frame
1
14
Flat Washer
Φ18*8.5*1.5
9
47
Screw
M6*12
9
15
Cap
Φ25
2
48
Nylon Nut
M8
5
16
Foam Grip
Φ22*3*160mm
2
49
Bolt
M10*80
7
17
Bushing
Φ25*25*60mm
1
50
Flat Washer
Φ10.5*20*1.5
7
18
End Cap
Φ38mm
2
51
Flat Washer
Φ20*8*2.0
1
19
Screw
M4*20
6
52
Nylon Nut
M10
7
20
Cushion
6
53
Bolt
M8*75
1
21
Bearing
6003
1
54
Bolt
M8*40
2
22
Screw
M4*5
2
55
Screw
M3*5
2
23
Bottom Bearing
Bracket
1
56
Tablet Holder
1
24
Bearing Roller
Φ52mm
1
57
Screw
M4*20
4
25
Upper Bearing
Bracket
Φ52mm
1
58
Tablet Holder
Bracket
1
26
Short Bearing
Spacer
Φ32*17mm
1
59
D-shape Washer
1
27L
Front Base Frame
Cover
1
60
Spring Washer
Φ14*Φ8.5
8
27R
Rear Base Frame
Cover
1
61
Nut
M8*T4*1.25
1
28
Main Frame Cover
1
62
Upper Base Cover
1
29
Cylinder
2
63
Screw
M5*21
1
30
V-shape Tube
1
64
T-shape Pin
T10*95mm
1
31
Connecting Bar
2
65
Cushion
28*19*8mm
2
32
Left Pedal Plate
1
66
Allen Wrench
5mm
1
33
Right Pedal Plate
1
10
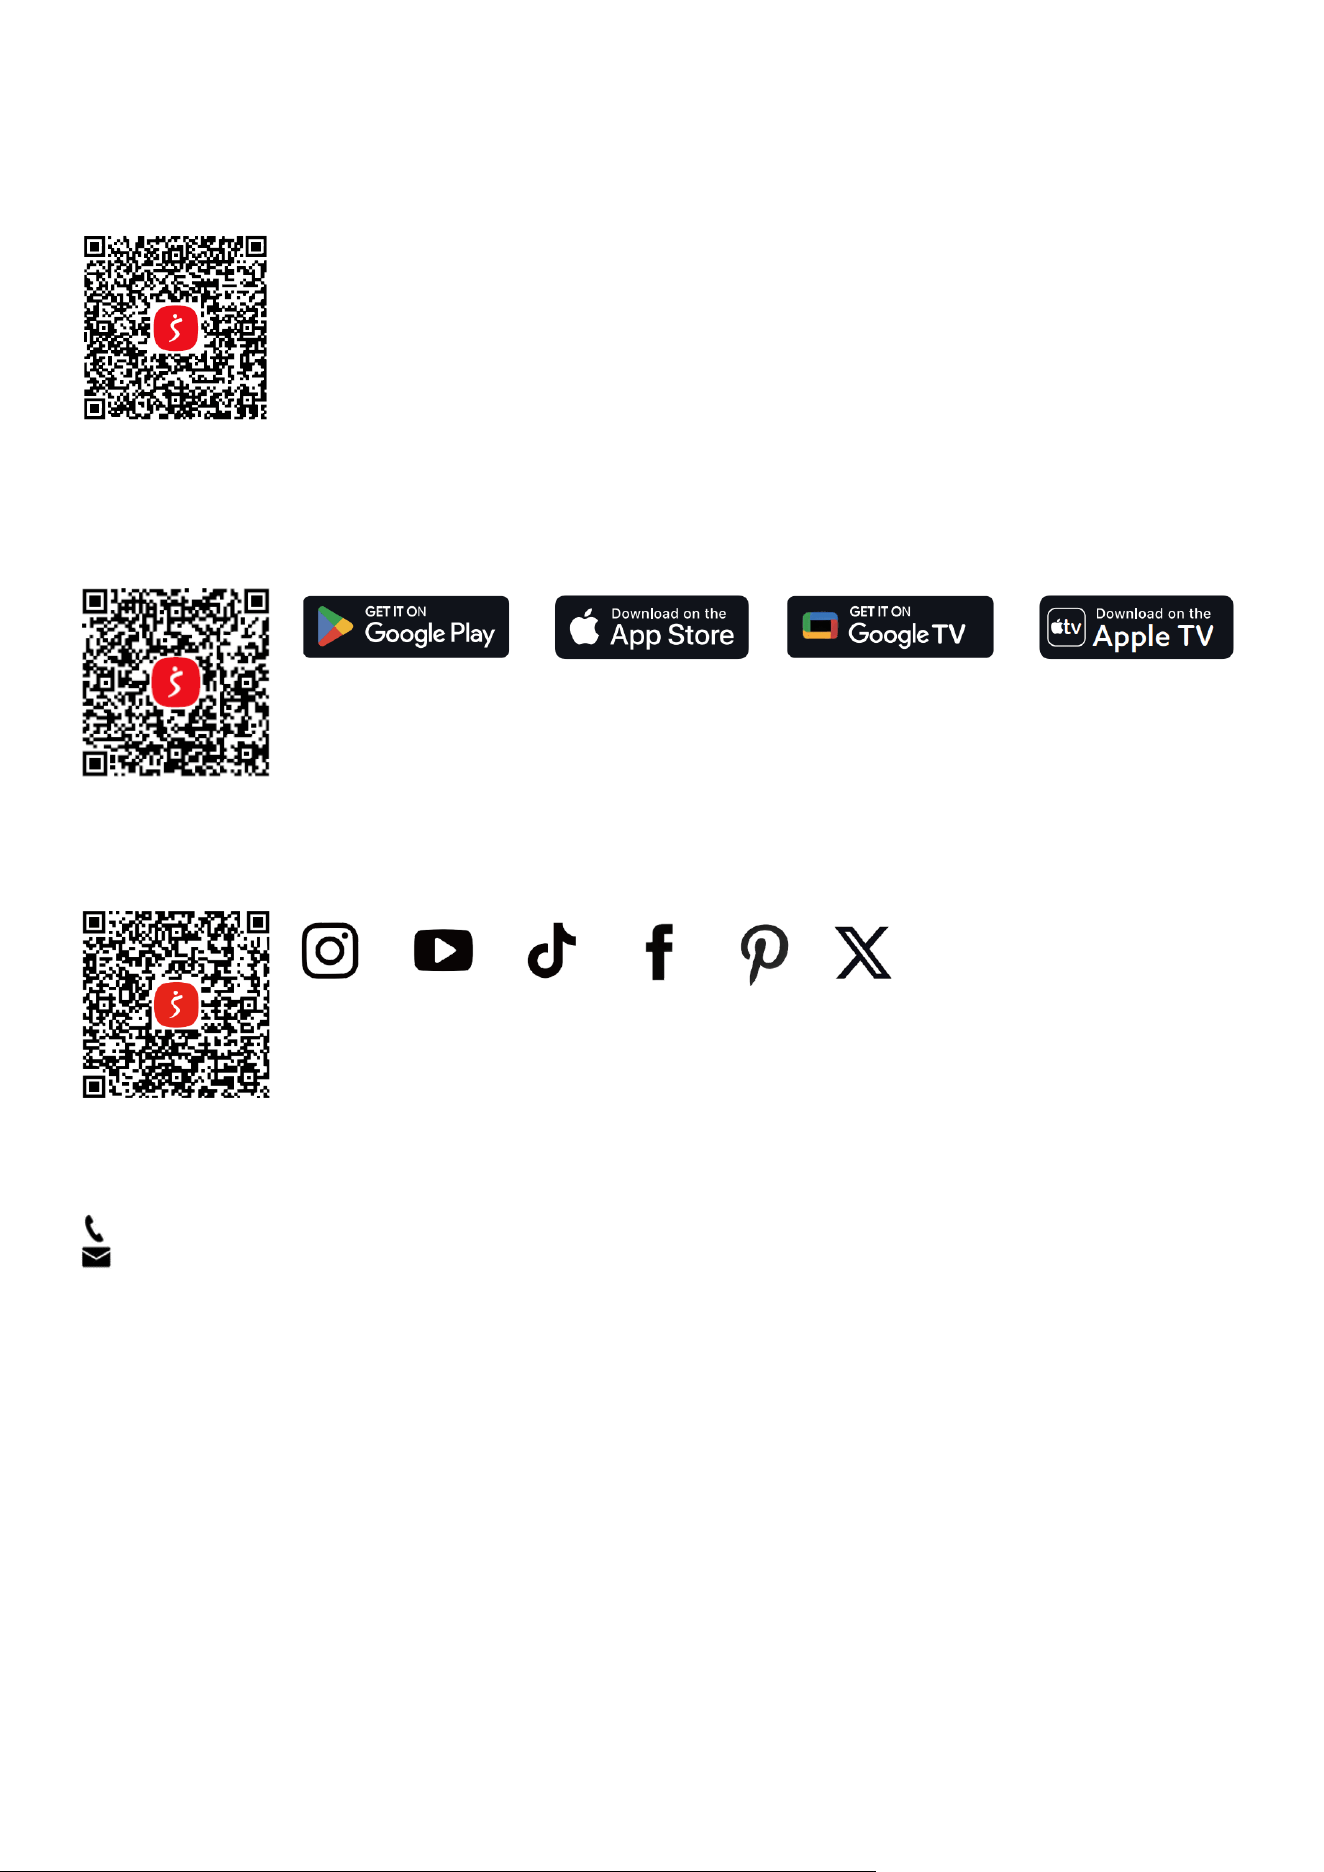
Exploded Diagram
Version: 1.0
Register
Register your product and verify warranty terms:
Download
Track your fitness progress & join FREE workout courses!
Download SunnyFit App today!
Follow
Find us on social media
Contact
Get in touch with us for any questions
1-877-90SUNNY (877-907-8669)
support@sunnyhealthfitness.com
www.sunnyhealthfitness.com