EN
2-
IN
-1
WIRELESS
MICROPHONE
Instruction Manual
Read all instructions carefully before use
and keep this manual for future reference.
CLIP ON

3
EN
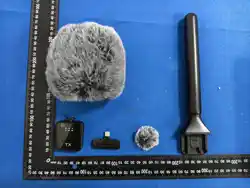
Package Includes:
• Wireless Clip-On Microphone
• Handheld Mount
• Furry Windscreen
• Small Furry Windscreen
• Pop Filter
• USB-C Wireless Receiver
• USB-C Charging Cable
• Instruction Manual
Product Features:
Connection
Indicator Light
Power
Indicator
Light
Noise Reduction Mode
Reverb Mode
Original Mode
Power Button
Volume Up
Volume Down
Furry
Windscreen
USB-C
Charge Port
Back Clip
22
4 5
EN
Functions:
Connection Indicator Light: Flashes when powered on, and
stays solid once connected to the receiver.
Power Indicator Light: Flashes red when the battery is low. Stays
solid red while charging, and turns off when fully charged.
Original Mode
Noise Reduction Mode
Reverb Mode
USB-C Charge Port: Used for charging the microphone.
Power Button:
• Press and hold for 3 seconds to turn on the microphone.
Noise Reduction mode activates automatically.
• Press once to cycle through Reverb, Original, and Noise
Reduction modes.
• Double-click to mute the microphone. Double-click again
to unmute.
Volume Up: Increases the microphone volume.
Volume Down: Reduces the microphone volume.
Specifications:
Input voltage
Battery capacity
Charging port
Working time
Transmission distance
Signal-to-noise ratio
Mic sensitivity
Frequency response
Product size
DC 5V
110 mAh
USB-C
Approx. 2 hours
Up to 65 ft (unobstructed)
64 dB
-42 dB
20 Hz–20 kHz
2.68 x 1.65 x 9.84 inches / 6.8 x 4.2 x 25 cm
EN
Assembly Instructions:
How to Use:
Step 1: Press and hold the power button on the microphone for 3
seconds; the indicator light will flash.
Step 2: Plug the receiver into the charging port of your mobile
phone. The indicator lights on both the microphone and receiver
will stay solid once successfully connected.
Step 3: Open your phone’s camera for video recording or start a
live stream, and you can use the microphone to record audio.
NOTE: Some phone brands (such as OPPO, VIVO, iQOO, and
Realme) require you to turn on the OTG function in your settings
for the microphone to work properly.
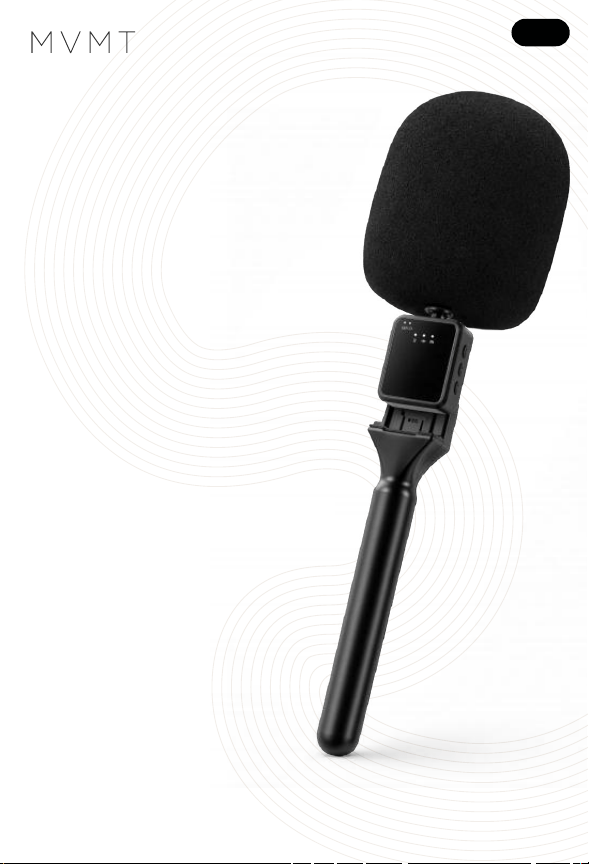
Attach the clip on the back into
the groove of the handheld
microphone to assemble them.
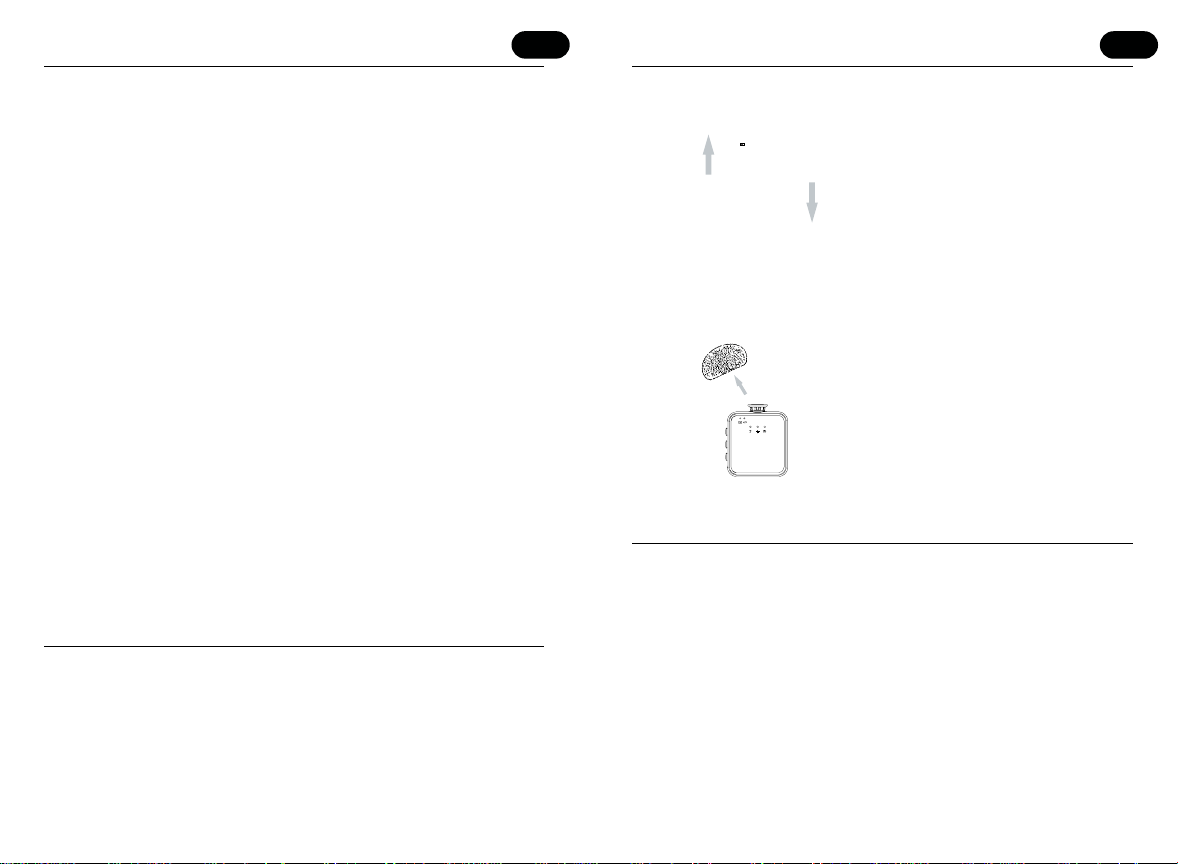
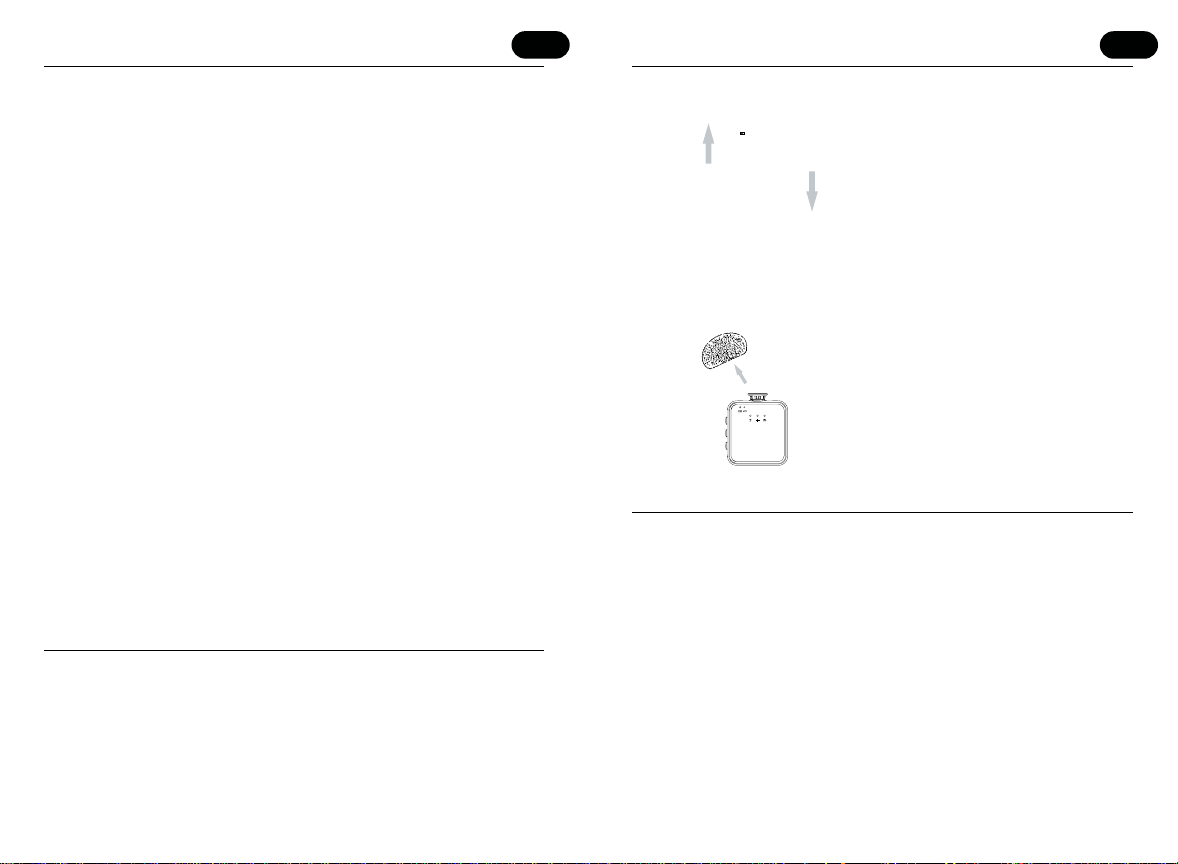
Remove the small furry
windscreen before attaching
the furry windscreen.
6 7
FCC statement:
This device complies with Part 15 of the FCC Rules. Operation is subject to
the following two conditions:
1. This device may not cause harmful interference.
2. This device must accept any interference received, including
interference that may cause undesired operation.
Changes or modifications not expressly approved by the party responsible
for compliance could void the user’s authority to operate the equipment.
Note: This equipment has been tested and found to comply with the
limits for a class Digital device, pursuant to Part 15 of the FCC Rules. These
limits are designed to provide reasonable protection against harmful
interference in a residential installation. This equipment generates uses
and can radiate radio frequency energy and, not installed and used in
accordance with the instructions, may harmful, cause interference to radio
communications. However, there is no guarantee that interference will
not occur in a particular installation if this equipment does cause harmful
interference to radio or television reception, which can be determined by
turning the equipment off and on, the user is encouraged to try to correct
the interference by one or more of the following measures.
• Reorient or relocate the receiving antenna.
• Increase the separation between the equipment and receiver.
• Connect the equipment into an outlet on a circuit different
from that to which the receiver is connected.
• Consult the dealer or an experienced radio/TV technician for help.
The device has been evaluated to meet general RF exposure requirement.
The device can be used in portable exposure condition without restriction.
Disposal of Electrical and Electronic Devices:
EN
This symbol indicates that electrical and electronic
devices must be collected separately.
• This product is intended for separate collection at an appropriate
collection point. Do not dispose of it with household waste.
• If the device uses batteries, they must be removed from the device
and disposed of at an appropriate collection center.
• If the batteries cannot be removed, do not attempt to remove them
yourself. This must be done by a qualified professional.
• Separate collection and recycling help conserve natural resources and
prevent negative effects on human health and the environment that
may result from improper disposal.
FR
Contenu de l’emballage:
• Microphone sans fil à pince
• Poignée portative
• Bonnette anti-vent en fourrure
• Petite bonnette anti-vent
en fourrure
• Filtre anti-pop
• Récepteur sans fil USB-C
• Câble de recharge USB-C
• Manuel d’instructions
Caractéristiques du produit:
Voyant de
connexion
Voyant
d’alimentation
Mode de réduction du bruit
Mode de réverbération
Mode original
Augmenter le volume
Bonnette
anti-vent en
fourrure
Port de recharge
USB-C
Pince arrière
Bouton d’alimentation
Diminuer le volume
FCC ID:
**PLS UPDATE ID
ACCORDINGLY**
8 9
FR
Fonctions:
Voyant de connexion: Clignote lorsque le microphone est mis sous
tension et demeure allumé en continu une fois connecté au
récepteur.
Voyant d’alimentation: Clignote en rouge lorsque la batterie est
faible. Demeure allumé en rouge pendant la recharge et s’éteint
lorsque la batterie est complètement chargée.
Mode original
Mode de réduction du bruit
Mode de réverbération
Port de recharge USB-C: Permet de recharger le microphone.
Bouton d’alimentation:
• Maintenez le bouton enfoncé pendant 3 secondes pour
allumer le microphone. Le mode Réduction du bruit s’active
automatiquement.
• Appuyez une fois pour basculer entre les modes
Réverbération, Son d’origine et Réduction du bruit.
• Appuyez deux fois pour couper le son du microphone.
Appuyez à nouveau deux fois pour réactiver le son.
Augmenter le volume: Augmente le volume du microphone.
Diminuer le volume: Diminue le volume du microphone.
Caractéristiques techniques:
Tension d’entrée
Capacité de la batterie
Port de recharge
Autonomie
Portée de transmission
Rapport signal/bruit
Sensibilité du microphone
Réponse en fréquence
Dimensions du produit
5 V c.c.
110 mAh
USB-C
Environ 2 heures
Jusqu’à 65 pi (sans obstacle)
64 dB
-42 dB
20 Hz–20 kHz
2.68 x 1.65 x 9.84 po / 6.8 x 4.2 x 25 cm
FR
Instructions d’assemblage:
Mode d’emploi:
Étape 1: Maintenez le bouton d’alimentation du microphone
enfoncé pendant 3 secondes. Le voyant lumineux clignotera.
Étape 2: Branchez le récepteur sur le port de recharge de votre
téléphone. Les voyants lumineux du microphone et du récepteur
demeureront allumés en continu une fois la connexion établie.
Étape 3: Ouvrez l’application Appareil photo de votre téléphone
pour enregistrer une vidéo ou commencer une diffusion en direct.
Vous pourrez ensuite utiliser le microphone pour enregistrer
le son.
REMARQUE: Certaines marques de téléphones, comme OPPO,
vivo, iQOO et realme, nécessitent l’activation de la fonction
OTG dans les réglages du téléphone pour que le microphone
fonctionne correctement.
Faites glisser la pince arrière dans
la rainure du microphone à main
pour la fixer.
Retirez la petite bonnette anti-vent
en fausse fourrure avant de fixer
la bonnette anti-vent en fausse
fourrure.
11
Mise au rebut des appareils électroniques et électriques :
FR
Ce symbole indique que les appareils électriques et
électroniques doivent être collectés séparément.
• Ce produit est destiné à une collecte séparée dans un point de
collecte approprié. Ne le jetez pas avec les déchets ménagers.
• Si l’appareil utilise des batteries, celles-ci doivent être retirées de
l’appareil et mises au rebut dans un centre de collecte approprié.
• Si les batteries ne peuvent pas être retirées, ne tentez pas de le faire
vous-même, car cela doit être effectué par un professionnel qualifié.
• La collecte séparée et le recyclage aident à préserver les ressources
naturelles et à prévenir les conséquences négatives pour la santé
humaine et l’environnement qui pourraient résulter d’une mise au
rebut incorrecte.
PL
Zawartość opakowania:
• Bezprzewodowy mikrofon
przypinany
• Uchwyt ręczny
• Futrzana osłona przeciwwietrzna
• Mała futrzana osłona
przeciwwietrzna
• Filtr pop
• Bezprzewodowy odbiornik USB-C
• Przewód do ładowania USB-C
• Instrukcja obsługi
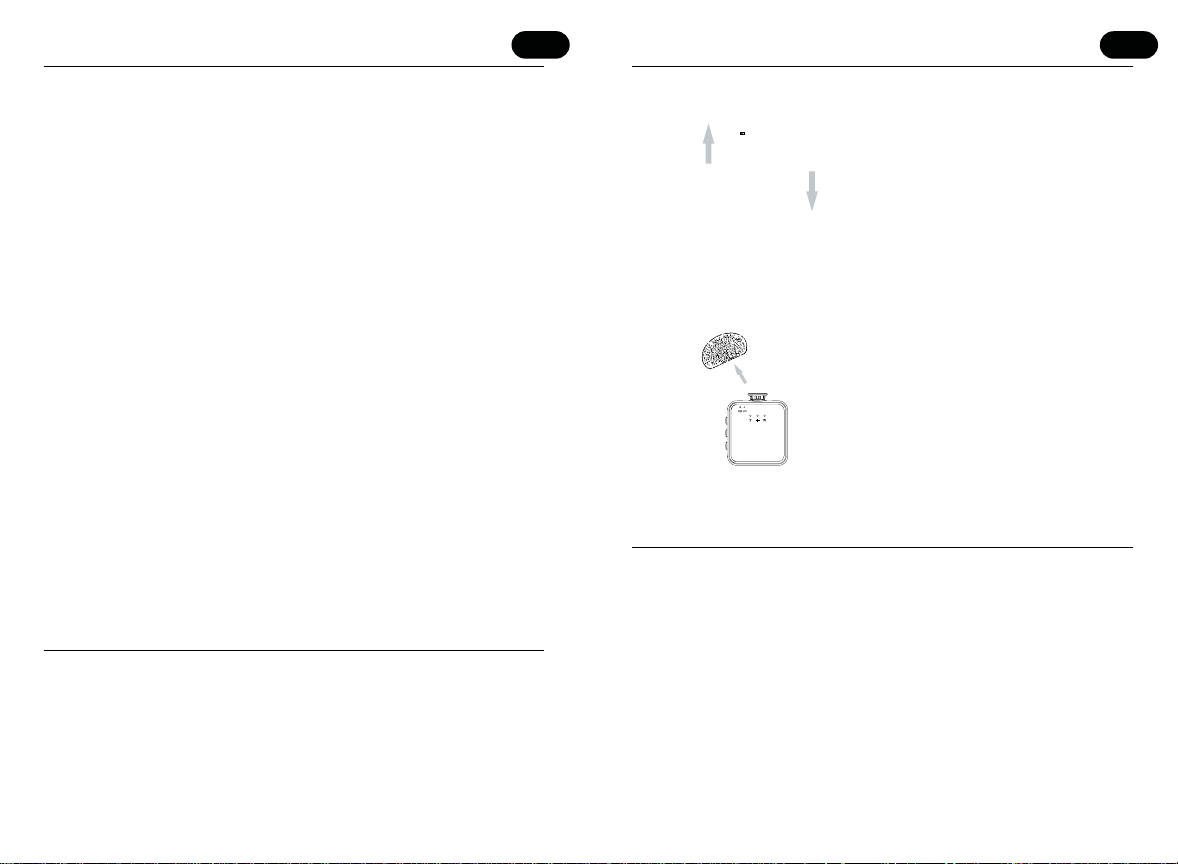
Cechy produktu:
Kontrolka
połączenia
Kontrolka zasilania
Tryb redukcji szumów
Tryb pogłosu
Tryb oryginalny
Zwiększanie
głośności
Futrzana osłona
przeciwwietrzna
Port ładowania
USB-C
Tylny klips
Zmniejszanie
głośności
Przycisk zasilania
12 13
PL
Funkcje:
Kontrolka połączenia: Miga po włączeniu i świeci światłem ciągłym
po połączeniu z odbiornikiem.
Kontrolka zasilania: Miga na czerwono, gdy poziom naładowania
baterii jest niski. Podczas ładowania świeci światłem ciągłym na
czerwono, a po pełnym naładowaniu gaśnie.
Tryb oryginalny
Tryb redukcji szumów
Tryb pogłosu
Port ładowania USB-C: Służy do ładowania mikrofonu.
Przycisk zasilania:
• Naciśnij i przytrzymaj przycisk przez 3 sekundy, aby włączyć
mikrofon. Tryb redukcji szumów włączy się automatycznie.
• Naciśnij raz, aby przełączać między trybami pogłosu,
oryginalnego dźwięku i redukcji szumów.
• Naciśnij dwukrotnie, aby wyciszyć mikrofon. Naciśnij
ponownie dwukrotnie, aby wyłączyć wyciszenie.
Zwiększanie głośności: Zwiększa głośność mikrofonu.
Zmniejszanie głośności: Zmniejsza głośność mikrofonu.
Specyfikacja techniczna:
Napięcie wejściowe
Pojemność akumulatora
Port ładowania
Czas pracy
Zasięg transmisji
Stosunek sygnału do szumu
Czułość mikrofonu
Pasmo przenoszenia
Wymiary produktu
5 V DC
110 mAh
USB-C
Około 2 godzin
Do 65 stóp (bez przeszkód)
64 dB
-42 dB
20 Hz–20 kHz
2.68 x 1.65 x 9.84 cala / 6.8 x 4.2 x 25 cm
PL
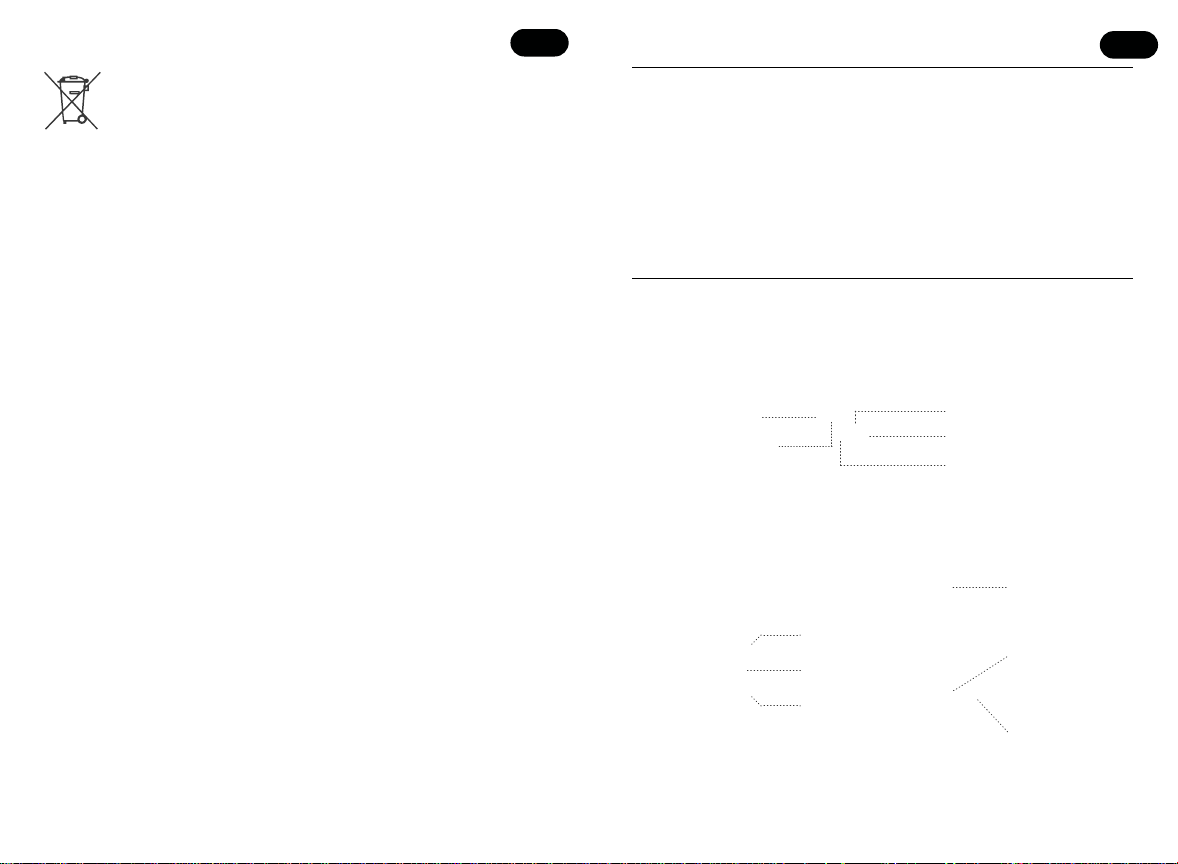
Instrukcja montażu:
Sposób użycia:
Krok 1: Naciśnij i przytrzymaj przycisk zasilania mikrofonu przez 3
sekundy. Kontrolka zacznie migać.
Krok 2: Podłącz odbiornik do portu ładowania telefonu. Po
pomyślnym nawiązaniu połączenia kontrolki na mikrofonie i
odbiorniku będą świecić światłem ciągłym.
Krok 3: Otwórz aplikację aparatu w telefonie, aby nagrać film, lub
rozpocznij transmisję na żywo. Następnie możesz użyć mikrofonu
do nagrywania dźwięku.
UWAGA: W przypadku niektórych marek telefonów, takich jak
OPPO, vivo, iQOO i realme, aby mikrofon działał prawidłowo, należy
włączyć funkcję OTG w ustawieniach telefonu.
Wsuń tylny klips w rowek
mikrofonu ręcznego, aby go
zamocować.
Zdejmij małą osłonę
przeciwwiatrową z futerkiem
przed założeniem osłony
przeciwwiatrowej z futerkiem.
14 15
Utylizacja urządzeń elektrycznych i elektronicznych:
PL
Ten symbol oznacza, że urządzenia elektryczne i
elektroniczne muszą być zbierane oddzielnie.
• Produkt należy przekazać do odpowiedniego punktu selektywnej
zbiórki odpadów. Nie należy wyrzucać go razem z odpadami
komunalnymi.
• Jeśli urządzenie jest zasilane bateriami, należy wyjąć je z urządzenia i
przekazać do odpowiedniego punktu zbiórki.
• Jeśli baterii nie można wyjąć, nie należy podejmować prób
samodzielnego demontażu. Powinien to zrobić wykwalifikowany
specjalista.
• Selektywna zbiórka i recykling pomagają chronić zasoby naturalne
oraz zapobiegają negatywnemu wpływowi na zdrowie ludzi i
środowisko, który może wynikać z niewłaściwej utylizacji.
NL
Inhoud van de verpakking:
• Draadloze clipmicrofoon
• Handgreep
• Pluizige windkap
• Kleine pluizige windkap
• Popfilter
• Draadloze USB-C-ontvanger
• USB-C-oplaadkabel
• Gebruiksaanwijzing
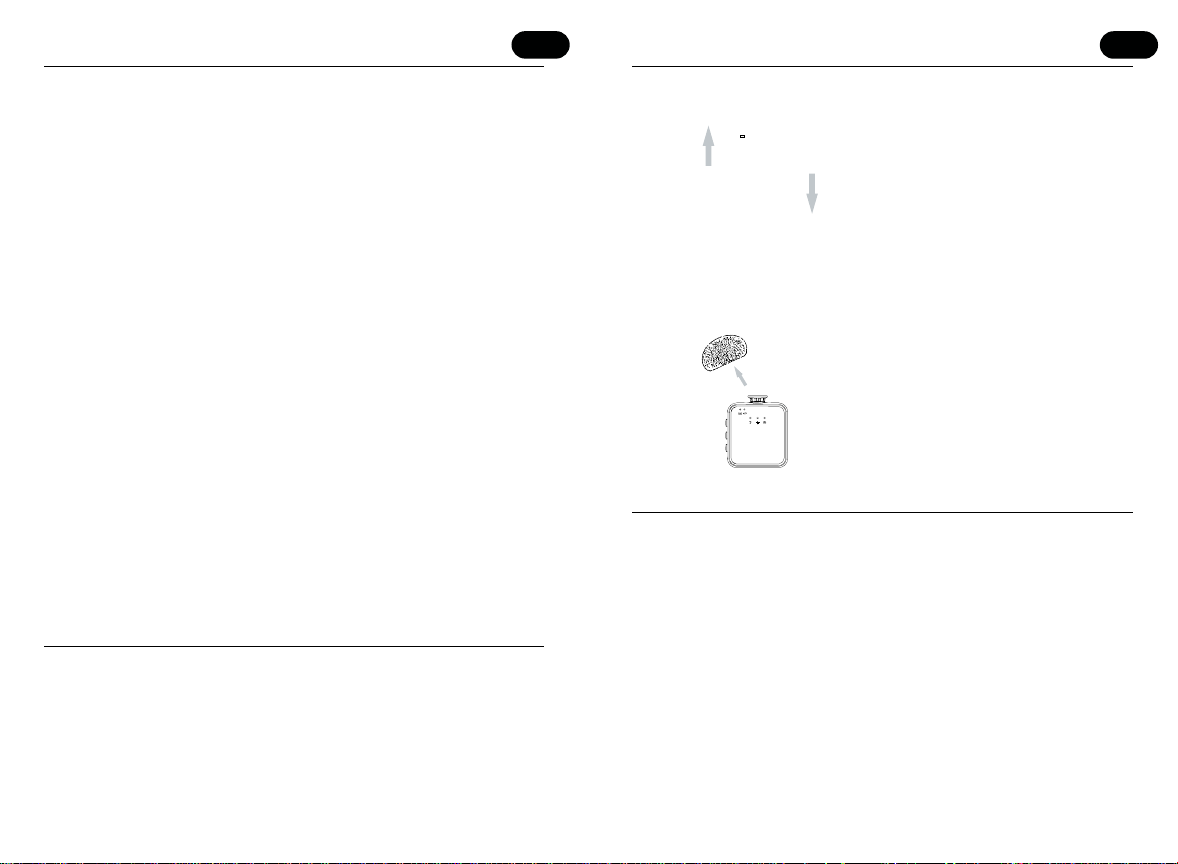
Productkenmerken:
Verbindings-
indicatielampje
Voedingsindicatielampje
Ruisonderdrukkingsmodus
Galmmodus
Originele modus
Pluizige windkap
USB-C-
oplaadpoort
Achterclip
Aan/uit-knop
Volume omhoog
Volume omlaag
16 17
NL
Functies:
Verbindingsindicatielampje: Knippert wanneer de microfoon
wordt ingeschakeld en blijft continu branden zodra er verbinding
met de ontvanger is gemaakt.
Voedingsindicatielampje: Knippert rood wanneer de batterij
bijna leeg is. Brandt tijdens het opladen continu rood en gaat uit
wanneer de batterij volledig is opgeladen.
Originele modus
Ruisonderdrukkingsmodus
Galmmodus
USB-C-oplaadpoort: Wordt gebruikt om de microfoon op te laden.
Aan/uit-knop:
• Houd de knop 3 seconden ingedrukt om de microfoon in te
schakelen. De ruisonderdrukkingsmodus wordt automatisch
geactiveerd.
• Druk eenmaal om te schakelen tussen de modi Galm,
Origineel geluid en Ruisonderdrukking.
• Druk tweemaal om de microfoon te dempen. Druk nogmaals
tweemaal om het dempen op te heffen.
Volume omhoog: Verhoogt het microfoonvolume.
Volume omlaag: Verlaagt het microfoonvolume.
Specificaties:
Ingangsspanning
Batterijcapaciteit
Oplaadpoort
Gebruiksduur
Zendbereik
Signaal-ruisverhouding
Microfoongevoeligheid
Frequentierespons
Productafmetingen
5 V DC
110 mAh
USB-C
Ongeveer 2 uur
Tot 65 ft (zonder obstakels)
64 dB
-42 dB
20 Hz–20 kHz
2.68 x 1.65 x 9.84 inch / 6.8 x 4.2 x 25 cm
NL
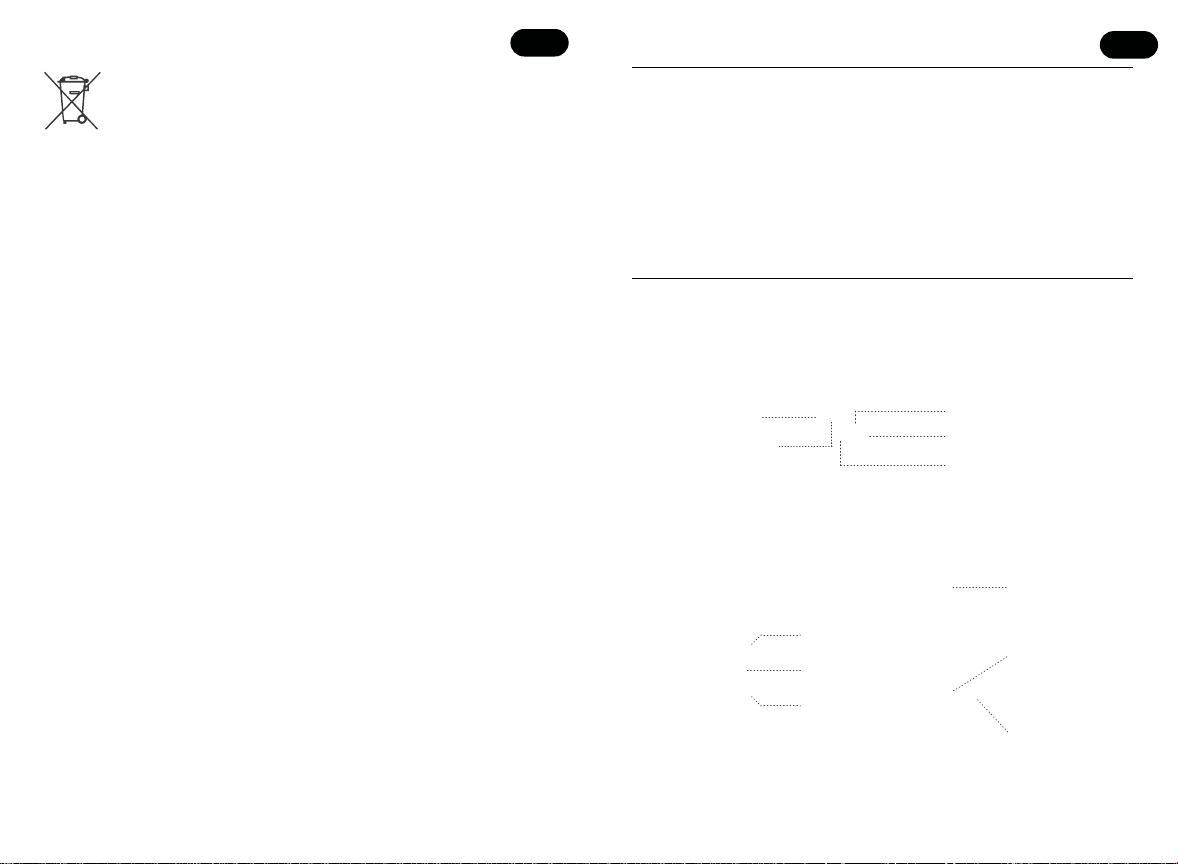
Montage-instructies:
Gebruiksaanwijzing:
Stap 1: Houd de aan-uitknop van de microfoon 3 seconden
ingedrukt. Het indicatielampje begint te knipperen.
Stap 2: Sluit de ontvanger aan op de oplaadpoort van uw
telefoon. De indicatielampjes op de microfoon en de ontvanger
blijven continu branden zodra de verbinding tot stand is
gebracht.
Stap 3: Open de camera-app op uw telefoon om een video op te
nemen of start een livestream. U kunt de microfoon vervolgens
gebruiken om audio op te nemen.
OPMERKING: Bij sommige telefoonmerken, zoals OPPO, vivo,
iQOO en realme, moet u de OTG-functie in de instellingen van
uw telefoon inschakelen om de microfoon goed te
laten werken.
Schuif de clip aan de achterkant
in de groef van de handmicrofoon
om deze te bevestigen.
Verwijder het kleine harige
windscherm voordat u het harige
windscherm bevestigt.
19
Afvoer van elektrische en elektronische apparaten:
NL
Dit symbool geeft aan dat elektrische en elektronische
apparaten gescheiden moeten worden ingezameld.
• Dit product moet afzonderlijk worden ingeleverd bij een geschikt
inzamelpunt. Gooi het niet weg met het huishoudelijk afval.
• Als het apparaat batterijen gebruikt, moeten deze uit het apparaat
worden verwijderd en bij een geschikt inzamelpunt worden
ingeleverd.
• Als de batterijen niet kunnen worden verwijderd, probeer ze dan
niet zelf te verwijderen. Dit moet door een gekwalificeerde vakman
worden gedaan.
• Gescheiden inzameling en recycling helpen natuurlijke hulpbronnen
te behouden en negatieve gevolgen voor de menselijke gezondheid
en het milieu als gevolg van onjuiste afvoer te voorkomen.
DE
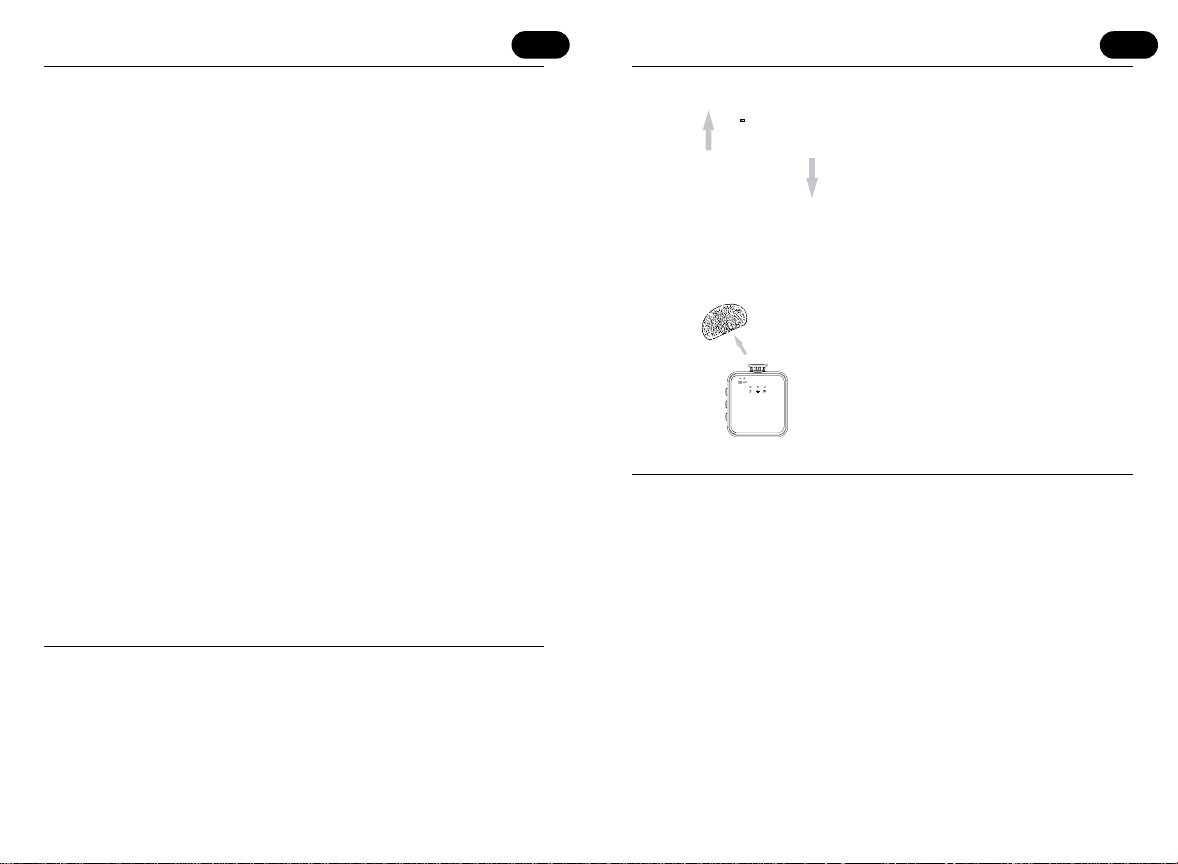
Lieferumfang:
• Kabelloses Ansteckmikrofon
• Handgriff
• Fellwindschutz
• Kleiner Fellwindschutz
• Popschutz
• Kabelloser USB-C-Empfänger
• USB-C-Ladekabel
• Bedienungsanleitung
Produktmerkmale:
Verbindungsanzeige
Betriebsanzeige
Geräuschreduzierungsmodus
Hallmodus
Originalmodus
Ein-/Aus-Taste
Fellwindschutz
USB-C-
Ladeanschluss
Rückseitiger Clip
Lautstärke erhöhen
Lautstärke verringern
20 21
DE
Funktionen:
Verbindungsanzeige: Blinkt nach dem Einschalten und leuchtet
dauerhaft, sobald die Verbindung mit dem Empfänger hergestellt
wurde.
Betriebsanzeige: Blinkt rot, wenn der Akkustand niedrig ist.
Leuchtet während des Ladevorgangs dauerhaft rot und erlischt,
sobald der Akku vollständig geladen ist.
Originalmodus
Geräuschreduzierungsmodus
Hallmodus
USB-C-Ladeanschluss: Dient zum Aufladen des Mikrofons.
Ein-/Aus-Taste:
• Halten Sie die Taste 3 Sekunden lang gedrückt, um das
Mikrofon einzuschalten. Der Rauschunterdrückungsmodus
wird automatisch aktiviert.
• Drücken Sie die Taste einmal, um zwischen den Modi Hall,
Originalton und Rauschunterdrückung zu wechseln.
• Drücken Sie die Taste zweimal, um das Mikrofon
stummzuschalten. Drücken Sie die Taste erneut zweimal, um
die Stummschaltung aufzuheben.
Lautstärke erhöhen: Erhöht die Mikrofonlautstärke.
Lautstärke verringern: Verringert die Mikrofonlautstärke.
Technische Daten:
Eingangsspannung
Akkukapazität
Ladeanschluss
Betriebsdauer
Übertragungsreichweite
Signal-Rausch-Verhältnis
Mikrofonempfindlichkeit
Frequenzgang
Produktabmessungen
5 V DC
110 mAh
USB-C
Ca. 2 Stunden
Bis zu 65 ft (bei freier Sicht)
64 dB
-42 dB
20 Hz–20 kHz
2.68 x 1.65 x 9.84 Zoll / 6.8 x 4.2 x 25 cm
DE
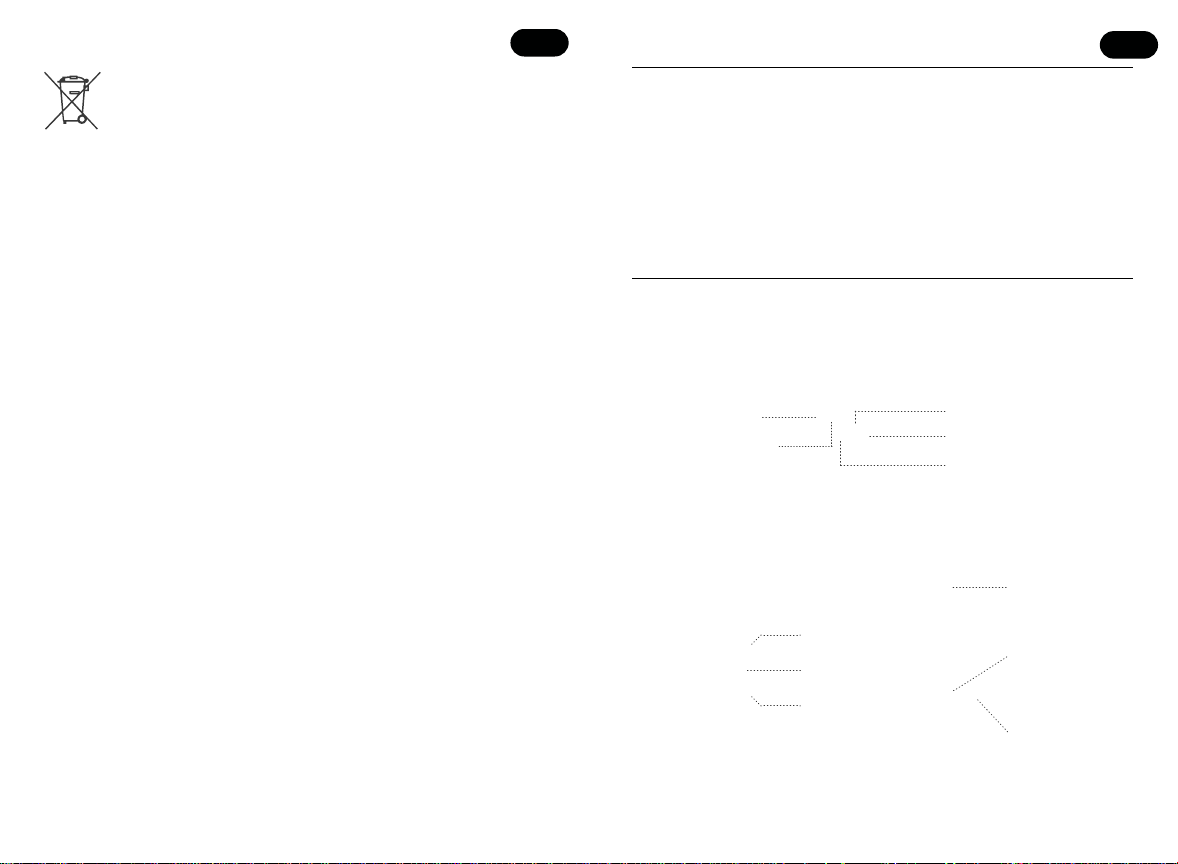
Montageanleitung:
Bedienung:
Schritt 1: Halten Sie die Ein-/Aus-Taste des Mikrofons 3 Sekunden
lang gedrückt. Die Kontrollleuchte beginnt
zu blinken.
Schritt 2: Schließen Sie den Empfänger an den Ladeanschluss
Ihres Smartphones an. Sobald die Verbindung erfolgreich
hergestellt wurde, leuchten die Kontrollleuchten am Mikrofon
und am Empfänger dauerhaft.
Schritt 3: Öffnen Sie die Kamera-App Ihres Smartphones,
um ein Video aufzunehmen, oder starten Sie einen
Livestream. Anschließend können Sie das Mikrofon zur
Tonaufnahme verwenden.
HINWEIS: Bei einigen Smartphone-Marken, wie OPPO, vivo,
iQOO und realme, muss die OTG-Funktion in den Einstellungen
des Smartphones aktiviert werden, damit das Mikrofon
ordnungsgemäß funktioniert.
Schieben Sie den Clip auf
der Rückseite in die Nut des
Handmikrofons, um ihn zu
befestigen.
Entfernen Sie den kleinen
Pelzwindschutz, bevor Sie den
Pelzwindschutz anbringen.
22 23
Entsorgung von Elektro- und Elektronikgeräten:
DE
Dieses Symbol weist darauf hin, dass Elektro- und
Elektronikgeräte getrennt gesammelt werden müssen.
• Dieses Produkt ist zur getrennten Sammlung an einer geeigneten
Sammelstelle vorgesehen. Entsorgen Sie es nicht über den Hausmüll.
• Wenn das Gerät Batterien verwendet, müssen diese aus dem Gerät
entfernt und bei einer geeigneten Sammelstelle entsorgt werden.
• Wenn die Batterien nicht entfernt werden können, versuchen Sie
nicht, sie selbst zu entfernen. Dies muss von einer qualifizierten
Fachkraft durchgeführt werden.
• Die getrennte Sammlung und das Recycling tragen dazu bei,
natürliche Ressourcen zu schonen und negative Auswirkungen auf
die menschliche Gesundheit und die Umwelt zu vermeiden, die
durch eine unsachgemäße Entsorgung entstehen können.
ES
Contenido del paquete:
• Micrófono inalámbrico de solapa
• Mango de mano
• Paravientos de pelo sintético
• Paravientos pequeño de pelo
sintético
• Filtro antipop
• Receptor inalámbrico USB-C
• Cable de carga USB-C
• Manual de instrucciones
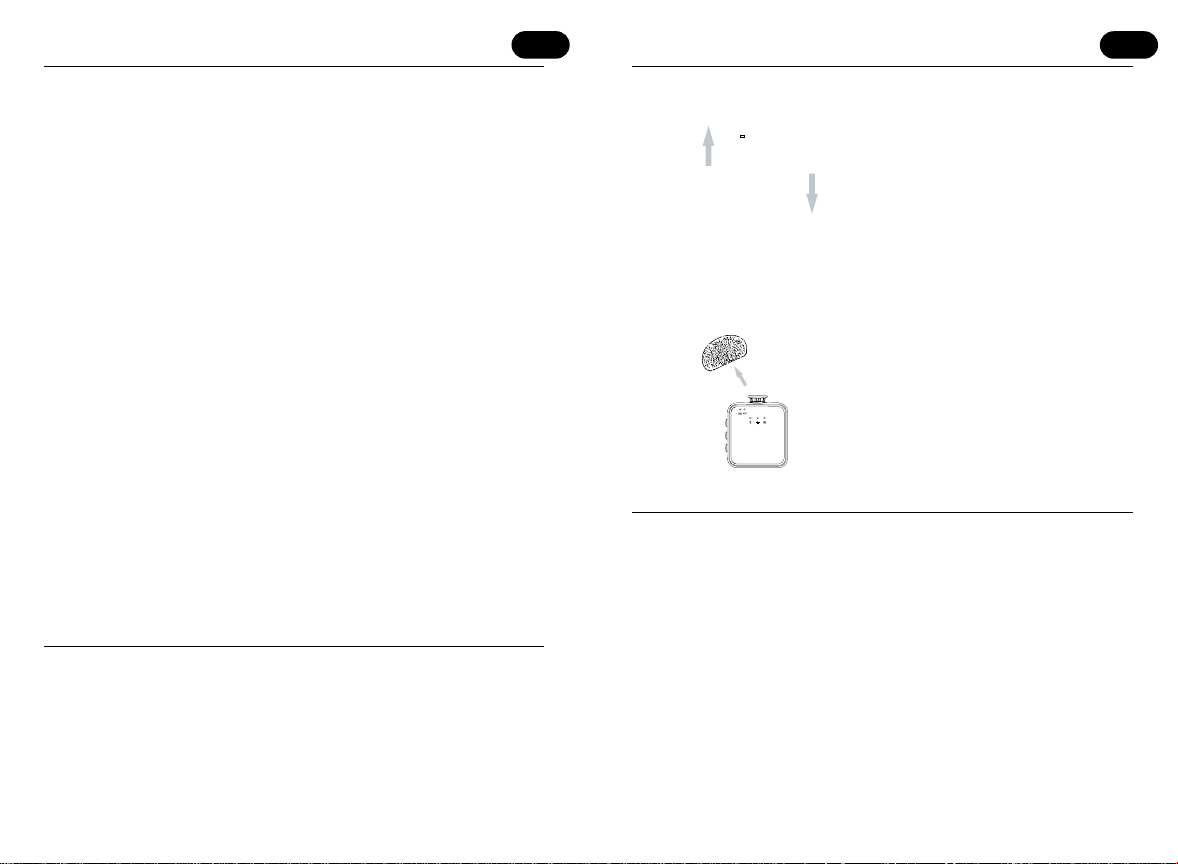
Características del producto:
Indicador luminoso
de conexión
Indicador luminoso
de encendido
Modo de reducción de ruido
Modo de reverberación
Modo original
Subir volumen
Bajar volumen
Paravientos de
pelo sintético
Puerto de
carga USB-C
Clip trasero
Botón de encendido
24 25
ES
Funciones:
Indicador luminoso de conexión: Parpadea al encender el
micrófono y permanece encendido de forma continua cuando se
conecta al receptor.
Indicador luminoso de encendido: Parpadea en rojo cuando el nivel
de la batería es bajo. Permanece encendido en rojo durante la carga
y se apaga cuando la batería está completamente cargada.
Modo original
Modo de reducción de ruido
Modo de reverberación
Puerto de carga USB-C: Se utiliza para cargar el micrófono.
Botón de encendido:
• Mantén pulsado el botón durante 3 segundos para encender
el micrófono. El modo Reducción de ruido se activa
automáticamente.
• Pulsa una vez para alternar entre los modos Reverberación,
Sonido original y Reducción de ruido.
• Pulsa dos veces para silenciar el micrófono. Pulsa dos veces de
nuevo para activar el sonido.
Subir volumen: Aumenta el volumen del micrófono.
Bajar volumen: Reduce el volumen del micrófono.
Especificaciones:
Voltaje de entrada
Capacidad de la batería
Puerto de carga
Tiempo de funcionamiento
Distancia de transmisión
Relación señal-ruido
Sensibilidad del micrófono
Respuesta de frecuencia
Dimensiones del producto
5 V CC
110 mAh
USB-C
Aproximadamente 2 horas
Hasta 65 pies (sin obstáculos)
64 dB
-42 dB
20 Hz–20 kHz
2.68 x 1.65 x 9.84 pulgadas / 6.8 x 4.2 x 25 cm
ES
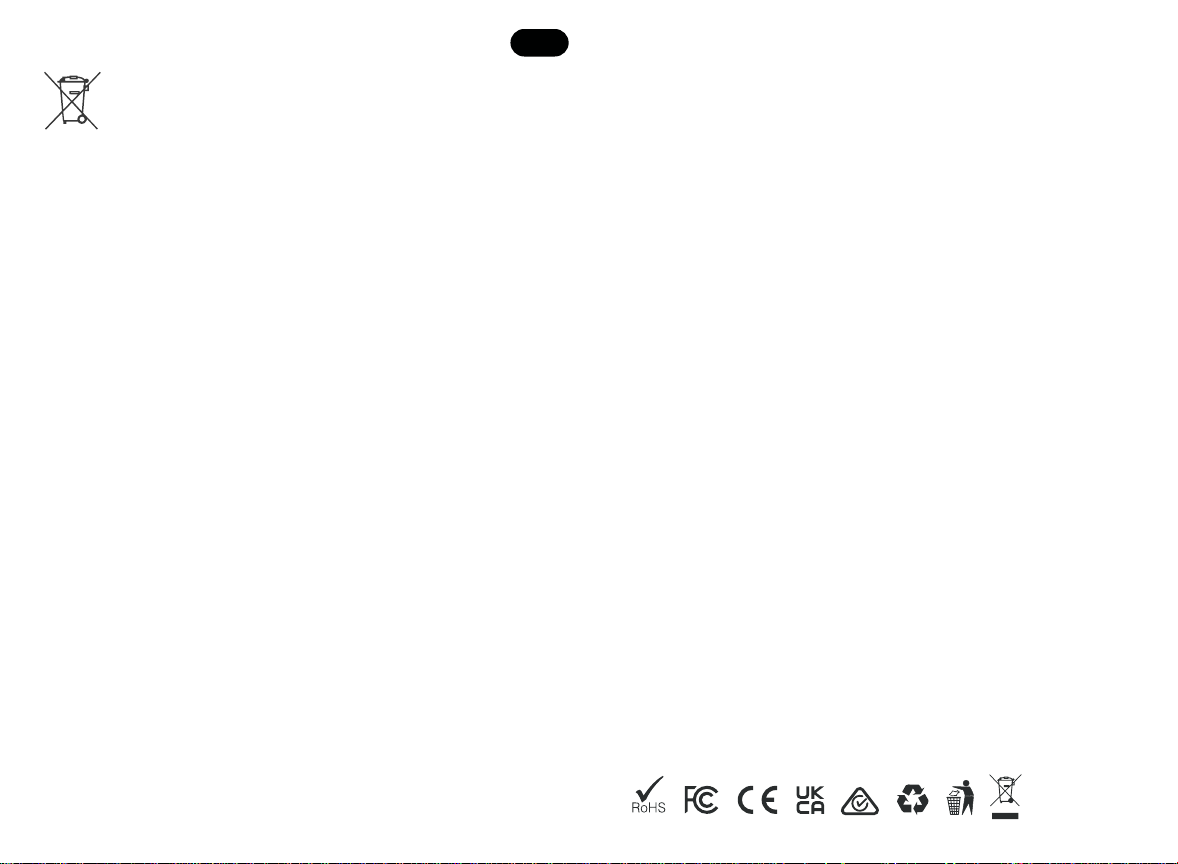
Instrucciones de montaje:
Modo de uso:
Paso 1: Mantenga pulsado el botón de encendido del micrófono
durante 3 segundos. El indicador luminoso comenzará a
parpadear.
Paso 2: Conecte el receptor al puerto de carga de su teléfono.
Los indicadores luminosos del micrófono y del receptor
permanecerán encendidos de forma continua una vez
establecida correctamente la conexión.
Paso 3: Abra la aplicación de la cámara de su teléfono para
grabar un vídeo o iniciar una transmisión en directo. A
continuación, puede utilizar el micrófono para grabar audio.
NOTA: En algunas marcas de teléfonos, como OPPO, vivo, iQOO
y realme, es necesario activar la función OTG en los ajustes del
teléfono para que el micrófono funcione correctamente.
Deslice el clip trasero en la ranura
del micrófono de mano para fijarlo.
Retire el antiviento de pelo sintético
pequeño antes de colocar el
antiviento de pelo sintético.
27
Eliminación de aparatos eléctricos y electrónicos:
ES
Este símbolo indica que los aparatos eléctricos y
electrónicos deben recogerse por separado.
• Este producto debe entregarse por separado en un punto de
recogida adecuado. No lo deseche junto con los residuos domésticos.
• Si el dispositivo utiliza pilas o baterías, deben retirarse del dispositivo y
desecharse en un punto de recogida adecuado.
• Si las pilas o baterías no pueden retirarse, no intente extraerlas usted
mismo. Esta tarea debe realizarla un profesional cualificado.
• La recogida selectiva y el reciclaje ayudan a conservar los recursos
naturales y a prevenir los efectos negativos sobre la salud humana
y el medio ambiente que pueden derivarse de una eliminación
inadecuada.
©2026 JME & CO. NYC, LLC. All Rights Reserved.
MVMT and MVMT logo are registered trademarks of JME & Co.
The artwork and design of this package are protected by United States Copyright
law and may not be reproduced, distributed, displayed, published, or used for any
purpose without prior written permission. You may not alter or remove any trade-
mark or copyright notice from this package. Because of continuous improvements
products may differ slightly from package.
Manufactured and distributed by JME & CO. NYC, LLC,
New York, NY 10018 USA.
Designed in USA, Made in China. | hello@jmeandco.com

28