content creator kit
Unable to operate? Just have a question?
call us at: 1-833-TGT-Tech or: 1-833-848-8324
need some help?
included
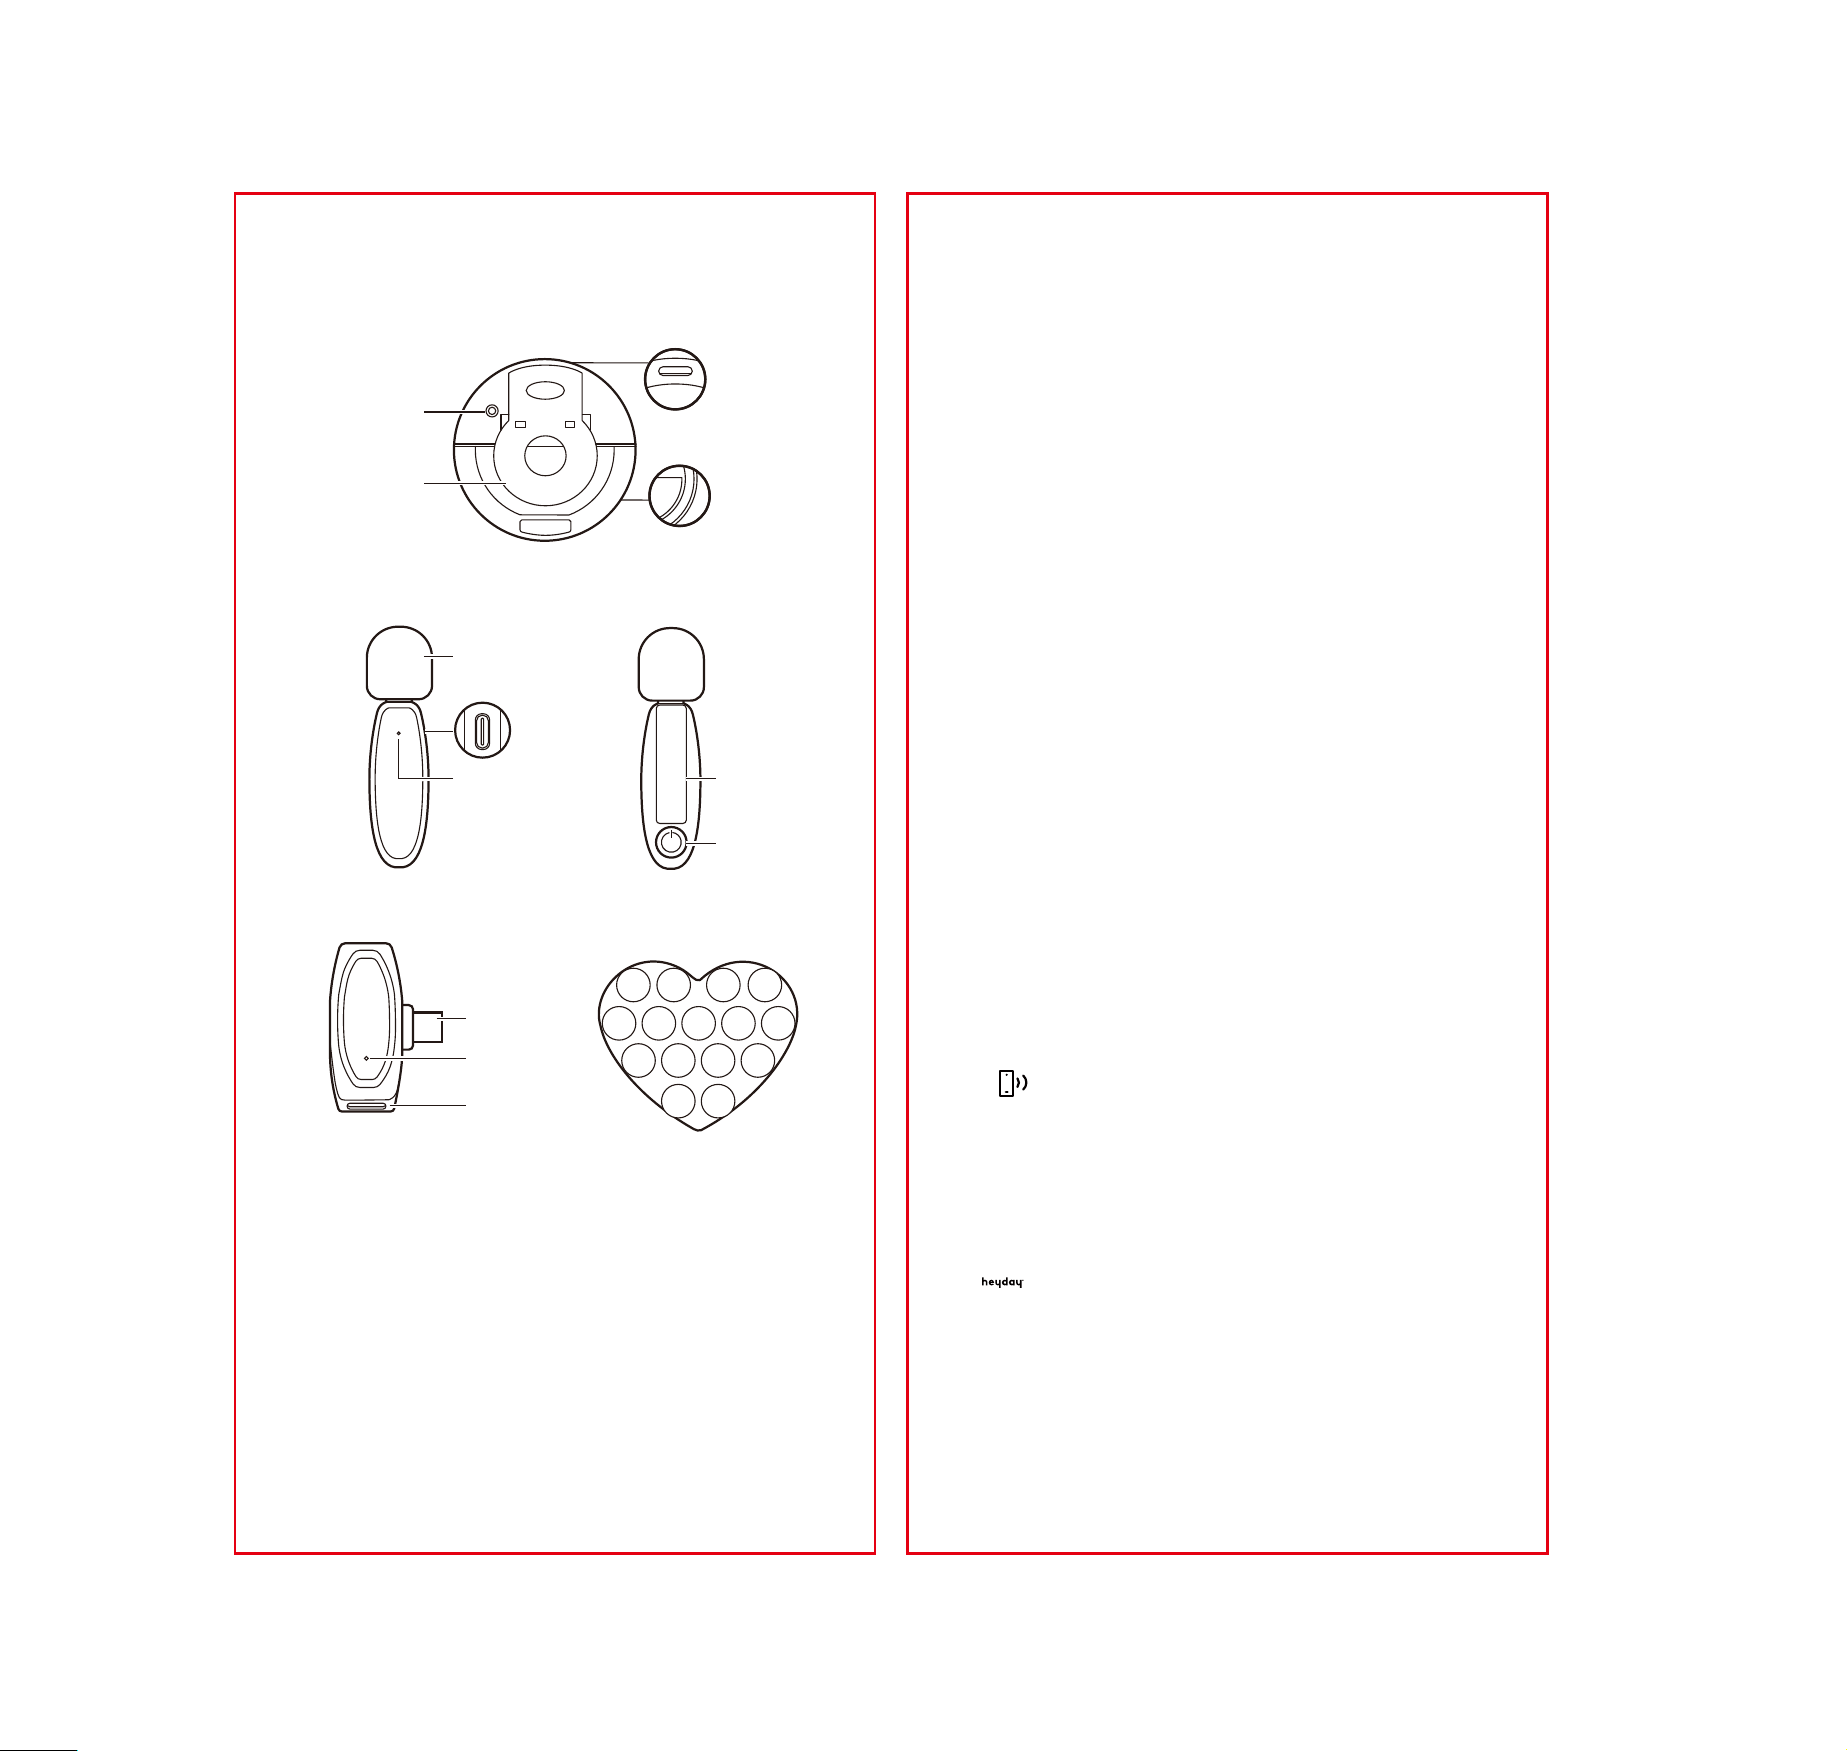
• Mini microphone
• USB-C receiver
• Clip-on ring light
• Double-sided phone suction mount
• USB-A to USB-C charging cable
indicator
mini microphone
• Quick ashing green - pairing
• Solid green - paired / Charging (when powered on)
• Solid red - charging (when powered o)
• No red light (when charging) - charging complete
• Solid blue - mute
• Slow ashing red - low battery
USB-C receiver
• Flashing green - pairing
• Solid green - paired
using wireless microphone
• Hold the power button on the mini microphone for 3 seconds to power on. The indicator
light will quickly ash green when it is ready to pair.
• Plug the receiver into the USB-C port of your mobile device. The indicator light will ash
green to indicate pairing.
• Both the mini microphone and the receiver will automatically pair after being turned on.
Both indicators will turn solid green.
• Then, record using the application on your mobile device.
• To mute the microphone, press the power button on the mini microphone.
mini microphone charging
• A full charge requires approximately 1.5 hour and will provide 4 hours of use.
• Plug the USB-C end of the charging cable into the charge port on the side of the mini
microphone.
• Plug the opposite end of the charging cable into a power supply of at least 5V 1A.
• Charging is complete when the red light turns o.
WARNING: Please use UL compliant power supply.
clip-on ring light
• A 5-minute charge provides 30 minutes of use.
• Plug the USB-C end of the charging cable into the charge port on the top of the clip-on
ring light.
• Plug the opposite end of the charging cable into a power supply of at least 5V 1A.
• Press the power button to turn it on/o and cycle through the dierent brightness levels:
on/low, medium, high, o.
• Clip the light to your device.
double-sided phone suction mount
• This suction mount will work on most phone surfaces, but it is recommended to use the
smoothest surface for the best adhesion.
• Clean the surface of your phone/case (not included) as well as the phone suction mount.
• For best results, a slightly damp phone suction mount is recommended.
• Press the slightly dampened phone suction mount to the center of your phone/case .
• Press it to a at, smooth surface. The adherence time is designed to last 8 minutes.
Re-press the device to reset adherence as needed.
• To remove, pull down from the top.
NOTE:
• This phone suction mount will hold the weight of most phones for a short duration of
time, but will not protect the phone from fall damage should the suction come loose. The
suction will inevitably lose strength over time.
• Not for use in a car.
• Check the suction cup for damage before using.
• Before releasing your phone, be sure the phone suction mount is properly secured to the
surface.
• If the phone starts to come o of the suction pad surface during use, reapply pressure.
• Never leave your phone on any unattended surfaces for long periods.
troubleshooting
• If the mini microphone is not working correctly, turn it on/o to restart.
• If the mini microphone won’t turn on, recharge the battery and try again.
• If the mini microphone won’t charge, make sure the power supply works, is 5V 1A, and is
not damaged.
• If the clip-on ring light is not working correctly, turn it on/o to restart.
• If the clip-on ring light won’t turn on, recharge the battery and try again.
• If the clip-on ring light won't charge, make sure the power supply works, is 5V 1A, and is.
not damaged
NOTE: This equipment has been tested and found to comply with the limits for a Class B digital device, pursuant to Part 15 of the FCC
Rules. These limits are designed to provide reasonable protection against harmful interference in a residential installation. This
equipment generates, uses and can radiate radio frequency energy and, if not installed and used in accordance with the instructions,
may cause harmful interference to radio communications.
However, there is no guarantee that interference will not occur in a particular installation. If this equipment does cause harmful
interference to radio or television reception, which can be determined by turning the equipment o and on, the user is encouraged to
try to correct the interference by one or more of the following measures:
• Reorient or relocate the receiving antenna.
• Increase the separation between the equipment and receiver.
• Connect the equipment into an outlet on a circuit dierent from that to which the receiver is connected.
• Consult the dealer or an experienced radio/TV technician for help.
Target Corp. Mpls. MN, 55403 Phone: 612-304-6073
For qualied repair specialists requesting repair information and parts please contact the original manufacturer at
customersupport@gemsndyours.com
Mini microphone FCC ID: 2AO23-CCK2 Model: CCK2 Input: 5V
⎓0.7A Max USB-C receiver FCC ID: 2AO23-CCK2A Model: CCK2A
Clip-on ring light Model: CCK2B Made in China
This device complies with part 15 of the FCC Rules. Operation is subject to the following two conditions: 1) This device may not cause
harmful interference, and 2) this device must accept any interference received, including interference that may cause undesired
operation.
Warning: Changes or modications to this unit not expressly approved by the party responsible for compliance could void the user’s
authority to operate the equipment.
The device has been evaluated to meet general RF exposure requirements. The device can be used in portable exposure conditions
without restriction.
mini microphone
clip-on ring light
light cover
(on the front)
power/
brightness
button
double-sided phone
suction mount
safety
• Do not expose the products to re, high temperature, direct sunlight, etc.
• Do not modify or repair the devices.
• Do not allow small particles to get into the ports of the products.
• Do not use chemical detergents to clean, use a soft dry cloth to wipe clean.
• Do not look directly at the light source of the clip light to avoid harming your eyes.
• Use caution when touching the light cover on the clip light after extended use as it may
become hot.
clip
USB-C receiver
indicator
charge input/
USB-C port
connect port/
USB-C port
power button
microphone
clip
microphone
front back
charge input/
USB-C port
(on the side)
indicator
charge input/
USB-C port
(on the top)
4in
front back
8.5 in