
torque X
Foldable & Cordless Pressure Washer Gun
User Manual
Thank you for choosing Portronics Torque X.
This foldable, cordless pressure washer gun is designed for quick and
effective cleaning of everyday surfaces using high-pressure water.
Torque X helps remove stubborn dirt and grime from, cars & bikes,
balconies & windows, outdoor furniture, garden tools, bathroom surfaces.
Its foldable design, rechargeable battery, and multiple spray modes make
cleaning easy and portable.
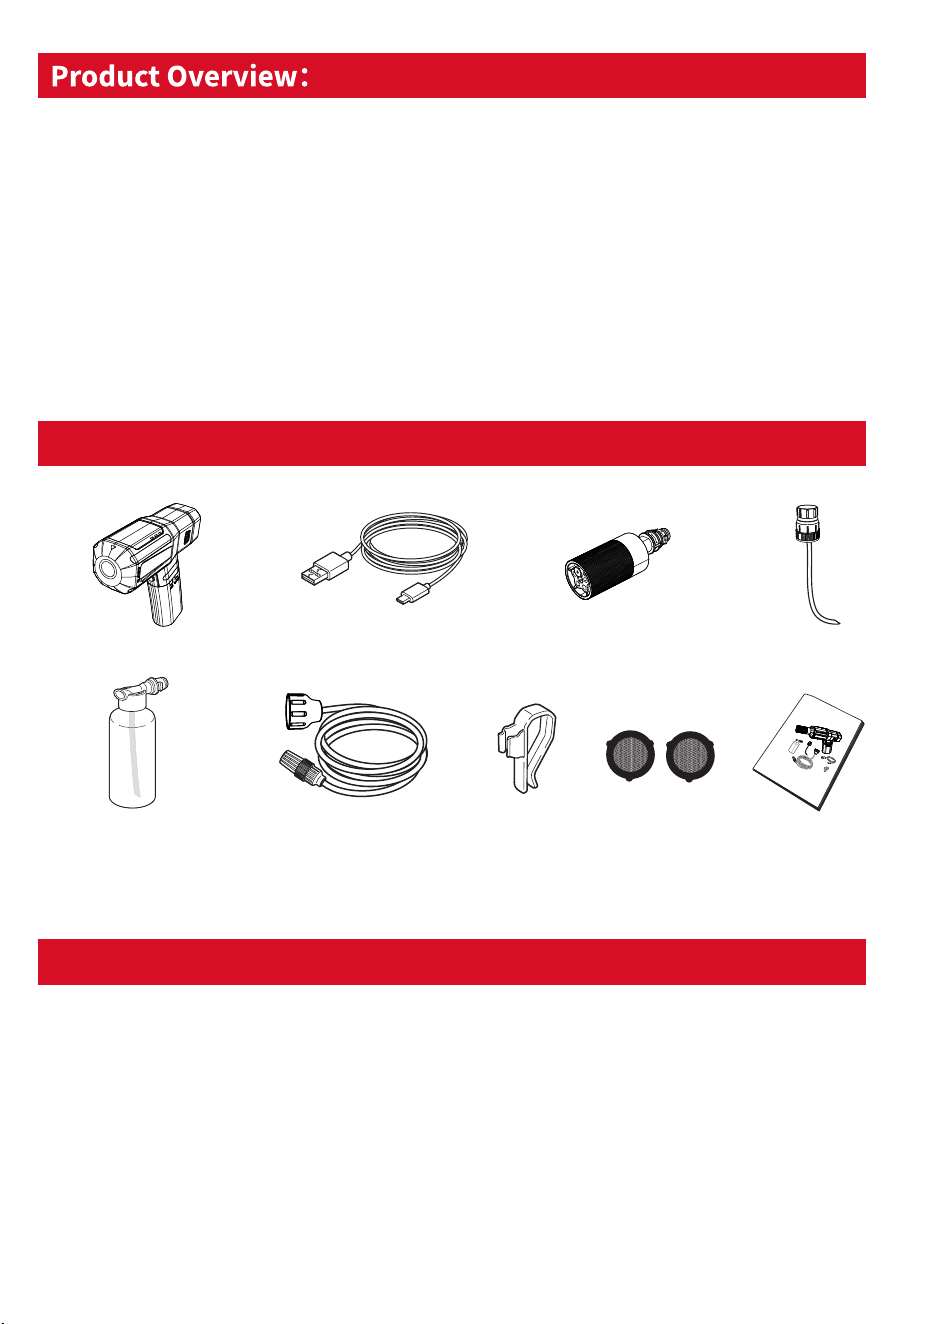
Package Contents
Torque X
Type-C Charging
Cable × 1
5-in-1 Rotating
Nozzle × 1
Water Bottle
Adapter × 1
Detergent Bottle
(200 ml) × 1
Self-Priming
Hose × 1
Hose
Clamp × 1
Filter Screens
× 2
User
Manual × 1
• Do not disassemble or modify the product
• Keep away from children
• Do not spray toward people, animals, or plants
• Do not use near fire, flammable liquids, or electrical appliances
• Avoid splashing water on the main unit
• Always use original accessories
Safety Guidelines
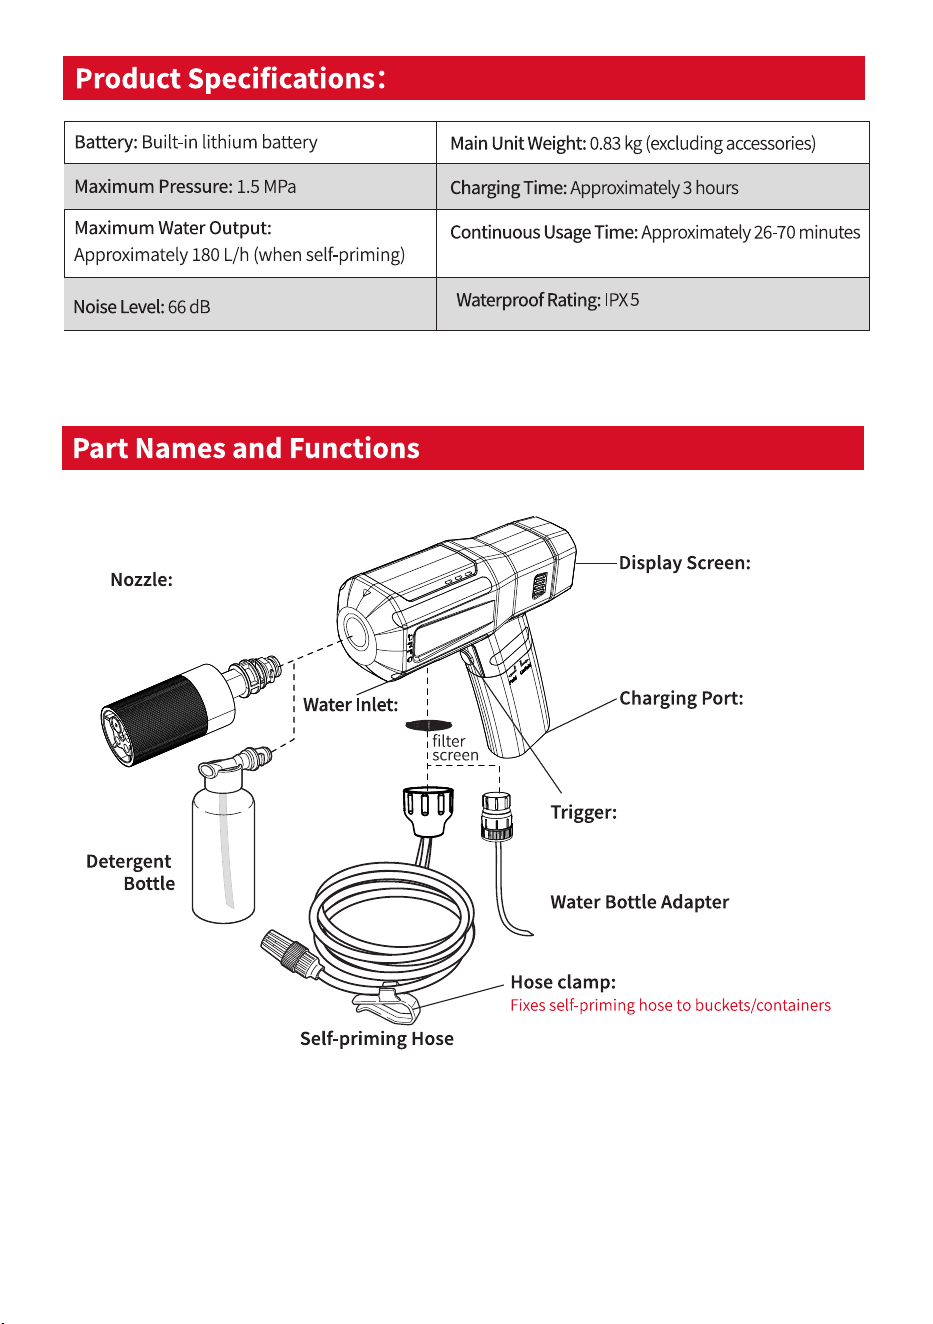
7.4V/4000 mAh
Multiple spray patterns
for different cleaning needs
Press to release water spray
Connects hose
or bottle adapter
For recharging the battery
Shows battery level, gear mode
& charging status
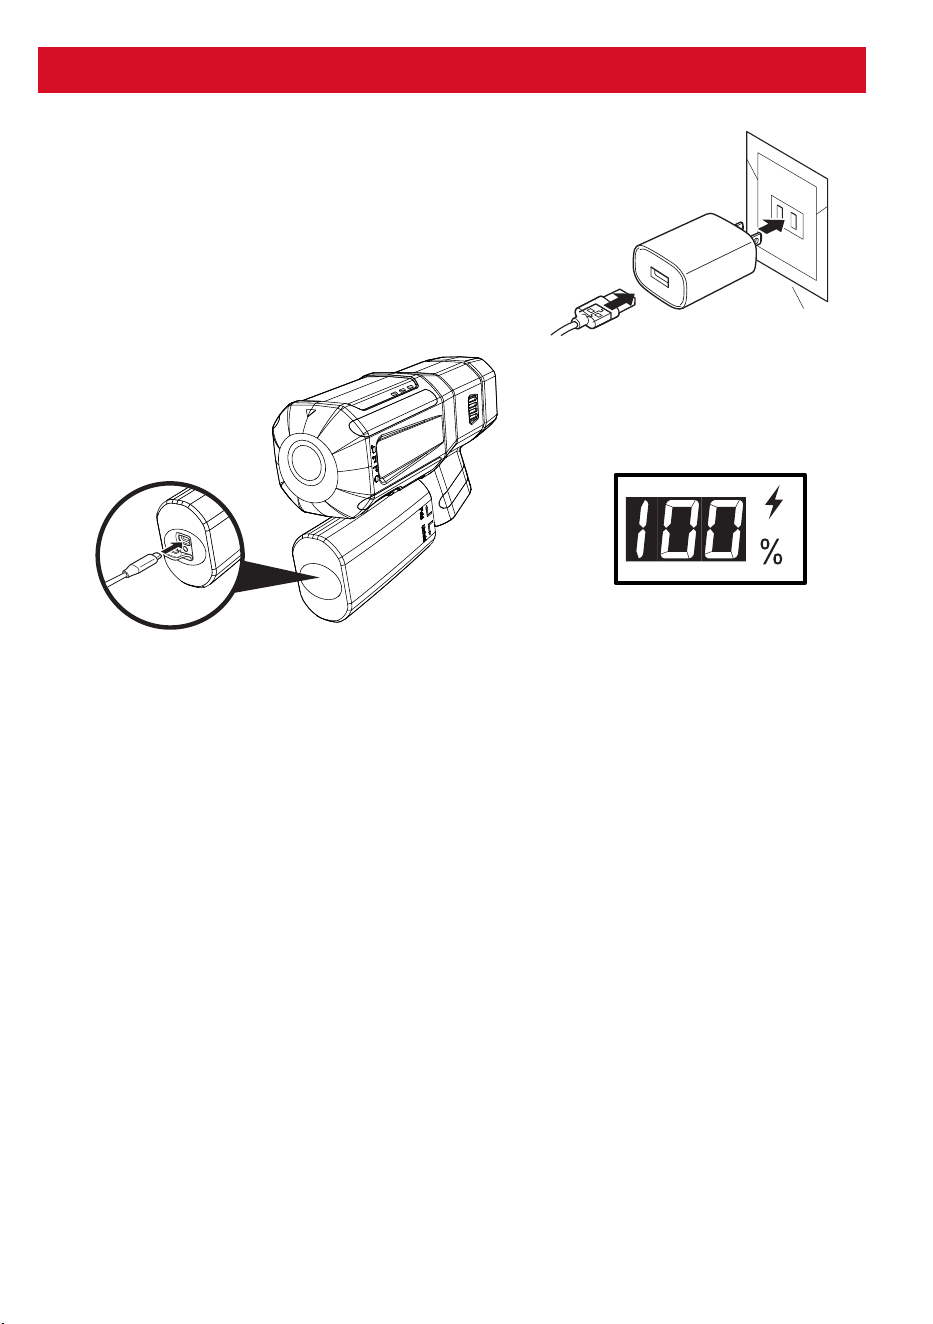
• Connect the adaptor to a power socket
• Insert the Type-C cable into the adaptor
• The lightning icon blinks while charging
• Display shows 100% when fully charged
Charging Instructions
⚠️ Notes:
• Adapter not included
• Use a 5V/2A or higher adapter
• Do not charge in wet conditions
• The device cannot be used while charging
• When the battery is exhausted, the display will show “E3” and the
device will automatically stop working to protect the battery.
• Avoid operating or leaving the device in a low-battery state, as this
may lead to battery degradation or malfunction.
• Always recharge the unit fully before restarting use or storing it.
• To prevent battery over-discharge and maintain battery health, fully
charge the battery at least once every 3–5 months, even when the
product is not in regular use.
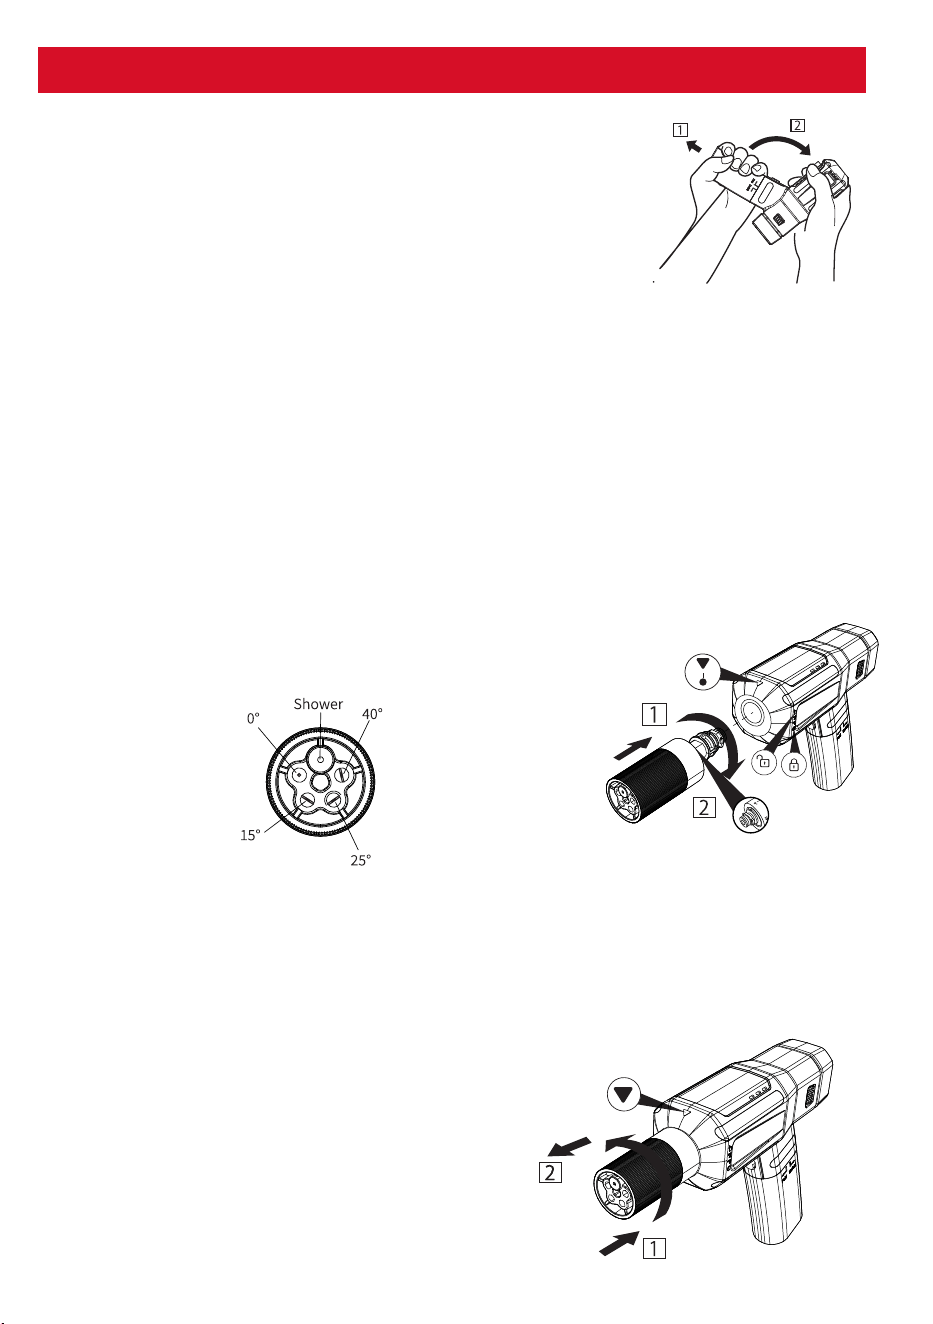
I. Folding & Unfolding the Handle
• Always unfold the handle before operation
• Listen for a “click” to confirm it is locked in place
• Fold only when the unit is powered OFF
Operating the Device
II.Installing the 5-in-1 Nozzle
• Follow the lock-shaped markings on the main unit to ensure correct
installation.
• Hold the 5-in-1 nozzle and align the oval clip on the nozzle with the
oval groove inside the water outlet at the front of the main unit.
• Ensure the wider hollow end of the nozzle faces downward.
• Push the nozzle fully into the outlet, then rotate it clockwise until the
triangular mark on the nozzle aligns with the water-shaped mark on
the main unit.
• This indicates the nozzle is securely locked in place
III. Removing the 5-in-1 Nozzle
• Push the nozzle slightly inward and rotate it until the triangular mark
moves away from the water-shaped mark.
• Pull the nozzle straight out from the main unit to remove it.
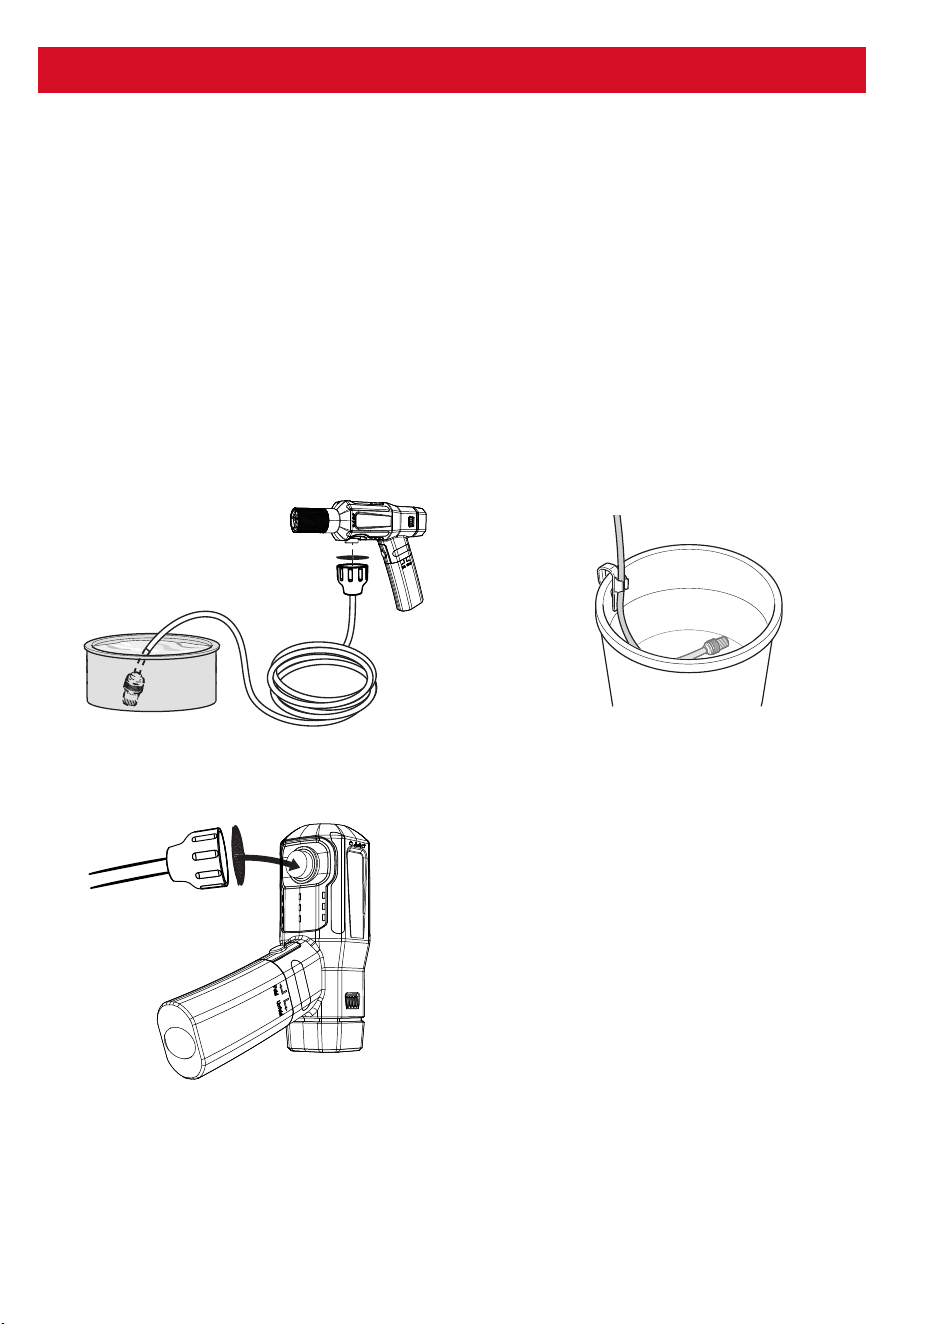
IV. Water Supply Options
Torque X can draw water in two convenient ways. Choose the method
that suits your cleaning setup.
Method A: Using Stored Water (Bucket / Tank)
Connect the self-priming hose to the water inlet of the main unit.
Place the filter end of the hose fully into a bucket, tub, or water tank.
Ensure the hose end remains fully submerged in water during operation.
Tip: If the hose floats, secure it using the included hose clamp to keep the
filter submerged.
Operating the Device
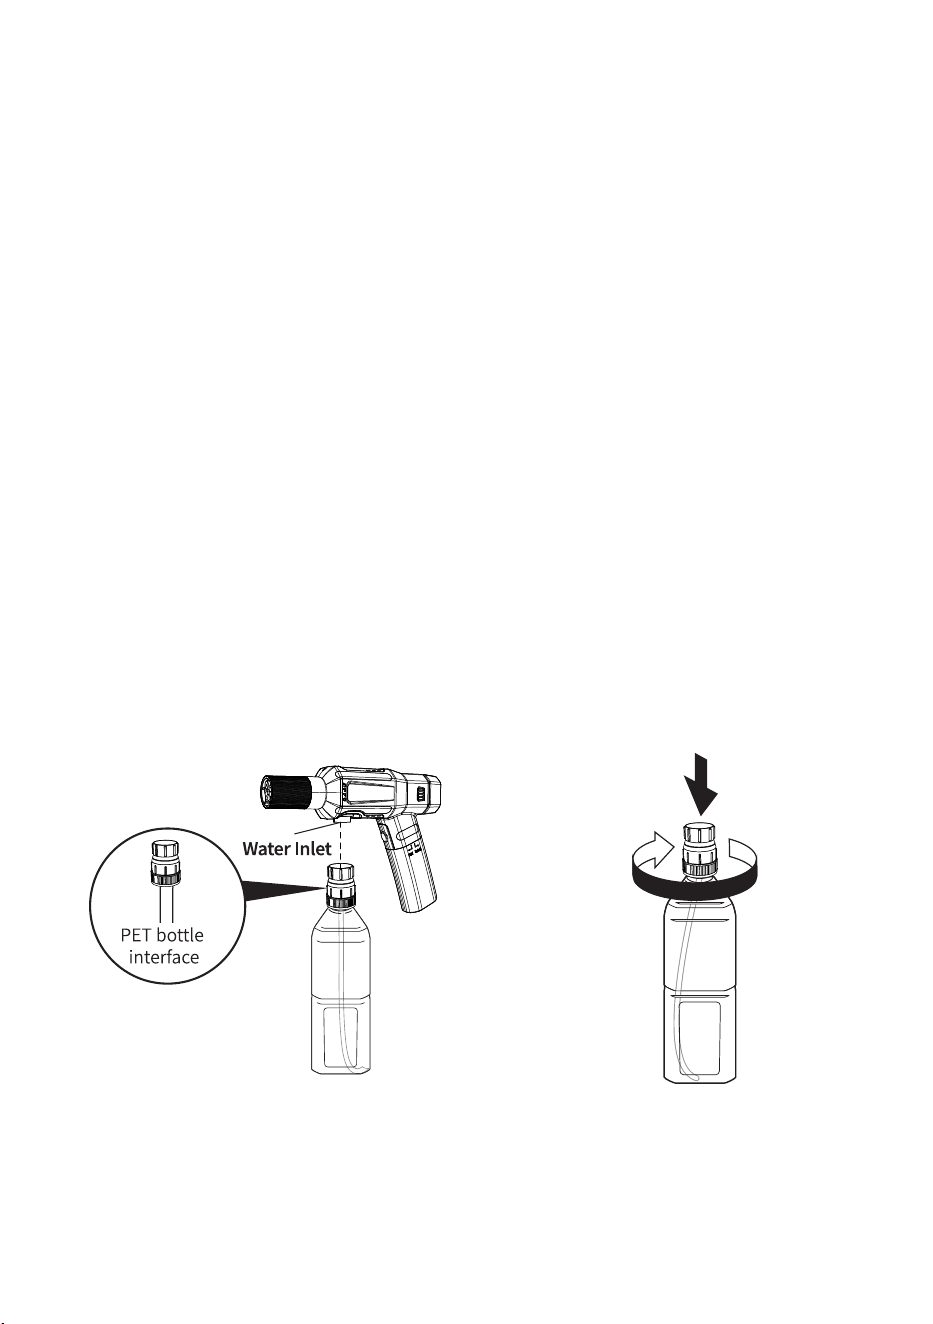
Method B: Using a Water Bottle
• This method is ideal for quick cleaning tasks or portable use.
• Insert the adapter firmly into the water bottle opening. Rotate it clockwise
until tight and secure. Do not overtighten.
• Attach the water bottle adapter to the water inlet.
• Use a standard 2-litre plastic bottle (28–32 mm mouth size
recommended).
• Fill the bottle with clean tap water before installation.
• Tips:
• Upto 2-litre bottles are recommended for proper fit and water flow.
• One full 2-litre bottle provides approximately 50 seconds of
continuous cleaning.
Note:
Plastic bottles are not included. Please arrange
suitable bottles separately
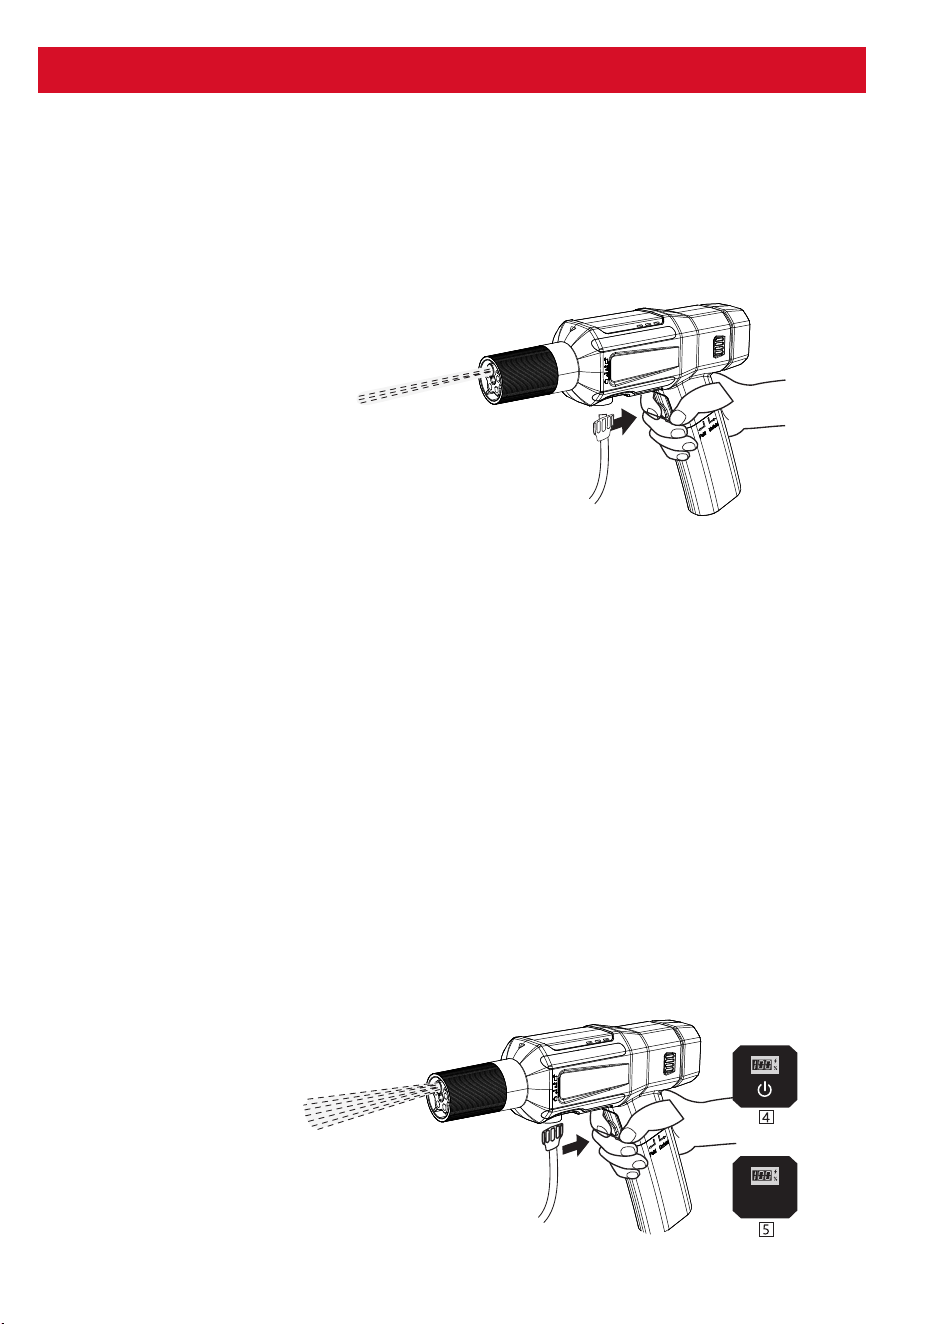
V. Prime the Water Flow (Confirm Jet Status)
• Aim the nozzle in a safe direction.
• Press and hold the trigger to release water.
• Continue spraying until air trapped in the hose is fully discharged and
the water flow becomes steady.
Operating the Device
• VI. Power ON & Start Cleaning (Without Detergent)
• Press and hold the power button for 1 second to turn ON the unit.
• Press the same button for 3 seconds to start the device on gear 1.
• Press the same button briefly to switch between the gears.
• The device has three gear modes.
• Gear 1: Low pressure – light cleaning
• Gear 2: Medium pressure – regular cleaning
• Gear 3: High pressure – tough dirt removal
• The selected gear is shown on the digital display.
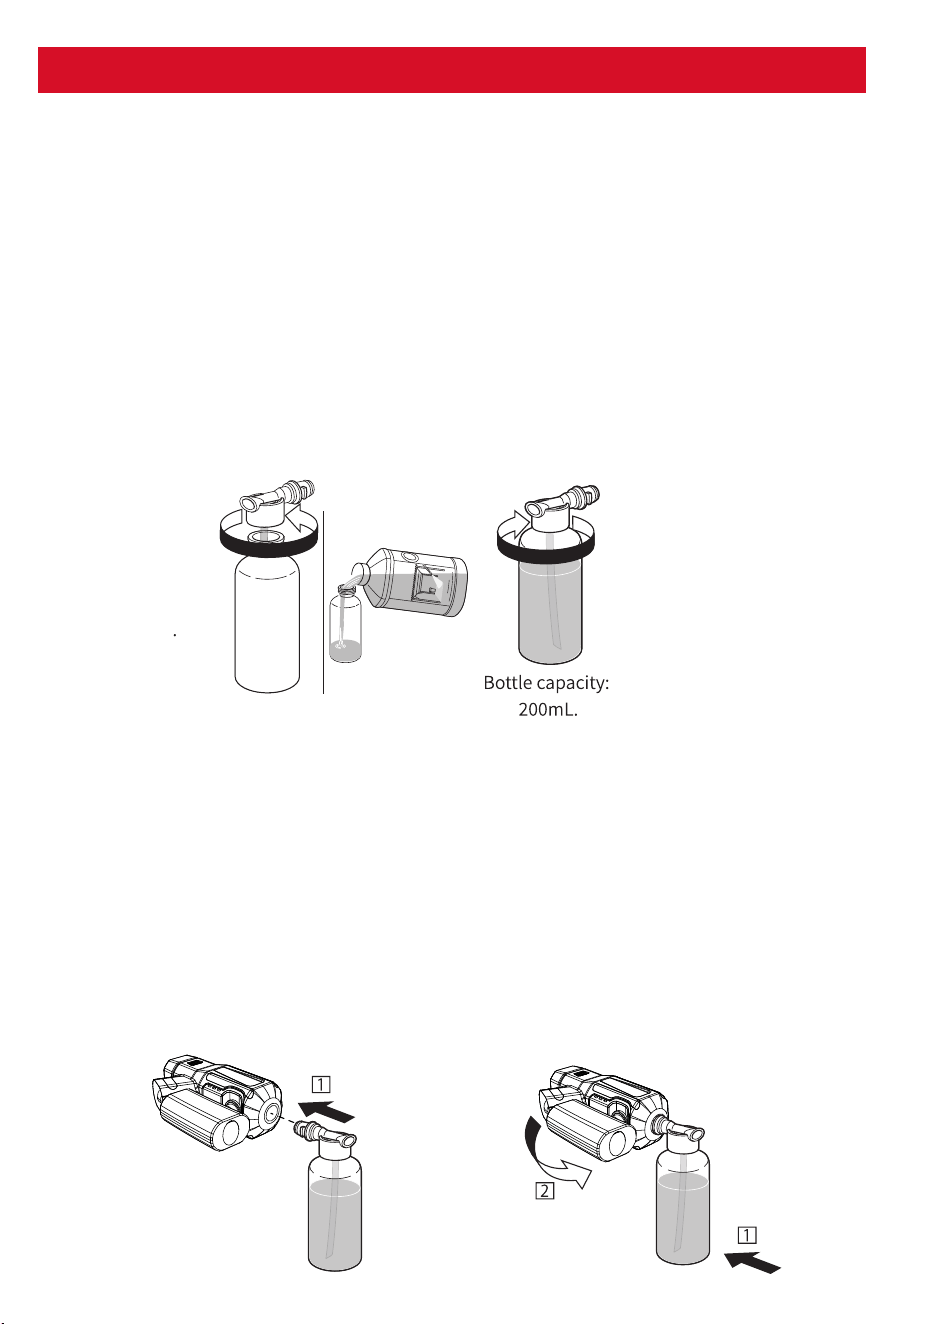
Step 1: Prepare the Detergent Bottle
Remove the self-priming hose, if connected.
Remove the 5-in-1 nozzle from the main unit.
Unscrew the cap of the detergent bottle.
Fill the bottle with a suitable detergent (capacity: 200 ml).
(Use only detergents designed for pressure washers.)
Operating the Device
Follow the steps below to safely and effectively use detergent with Torque X.
Step 2: Install the Detergent Bottle
Hold the detergent bottle vertically and align it with the front interface of
the main unit.
Insert the bottle and rotate the main unit downward by 90°, following the
arrow direction, until it locks securely.
Caution:
Do not install the detergent bottle horizontally, as this may cause leakage.
VII. Cleaning with Detergent
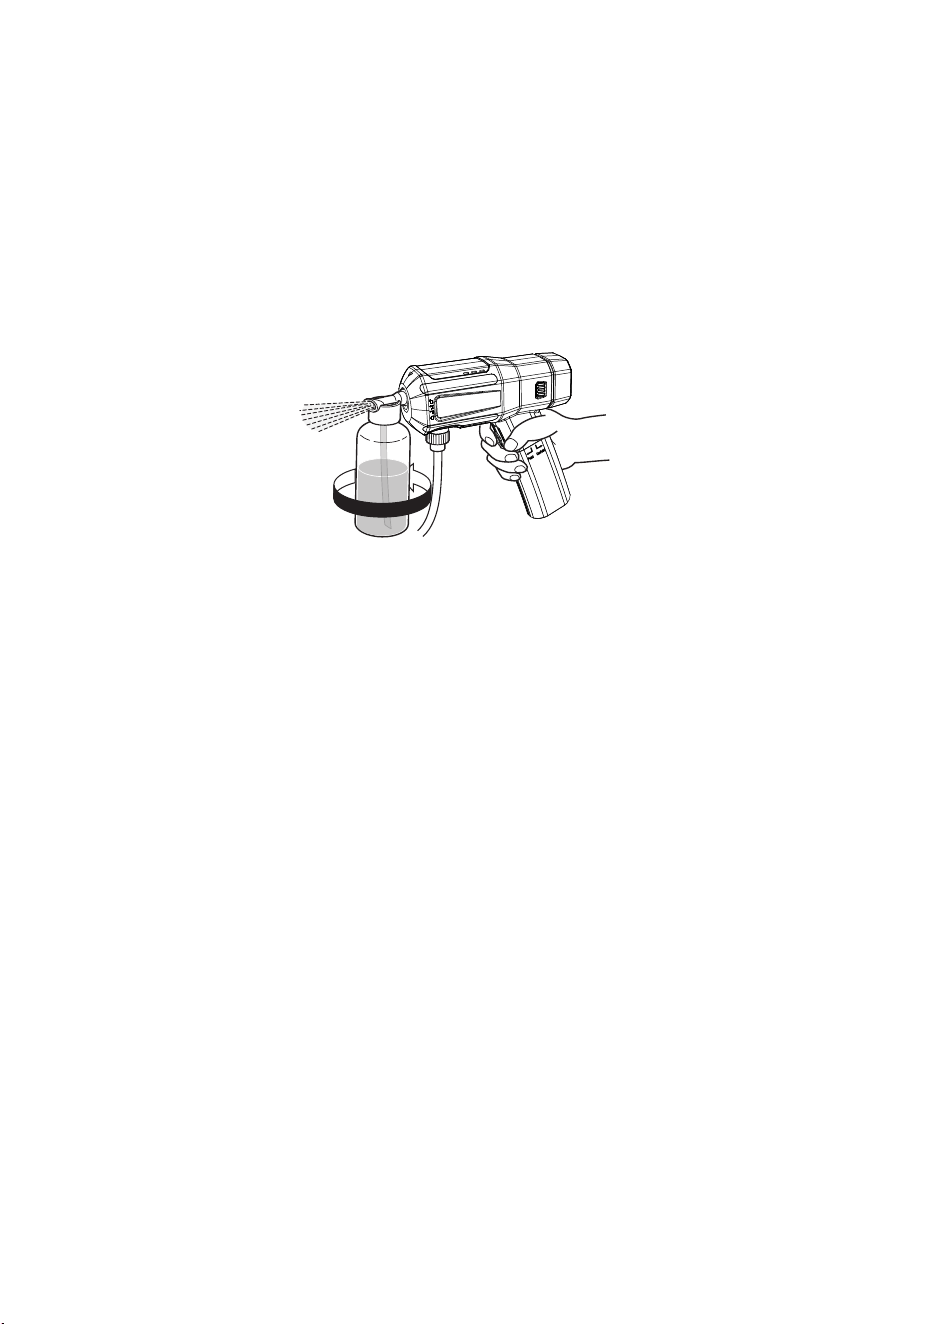
Step 3: Start Detergent Cleaning
Fully unfold the handle before operation.
Connect the self-priming hose or water bottle adapter, as required.
Press the trigger to spray detergent evenly over the surface.
Recommendation:
Apply a light, even layer of detergent first for better stain removal.
Step 4: Remove the Detergent Bottle
After application, rotate the detergent bottle counterclockwise by 90° and
remove it.
Do not press the trigger while removing the detergent bottle or installing
the nozzle.
Step 5: Rinse the Surface
Reinstall the 5-in-1 nozzle.
Select Standard Spray Mode (0° / 15° / 25° / 40°) or Shower Mode.
Rinse the surface thoroughly with clean water before the detergent dries.
Step 6: After Use
Rinse the inside of the detergent bottle with clean water.
Store the bottle dry for next use.
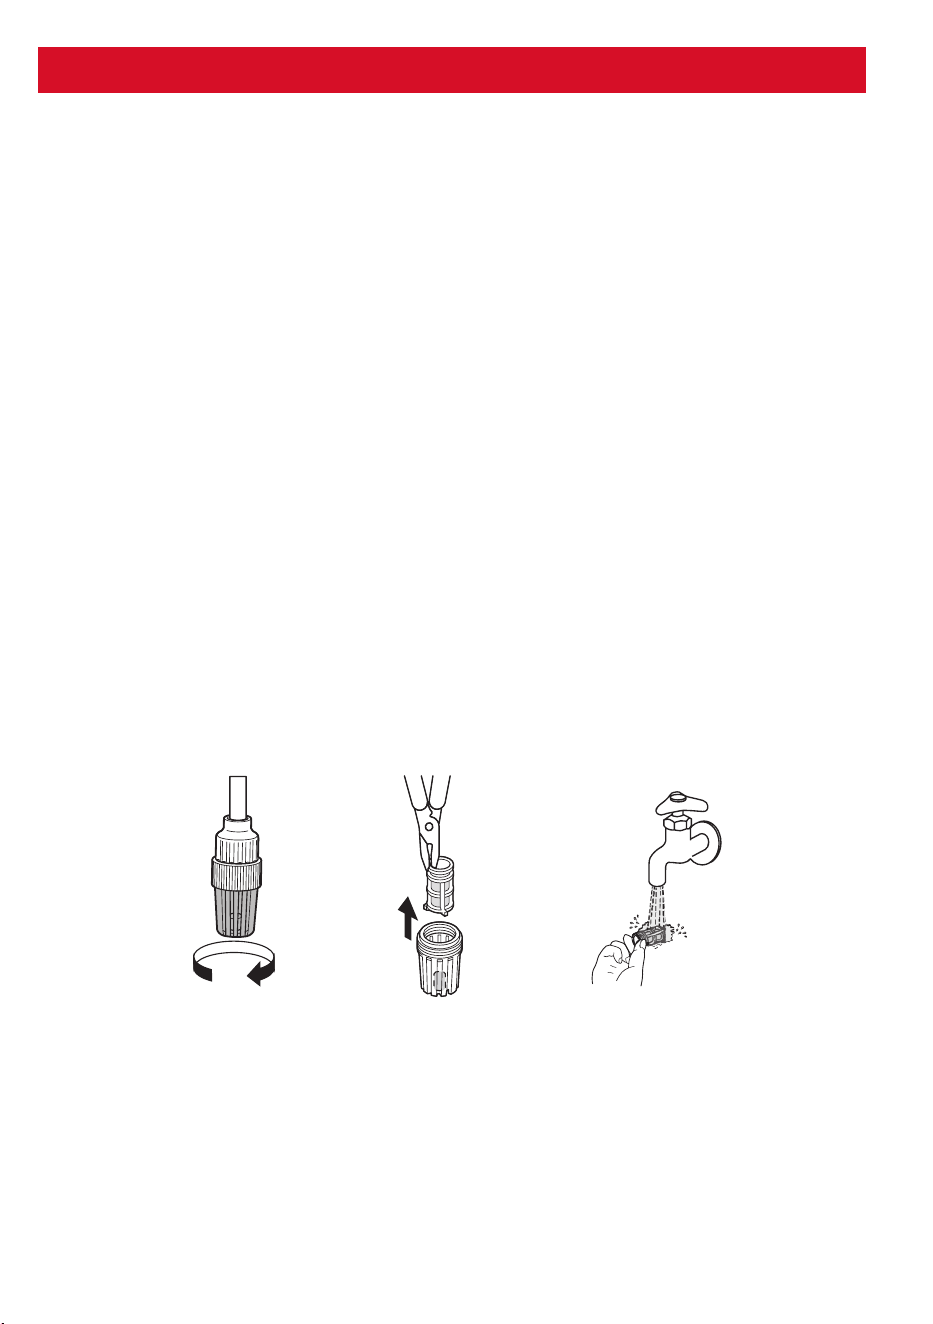
Regular cleaning of the filter helps maintain smooth water flow and
prevents blockages.
Step 1: Remove the Filter
Remove the white filter screen from the front end of the self-priming hose.
If the filter cover comes off, place it back correctly before continuing.
If dust or residue is stuck inside, gently remove it using pliers.
Step 2: Clean the Filter
Rinse the filter thoroughly under clean running water to remove dirt and
debris.
Ensure all visible particles are washed away.
Step 3: Reinstall the Filter
Place the filter back into its original position.
Secure it properly so it sits firmly in place before use.
Cleaning the Self-Priming Hose Filter
www.portronics.com
For Support
Visit : www.portronics.com
Email : [email protected]
Contact No. : +91 9555245245
(Working Hrs. : Monday - Saturday 10:00am - 6:00pm)
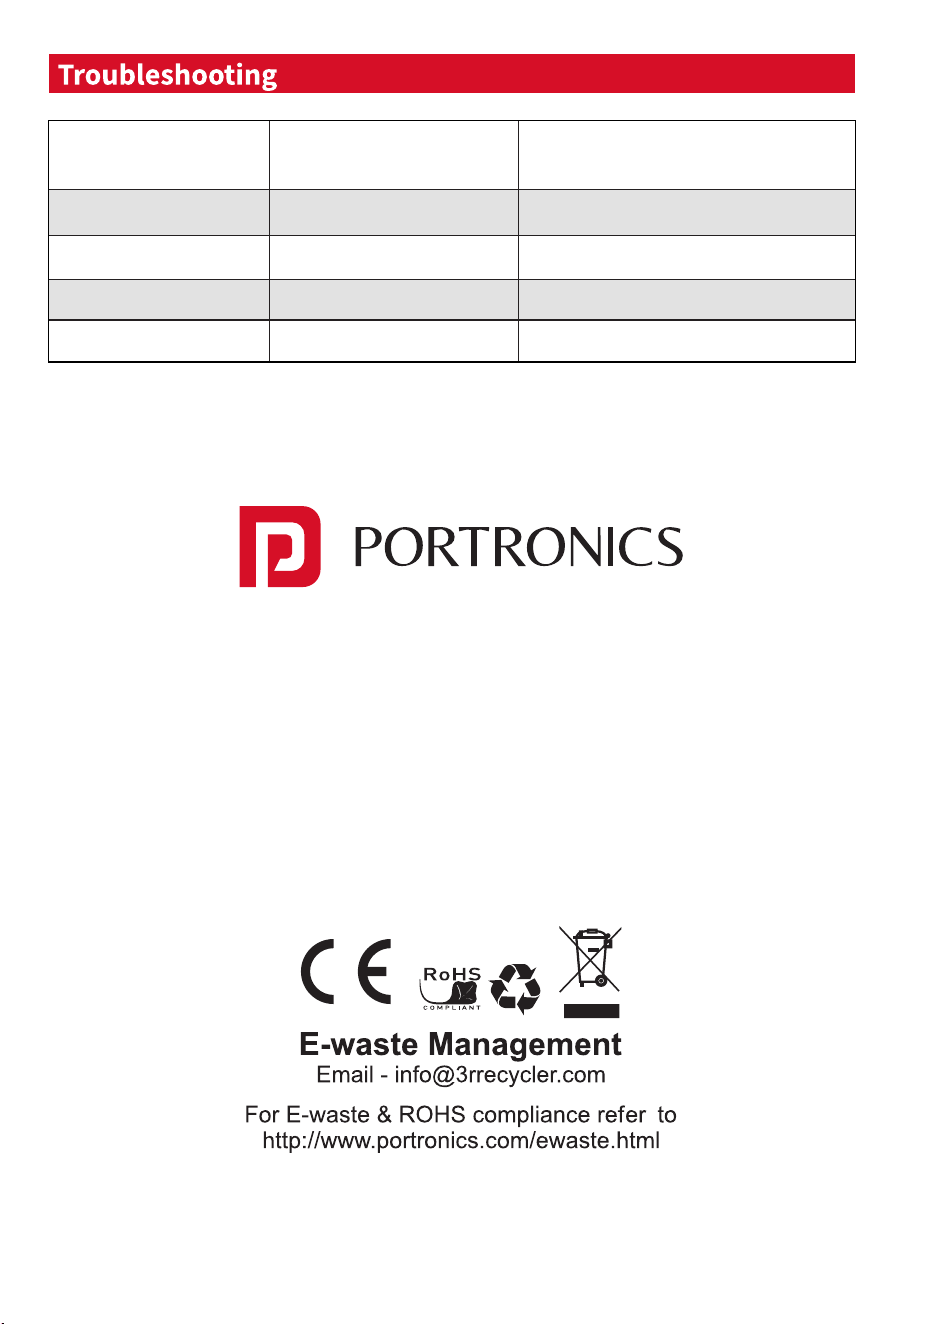
Issue Possible Reason Solution
Unit not starting Battery low
Recharge
No water flow
Blocked filter/nozzle
Clean filter
Low pressure Nozzle blocked
Unclog nozzle
Water leakage
Loose connection
Loose connection
