INSTRUCTION MANUAL
AIR FRY TOASTER OVEN
TL2-AC35ZA(GR)
Please review this instruction manual before operating.
https://z.wiki

CONTENTS
IMPORTANT SAFEGUARDS
Basic safety precautions .................................................................................................................................. EN-01
Short cord instruction (detachable power-supply cord) .................................................................... EN-05
Before rst use ................................................................................................................................................... EN-06
PRODUCT INSTRUCTION
Name of parts ..................................................................................................................................................... EN-07
OPERATION
How to use .......................................................................................................................................................... EN-08
Mute function .................................................................................................................................................... EN-10
Eco function ....................................................................................................................................................... EN-10
Memory function ............................................................................................................................................. EN-10
Factory data reset ............................................................................................................................................. EN-10
Toast function .................................................................................................................................................... EN-11
Bake function ..................................................................................................................................................... EN-11
Roast function ................................................................................................................................................... EN-12
Broil function ..................................................................................................................................................... EN-13
Pizza function .................................................................................................................................................... EN-13
Warm function ................................................................................................................................................... EN-14
Reheat function ................................................................................................................................................ EN-15
Dehydrate function ......................................................................................................................................... EN-15
Rotiss function ................................................................................................................................................... EN-16
Rotisserie function using the rotisserie fork ........................................................................................... EN-17
https://z.wiki

NOTE
BEFORE OPERATING THIS PRODUCT, READ,
UNDERSTAND, AND FOLLOW THESE INSTRUCTIONS.
BE SURE TO SAVE THIS BOOKLIST FOR FUTURE
REFERENCE.
Care and cleaning ............................................................................................................................................. EN-18
Specication
........................................................................................................................................................ EN-19
One year limited warranty
......................................................................................................
EN-20
https://z.wiki
EN-01
IMPORTANT SAFEGUARDS
BASIC SAFETY PRECAUTIONS
When using electrical appliance, basic safety precautions should
always be followed, including the following:
Read all instructions.
Close supervision is
necessary when any
appliance is used by or
near children.
Unplug from the outlet
when not in use and before
cleaning. Allow to cool
before putting on or taking
o parts.
The use of accessory
attachments is not
recommended by the
appliance manufacturer.
This may cause injuries.
Extreme caution must be
used when you move an
appliance containing hot
oil or other hot liquids.
Avoid contacting moving
parts.
For household use only.
Remove the plug from the
outlet when the appliance
is not in use, before putting
on or taking o parts, and
before cleaning. Allow to
cool before handling.
Extreme caution should be
exercised when you use
containers constructed of
materials other than metal
or glass.
Caution-To ensure
continued protection
against risk of electric
shock, connect to properly
https://z.wiki
EN-02
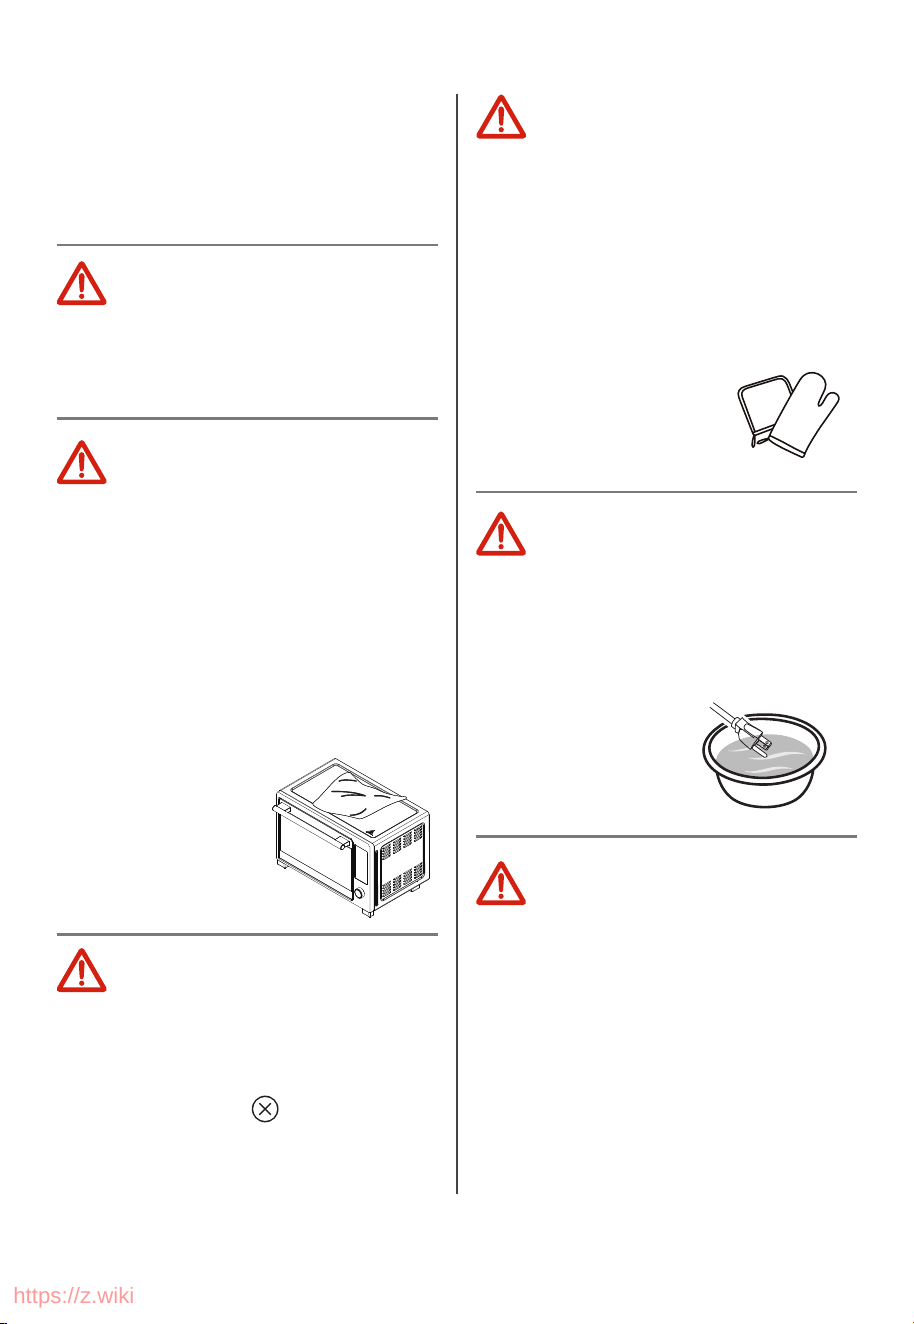
The outside of the oven,
including the door, is hot
during and after use.
A fire may occur if the
toaster-oven is covered
or touching flammable
material, including
curtains, draperies, walls,
etc., when in operation. Do
not store any flammable
materials on top of
the appliance when in
operation.
Always attach plug to
appliance rst, then plug
cord into the wall outlet.
To disconnect, turn any
control to " ", then
remove plug from wall
outlet.
Always use heat-resistant
gloves, pads, or oven
mitts when handling
hot materials, and when
placing items in or
removing items from the
oven, including trays, racks,
accessories, or containers.
To protect against electrical
shock, do not immerse
the cord, plugs, or (state
specific part or parts in
question) in water or other
liquid.
grounded outlets only.
( If the appliance is of the
grounded type)
Use extreme caution when
removing tray or disposing
of hot grease.
https://z.wiki
EN-03
Do not store any materials,
other than manufacturers
recommended accessories,
in this oven when not in
use.
Do not operate any
appliance with a damaged
cord or plug or after the
appliance malfunctions
or has been damaged
in any manner. Return
appliance to the nearest
authorized service facility
for examination, repair, or
adjustment.
Do not touch hot surfaces.
Use handles or knobs.
Do not let cord hang over
edge of table or counter, or
touch hot surfaces.
Do not use the appliance
outdoors.
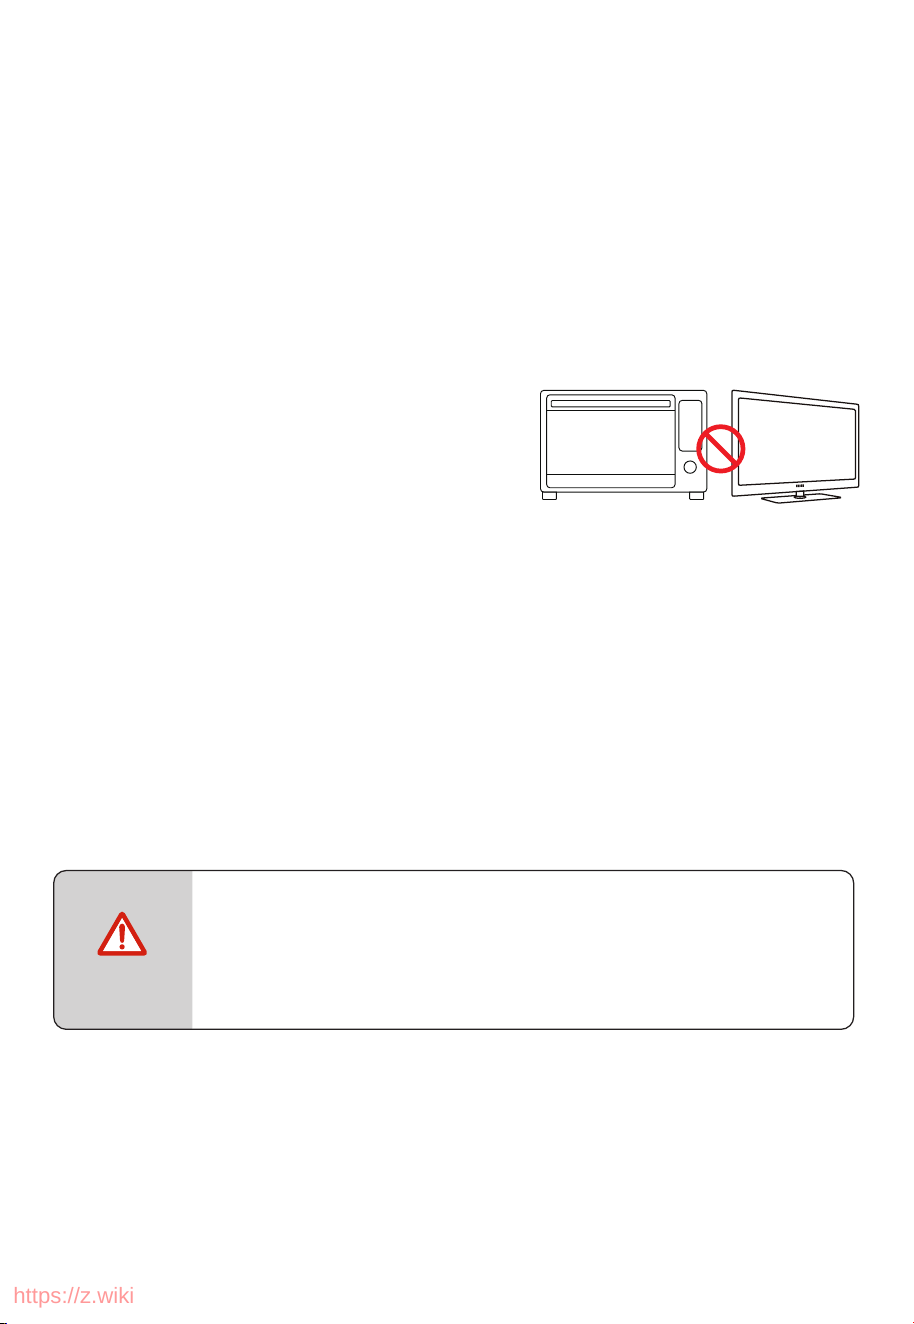
Do not place on or near a
hot gas or electric burner,
or in a heated oven.
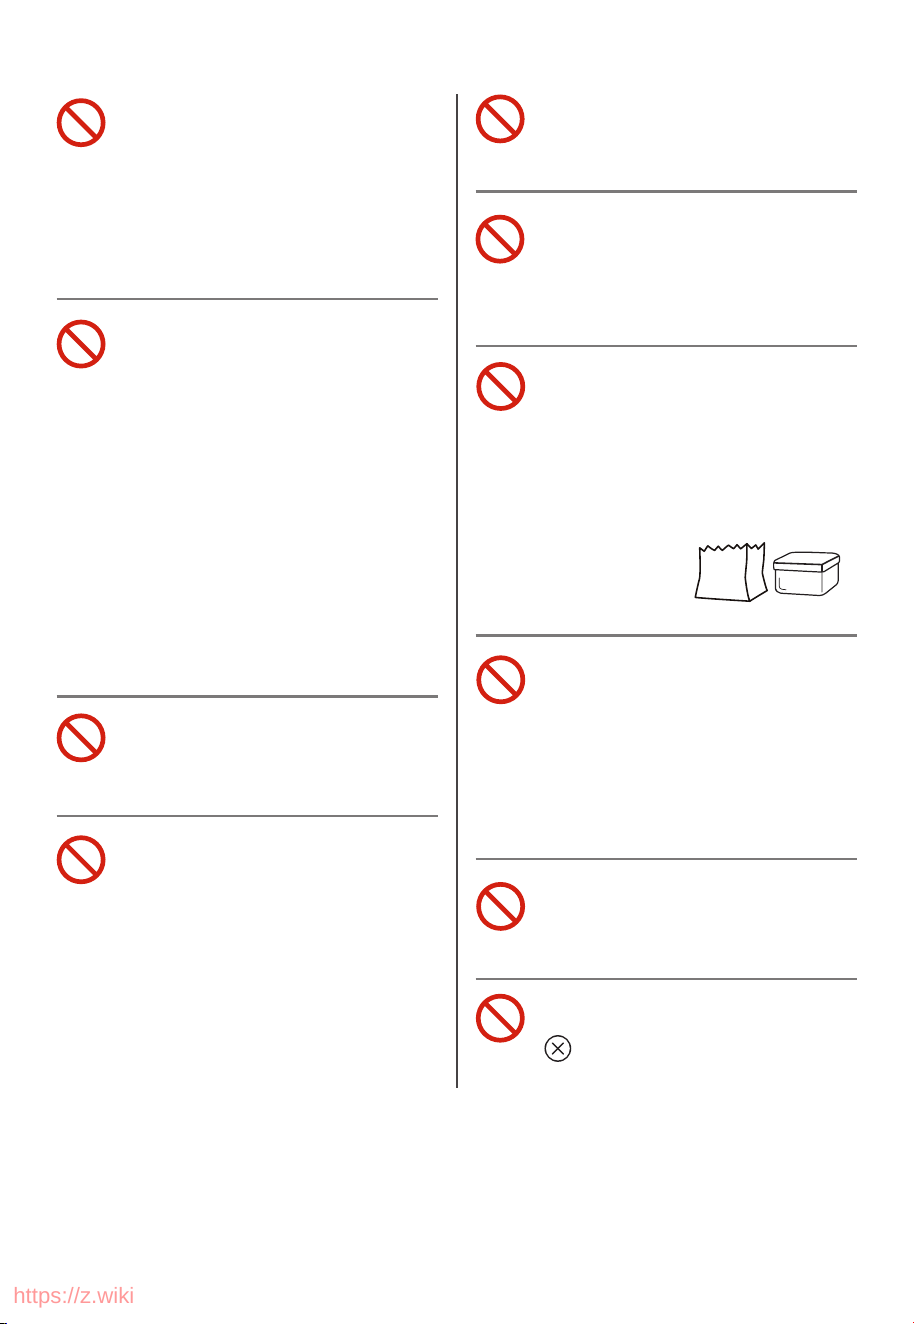
Do not place any of the
following materials in
the oven: (that is, paper,
cardboard, plastic, and the
like).
Do not cover crumb tray or
any part of the oven with a
metal foil.
This will cause over-
heating of the oven.
Do not use the appliance
for other intended use.
During operation, press
"
" can stop cooking.
https://z.wiki
EN-04
Do not insert your fingers into any gaps or holes. This
may cause injuries.
SAVE THESE INSTRUCTIONS
CAUTION
Do not clean with metal
scouring pads. Pieces can
break o the pad and
touch electrical parts,
creating parts, creating a
risk of electric shock.
Oversize foods or metal
utensils must not be
inserted in a toaster-oven
as they may create a fire or
risk of electric shock.
https://z.wiki

EN-05
SHORT CORD INSTRUCTION
(DETACHABLE POWER-SUPPLY CORD)
1. A short power-supply cord (or detachable power-supply cord)
should be used to reduce the risk resulting from becoming
entangled in or tripping over a longer cord.
2. Longer detachable power-supply cords or extension cords are
available and may be used if care is exercised in their use.
3. If a longer detachable power-supply cord or extension cord is
used:
(1). The marked electrical rating of the cord set or extension
cord should be at least as great as the electrical rating of the
appliance.
(2). The cord should be arranged so that it will not drape over
the countertop or tabletop where it can be pulled on by
children or tripped over unintentionally.
(3). If the appliance is of the grounded type, the extension cord
should be a grounding-type 3-wire cord.
https://z.wiki
EN-06
BEFORE FIRST USE
1. Remove all accessories and shipping materials packed inside the
oven.
2. Wash the oven fittings with a dab of washing-up liquid and warm
water. Wipe the unit and the oven fittings dry before using with
paper towels or a dry cloth.
3. Place the oven on a flat counter or
other stable surface.
DO NOT OPERATE ON THE SAME
CIRCUIT WITH ANOTHER APPLIANCE.
4. Make sure the crumb tray is properly fitted before using the
oven.
5. Before working, place the crumb tray under the bottom heating
pipes.
We recommend placing all accessories inside the oven and
running it on Roast function at 450˚F for 15 minutes. This
removes residues and odor traces that may be present.
The oven may smoke during this process. This is
normal for a new oven and will not last more than
10-15 minutes.
NOTE
https://z.wiki
EN-07
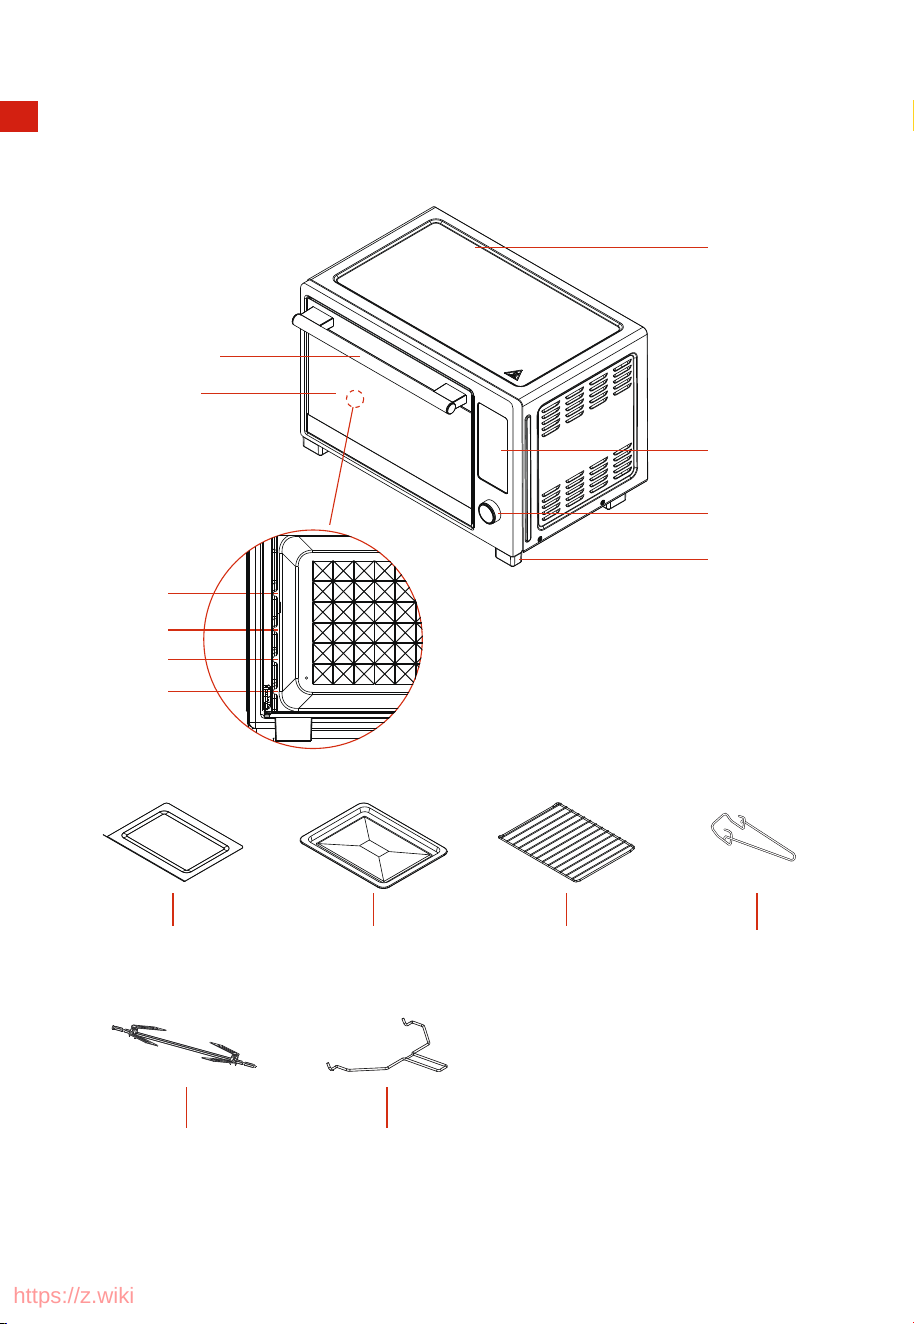
NAME OF PARTS
Housing
Knob
Foot
Display
Door Handle
Crumb Tray
Door Glass
Baking Tray Baking Rack
Layer 3
Layer 4
Layer 2
Layer 1
Remover Holder
Rotisserie Fork Rotisserie Kit
PRODUCT INSTRUCTION
https://z.wiki
EN-08
HOW TO USE
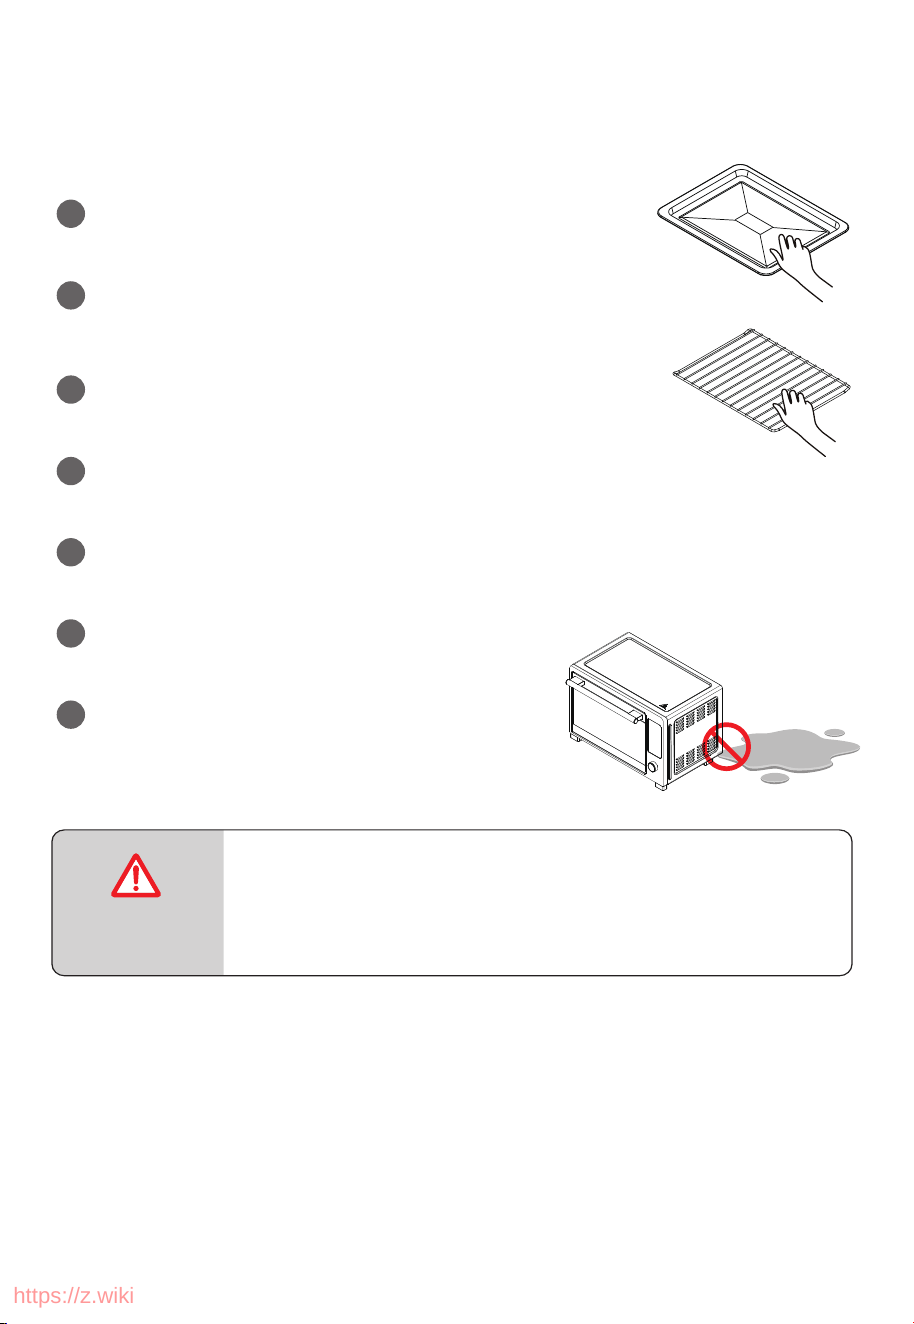
1
Place the Baking rack in position that will accommodate the height of the food to be
cooked.
2
The food should be put onto the baking tray to avoid catching fire by on accumulation
of food dripping on the heating pipes.
3
Make sure that you always use an ovenproof container in the oven, never use plastic or
cardboard containers in the oven.
4
Clean the heating pipe periodically.
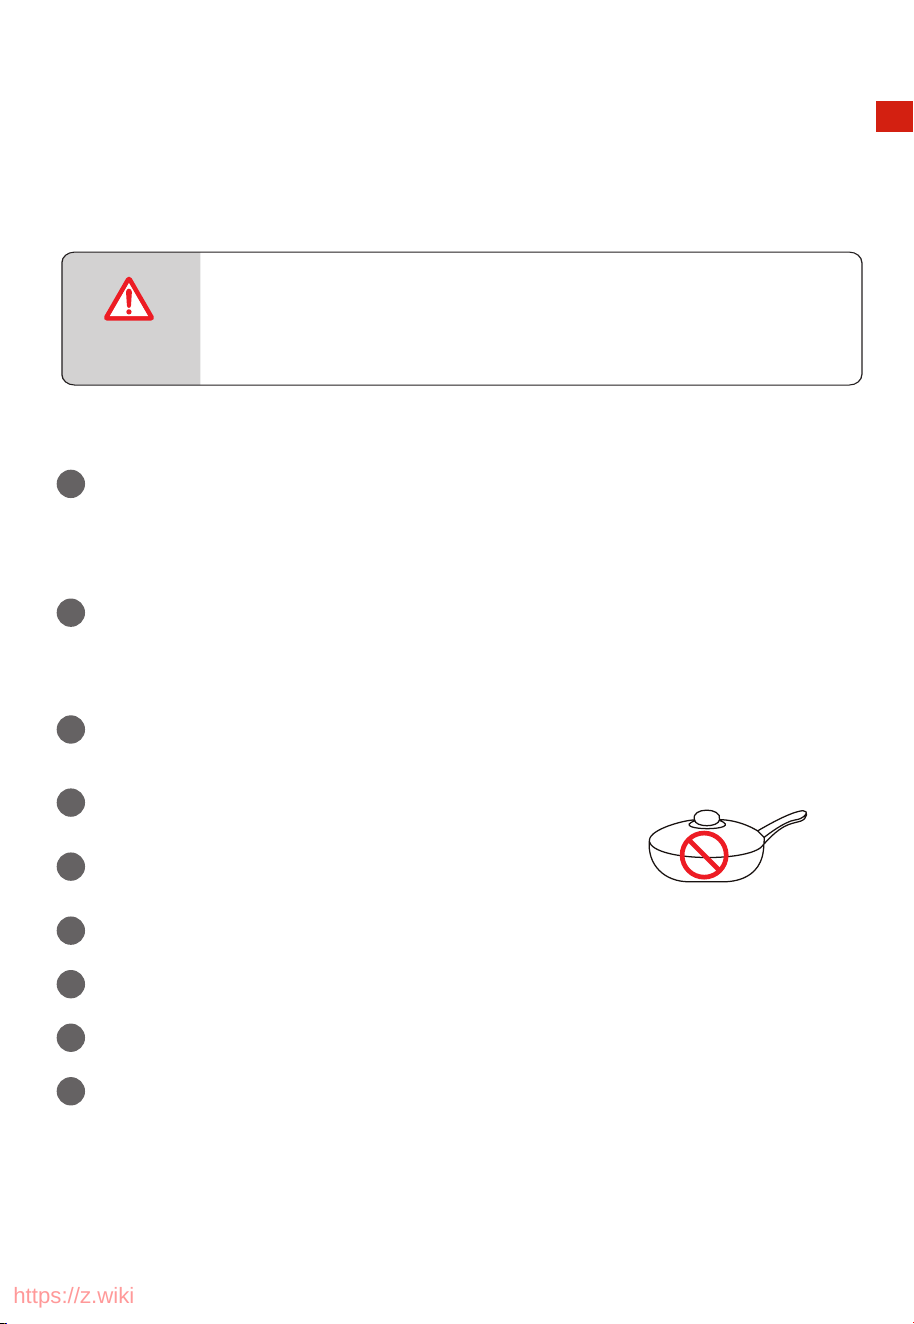
5
Never use glass or ceramic pans or lids.
6
DO NOT let juices run to the bottom of the oven. Use the Crumb Tray when cooking.
7
Set the temperature as suggested by the recipe or as desired.
8
Securely shut the door and set the cooking time to begin operating the oven.
9
Please don’t unplug the power cord when the oven nishes working, the fan will stop
delay working 1 min.
THE OVEN SURFACES ARE HOT DURING AND AFTER
USE GENERAL INSTRUCTIONS.
CAUTION
OPERATION
https://z.wiki
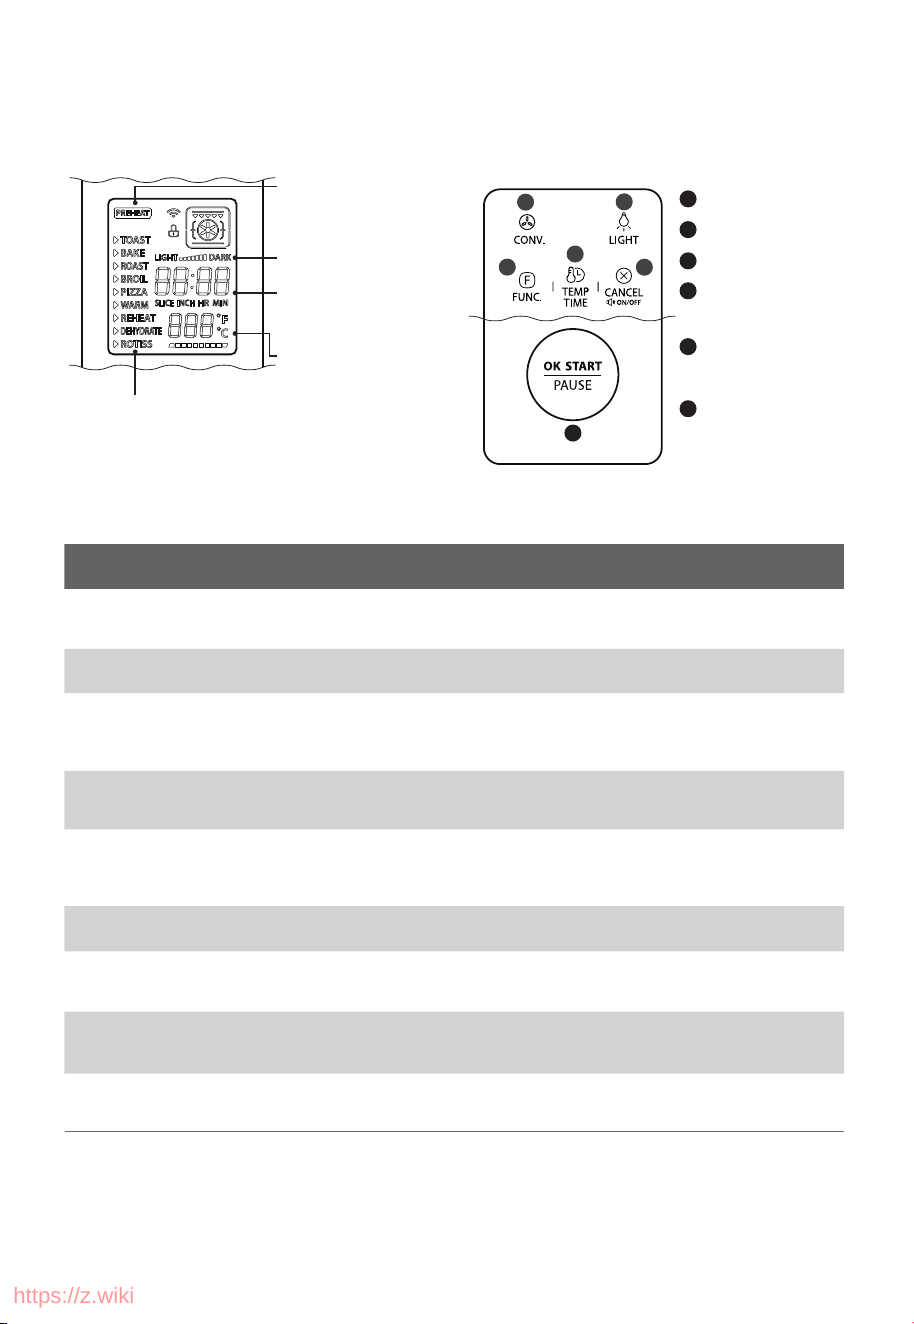
EN-09
Cooking function
Darkness Level
(only Toast function)
Preheat
convection button
Light button
Function button
Temperature/Time
button
Back/Cancel /Mute/
Eco button
OK/Start/Pause
knob or button
Time / Slice / Inch
(only slice/inch for the
Toast or Pizza function)
Temperature
1
2
3
4
5
6
COOKING
PRODUCT FUNCTIONS
COOKING
FUNCTION
TOAST
BAKE
BROIL
ROAST
PIZZA
REHEAT
WARM
DEHYDRATE
SETTING RANGE
1-6 Slices
Darkness Level 1-7
DESCRIPTIONS
Evenly toast up to 6 bread
slices to your perfect level
of darkness
ACCESSORIES
Baking Rack at
postion 3
ROTISS
(ROTISSERIE)
CONVECTION FAN
OFF
OFF
OFF
Achieve overall even
cooking and browning.
Baking Tray at
postion 2 or 3
150~450°F
1 min~2 hrs
Optional
(Default: OFF)
150~450°F
1 min~2 hrs
Optional
(Default: OFF)
400~450°F
1 min~2 hrs
Optional
(Default: OFF)
Optional
(Default: OFF)
Optional
(Default: OFF)
Achieve a crispy outside and
perfectly cooked inside for a
variety of meats, poultry
and veggies
Baking Rack at
postion 3
Baking Rack at
postion 3
Broil meat and sh and evenly
browns the tops of casseroles.
Baking Rack or
Baking Tray, at
postion 2 or 3
Baking Rack or
Baking Tray, at
postion 2 or 3
Melts and browns cheese and
toppings, while crisping crust
Preset temp & time for
6/9/12 inch (manual
setting - 150~450°F
1 min~30 mins)
Keep food warm and
prevent bacterial growth
Baking Tray at
postion 2 or 3
100~300°F
1 min~4 hrs
Heat leftovers without
over cooking
Baking Rack or
Baking Tray, at
postion 2 or 3
150~450°F
1 min~20 mins
Evenly dry out food without
cooking. Best for jerky, dried
fruit and vegetable chips.
100°F~200°F
1 min~24 hrs
ON
Rotate and roast whole chicken Rotisserie Fork
350°F~450°F
1 min~2 hrs
CONTROL PANEL COOKING STEP
/
6
3
4
5
1
2
https://z.wiki
EN-10
OPERATION
ECO FUNCTION
1
Press ” ” button into the ECO function. Press ” ” button again,
the oven exit the ECO function.
MEMORY FUNCTION
1
The setting of the cooking will be stored automatically. When you
select the same function next time, press " OK/START/PAUSE " to
start cooking, it will cook with the previous setting.
FACTORY DATA RESET
1
When the oven is plugged into an
outlet, press the " OK/START/PAUSE "
and
buttons in eco mode within
1 minute, clear used data. If it
successfully, the screen will display
"CLr" and then return to the standby
mode after 3 seconds.
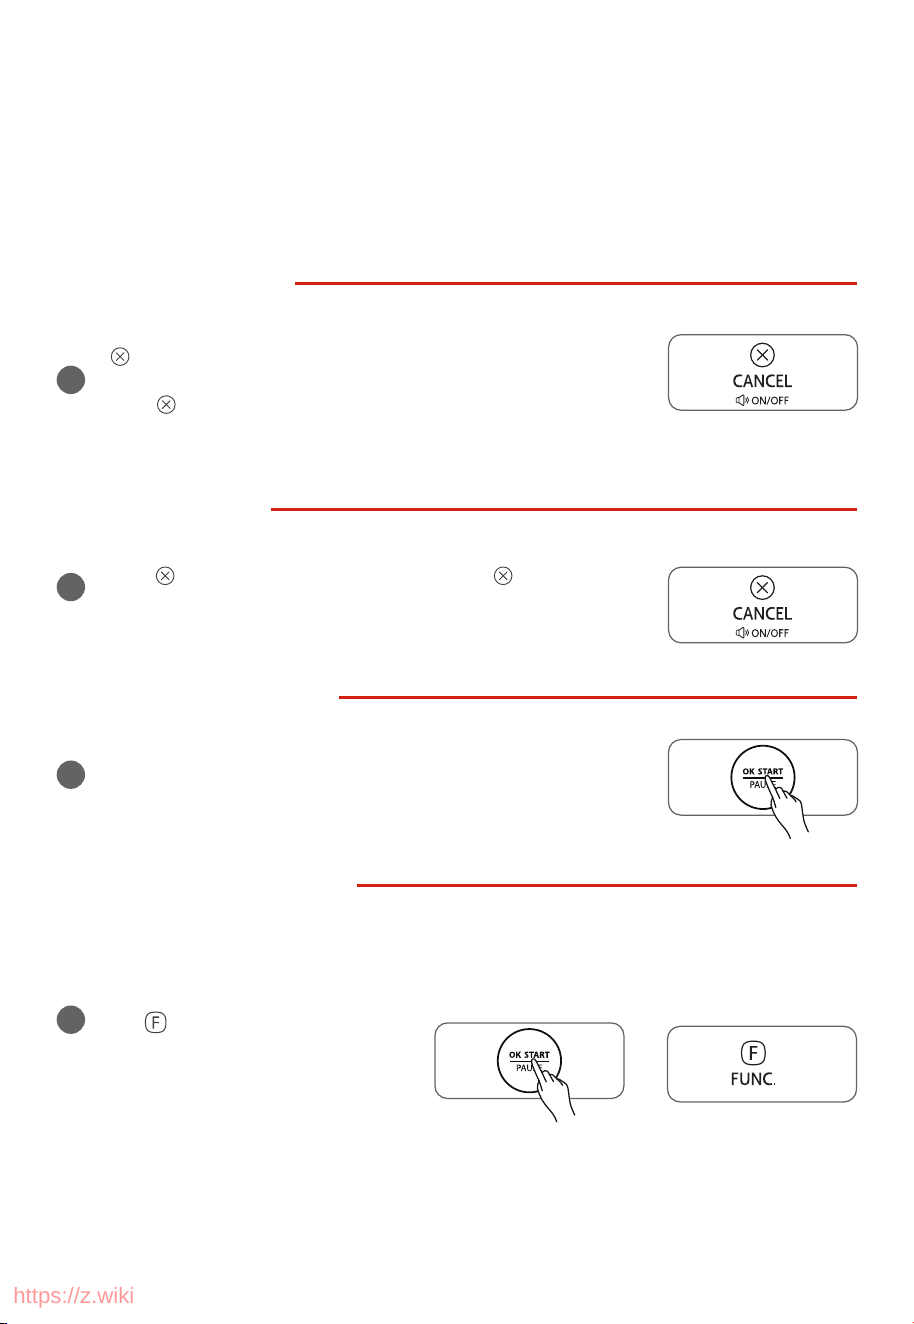
OPERATION
When the oven is powered, the buzzer will ring once. In the process of cooking , you can press
" OK/START/PAUSE " to pause cooking.
MUTE FUNCTION
1
When you want the oven to go silent, long press for 3 seconds
“ ” , in the standby/power saving/setting state. The display screen
will show “oFF”. Then the machine will be in the mute function. And
press “ ” once, it will be cancel the mute function. The display
screen will show “on”.
/
and
/
“ ”
https://z.wiki
EN-11
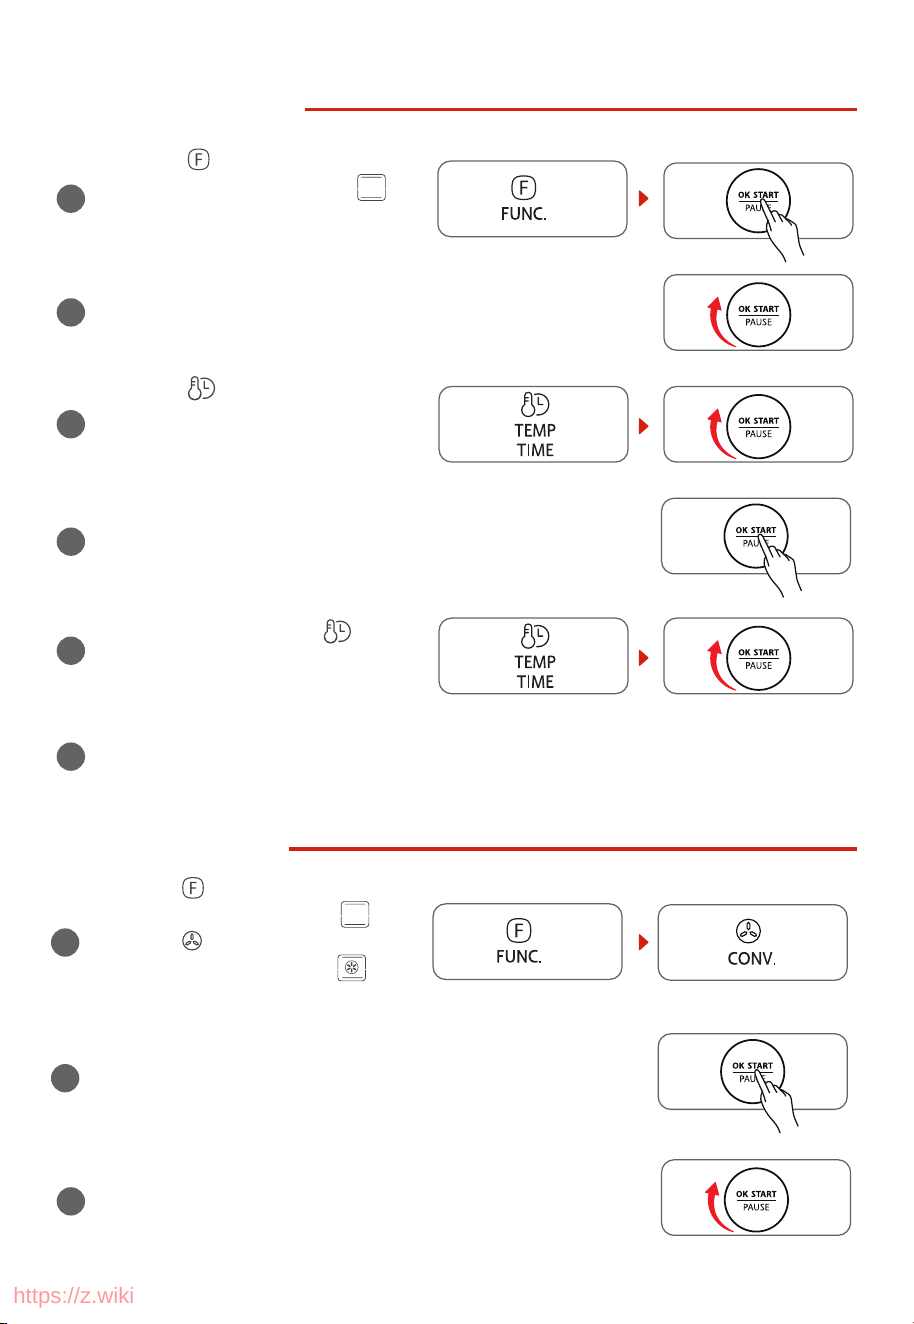
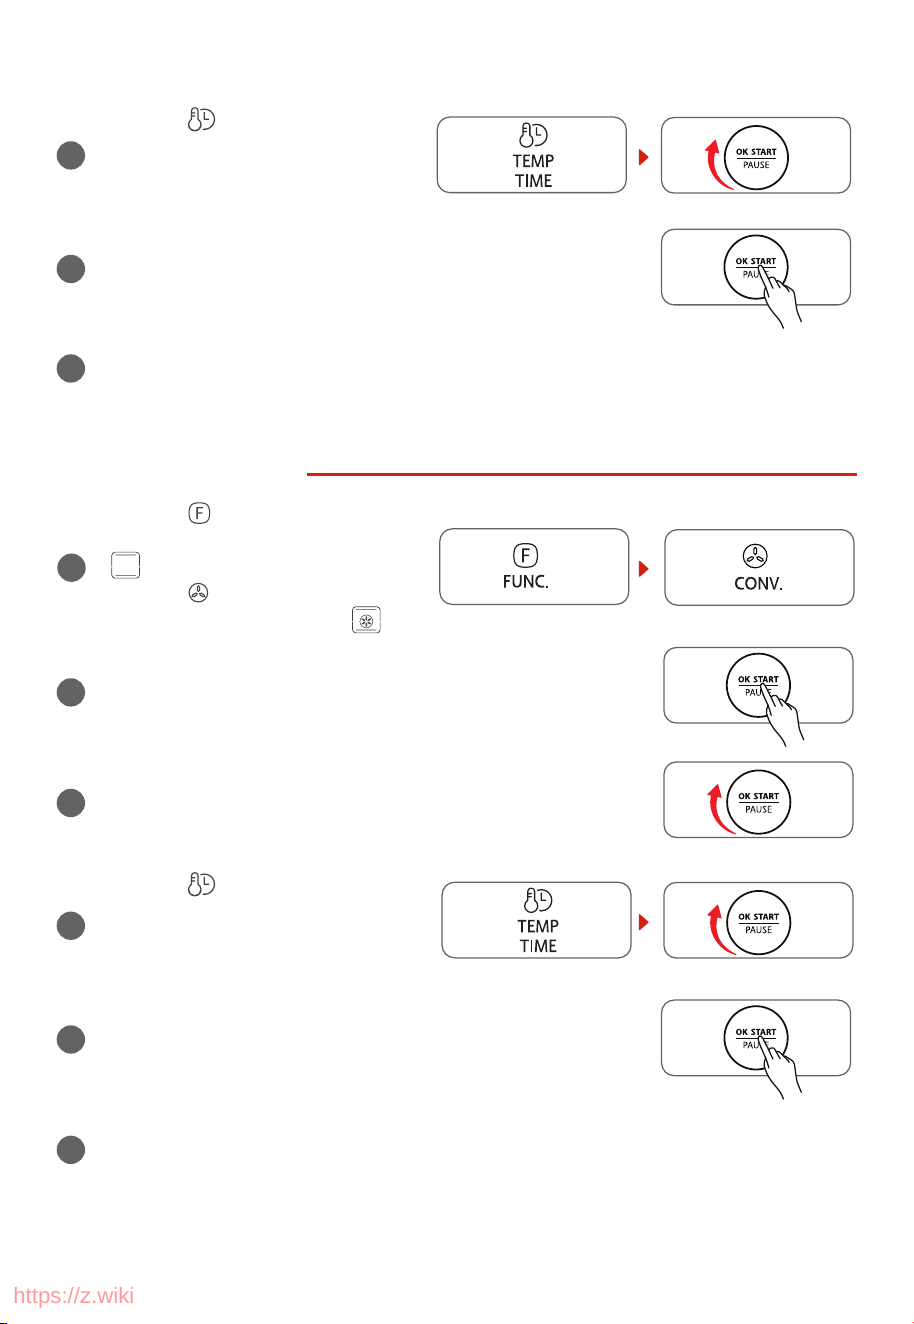
TOAST FUNCTION
1
Press the “ ” button once. The display
screen will show “TOAST” and “
”.
Press the “OK/START/PAUSE” button, the
machine will be in the TOAST function.
/
2
Rotate the “OK/START/PAUSE” knob to choose the slice number
of toast. The default number is 4 slices.
/
3
Press the “ ” button and rotate the
“OK/START/PAUSE” knob to choose
/
4
Press the “OK/START/PAUSE” button to start cooking.
The default cooking time is 4 minutes 35 seconds.
/
5
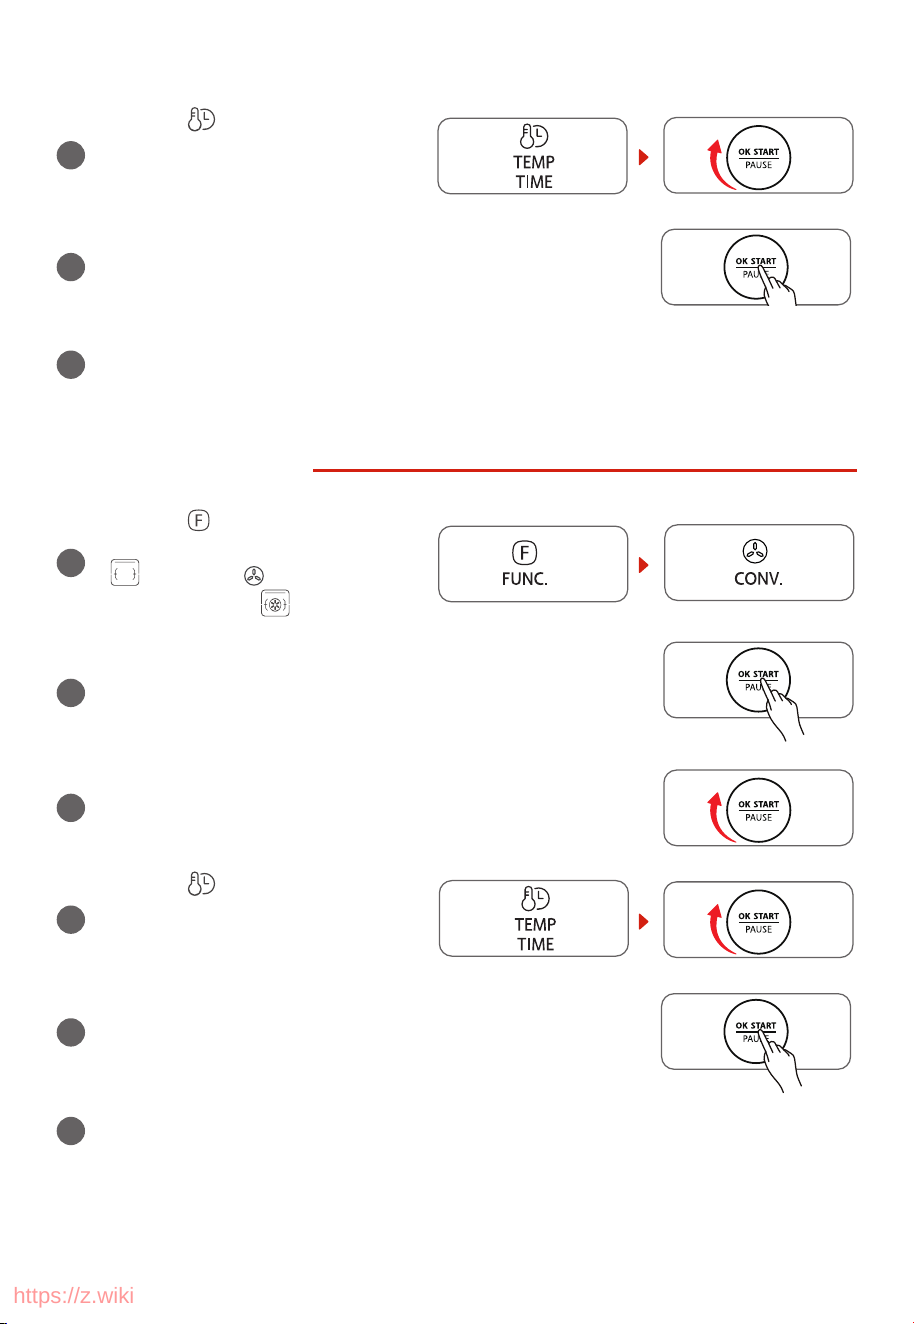
BAKE FUNCTION
3
Rotate the “OK/START/PAUSE” knob to adjust the temperature.
The default temperature is 350˚F.
/
the degrees level.
The default setting is 4.
After the cooking finishes, the machine will beep 3 times and the display screen will
show “End”. Pay attention to the high temperature of both the food and the machine
when you take out the food.
6
1
Press the “ ” button twice. The display
screen will show “BAKE” and
" ".
Press the “ ” button, the display
screen will show “BAKE”and " ".
2
Press the “OK/START/PAUSE” button, the machine will be in the
BAKE function.
/
” button
/
During cooking, press the “
and rotate the “OK/START/PAUSE” knob
to adjust the cooking time.
https://z.wiki
EN-12
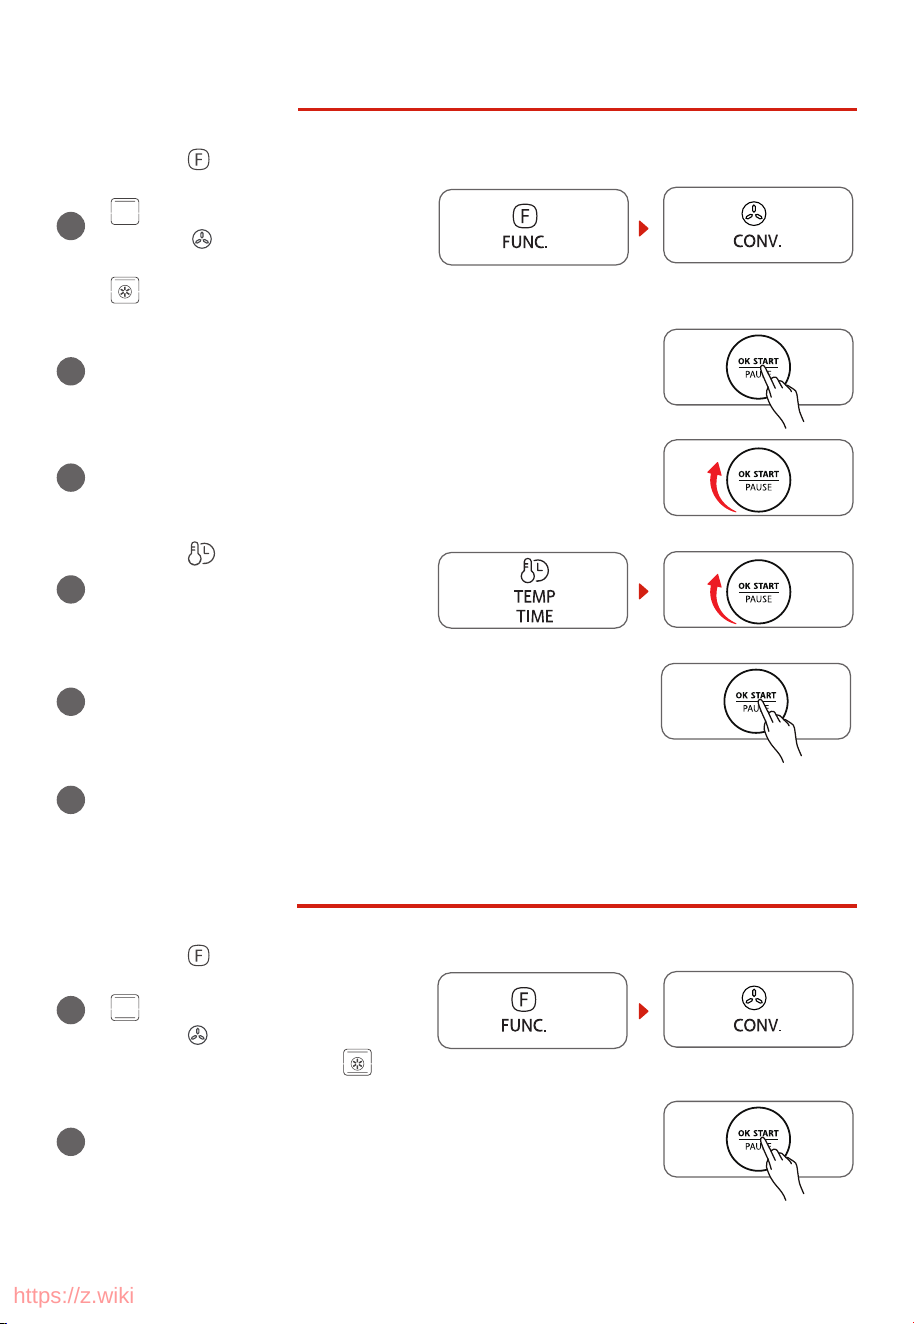
4
Press the “ ” button and rotate the
“OK/START/PAUSE” knob to adjust the
cooking time. The default time is 30
minutes.
/
5
Press “OK/START/PAUSE” button to start cooking.
/
6
After the cooking nishes, the machine will beep 3 times and the display screen will show
“End”. Pay attention to the high temperature of both the food and the machine when you
take out the food.
ROAST FUNCTION
3
Press the “OK/START/PAUSE” button, the machine will be in the
ROAST function.
/
4
Rotate the “OK/START/PAUSE” knob to adjust the temperature.
The default temperature is 400˚F.
/
5
Press the “ ” button and rotate the
“OK/START/PAUSE” knob to adjust the
cooking time. The default time is 60
minutes.
/
6
Press the “OK/START/PAUSE” button to start cooking.
/
After the cooking nishes, the machine will beep 3 times and the display screen will show
“End”. Pay attention to the high temperature of both the food and the machine when you
take out the food.
1
Press the “ ” button 3 times. The
display screen will show “ROAST” and
“ ”.
Press the “ ” button, the display
screen will shou “ROAST”and “ ”.
2
https://z.wiki
EN-13
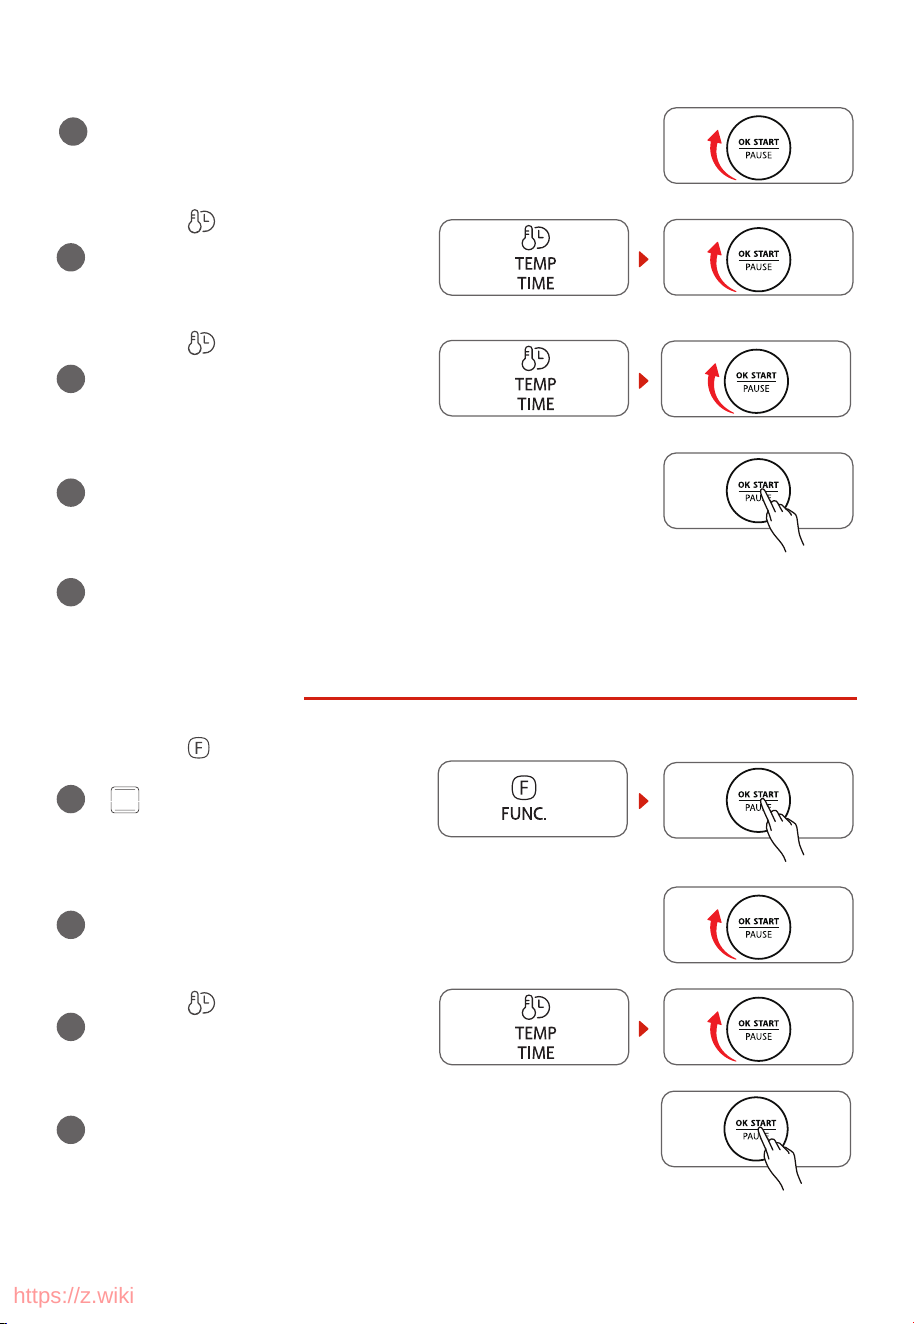
BROIL FUNCTION
1
Press the “ ” button 4 times. The
display screen will show “BROIL” and
“
”.
Press the “
” button, the display
screen will shou “BROIL”and
“
”.
2
Press the “OK/START/PAUSE” button, the machine will be in the
BROIL function.
/
3
Rotate the “OK/START/PAUSE” knob to adjust the temperature.
The default temperature is 450˚F.
/
4
Press the “ ” button and rotate the
“OK/START/PAUSE” knob to adjust the
cooking time. The default time is 10
minutes.
/
5
Press the “OK/START/PAUSE” button to start cooking.
/
6
After the cooking nishes, the machine will beep 3 times and the display screen will show
“End”. Pay attention to the high temperature of both the food and the machine when you
take out the food.
PIZZA FUNCTION
1
Press the “ ” button 5 times. The
display screen will show “PIZZA” and
“
”.
Press the “
” button, the display
screen will shou “PIZZA”and “
”.
2
Press the “OK/START/PAUSE” button, the machine will be in the
PIZZA function.
/
https://z.wiki
EN-14
3
Rotate the “OK/START/PAUSE” knob to choose pizza sizes,
including 6 inches, 9 inches, 12 inches,
The default size is 9 inches.
/
4
Press the “ ” button and rotate the
“OK/START/PAUSE” knob to adjust the
temperature. The default temperature is
400˚F for a 9-inch pizza.
/
5
Press the “ ” button and rotate the
“OK/START/PAUSE” knob to adjust the
cooking time. The default time is 14
minutes for a 9-inch pizza.
/
6
Press the “OK/START/PAUSE” button to start cooking.
/
7
After the cooking nishes, the machine will beep 3 times and the display screen will show
“End”. Pay attention to the high temperature of both the food and the machine when you
take out the food.
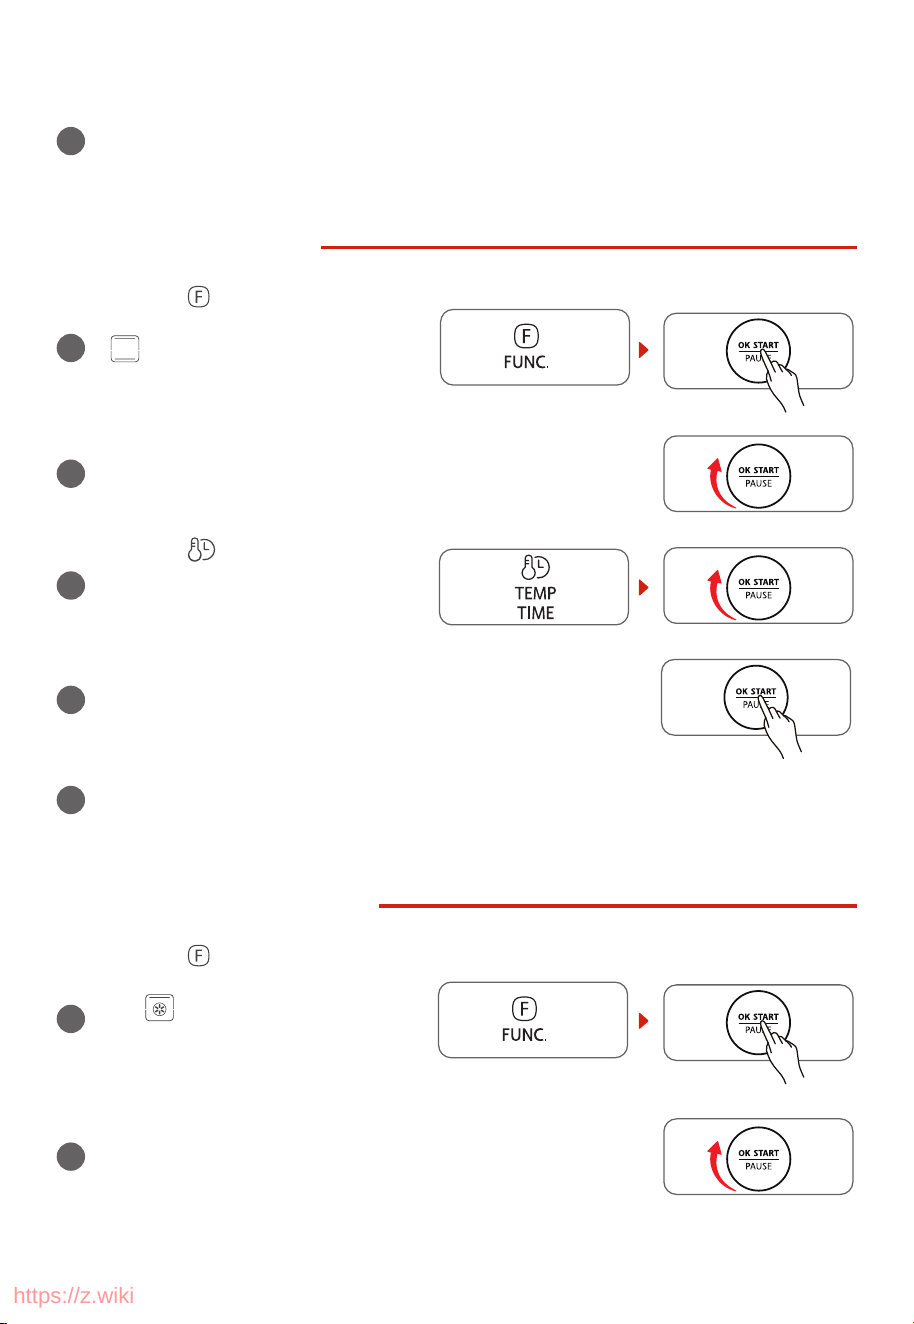
WARM FUNCTION
1
Press the “ ” button 6 times. The
display screen will show “WARM” and
“
”.
Press the “OK/START/PAUSE” button, the
machine will be in the WARM function.
/
2
Rotate the “OK/START/PAUSE” knob to adjust the temperature.
The default temperature is 180˚F.
/
3
Press the “ ” button and rotate the
“OK/START/PAUSE” knob to adjust the
cooking time. The default time is 1 hour.
/
4
Press the “OK/START/PAUSE” button to start cooking.
/
https://z.wiki
EN-15
5
After the cooking nishes, the machine will beep 3 times and the display screen will show
“End”. Pay attention to the high temperature of both the food and the machine when you
take out the food.
REHEAT FUNCTION
1
Press the “ ” button 7 times. The
display screen will show “REHEAT” and
“ ”.
Press the “OK/START/PAUSE” button, the
machine will be in the REHEAT function.
/
2
Rotate the “OK/START/PAUSE” knob to adjust the temperature.
The default temperature is 350˚F.
/
3
Press the “ ” button and rotate the
“OK/START/PAUSE” knob to adjust the
cooking time. The default time is 3
minutes.
/
4
Press the “OK/START/PAUSE” button to start cooking.
/
5
After the cooking nishes, the machine will beep 3 times and the display screen will show
“End”. Pay attention to the high temperature of both the food and the machine when you
take out the food.
DEHYDRATE FUNCTION
1
Press the “ ” button 8 times. The
display screen will show “DEHYDRATE”
and “ ”.
Press the “OK/START/PAUSE” button,
the machine will be in the DEHYDRATE
function.
/
2
Rotate the “OK/START/PAUSE” knob to adjust the temperature.
The default temperature is 150˚F.
/
https://z.wiki
EN-16
3
Press the “ ” button and rotate the
“OK/START/PAUSE” knob to adjust the
cooking time. The default time is 4
hours.
/
4
Press the “OK/START/PAUSE” button to start cooking.
/
5
After the cooking nishes, the machine will beep 3 times and the display screen will show
“End”. Pay attention to the high temperature of both the food and the machine when you
take out the food.
ROTISS FUNCTION
1
Press the “ ” button 9 times. The
display screen will show “ROTISS” and
“
”. Press the “ ” display screen will
shou “ROTISS”and “ ”.
2
Press the “OK/START/PAUSE” button, the machine will be in the
ROTISSERIE function.
/
3
Rotate the “OK/START/PAUSE” knob to adjust the temperature.
/
4
The default temperature is 450˚F.
Press the “ ” button and rotate the
“OK/START/PAUSE” knob to adjust
the cooking time. The default time is
50 minutes.
/
5
Press the “OK/START/PAUSE” button to start cooking.
/
6
After the cooking nishes, the machine will beep 3 times and the display screen will show
“End”. Pay attention to the high temperature of both the food and the machine when you
take out the food.
https://z.wiki

EN-17
ROTISSERIE FUNCTION USING THE ROTISSERIE FORK
1
Insert a fork into the rotisserie pole.
2
Tighten the screw to x the fork in an appropriate place.
3
Put the food into the rotisserie pole and then use the fork to x a side of the food.
4
Insert the other fork into the rotisserie pole to x the other side of the food.
5
Tighten the screw to x the fork in an appropriate place.
6
Use the rotisserie kit to put the food with rotisserie fork in the oven.
7
Insert the pointed end of the rotisserie fork into the hole of the right side of the oven.
Then put the other side of the rotisserie fork on the notch of the left side of the oven.
https://z.wiki
EN-18
CARE AND CLEANING
1
Before cleaning unplug the toaster oven and allow it to cool
completely.
2
Wash all the attachments with mild, soaped water including the
baking rack and the baking tray.
3
Do not use abrasive cleansers, scrubbing brushes and chemical
cleaner as this will cause damage to the non-stick coating of baking
Tray.
4
Using a wet cloth to wipe the inner of the oven.
5
To clean the door by using a wet cloth saturated with detergent
or soap.
6
Never immerse the unit in water or other liquid.
7
Any other servicing should be performed by an
authorized service representative.
Warning: Hot Surface!
Advertencia: ¡Supercie Caliente!
Avertissement: Surface Chaude!
CAUTION: HOT
SURFACE
https://z.wiki
EN-19
SPECIFICATION
MODEL
TL2-AC35ZA(GR)
CUBAGE 32L
VOLTAGE
120V~
AC FREQUENCY 60Hz
POWER 1650W
All pictures in this manual are for illustrative purposes only; these may be
slightly different from the purchased equipment, please refer to the
actual product.
NOTE
PN:16171000A17973
https://z.wiki

p
l
s
g
l
f
y
e.
r
ONE YEAR LIMITED WARRANTY
This product carries a warranty stating that it will be free from defects in material and workmanshi
for a period of one year from the date of purchase. This warranty is valid for the original retai
purchaser from the date of initial retail purchase and is not transferable. Keep your original sale
receipt.
IMPORTANT:
1. This warranty does not cover damages resulting from accident, misuse or abuse, lack of reasonable
care, the axing of any attachments not pr
ovided with the product, loss of parts, or subjecting
the appliance to any but the specified voltage. ( Read directions carefully. )
2. This warranty is void if this product is ever used for other than private household purposes.
3. This warranty is void if this product is ever used outside of United State.
If service is required during the warranty period, properly pack your unit. We recommend usin
the original carton and packing materials.
If additional assistance is needed, please contact customer assistance at:
Midea America Corp. expressly disclaims all responsibility for consequential damages or incidenta
losses caused by use of the appliance. Some states do not allow this exclusion or limitation o
incidental or conse quential losses so the foregoing disclaimer may not apply to
you. This warrant
gives you specific legal rights, and you may also have other rights which may vary from state to stat
The serial number can be found on the back cabinet. We suggest that you record the serial numbe
of your unit in the space below for future reference
Model Number : ____________________
Serial Number : _____________________
SAVE THIS FOR YOUR RECORDS
Made in China
Product registration is not mandatory. Failure to complete and return the card or form does
not diminish the consumer' s warranty rights.
customercare@us.toshiba-lifestyle.com
855-204-5313
EN-20
https://z.wiki