Please review this instruction manual before operating.
INSTRUCTION MANUAL
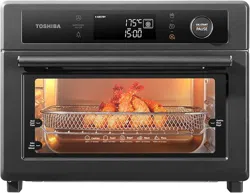
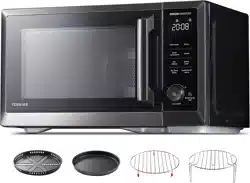
AIR FRYER OVEN
TL2-AC368LEA(GR)

CONTENTS
IMPORTANT SAFEGUARDS
Basic safety precautions
Short cord instruction
..........................................................................................................................................
PRODUCT INSTRUCTION
Names of parts
........................................................................................................................................
OPERATION
...........................................................................................................................................
01
...........................................................................................................................................
04
04
...............................................................................................................
05
06
...........................................................................................................................
07
..........................................................................................................................................
08
..........................................................................................................................................
09
...............................................................................................................................
..
10
...............................................................................................................................
...........
10
...............................................................................................................................
..
11
...............................................................................................................................
.....
12
..........................................................................................................................................
13
...............................................................................................................................
...........
14
...............................................................................................................................
..........
15
...............................................................................................................................
...........
16
Cooking guidelines
Control panel
Cooking
Eco function
Memory function
Toast function
Bake function
Slow function
Cookie function
Roast function
Dehydrate function

...............................................................................................................................
............
17
Proof function
Broil function
Reheat function
Pizza function
Cheese function
...............................................................................................................................
...........
18
...............................................................................................................................
...........
19
...............................................................................................................................
...........
20
...............................................................................................................................
...........
21
Airfry function
...............................................................................................................................
...........
22
BEFORE OPERATING THIS PRODUCT, READ,
UNDERSTAND, AND FOLLOW THESE INSTRUCTIONS.
BE SURE TO SAVE THIS BOOKLIST FOR FUTURE
REFERENCE.
NOTE
MAINTENANCE
...................................................................................................................
24
One year limited warranty
..........................................................................................................................................
23
CLEANING AND CARE
cleaning and care
IMPORTANT SAFEGUARDS
BASIC SAFETY PRECAUTIONS
When using electrical appliances, basic safety precautions should always
be followed including the following :
01
Read all instructions.
Close supervision is
necessary when any
appliance is used by or
near children.
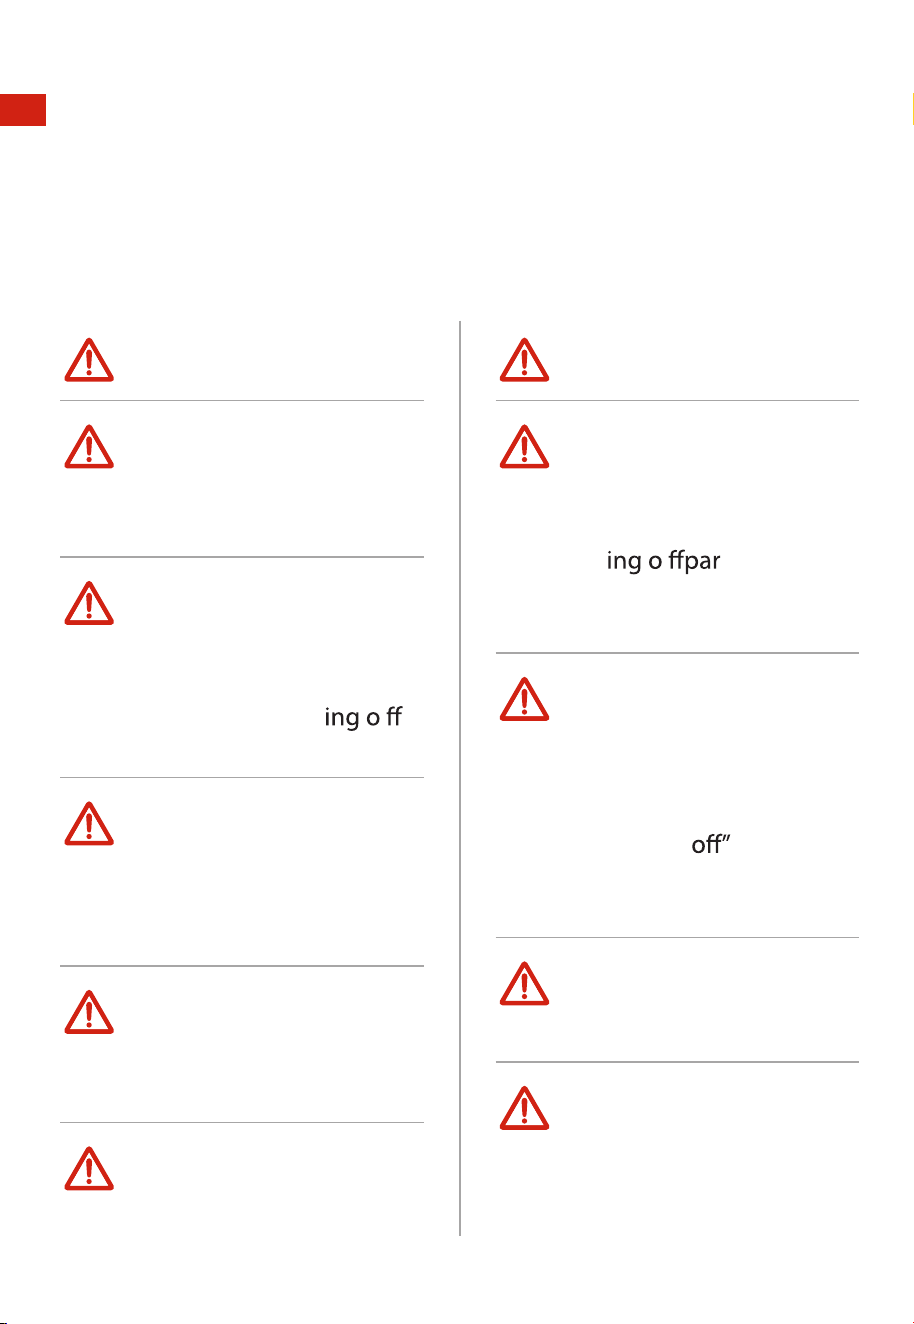
Unplug from the outlet
when not in use and
before cleaning.
Allow to cool before
putting on or tak
parts.
The use of accessory
attachments is not
recommended by the
appliance manufacturer.
This may cause injuries.
Extreme caution must be
used when you move an
appliance containing hot
oil or other hot liquids.
Avoid contacting moving
parts.
For household use only.
Remove the plug from
the outlet when the
appliance is not in use,
before putting on or
tak
ts, and
before cleaning. Allow to
cool before handling.
Always attach the plug to
the appliance first, then
plug the cord into the
wall outlet.
To disconnect, turn any
control to “
, then
remove the plug from the
wall outlet.
Use extreme caution
when removing tray or
disposing of hot grease.
Extreme caution should
be exercised when
you use containers
constructed of materials
other than metal or glass.
02
To ensure continuous
protection against
risks of electric shock,
connect the appliance to
the properly grounded
outlets only.
The outside of the oven,
including the door, is hot
during and after use.
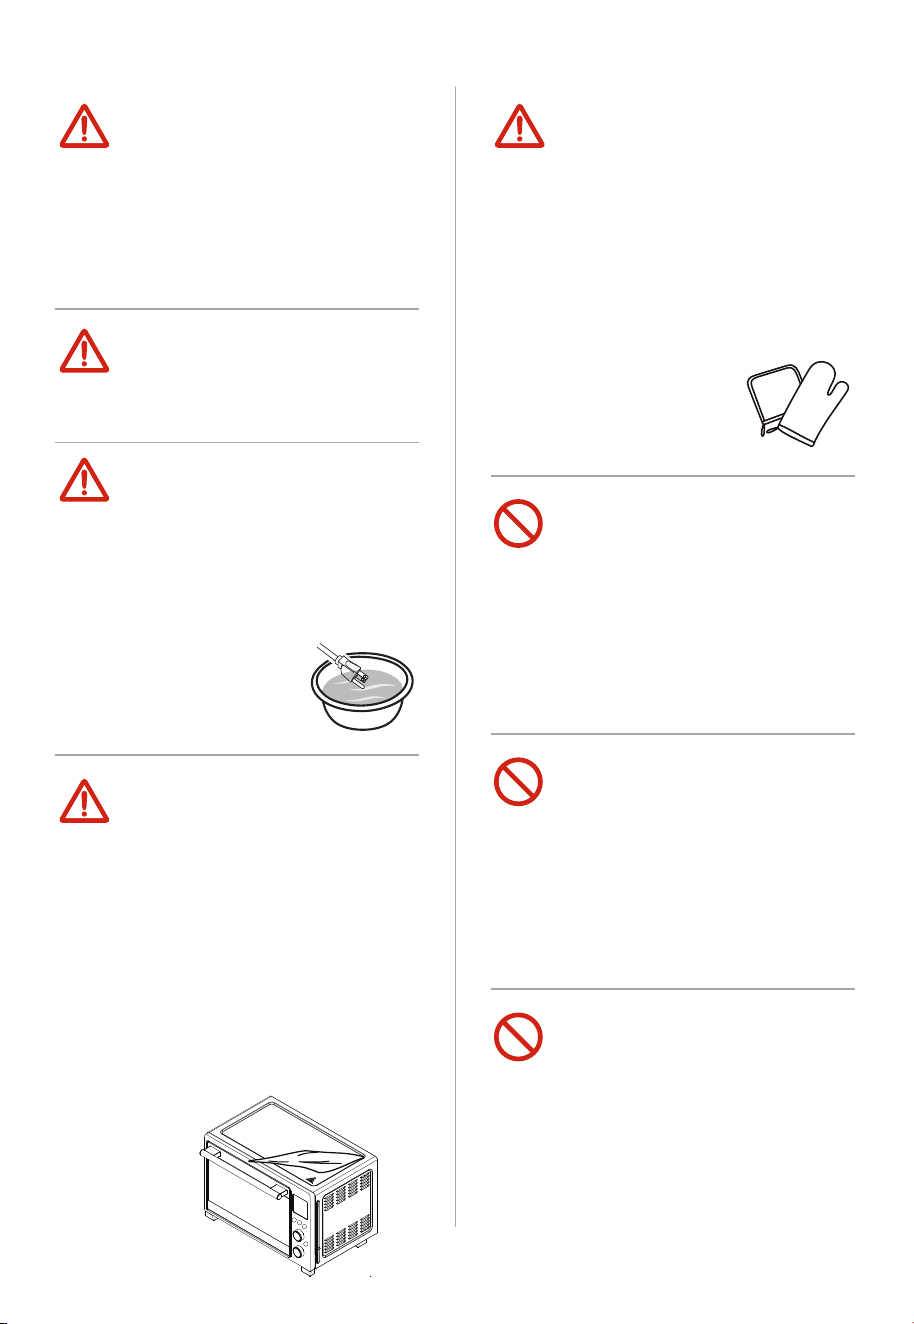
To protect against
electrical shock, do not
immerse the cord, plugs,
or (state specific part
or parts in question) in
water or other liquid.
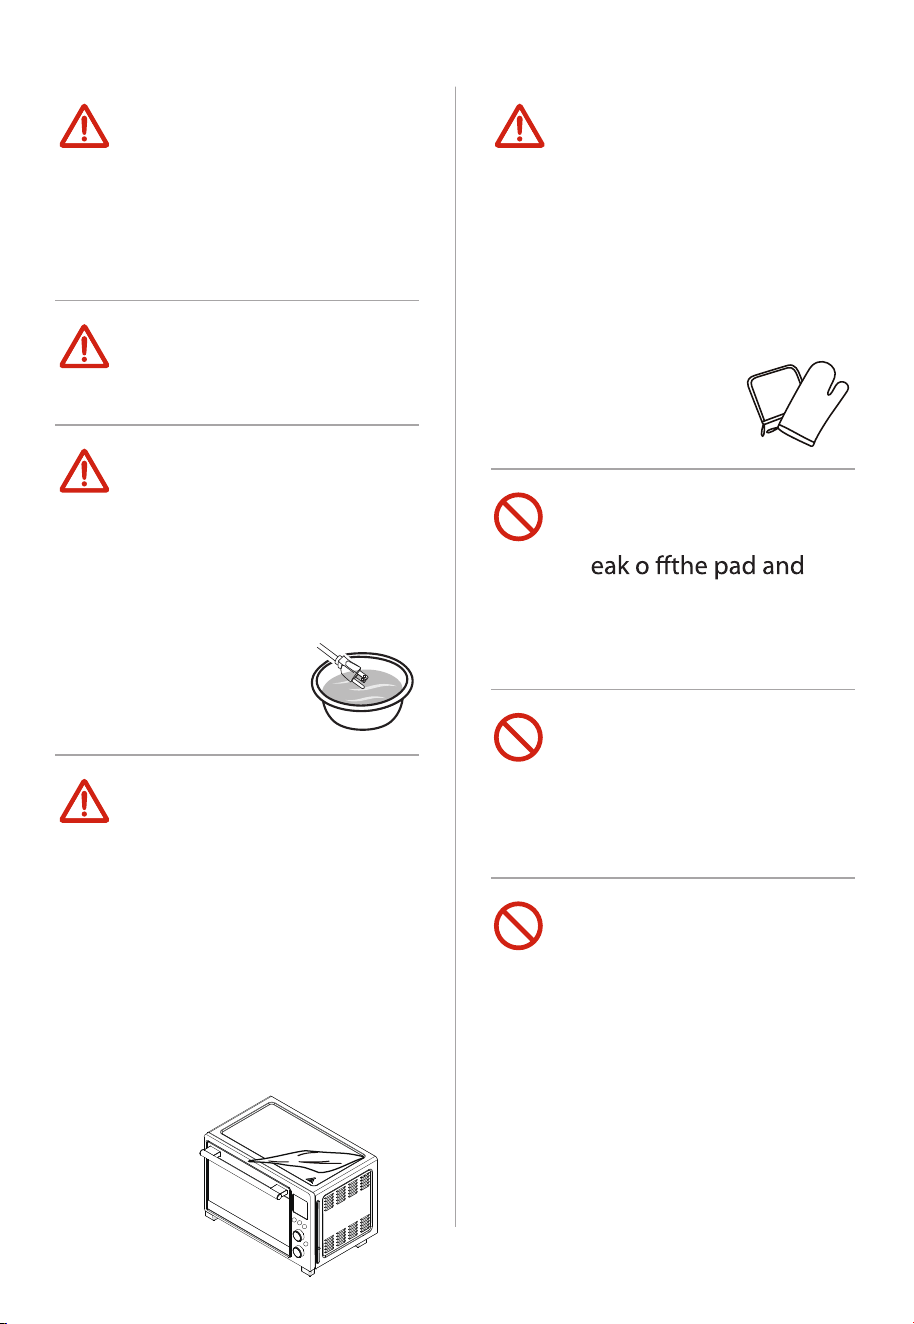
A fire may occur if the
toaster-oven is covered
or touching flammable
material, including
curtains, draperies,
walls, etc., when in
operation. Do not store
any flammable materials
on top of the appliance
when in operation.
Always use heat-resistant
gloves, pads, or oven
mitts when handling
hot materials, and when
placing items in or
removing items from the
oven, including trays, racks,
accessories, or containers.
Do not clean with metal
scouring pads. Pieces can
br
touch electrical parts,
creating parts, or creating
a risk of electric shock.
Oversize foods or metal
utensils must not be
inserted in a toaster-oven
as they may create a fire
or risk of electric shock.
Do not store any
materials, other
than manufacturers
recommended
accessories, in this oven
when not in use.
03
Do not place on or near a
hot gas or electric burner,
or in a heated oven.
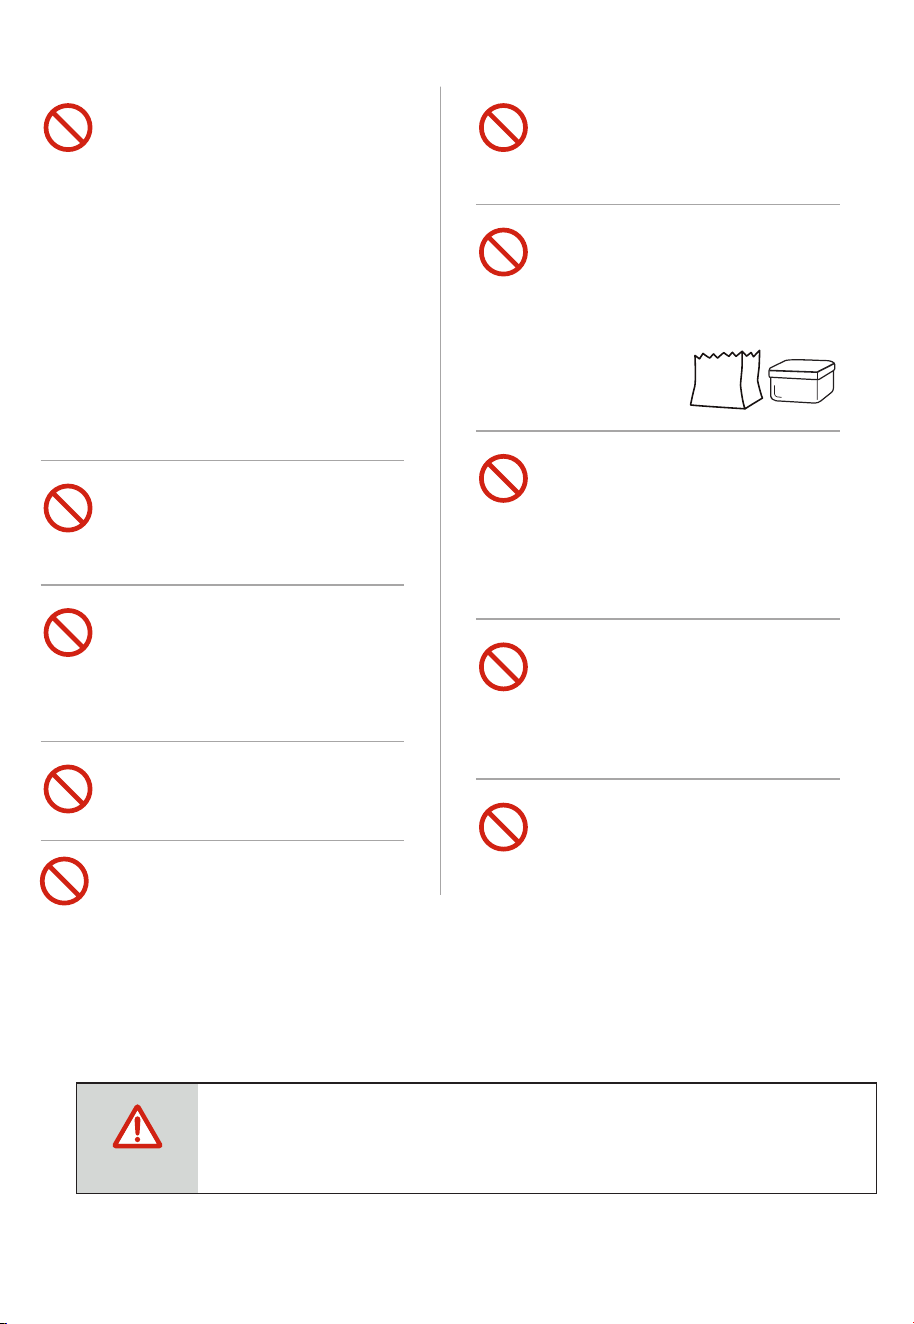
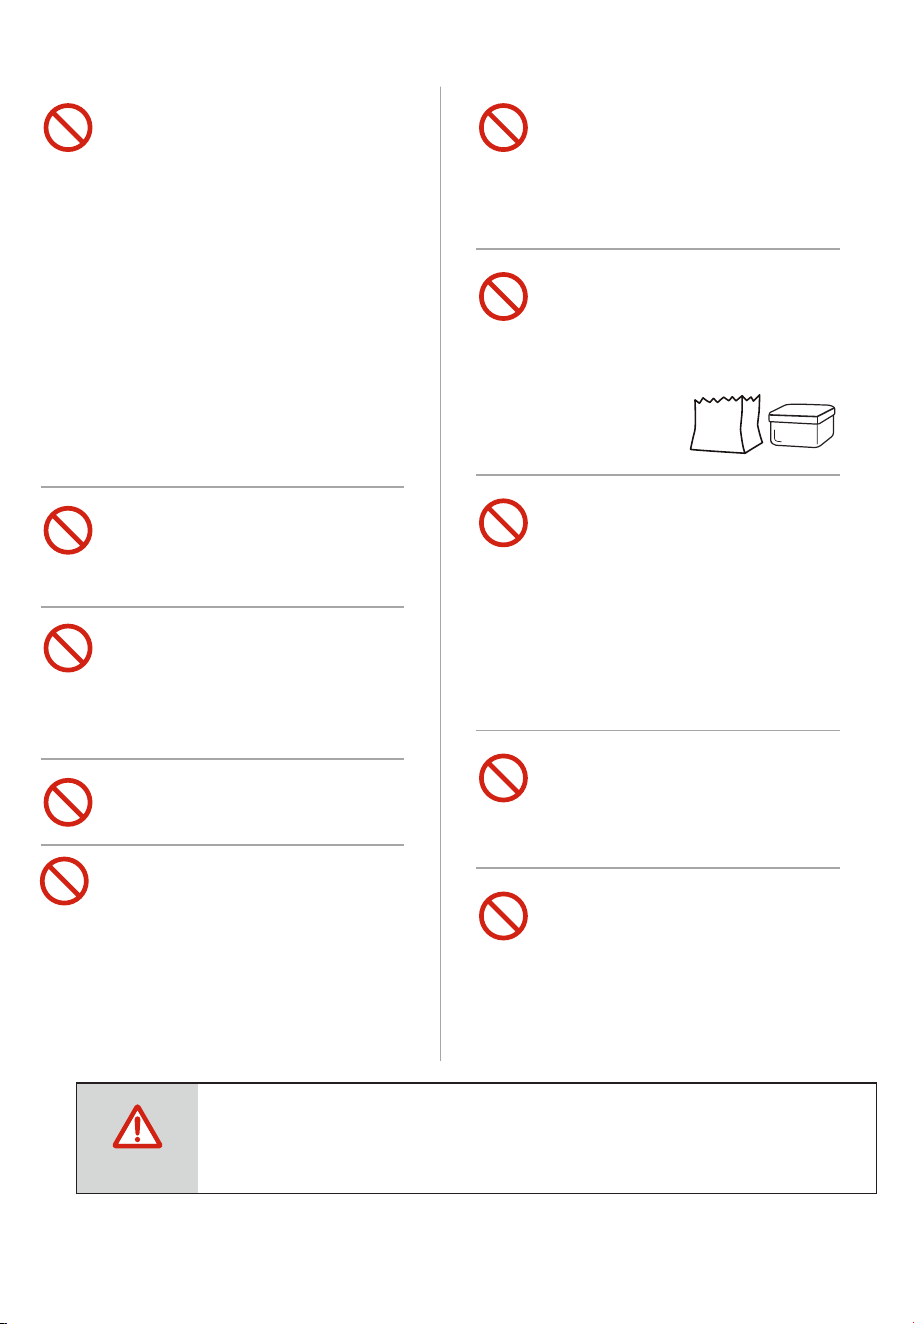
Do not place any of the
following materials in
the oven: (that is, paper,
cardboard, plastic, etc.).
Do not cover crumb tray
or any part of the oven
with a metal foil.
This will cause
over-heating of the oven.
Do not use the appliance
for other usages that
are not described in this
manual.
During operation, press
" START/PAUSE " can stop
cooking.
Do not operate
any appliance with
a damaged cord or
plug, or after the
appliance malfunctions
or has been damaged
in any manner. Return
appliance to the nearest
authorized service facility
for examination, repair,
or adjustment.
Do not touch hot
surfaces.
Use handles or knobs.
Do not hang the cord
over the edge of a table
or counter, or touch hot
surfaces.
Do not use the appliance
outdoors.
Do not insert your fingers into any gaps or holes.
This may cause injuries.
CAUTION
This device may not cause
harmful interference, and
this device must accert any
interference received,
including interference that
may cause undesired opera-
tion.
SAVE THESE INSTRUCTIONS
HOUSEHOLD INDOOR USE ONLY

04
SHORT CORD INSTRUCTION
(DETACHABLE POWER-SUPPLY CORD)
1. A short power-supply cord (or detachable power-supply cord)
should be used to reduce the risk resulting from becoming
entangled in or tripping over a longer cord.
2. Longer detachable power-supply cords or extension cords are
available and may be used if care is exercised in their use.
3. If a longer detachable power-supply cord or extension cord is used:
• The marked
electrical rating of the cord set or extension cord should
be at least as great as the electrical rating of the appliance.
• The cord should be arranged so that it will not drape over the
countertop or tabletop where it can be pulled on by children or
tripped over unintentionally.
• If the appliance is of the grounded type, the extension cord should
be a grounding-type 3-wire cord.
DATA
MODEL
120VAC
60Hz
1750 W
SPECIFICATIONS
SPECIFICATIONS
POWER SUPPLY
POWER CONSUMPTION
TL2-AC368LEA(GR)
BEFORE USING FOR THE FIRST TIME
1. Remove all accessories and shipping materials packed inside the Oven.
2.
3.
4.
CAUTION
The oven may smoke inside during process. This is normal for
a new oven and will not last more than 10-15 minutes
.
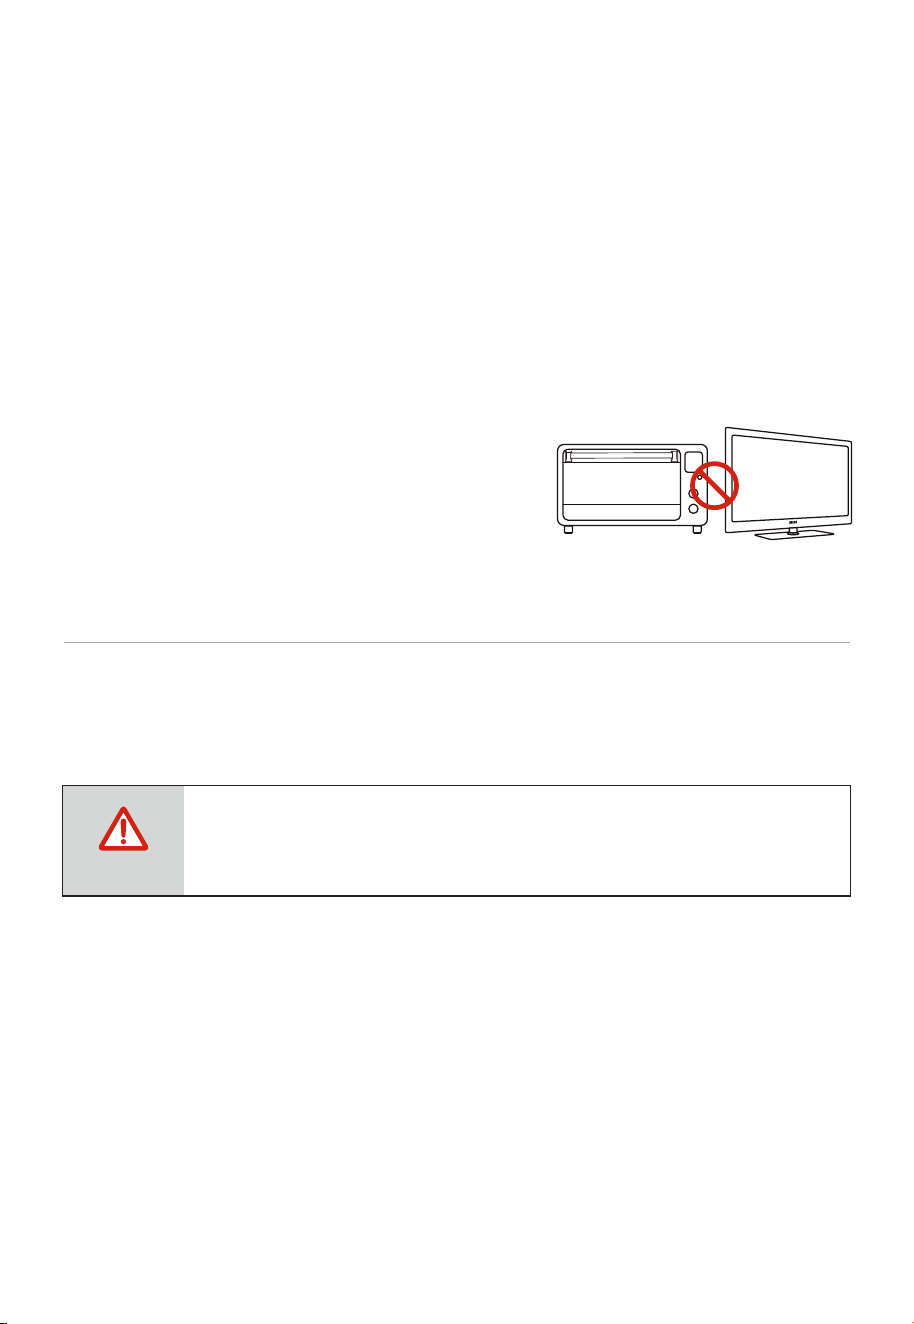
DO NOT OPERATE ON THE SAME CIRCUIT WITH
ANOTHER APPLIANCE.
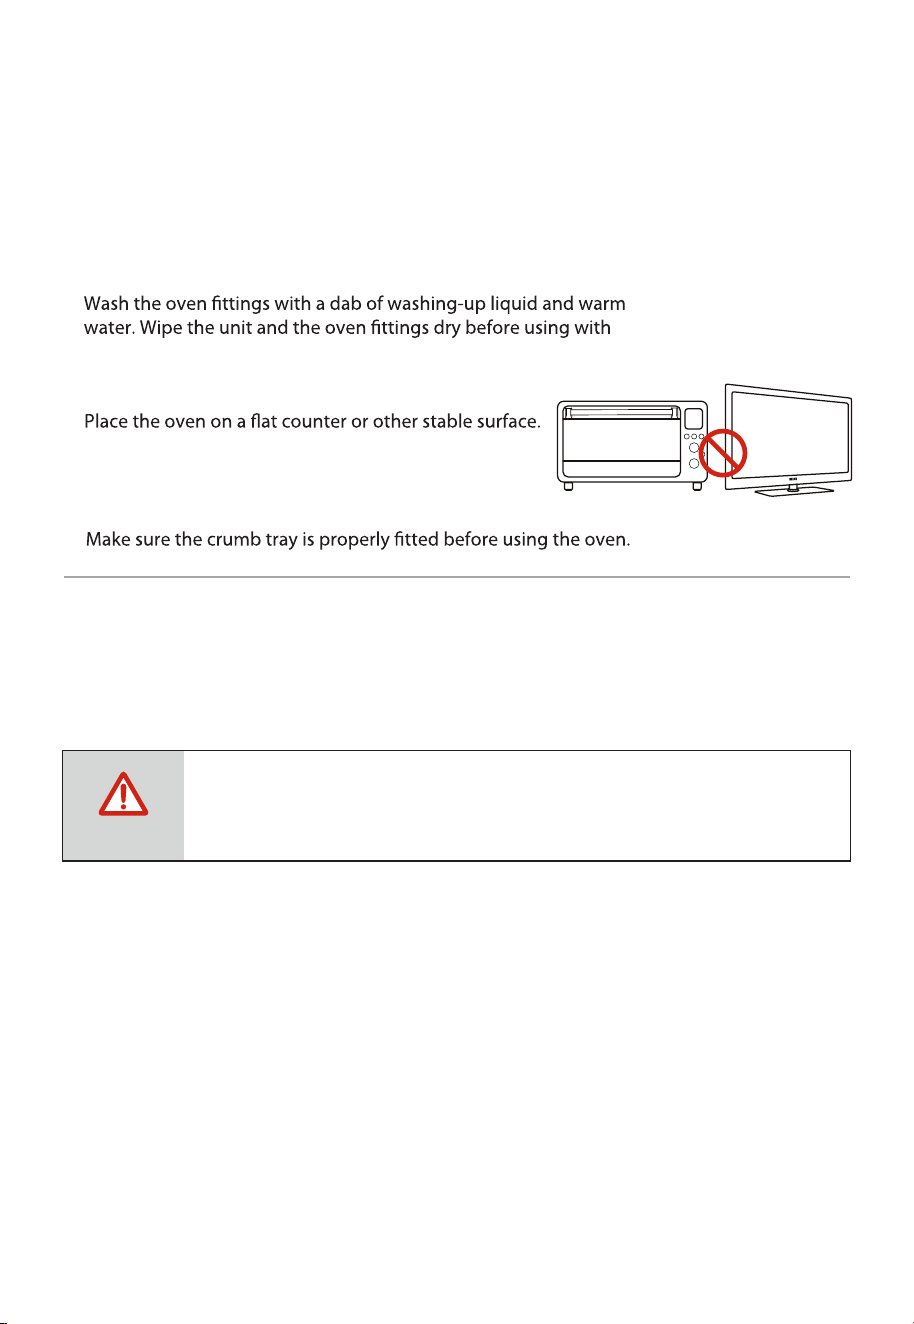
paper towels or a dry cloth.
05
5. Before working, place the crumb tray under the bottom heating pipes.
We recommend placing all accessories inside the oven and running it on roast
function at 450˚F for 15 minutes. This removes residues and odor traces that
may be present.
PRODUCT
INSTRUCTION
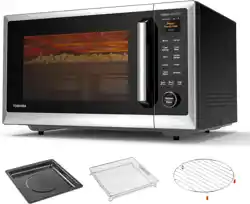
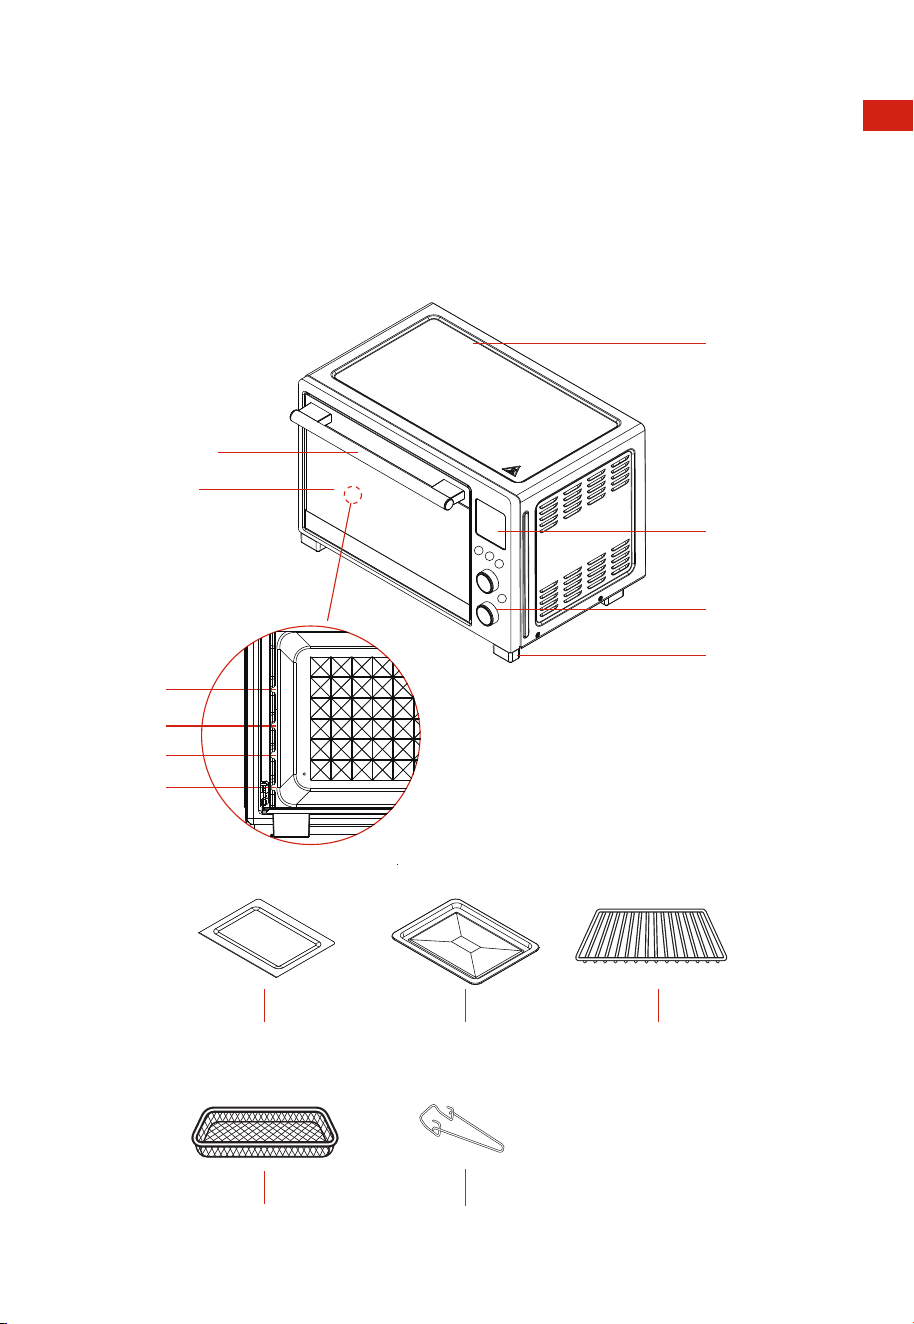
NAMES OF PARTS
06
Housing
Knob
Foot
Display
Door Handle
Crumb Tray
Air fry basket
Door Glass
Baking Tray Baking Rack X2
Layer 3
Layer 4
Layer 2
Layer 1
Remover Holder

OPERATION
STRUCTIONSIN
CAUTION
COOKING GUIDELINES
THE OVEN SURFACES ARE HOT DURING AND AFTER USE.
07
1
Place the Baking rack in position that will accommodate
the height of the food to be cooked.
2
3
Clean the heating pipes periodically.
4
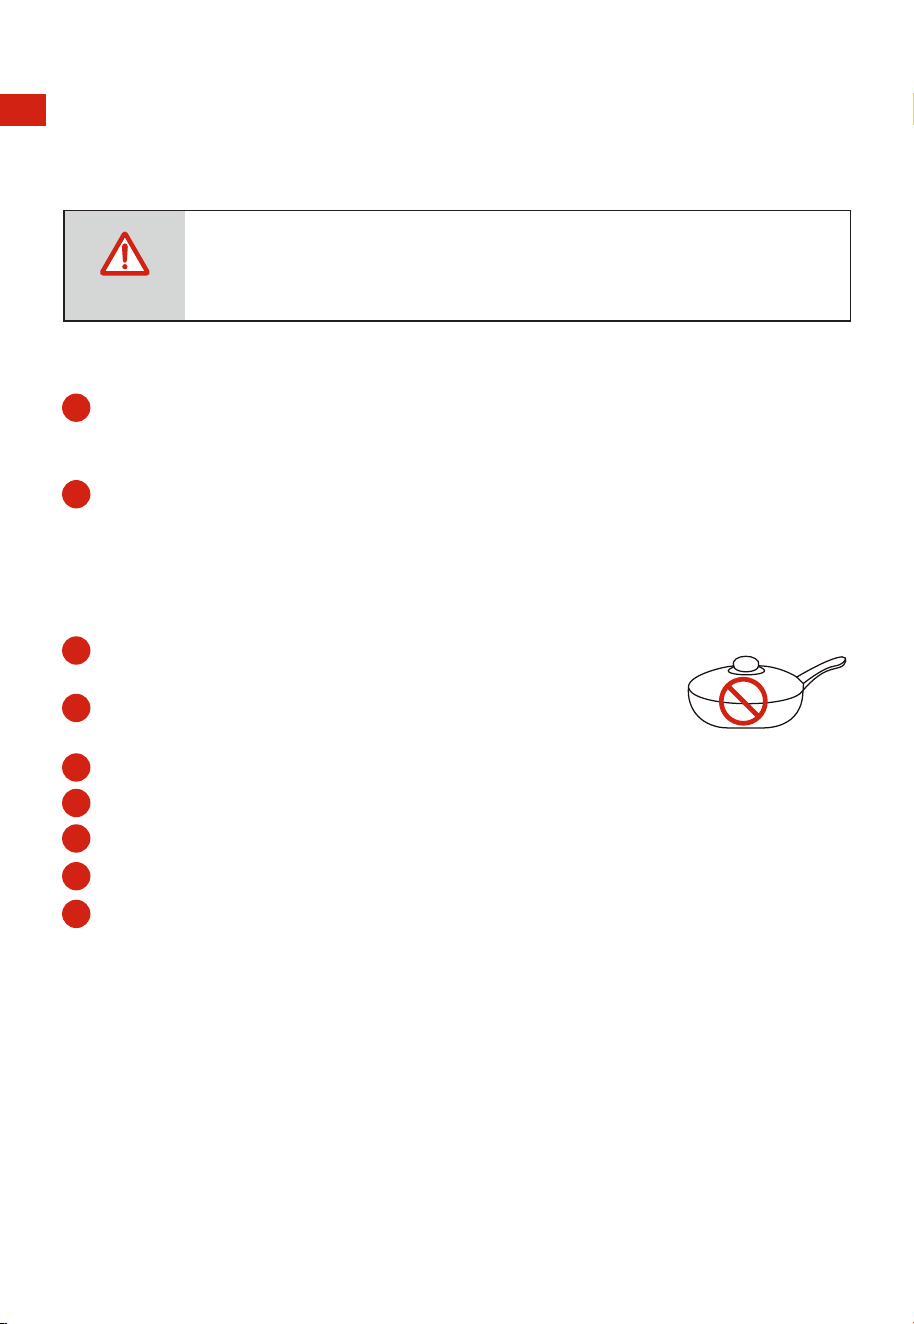
Never use glass or ceramic pans or lids
5
6
Set the temperature as suggested by the recipe or as desired.
7
8
9
The air fry basket needs to be used on the baking rack.
stop delay working 1 min.
NEVER let oil or other liquids from the food to drip down to the bottom of the oven.
Securely shut the door and set the cooking time to begin cooking.
The food should be put onto the baking tray to avoid catching
Make sure that you always use an ovenproof container in the
oven, never use plastic or cardboard containers in the oven.
08
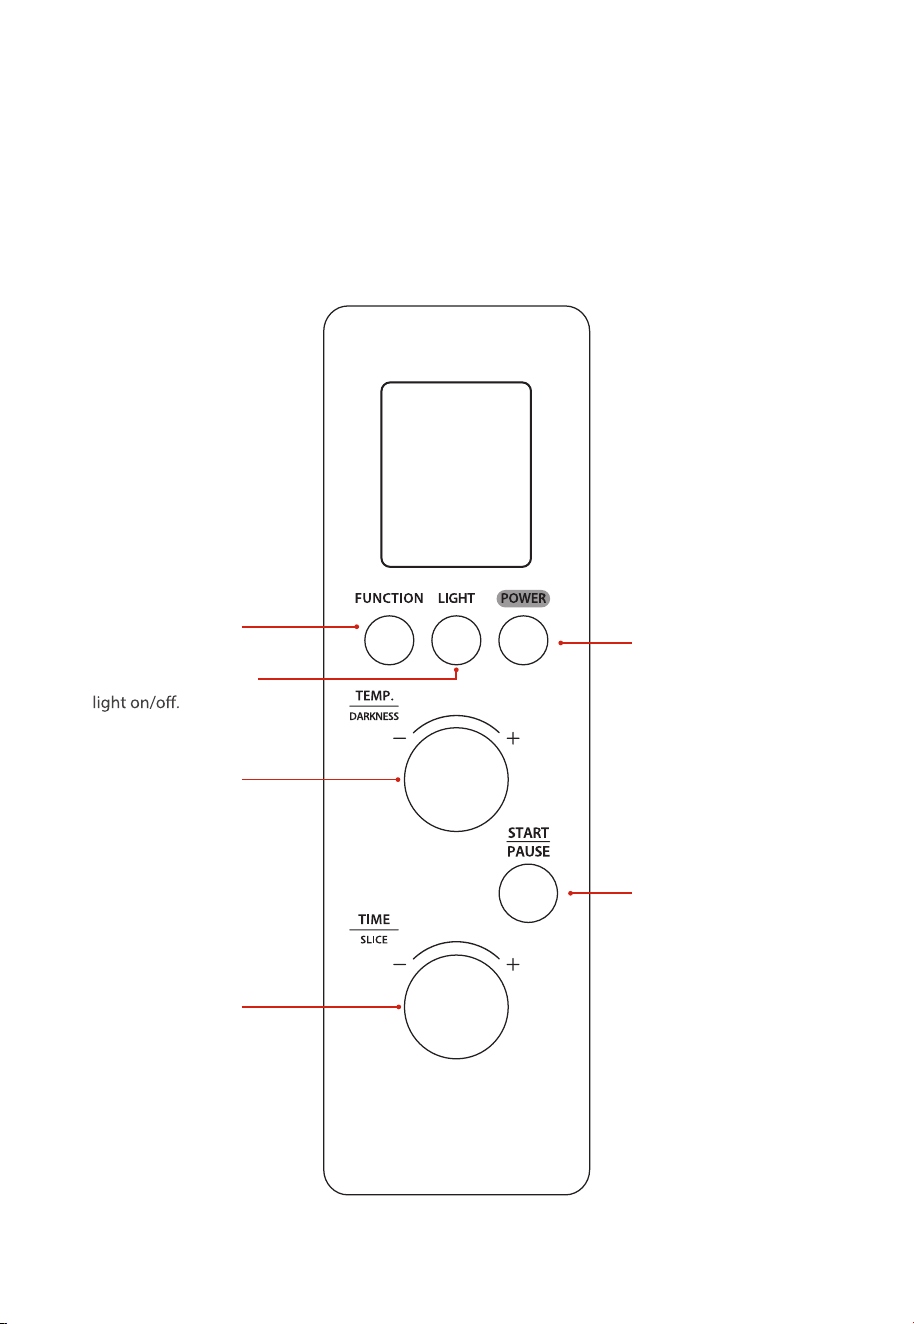
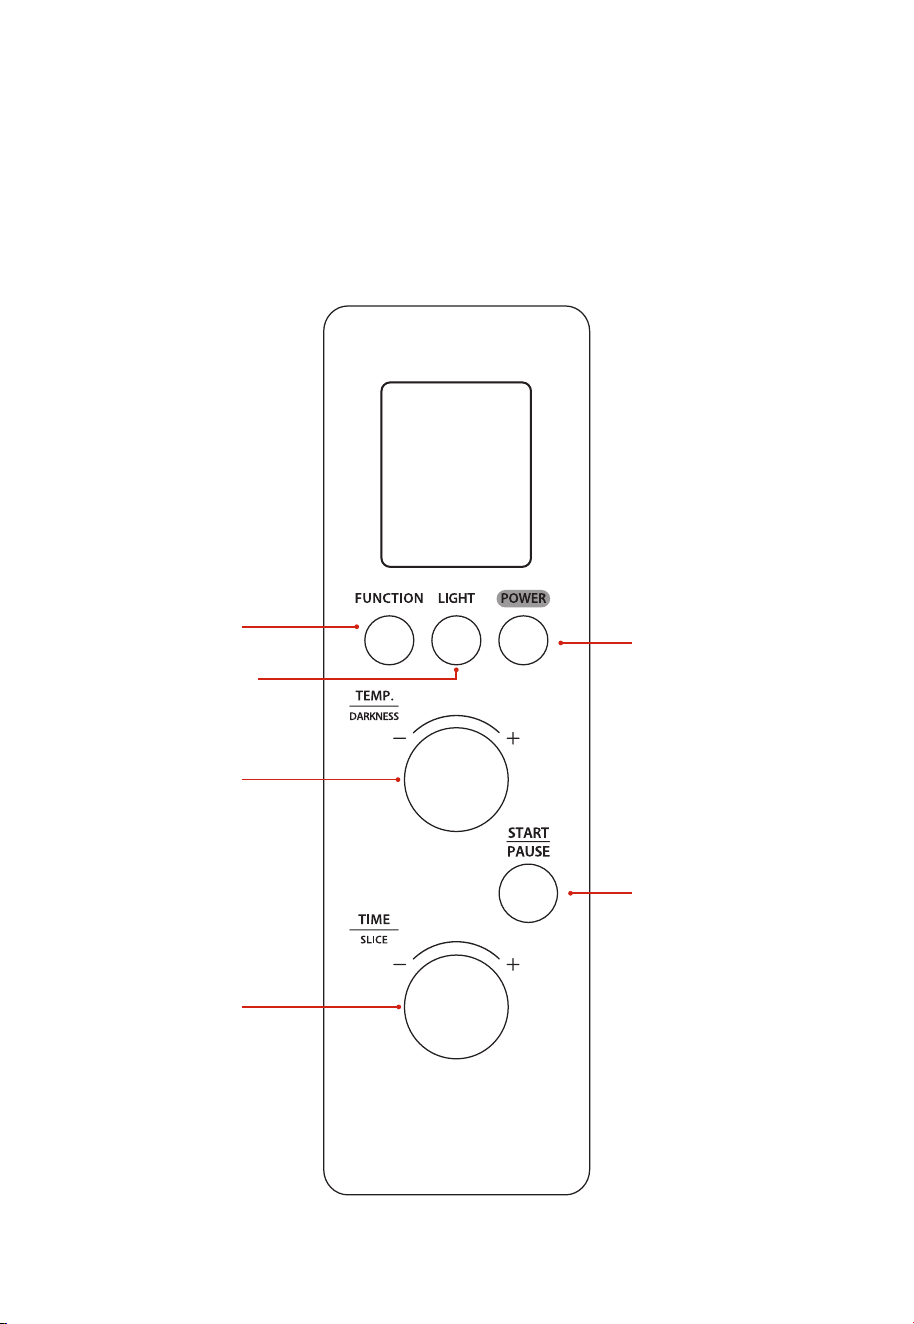
CONTROL PANEL
START/PAUSE
Press this button to
start/pause cooking.
POWER
In standby mode, press this
button to enter the eco mode.
TEMP./DARKNESS
Rotate the knob
select temperature
or darkness.
FUNCTION
Press this button to
select function.
LIGHT
Switching an internal
TIME/SLICE
Rotate the knob
to select time
or slice.
Press this button to
cancel the setting.

09
COOKING
PRODUCT FUNCTIONS
COOKING
FUNCTION
TEMP. RANGE TIME RANGE PREHEAT
AIRFRY
450°F 150°F-450°F
HI/Lo
/ /
1min-2hour
/
350°F
100°F
HI
350°F 300°F-450°F
150°F-450°F
80°F-110°F
1min-2hour
1min-9hour
15min 1min-2hour
DEFAULT
TEMP.
DEFAULT
TIME
TOAST
BAKE
SLOW
ROAST
DEHYD
COOKIE
PROOF
BROIL
REHEAT
×
√
×
√
√
√
×
×
×
200°F 100°F-230°F 1min-8hour
300°F-450°F 1min-2hour
1min-2hour
375°F
200°F-450°F
30min
50min
20min
PIZZA 400°F 350°F-450°F 17min 1min-45min √
/ / /BAGEL ×/
15min
1h
15min
/
20min
1min-2hour400°F
×90°F-200°F 4h 1min-24hour150°F
will show “End”. Pay attention to the high temperature of both the food and the
After the cooking nishes, the machine will beep 3 times and the display screen
machine when you take out the food.
10
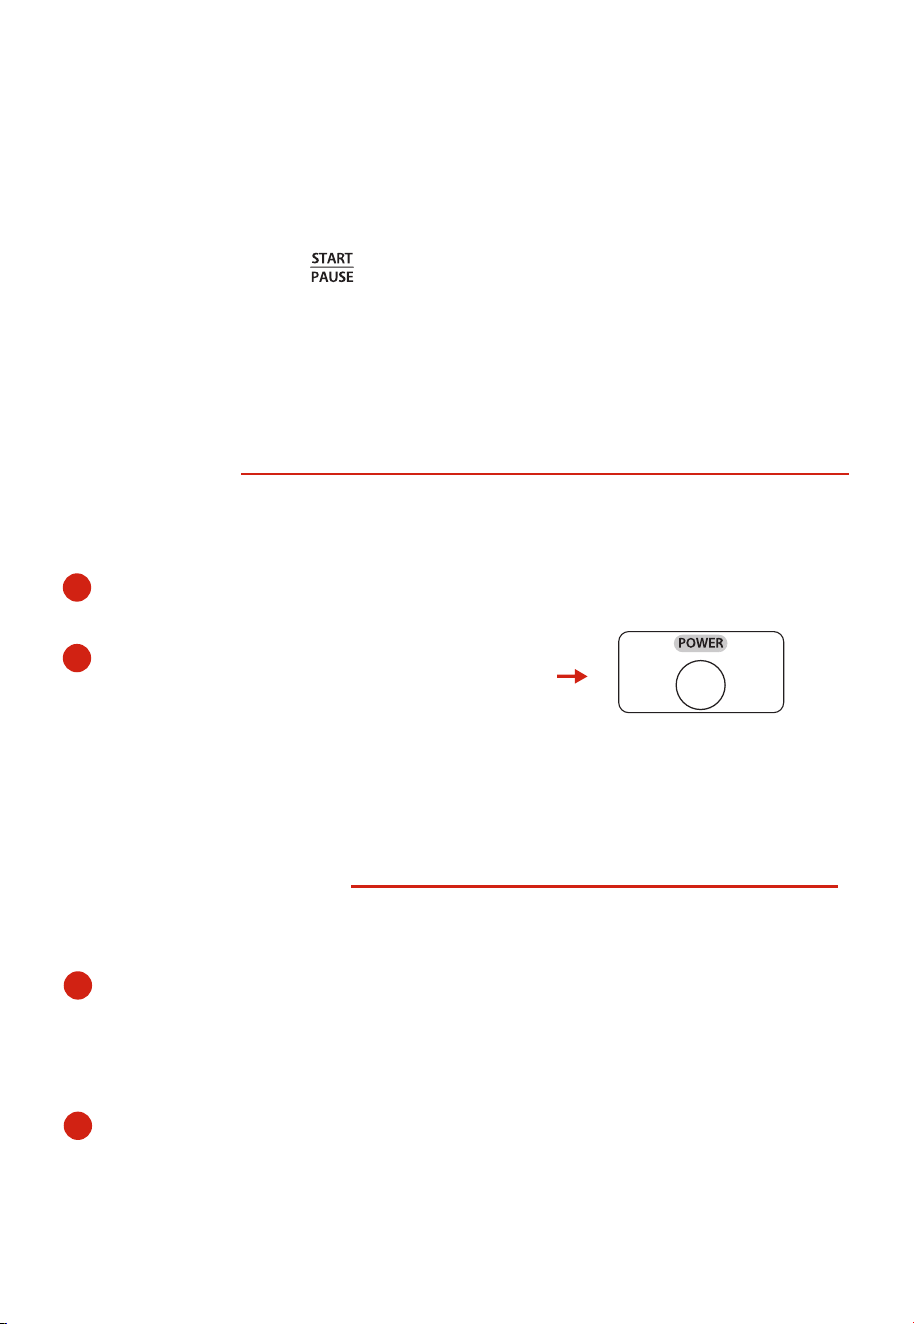
When the oven is powered, the buzzer will ring once. In the process of cooking ,
you can press " " to pause cooking.
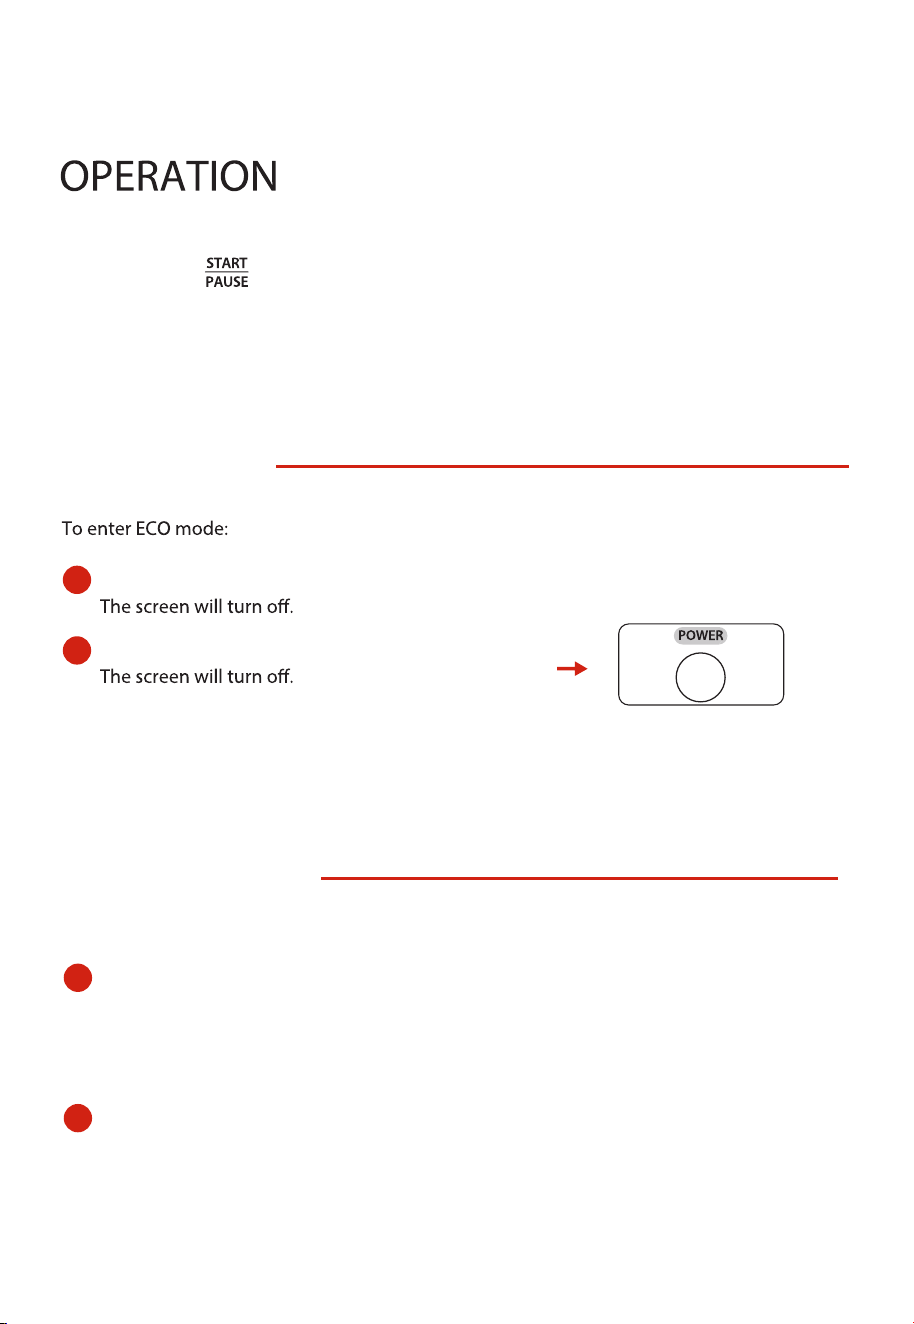
In standby mode, do not perform any operation for 5 minutes.
In standby mode, press “ POWER ”once.
2
1
MEMORY FUNCTION
2
The pizza function memory temperature and time.
1
ECO FUNCTION
To cancel ECO mode:
In ECO mode, pressing any key will cancel it.
The setting of the cooking will be stored
automatically. When you operate the same
function next time, it will cook with the previous
setting.
The toast and bagel function will only memorize the amount and darkness.

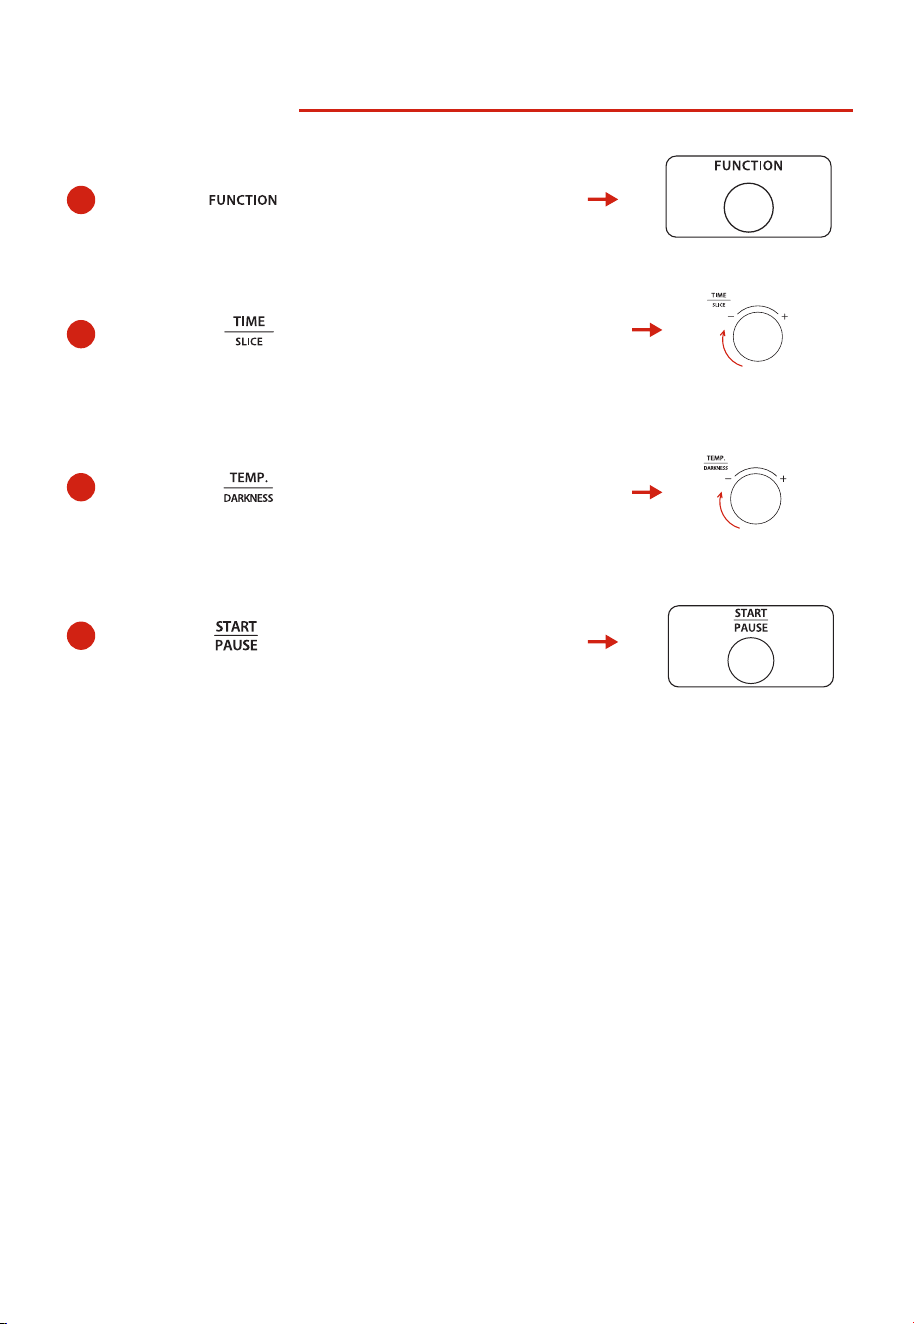
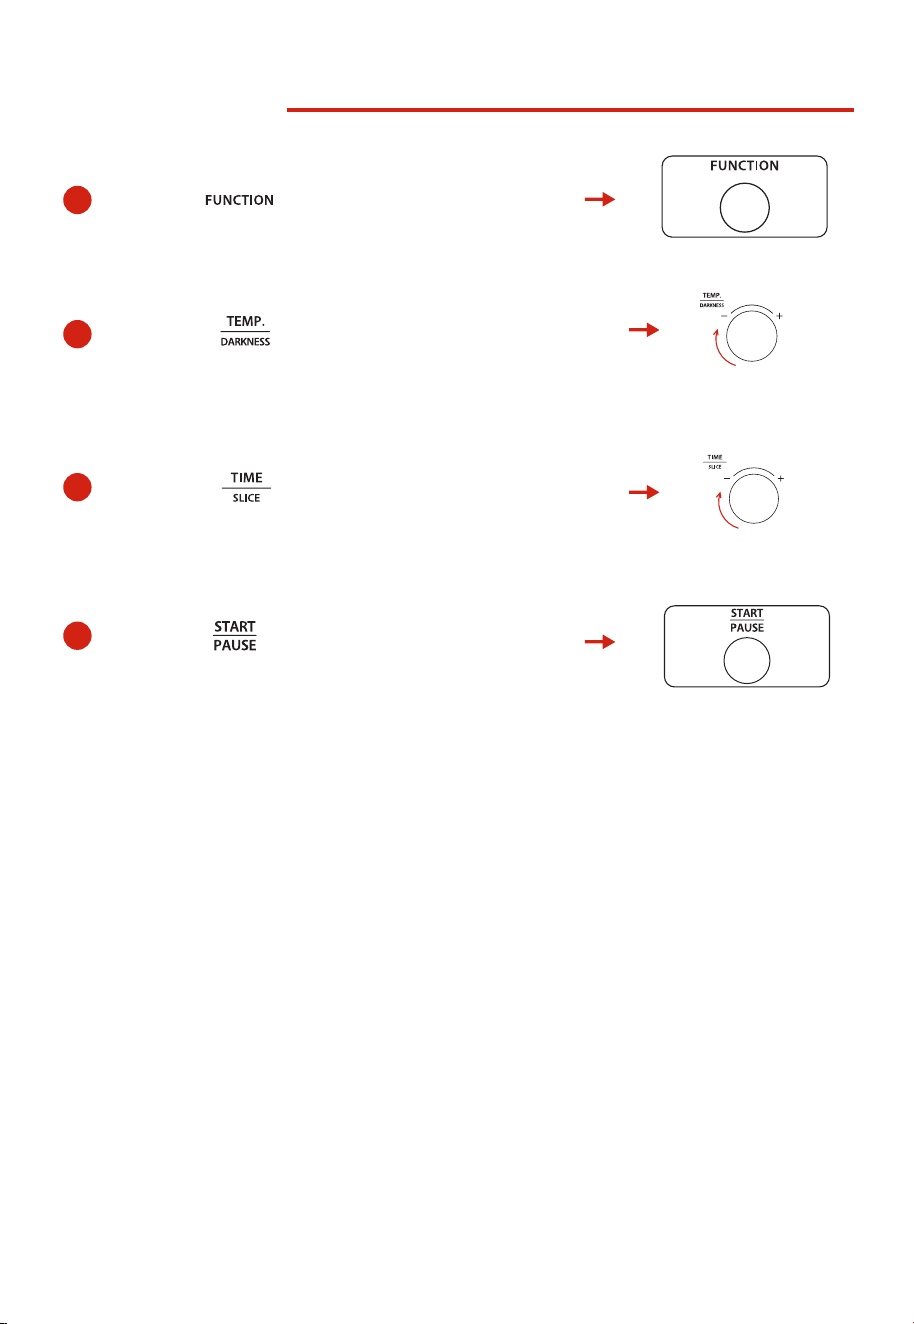
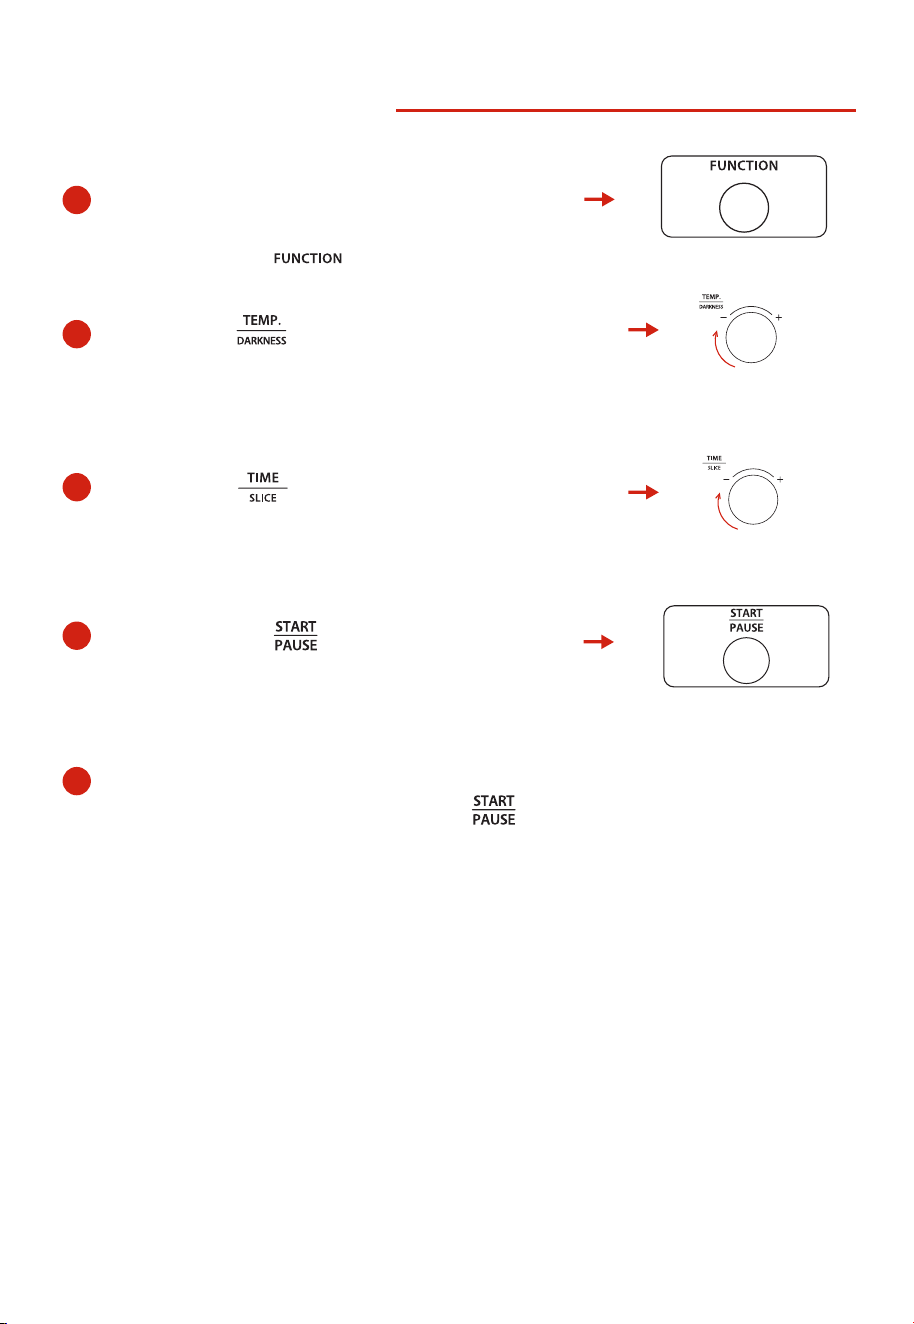
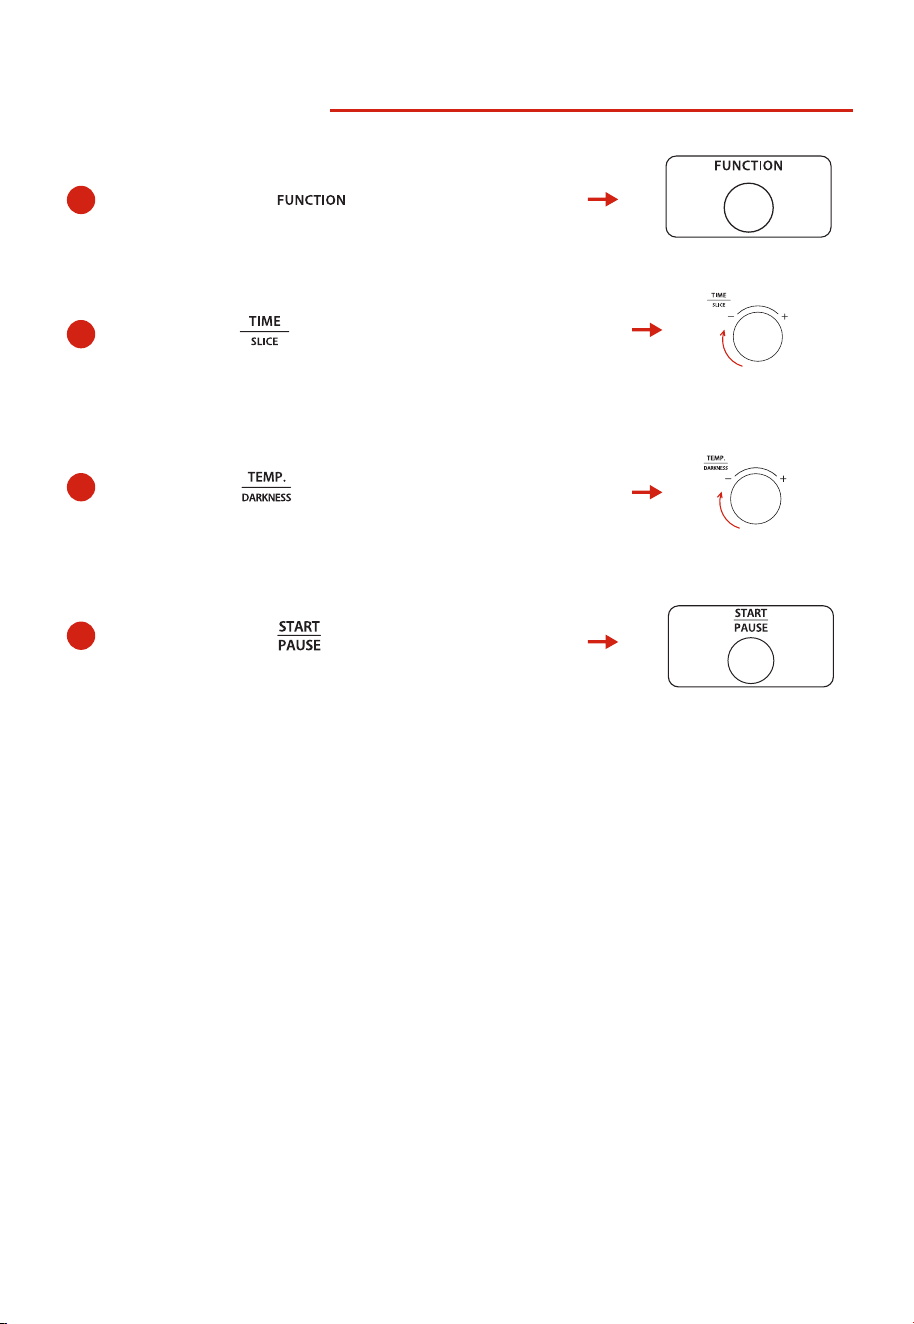
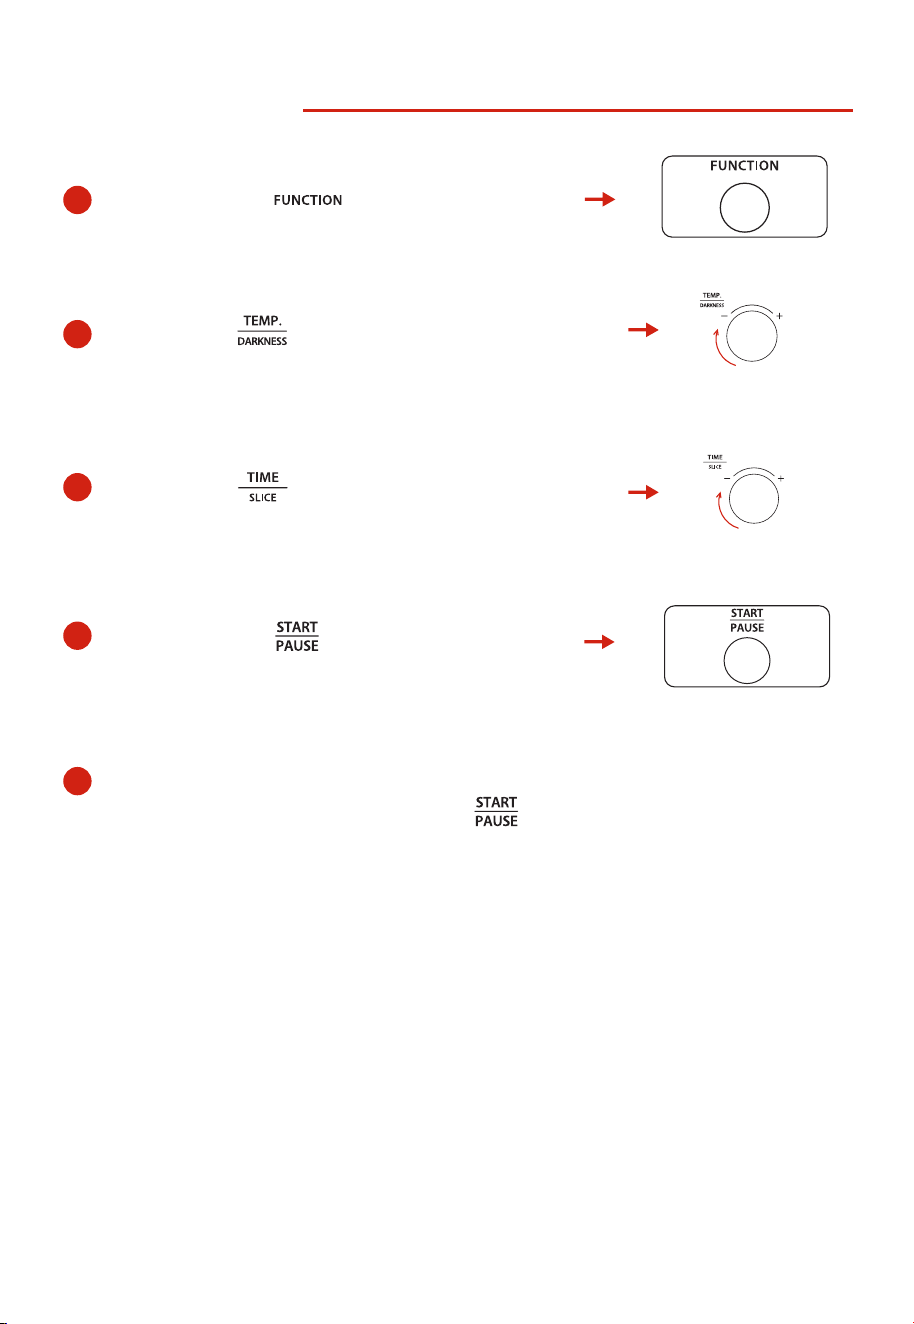
AIRFRY FUNCTION
2
Rotate the “ ” knob to adjust the temperature.
3
Rotate the “ ” knob to adjust the cooking time.
1
When first used, the default function is airfry function,
or press the “ ” button to select airfry function.
11
4
Press the “ ” button to start preheating.
When preheat temperature reached, the oven will
sound 3 times.
5
Put the food into the oven and close the door,
Press the “ ” button to start cooking.
12
TOAST FUNCTION
2
Rotate the “ ” knob to choose the slice
number of toast. The default number is 4 slices.
1
Press the “ ” button to select toast function.
3
Rotate the “ ” knob to choose the darkness level.
The default setting is 4.
4
Press the “ ” button to start cooking.
13
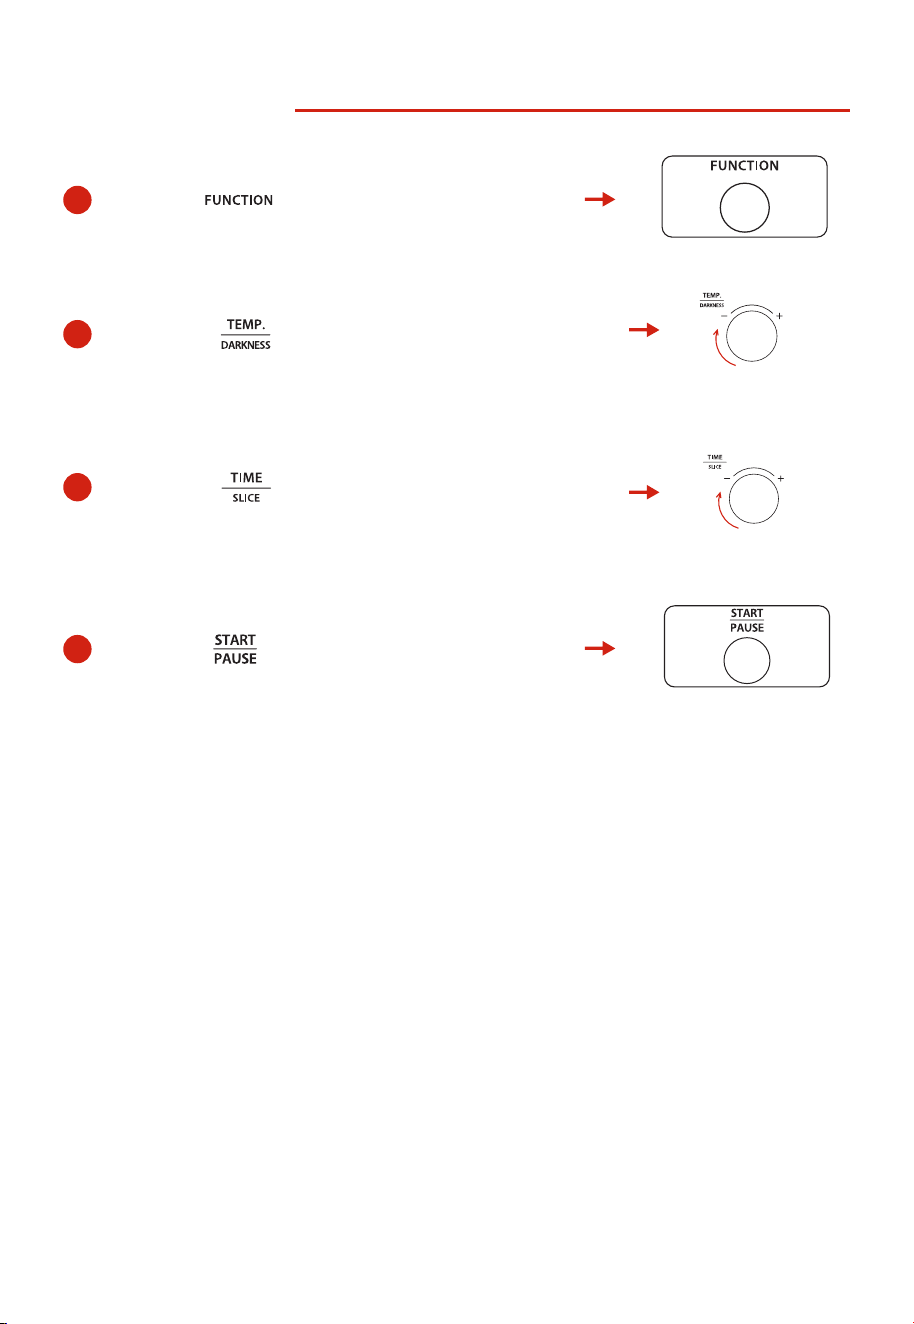
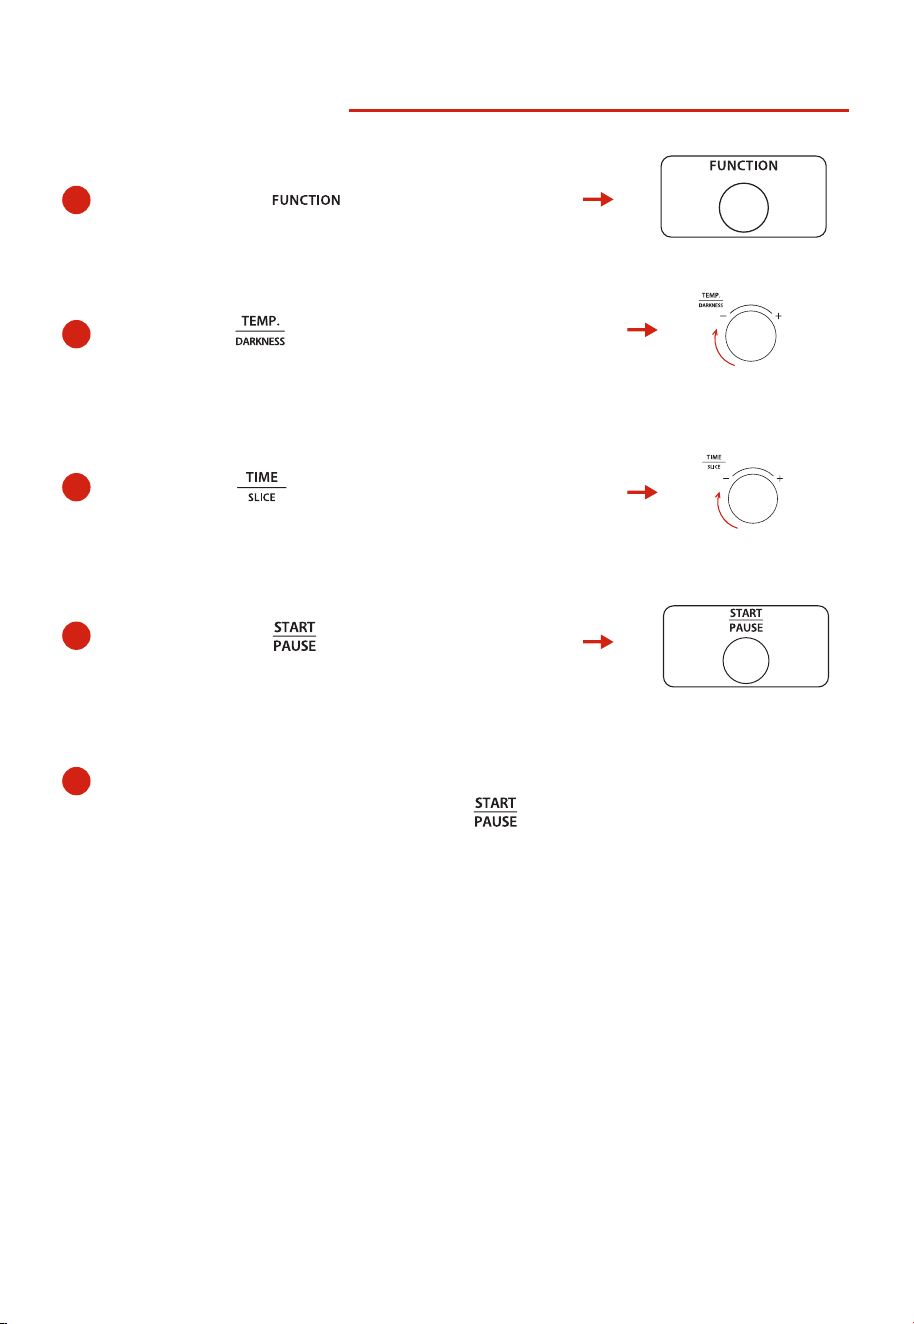
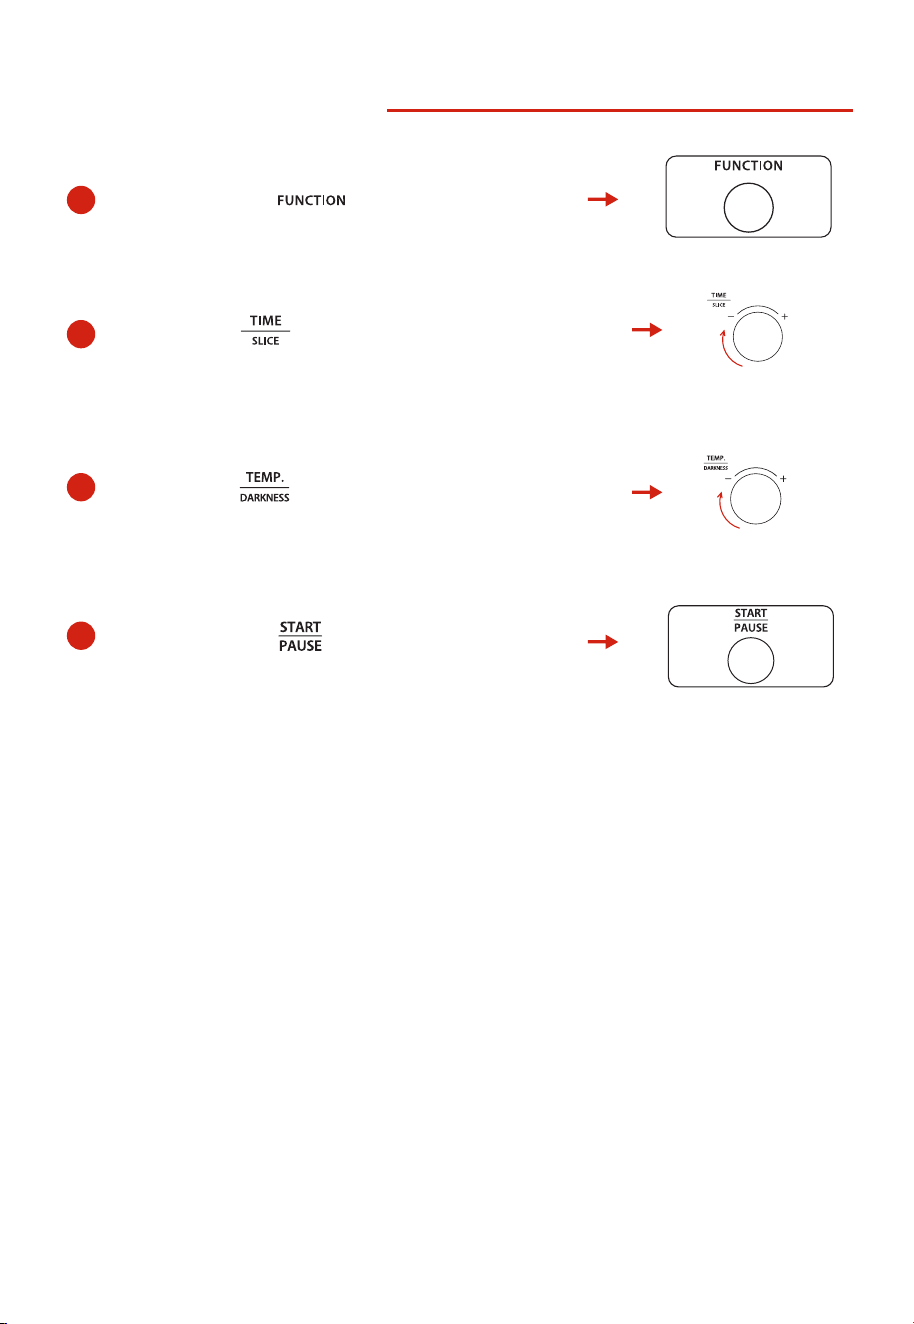
Press the “ ” button to select bake function.
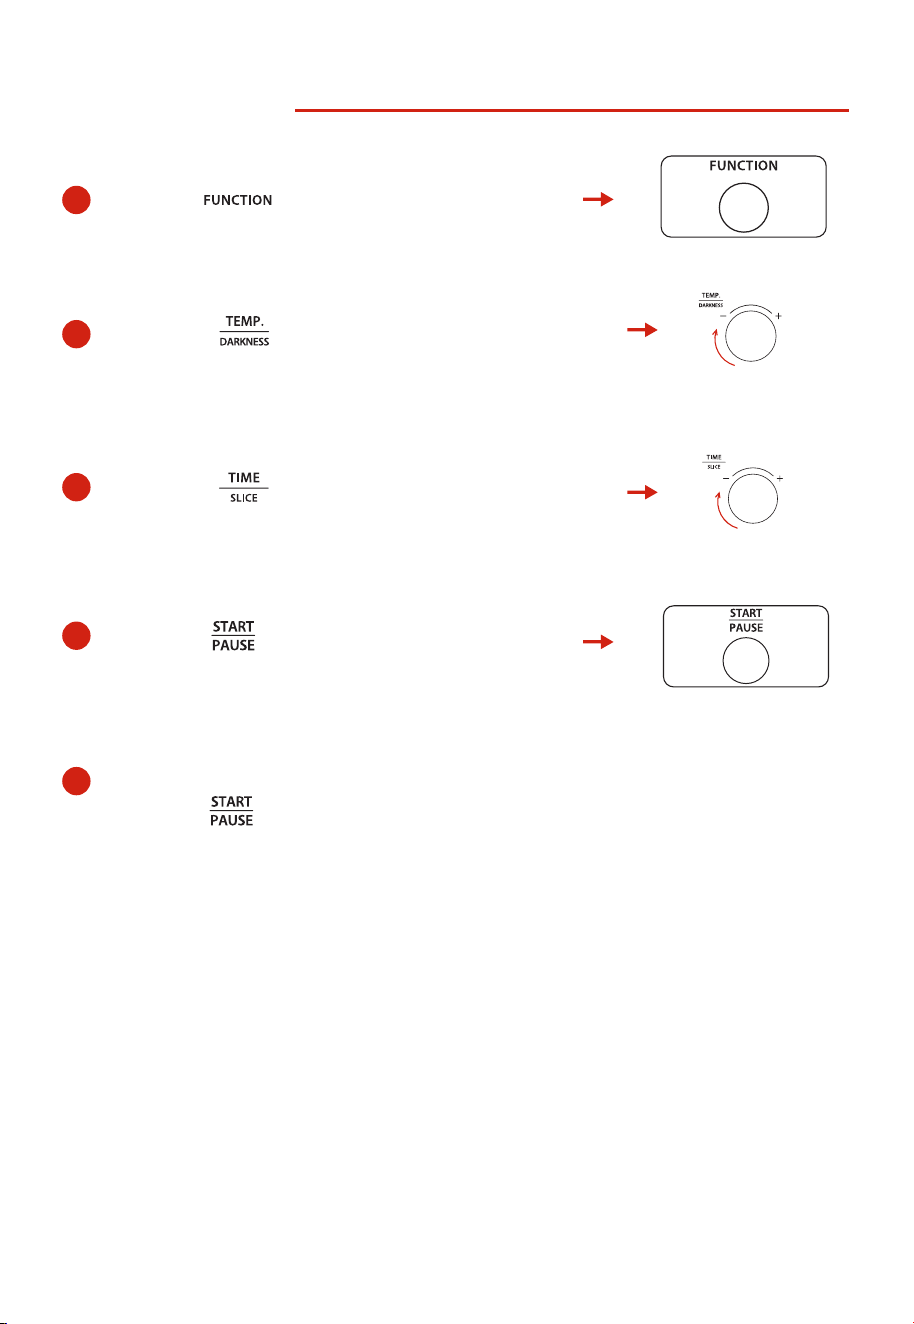
BAKE FUNCTION
1
2
Rotate the “ ” knob to adjust the temperature.
3
Rotate the “ ” knob to adjust the cooking time.
4
Press the “ ” button to start preheating.
When preheat temperature reached, the oven will
sound 3 times.
5
Put the food into the oven and close the door,
Press the “ ” button to start cooking.
14
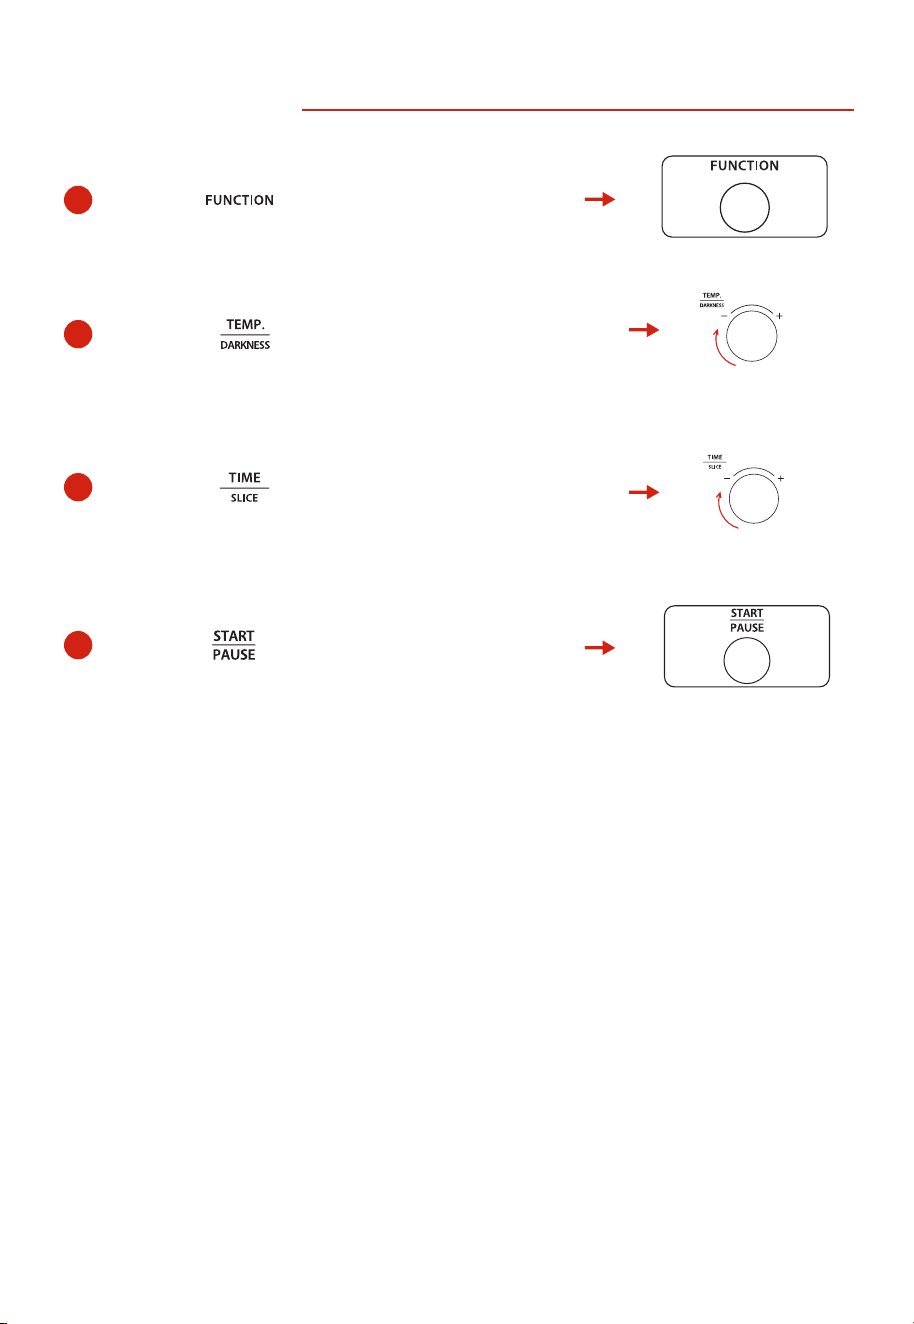
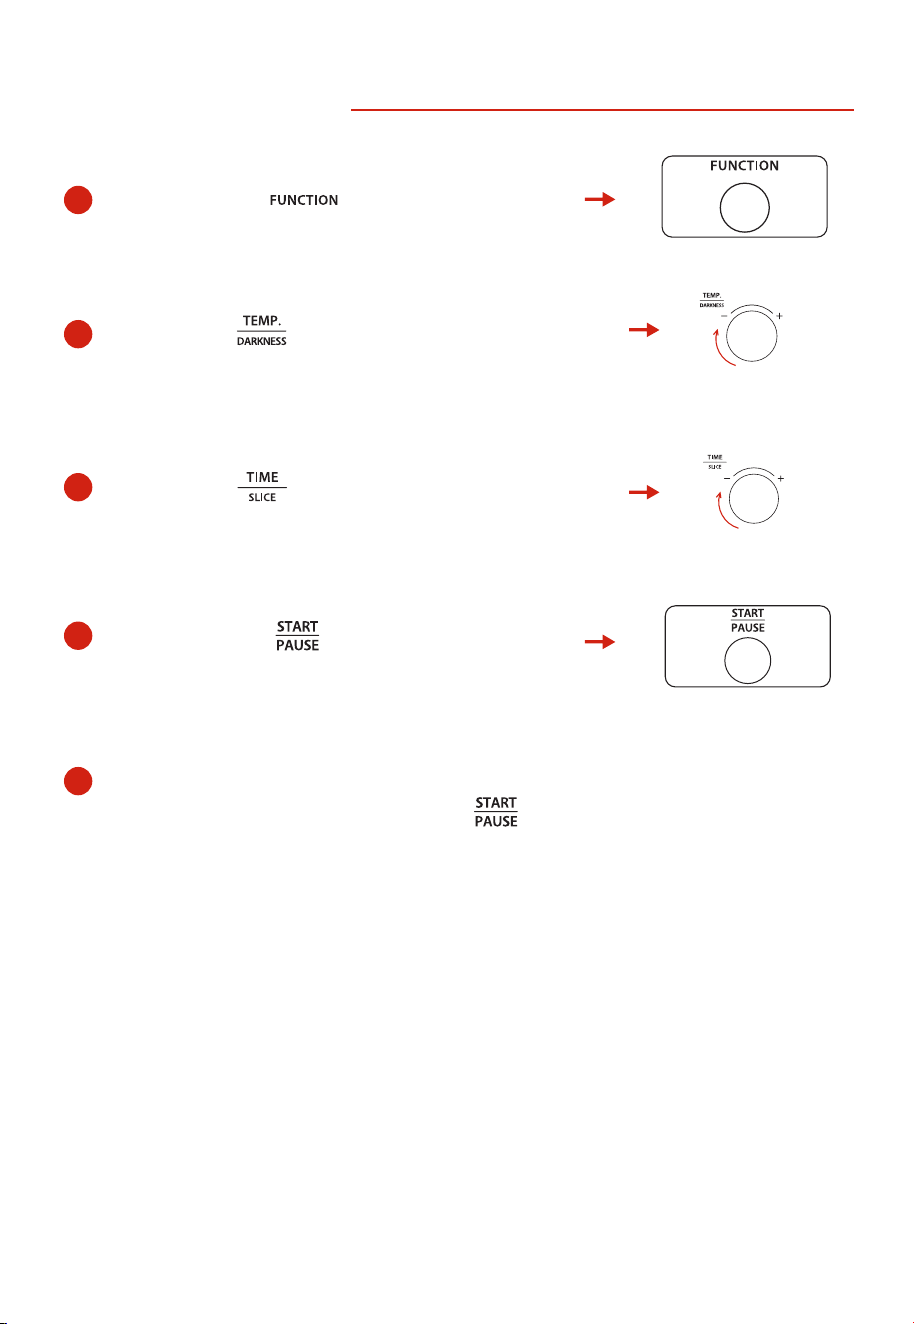
4
Press the “ ” button to start preheating.
When preheat temperature reached, the oven will
sound 3 times.
5
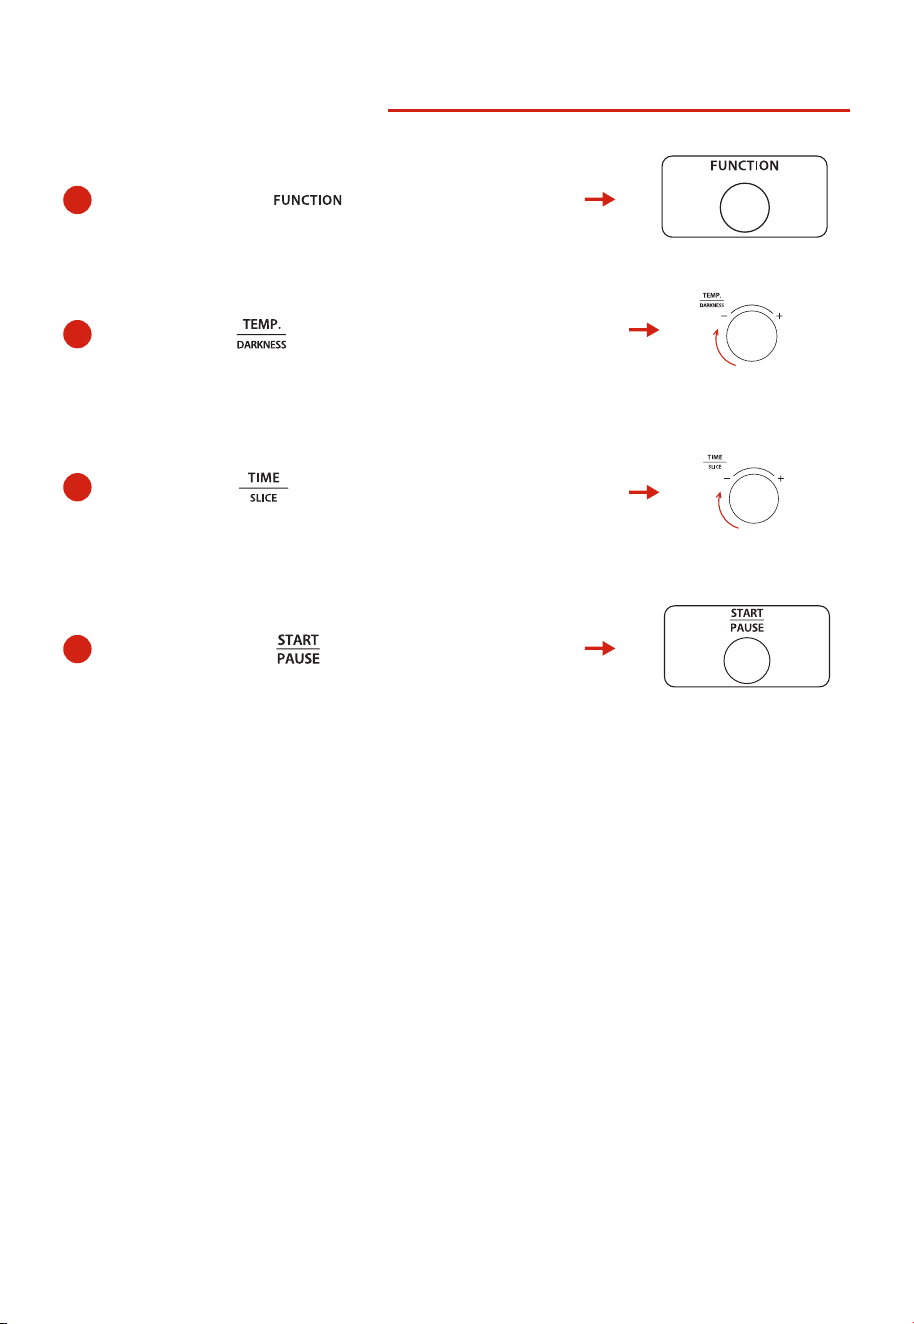
ROAST FUNCTION
1
2
Press the “ ” button to select roast function.
Rotate the “ ” knob to adjust the temperature.
The default temperature is 400˚F.
3
Rotate the “ ” knob to adjust the cooking time.
The default time is 30 minutes.
Put the food into the oven and close the door,
Press the “ ” button to start cooking.
有预热
15
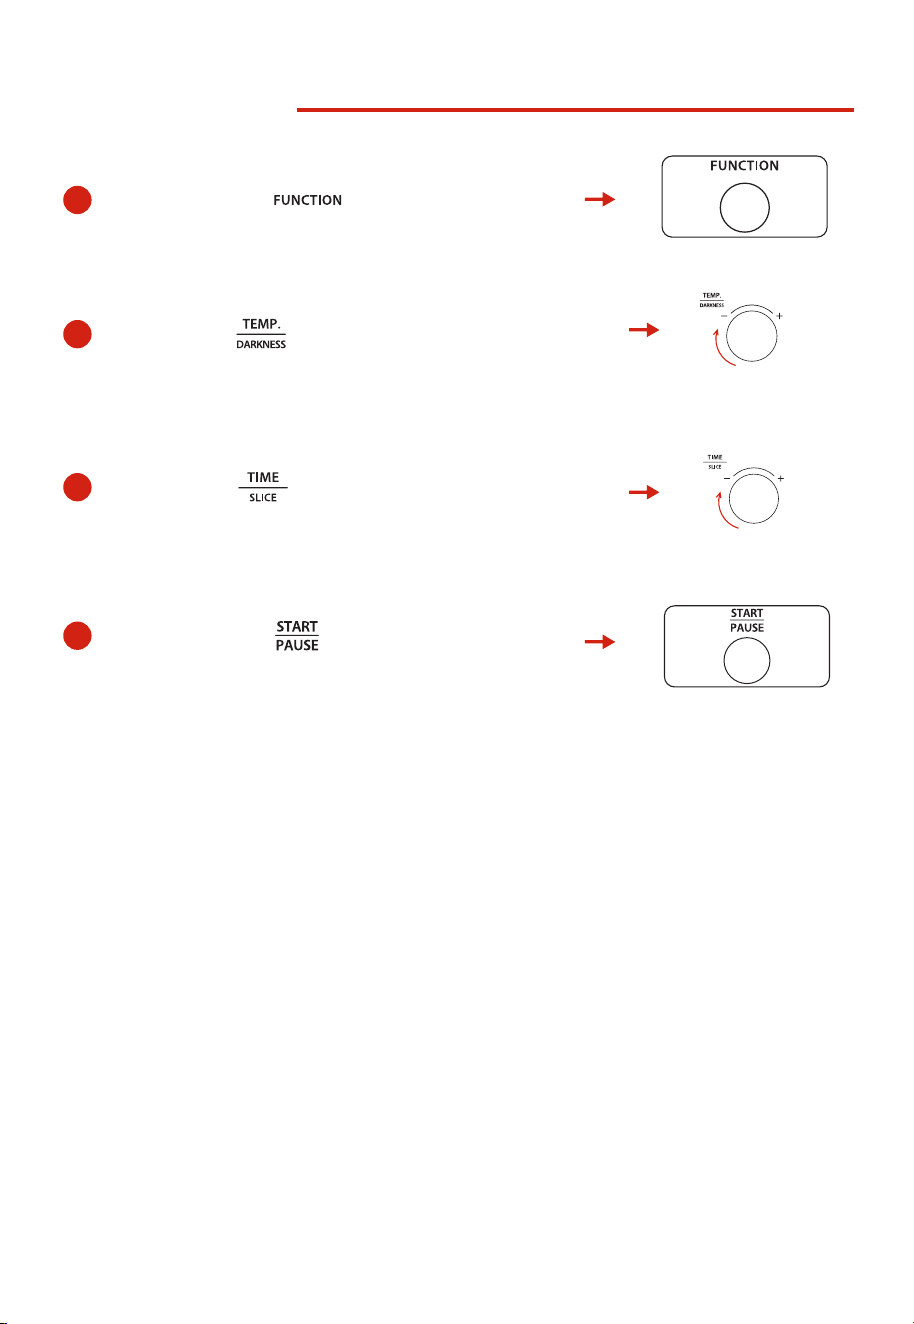
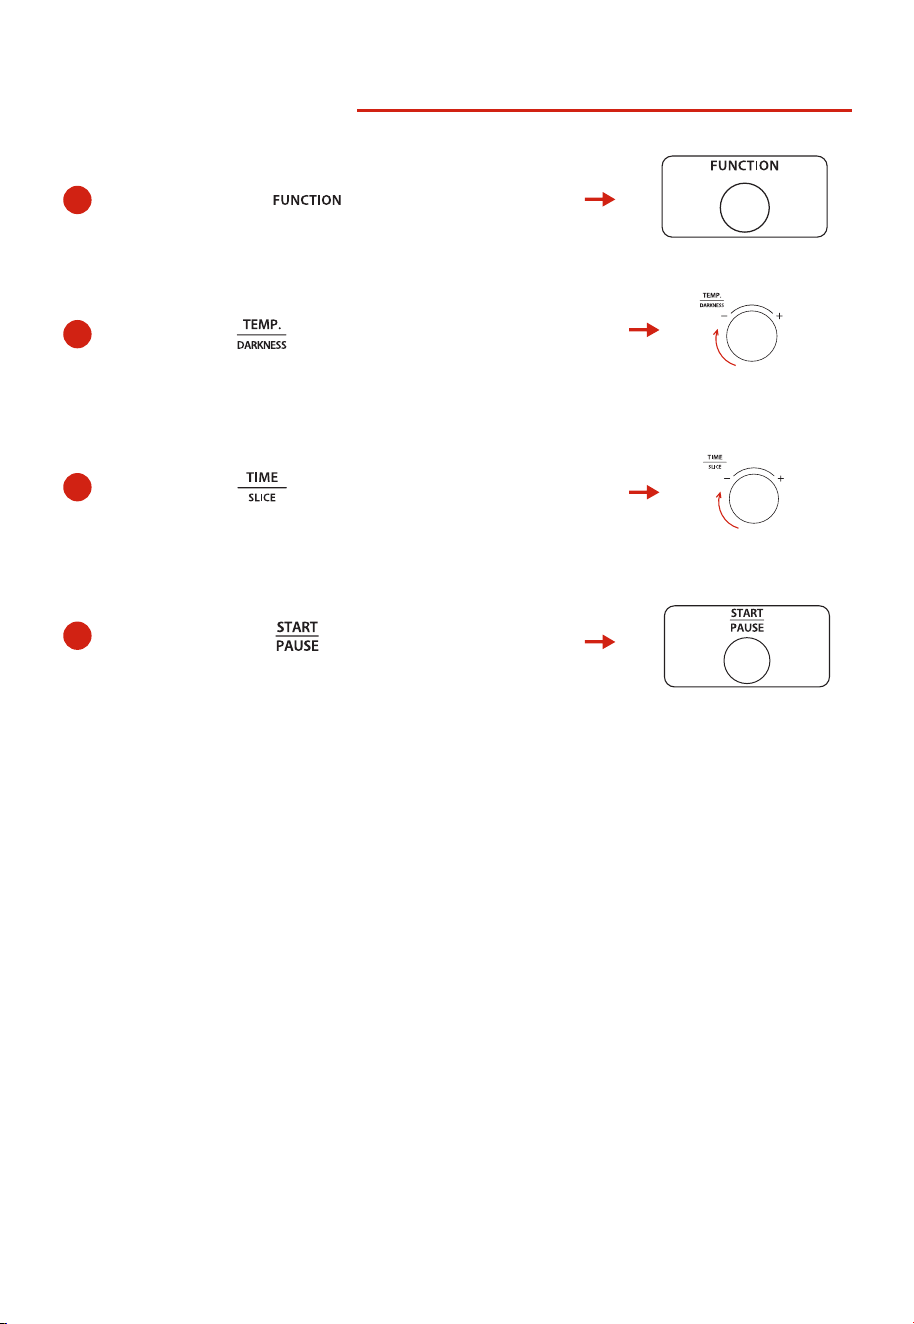
BROIL FUNCTION
2
Rotate the “ ” knob to adjust the temperature.
3
4
Rotate the “ ” knob to adjust the cooking time.
1
Press the “ ” button to select broil function.
Press the “ ” button to start cooking.

16
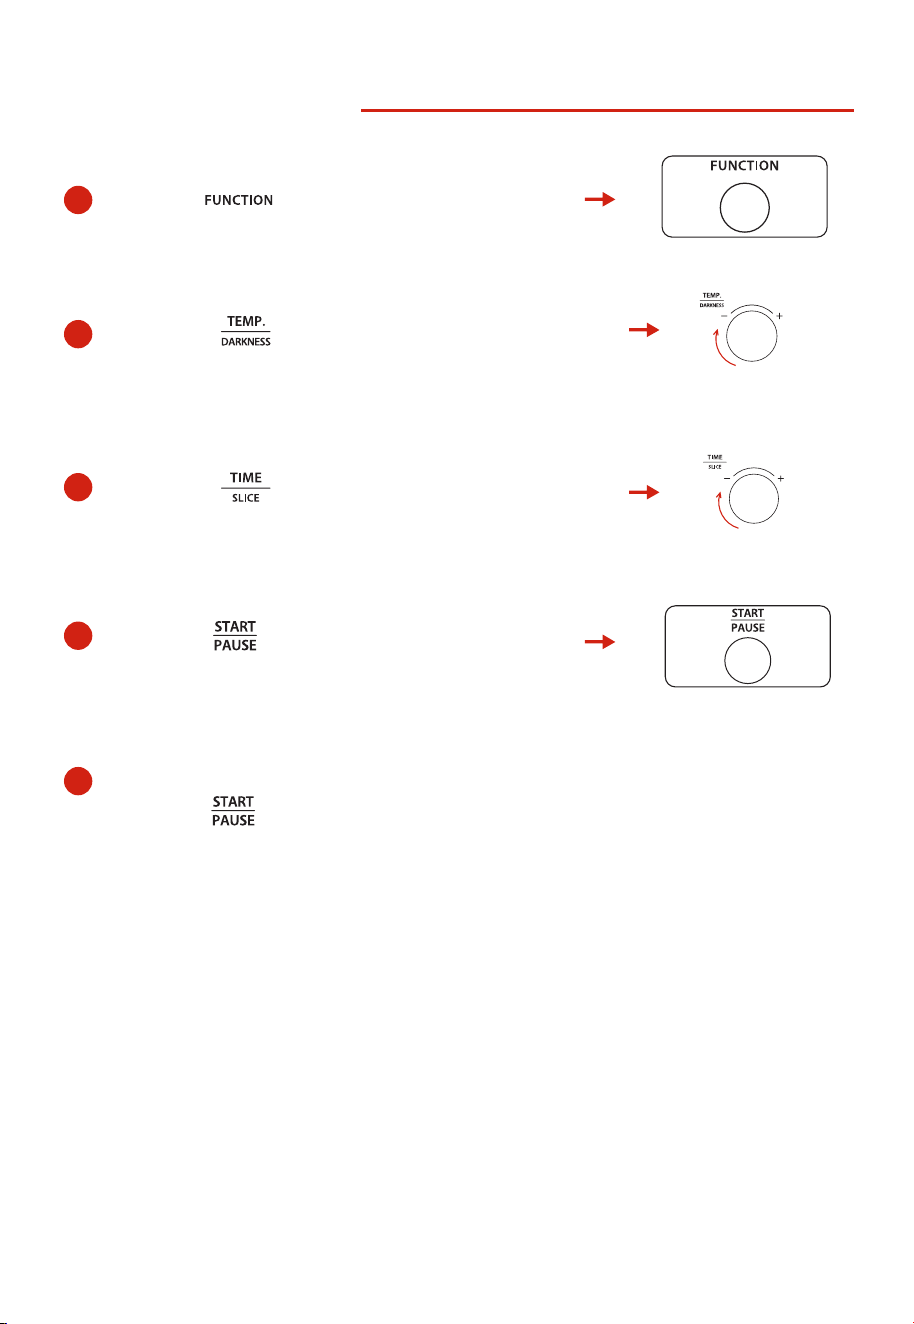
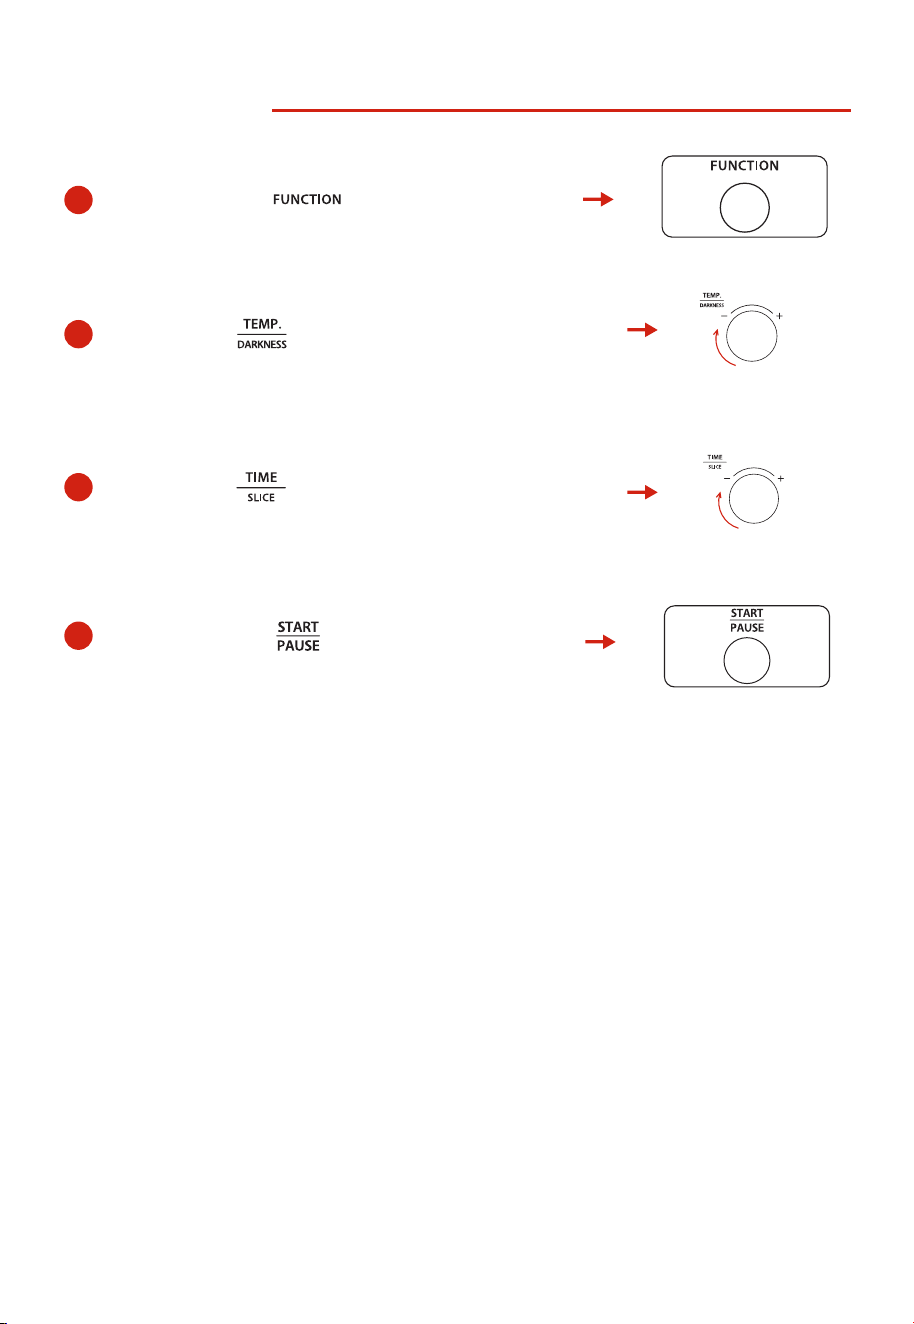
COOKIE FUNCTION
1
2
Rotate the “ ” knob to adjust the temperature.
3
Rotate the “ ” knob to adjust the cooking time.
Press the “ ” button to select cookie function.
4
Press the “ ” button to start preheating.
When preheat temperature reached, the oven will
sound 3 times.
5
Put the food into the oven and close the door,
Press the “ ” button to start cooking.
17
REHEAT FUNCTION
2
Rotate the “ ” knob to adjust the temperature.
3
4
Rotate the “ ” knob to adjust the cooking time.
1
Press the “ ” button to select reheat function.
Press the “ ” button to start cooking.

18
4
Press the “ ” button to start cooking.
SLOW FUNCTION
1
2
3
Press the “ ” button to select slow function.
Rotate the “ ” knob to adjust the temperature.
Rotate the “ ” knob to adjust the cooking time.
19
DEHYD FUNCTION
4
Press the “ ” button to start cooking.
1
2
Press the “ ” button to select dehydrate
function.
Rotate the “ ” knob to adjust the temperature.
3
Rotate the “ ” knob to adjust the cooking time.

20
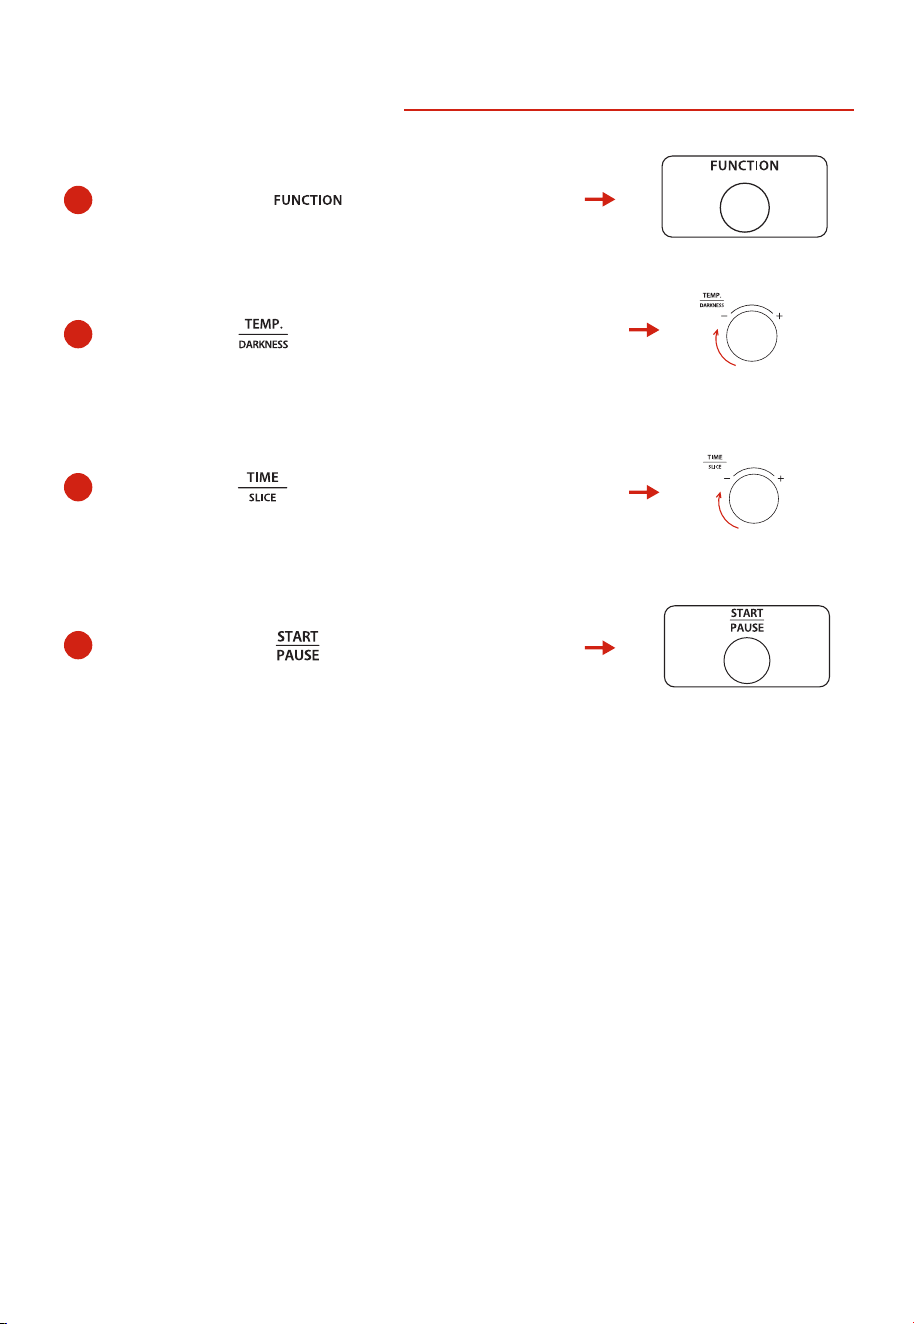
PROOF FUNCTION
2
Rotate the “ ” knob to adjust the temperature.
3
4
Rotate the “ ” knob to adjust the cooking time.
1
Press the “ ” button to select proof function.
Press the “ ” button to start cooking.

21
PIZZA FUNCTION
1
Press the “ ” button to select pizza function.
4
Press the “ ” button to start preheating.
When preheat temperature reached, the oven will
sound 3 times.
5
2
Rotate the “ ” knob to adjust the temperature.
3
Rotate the “ ” knob to adjust the cooking time.
Put the food into the oven and close the door,
Press the “ ” button to start cooking.

BAGEL FUNCTION
2
Rotate the “ ” knob to choose the slice
number of toast. The default number is 4 slices.
1
Press the “ ” button to select bagel function.
3
Rotate the “ ” knob to choose the darkness level.
The default setting is 4.
22
4
Press the “ ” button to start cooking.

23
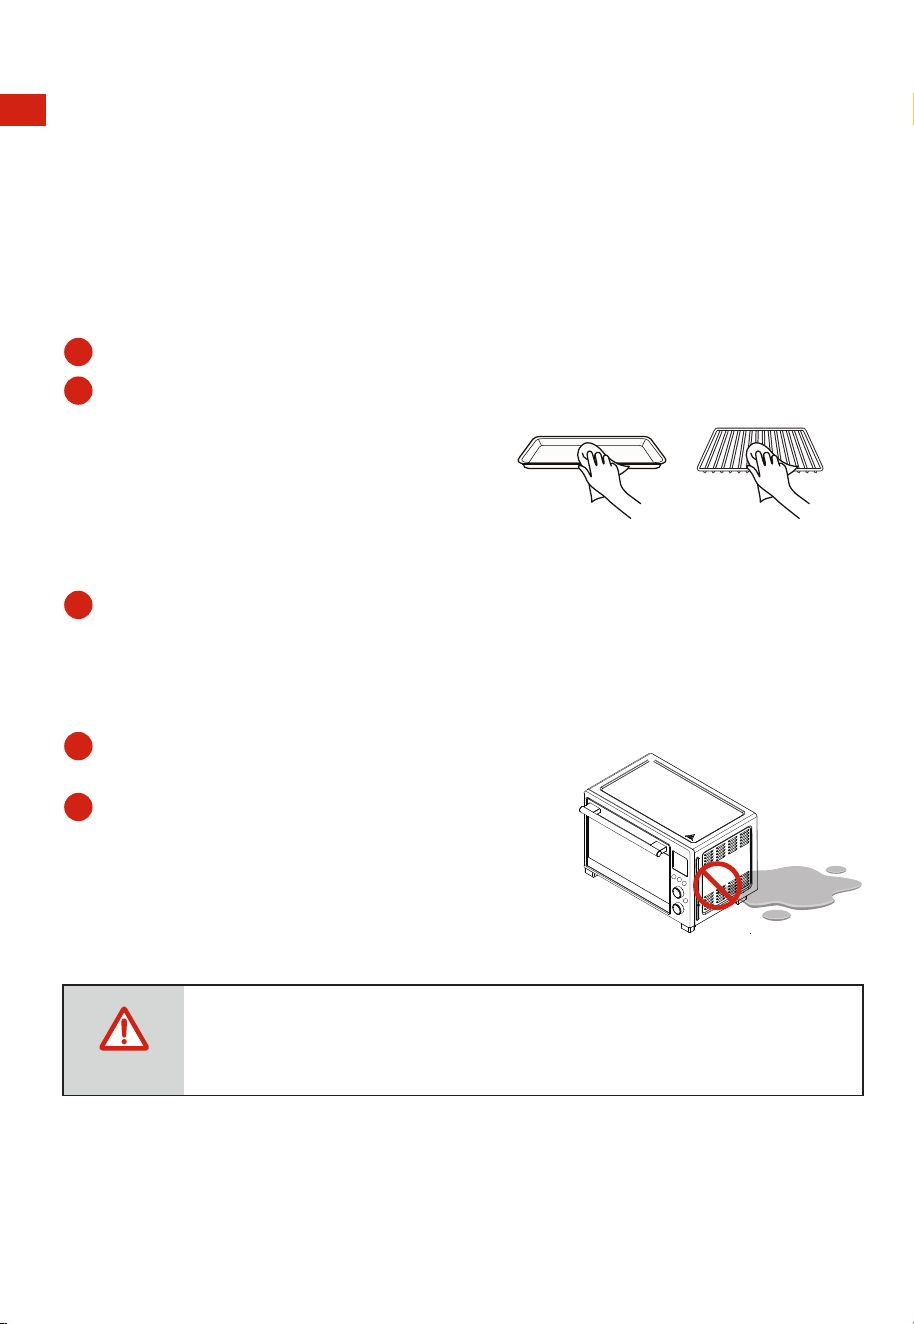
CLEANING AND CARE
CAUTION
Warning: Hot Surface!
1
2
Wash all the accessories with mild and
soaped water including the baking rack
the baking tray.
Do not use abrasive cleansers, scrubbing
brushes, or chemical cleaner. This will cause
damage to the non-stick coating of the
baking tray.
3
Using a wet cloth to wipe the inner of the oven.
To clean the door, use a wet cloth saturated with
detergent or soap.
4
Never immerse the unit in water or other liquid.
5
Any other servicing should be performed by an
authorized service representative.
and
CLEANING AND CARE
With proper care and cleaning, your appliance will retain its appearance and remain fully
functional for a long time. We will explain here how you should correctly care for and
clean your appliance. Do not use glass cleaners or metal/glass scrapers for cleaning.
Before cleaning, unplug the oven and allow it to cool completely.

24
p
l
s
g
l
f
y
e.
r
ONE YEAR LIMITED WARRANTY
This product carries a warranty stating that it will be free from defects in material and workmanshi
for a period of one year from the date of purchase. This warranty is valid for the original retai
purchaser from the date of initial retail purchase and is not transferable. Keep your original sale
receipt.
IMPORTANT:
1. This warranty does not cover damages resulting from accident, misuse or abuse, lack of reasonable
care
y attachments not provided with the product, loss of parts, or subjecting
the appliance to any but the specified voltage. ( Read directions carefully. )
2. This warranty is void if this product is ever used for other than private household purposes.
3. This warranty is void if this product is ever used outside of United State.
If service is required during the warranty period, properly pack your unit. We recommend usin
the original carton and packing materials.
If additional assistance is needed, please contact customer assistance at:
Midea America Corp. expressly disclaims all responsibility for consequential damages or incidenta
losses caused by use of the appliance. Some states do not allow this exclusion or limitation o
incidental or conse quential losses so the foregoing disclaimer may not apply to
you. This warrant
gives you specific legal rights, and you may also have other rights which may vary from state to stat
The serial number can be found on the back cabinet. We suggest that you record the serial numbe
of your unit in the space below for future reference
Model Number : ____________________
Serial Number : _____________________
SAVE THIS FOR YOUR RECORDS
Made in China
Product registration is not mandatory. Failure to complete and return the card or form does
not diminish the consumer' s warranty rights.
customercare@us.toshiba-lifestyle.com
855-204-5313
MAINTENANCE

#
Details
Matter

Lea este manual de instrucciones antes de usar el aparato.
MANUAL DE INSTRUCCIONES
Horno Eléctrico con
Freidora de Aire
TL2-AC368LEA(GR)

ÍNDICE
INSTRUCCIONES DE SEGURIDAD IMPORTANTES
Precauciones básicas de seguridad................................................................................................................... 01
Instrucciones de cable corto................................................................................................................................ 04
Especificaciones........................................................................................................................................................ 04
Antes de usar por primera vez............................................................................................................................. 05
INSTRUCCIONES DEL PRODUCTO
Nombre de las partes.............................................................................................................................................. 06
FUNCIONAMIENTO
Guía de cocción ........................................................................................................................................................07
Panel de control........................................................................................................................................................ 08
Cocción ........................................................................................................................................................................ 09
Función Eco................................................................................................................................................................10
Función de memoria...............................................................................................................................................10
Función de tostar .....................................................................................................................................................11
Función de hornear................................................................................................................................................. 12
Función lenta.............................................................................................................................................................13
Función de galletas .................................................................................................................................................14
Función de rostizar.................................................................................................................................................. 15
Función de deshidratar..........................................................................................................................................16
Función de preparar................................................................................................................................................ 17
Función de asar......................................................................................................................................................... 18
Función de recalentar............................................................................................................................................. 19
Función de pizza.......................................................................................................................................................20
Función de queso..................................................................................................................................................... 21
Función de freír al aire............................................................................................................................................ 22
LIMPIEZA Y CUIDADO
limpieza y cuidado................................................................................................................................................... 23
MANTENIMIENTO
Garantía limitada de un año................................................................................................................................. 24
LEA, COMPRENDA Y SIGA TODAS LAS INSTRUCCIONES
CUIDADOSAMENTE ANTES DE UTILIZAR ESTE
PRODUCTO. ASEGÚRESE DE GUARDAR ESTE MANUAL
PARA FUTURAS CONSULTAS.
NOTA
01
INSTRUCCIONES DE SEGURIDAD
IMPORTANTES
PRECAUCIONES BÁSICAS DE SEGURIDAD
Cuando utilice electrodomésticos, siga siempre las siguientes
precauciones de seguridad básicas:
Lea todas los
instrucciones.
Es necesaria una estrecha
supervisión cuando se
utiliza cualquier aparato
cerca de niños.
Desenchufe el aparato
del tomacorriente cuando
no esté en uso y antes de
limpiarlo.
Deje enfriarlo antes de
colocar o retirar sus partes.
El uso de accesorios no
está recomendado por el
fabricante del aparato.
Esto podría causar
lesiones.
Tenga especial cuidado al
mover un aparato que
contenga aceite caliente
u otros líquidos calientes.
Evite el contacto con las
partes móviles.
Solo para uso doméstico.
Retire el enchufe del
tomacorriente cuando no
esté en uso, antes de
colocar o retirar las piezas
y antes de limpiarlo. Deje
que se enfríe antes de
manipularlo.
Siempre conecte primero
el enchufe al aparato y
luego enchufe el cable al
tomacorriente.
Para desconectar,
apague cualquier control
y desenchufe el aparato.
Tenga especial cuidado al
retirar la bandeja o al
desechar la grasa caliente.
Tenga especial cuidado
cuando se utilicen
recipientes que no sean
de metal o vidrio.
02
Para garantizar una
protección continua contra
riesgos de descarga
eléctrica, conecte el aparato
únicamente a
tomacorrientes con
conexión a tierra adecuada.
El exterior del horno,
incluida la puerta, está
caliente durante y después
de su uso.
Para protegerse contra
descargas eléctricas, no
sumerja el cable, los
enchufes o (indique la
pieza o piezas específicas
correspondientes) en
agua ni en
ningún otro
líquido.
Durante el funcionamiento
del horno podría
producirse un incendio si el
horno tostador está
cubierto o toca material
inflamable, incluyendo
cortinas, cortinas, paredes,
etc. No coloque ningún
material inflamable encima
del aparato cuando esté en
funcionamiento.
Utilice siempre guantes
para horno, almohadillas o
manoplas resistentes al
calor cuando manipule
materiales calientes y
cuando introduzca o retire
objetos del horno, incluidas
bandejas, rejillas,
accesorios o
recipientes.
No limpie con esponjas
de metal. Los fragmentos
de la esponja pueden
desprenderse y tocar las
piezas eléctricas, creando
un riesgo de descarga
eléctrica.
Evite introducir alimentos
o utensilios de metal de
gran tamaño en el horno
tostador, ya que podrían
provocar un incendio o
un riesgo de descarga
eléctrica.
No almacene ningún
material en este horno
cuando no esté en uso,
excepto los accesorios
recomendados por el
fabricante.
03
No lo coloque sobre o
cerca de un quemador de
gas o eléctrico caliente, ni
en un horno caliente.
No coloque ninguno de
los siguientes materiales
en el horno: (es decir,
papel, cartón, plástico,
etc.).
No cubra la bandeja para
migas ni ninguna parte
del horno con papel de
aluminio.
Esto podría provocar un
sobrecalentamiento del
horno.
No utilice el aparato para
otros usos que no estén
descritos en este manual.
Durante el
funcionamiento, presione
"START/PAUSE" para
detener la cocción.
No utilice el
electrodoméstico si el
cable de alimentación o el
enchufe están dañados o si
el electrodoméstico no
funciona correctamente o
ha sido dañado de alguna
manera. Lleve el
electrodoméstico al
servicio técnico autorizado
más cercano para su
revisión, reparación o
mantenimiento.
Evite tocar las superficies
calientes.
Utilice las asas o perillas.
No permita que el cable
cuelgue del borde de una
mesa o encimera ni toque
las superficies calientes.
No utilice el aparato al
aire libre.
No introduzca los dedos en los espacios u orificios.
Esto podría causar lesiones.
PRECAUCIÓN
Este dispositivo no puede
causar interferencias
perjudiciales y debe aceptar
cualquier interferencia
recibida, incluida aquella que
pueda causar un
funcionamiento no deseado.
GUARDE ESTAS INSTRUCCIONES. SOLO
PARA USO DOMÉSTICO EN INTERIORES.

04
INSTRUCCIONES DE CABLE CORTO (CABLE
DE ALIMENTACIÓN DESMONTABLE)
1. Se proporciona un cable de alimentación corto (o cable de
alimentación desmontable) para reducir el riesgo de enredarse
o tropezarse con un cable de alimentación más largo.
2. Se pueden utilizar cables de alimentación desmontables más
largos o cables de extensión solo si se utilizan con cuidado.
3. Si utiliza un cable de alimentación desmontable más largo o un
cable de extensión:
• La clasificación eléctrica marcada en el cable de alimentación o
cable de extensión debe ser como mínimo igual que la
clasificación eléctrica del electrodoméstico.
• No deje el cable colgando por el borde de la mesa o encimera,
para evitar que los niños tiren de él o se tropiecen.
• Si el electrodoméstico es del tipo con conexión a tierra, el cable
de extensión deberá ser un cable de 3 hilos con conexión a
tierra.
DATOS
MODELO
FUENTE DE ALIMENTACIÓN 120 VAC 60 Hz
1750 W
ESPECIFICACIONES
ESPECIFICACIONES
CONSUMO DE ENERGÍA
TL2-AC368LEA(GR)
05
ANTES DE USAR POR PRIMERA VEZ
1. Retire todos los accesorios y materiales de embalaje en el interior del horno.
4. Asegúrese de que la bandeja para migas esté correctamente instalada antes de utilizar el
horno.
2. Lave los accesorios del horno con un poco de detergente líquido
y agua tibia. Seque la unidad y los accesorios del horno antes de
utilizarlos con toallas de papel o un paño seco.
3. Coloque el horno sobre una encimera plana u otra
superficie estable.
NO UTILICE EN EL MISMO CIRCUITO CON OTRO
ELECTRODOMÉSTICO.
PRECAUCIÓN
El interior del horno podría humear durante este proceso. Esto es
normal cuando el horno es nuevo y este proceso no durará más de
10-15 minutos.
5. Antes de poner en funcionamiento, coloque la bandeja para migas debajo de los tubos
de calefacción inferiores.
Se recomienda colocar todos los accesorios dentro del horno y utilizar la función de
rostizar a 450˚F durante 15 minutos. Esto elimina los residuos y los posibles olores.

06
INSTRUCCIONES DEL PRODUCTO
NOMBRE DE LAS PARTES
Carcasa
Perilla
Pata
Pantalla
Manijas de la
puerta
Bandeja para
migas
Cesta para freír
al aire
Puerta de
cristal
Bandeja para
hornear
Rejilla para
hornear
X2
Nivel 3
Nivel 4
Nivel 2
Nivel 1
Soporte
removedor
1
2
3
4
5
6
7
8
9
07
FUNCIONAMIENTO
INSTRUCCIONES
PRECAUCIÓN
GUÍA DE COCCIÓN
LAS SUPERFICIES DEL HORNO ESTÁN CALIENTES DURANTE Y
DESPUÉS DEL USO
Coloque la rejilla para hornear en una posición que se adapte
a la altura de los alimentos que se van a cocinar.
Limpie periódicamente los tubos de calefacción.
No utilice nunca ollas o tapas de vidrio o cerámica
NUNCA deje que el aceite u otros líquidos de los alimentos goteen hasta el fondo del horno.
Establezca la temperatura según lo sugerido por la receta o según lo desee.
Cierre bien la puerta y programe el tiempo de cocción para iniciar la cocción.
La cesta para freír con aire debe utilizarse sobre la rejilla para hornear.
No desenchufe el cable de alimentación una vez finalizado el funcionamiento del horno.
El ventilador dejará de funcionar después de 1 minuto.
Los alimentos deben colocarse en la bandeja del horno para
evitar que se incendien por la acumulación de restos de
comida en los tubos de calefacción. Asegúrese de utilizar
siempre un recipiente resistente al horno, nunca utilice
recipientes de plástico o cartón en el horno.
08
PANEL DE CONTROL
TEMP./OSCURIDAD
Gire la perilla para
seleccionar la
temperatura u
oscuridad.
FUNCIÓN
Presiona este botón
para seleccionar la función.
LUZ
Permite encender/apagar
la luz interna del horno.
Inicio/Pausa
Presione este botón para
comenzar/pausar la cocción.
POTENCIA
En el modo de espera,
presione este botón para
entrar en el modo eco.
Presione este botón para
cancelar la configuración.
TIEMPO/
REBANADA
Gire la perilla
para seleccionar
tiempo o
rebanada.

09
COCCIÓN
FUNCIONES DEL PRODUCTO
FUNCIÓN DE
COCCIÓN
TEMP. RANGO RANGO DE TIEMPO
PRECAL-
ENTAR
TEMPERATURA
PREDETER-
MINADA
TIEMPO
PREDETER-
MINADO
FREÍR CON
AIRE
450°F 150°F - 450°F
HI/Lo
/ /
1 min - 2 horas
/
350°F
100°F
HI
350°F 300°F - 450°F
150°F - 450°F
80°F - 110°F
1 min - 2 horas
1 min - 9 horas
15 mín 1 min - 2 horas
TOSTAR
HORNEAR
LENTO
ROSTIZAR
DESH
GALLETAS
PREPARAR
ASAR
RECALENTAR
×
√
×
√
√
√
×
×
×
200°F 100°F - 230°F 1 min - 8 horas
300°F - 450°F 1 min - 2 horas
1 min - 2 horas
375°F
200°F - 450°F
30 mín
50 min
20 min
PIZZA 400°F 350°F - 450°F 17 min 1 min - 45 min √
/ / /ROSQUILLA ×/
15 mín
1 h
15 mín
/
20 min
1 min - 2 horas400°F
×90°F - 200°F 4 h 1 min - 24 horas150°F
2
1
2
1
10
En el modo de espera, no realice ninguna operación durante 5 minutos.
La pantalla se apagará.
En el modo de espera, presione "POWER" una vez.
La pantalla se apagará.
Cuando el horno esté encendido, el timbre sonará una vez. Durante el proceso de
cocción, puede presionar " " para pausar la cocción.
Para ingresar al modo ECO:
FUNCIÓN DE MEMORIA
FUNCIÓN ECO
Para cancelar el modo ECO:
En el modo ECO, puede presionar cualquier botón para cancelar esta función.
La configuración de cocción se guardará
automáticamente. La próxima vez que utilice la
misma función, se cocinará con la configuración
anterior.
FUNCIONAMIENTO
Una vez nalizada la cocción, el aparato sonará 3 veces y la pantalla mostrará
“End”. Preste atención a la temperatura elevada de la comida y del aparato
cuando saque la comida.
La función de pizza memoriza la temperatura y el tiempo.
La función de tostar y rosquillas solo memoriza la cantidad y el nivel de oscuridad.
11
2
3
1
4
5
FUNCIÓN DE FREÍR AL AIRE
Gire la perilla “ ” para ajustar la temperatura.
Gire la perilla “ ” para ajustar el tiempo de
cocción.
Cuando se utiliza por primera vez, la función
predeterminada es la función de freír al aire, o
presione el botón “ ” para seleccionar la
función de freír al aire.
Presione el botón “ ” para iniciar el
precalentamiento.
Cuando se alcance la temperatura de
precalentamiento, el horno sonará 3 veces.
Introduzca los alimentos en el horno y cierre la
puerta. A continuación, presione el botón “ ”
para iniciar la cocción.
12
2
1
3
4
FUNCIÓN DE TOSTAR
Presione el botón “ ” para seleccionar la
función de tostar.
Presione el botón “ ” para iniciar la cocción.
Gire la perilla “ ” para elegir el número de
rebanadas de pan tostado. El número predeterminado
es 4 rebanadas.
Gire la perilla “ ” para elegir el nivel de oscuridad.
La configuración predeterminada es 4.
13
1
2
3
4
5
Presione el botón “ ” para seleccionar la
función de hornear.
FUNCIÓN DE HORNEAR
Gire la perilla “ ” para ajustar la temperatura.
Gire la perilla “ ” para ajustar el tiempo de cocción.
Presione el botón “ ” para iniciar el
precalentamiento.
Cuando se alcance la temperatura de
precalentamiento, el horno sonará 3 veces.
Introduzca los alimentos en el horno y cierre la
puerta. A continuación, presione el botón “ ”
para iniciar la cocción.
14
4
5
1
2
3
FUNCIÓN DE ROSTIZAR
Presione el botón“ ” para seleccionar la
función de rostizar.
Gire la perilla “ ” para ajustar la temperatura.
La temperatura predeterminada es de 400˚F.
Gire la perilla “ ” para ajustar el tiempo de
cocción.
El tiempo predeterminado es de 30 minutos.
Presione el botón “ ” para iniciar el
precalentamiento.
Cuando se alcance la temperatura de
precalentamiento, el horno sonará 3 veces.
Introduzca los alimentos en el horno y cierre la
puerta. A continuación, presione el botón “ ”
para iniciar la cocción.
15
2
3
4
1
FUNCIÓN DE ASAR
Gire la perilla “ ” para ajustar la temperatura.
Gire la perilla “ ” para ajustar el tiempo de
cocción.
Presione el botón “ ” para seleccionar la
función de asar.
Presione el botón “ ” para iniciar la cocción.

16
1
2
3
4
5
FUNCIÓN DE GALLETAS
Gire la perilla “ ” para ajustar la temperatura.
Gire la perilla “ ” para ajustar el tiempo de
cocción.
Presione el botón “ ” para seleccionar la
función de galletas.
Presione el botón “ ” para iniciar el
precalentamiento.
Cuando se alcance la temperatura de
precalentamiento, el horno sonará 3 veces.
Introduzca los alimentos en el horno y cierre la
puerta. A continuación, presione el botón “ ”
para iniciar la cocción.
17
2
3
4
1
FUNCIÓN DE RECALENTAR
Gire la perilla “ ” para ajustar la temperatura.
Gire la perilla “ ” para ajustar el tiempo de
cocción.
Presione el botón “ ” para seleccionar la
función de recalentar.
Presione el botón “ ” para iniciar la cocción.
18
4
1
2
3
Presione el botón “ ” para iniciar la cocción.
FUNCIÓN LENTA
Presione el botón “ ” para seleccionar la
función lenta.
Gire la perilla “ ” para ajustar la temperatura.
Gire la perilla “ ” para ajustar el tiempo de
cocción.
19
4
1
2
3
FUNCIÓN DE DESHIDRATAR
Presione el botón “ ” para iniciar la cocción.
Gire la perilla “ ” para ajustar la temperatura.
Gire la perilla “ ” para ajustar el tiempo de cocción.
Presione el botón “ ” para seleccionar la
función de deshidratar.
20
2
3
4
1
FUNCIÓN DE PREPARAR
Gire la perilla “ ” para ajustar la temperatura.
Gire la perilla “ ” para ajustar el tiempo de
cocción.
Presione el botón “ ” para seleccionar la
función de preparar.
Presione el botón “ ” para iniciar la cocción.
21
1
4
5
2
3
FUNCIÓN DE PIZZA
Presione el botón “ ” para seleccionar la
función de pizza.
Gire la perilla “ ” para ajustar la temperatura.
Gire la perilla “ ” para ajustar el tiempo de
cocción.
Presione el botón “ ” para iniciar el
precalentamiento.
Cuando se alcance la temperatura de
precalentamiento, el horno sonará 3 veces.
Introduzca los alimentos en el horno y cierre la
puerta. A continuación, presione el botón “ ”
para iniciar la cocción.
22
2
1
3
4
FUNCIÓN DE ROSQUILLAS
Presione el botón “ ” para seleccionar la
función de rosquillas.
Gire la perilla “ ” para elegir el nivel de oscuridad.
La configuración predeterminada es 4.
Presione el botón “ ” para iniciar la cocción.
Gire la perilla “ ” para elegir el número de
rebanadas de pan tostado. El número
predeterminado es 4 rebanadas.
1
2
3
4
5
23
LIMPIEZA Y CUIDADO
PRECAUCIÓN
Advertencia: ¡Superficie caliente!
Lave todos los accesorios con agua jabonosa
suave, incluida la rejilla y la bandeja para
hornear.
No utilice limpiadores abrasivos, cepillos ni
limpiadores químicos. Esto podría dañar el
revestimiento antiadherente de la bandeja
para hornear.
Utilice un paño húmedo para limpiar el interior
del horno. Para limpiar la puerta, utilice un paño
húmedo empapado con detergente o jabón.
No sumerja este electrodoméstico en agua ni en
ningún otro líquido.
Cualquier otro servicio debe ser realizado por un
centro de servicio autorizado.
LIMPIEZA Y CUIDADO
Con un buen cuidado y limpieza, su electrodoméstico conservará su aspecto y seguirá
funcionando perfectamente durante mucho tiempo. Aquí le explicaremos cómo debe cuidar y
limpiar correctamente su electrodoméstico. No utilice limpiadores de vidrio, ni raspadores de
metal o vidrio para la limpieza.
Antes de la limpieza, desenchufe el horno y déjelo enfriar completamente.

24
GARANTÍA LIMITADA DE UN AÑO
Este producto tiene una garantía que establece que estará libre de defectos de material y mano
de obra durante un período de un año a partir de la fecha de compra. Esta garantía es válida para
el comprador al detal original a partir de la fecha de la compra al detal inicial y no es transferible.
Guarde su factura de compra original.
IMPORTANTE:
1. Esta garantía no cubre los daños resultantes de accidentes, mal uso o abuso, falta de cuidado
razonable, la colocación de cualquier accesorio no proporcionado con el producto, la pérdida
de piezas, o someter el aparato a cualquier voltaje que no sea el especificado. ( Lea las
instrucciones cuidadosamente.)
2. Esta garantía queda anulada si este producto se llega a utilizar para fines distintos de los
domésticos.
3. Esta garantía queda anulada si este producto se llega a utilizar fuera de los Estados Unidos.
Si requiere servicio durante el período de garantía, empaque adecuadamente el producto. Se
recomienda utilizar la caja y los materiales de embalaje originales.
Si necesita ayuda adicional, póngase en contacto con el centro de atención al cliente en:
855-204-5313
Midea America Corp. renuncia expresamente a toda responsabilidad por daños consecuentes o
pérdidas incidentales causadas por el uso del electrodoméstico. Algunos estados no permiten
esta exclusión o limitación de pérdidas incidentales o consecuentes, por lo que es posible que el
descargo de responsabilidad anterior no se aplique a usted. Esta garantía le otorga derechos
legales específicos, además usted también puede tener otros derechos que varían de un estado a
otro.
El número de serie se puede encontrar en la parte trasera. Le sugerimos que anote el número de
serie de su unidad en el espacio siguiente para futuras referencias
Número de Modelo: ____________________
Número de Serie: _____________________
El registro del producto no es obligatorio. No completar y devolver la tarjeta o el formulario no
disminuye los derechos de garantía del consumidor.
GUARDE ESTA INFORMACIÓN
Fabricado en China
MANTENIMIENTO

#
Details
Matter