TOASTER OVEN
INSTRUCTION MANUAL
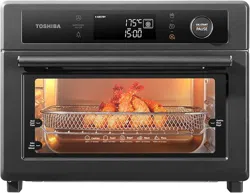
TL2-AC25GZA(GR)
Please review this instruction manual before operating.

CONTENTS
IMPORTANT SAFEGUARDS
Basic safety precautions .................................................................................................................................. EN-01
Short cord instruction (detachable power-supply cord) .................................................................... EN-05
Before rst use ................................................................................................................................................... EN-06
PRODUCT INSTRUCTION
Name of parts ..................................................................................................................................................... EN-07
OPERATION
How to use ........................................................................................................................................................... EN-08
Mute ....................................................................................................................................................................... EN-10
Airfry ...................................................................................................................................................................... EN-10
Airfry menu.......................................................................................................................................................... EN-11
Toast ....................................................................................................................................................................... EN-12
Bake ........................................................................................................................................................................ EN-13
Broil ........................................................................................................................................................................ EN-13
Roast ...................................................................................................................................................................... EN-14
Pizza ....................................................................................................................................................................... EN-15
Cookies .................................................................................................................................................................. EN-15
Bagel ...................................................................................................................................................................... EN-16
BEFORE OPERATING THIS PRODUCT, READ,
UNDERSTAND, AND FOLLOW THESE INSTRUCTIONS.
BE SURE TO SAVE THIS BOOKLIST FOR FUTURE
REFERENCE.
NOTE
Reheat.................................................................................................................................................................... EN-17
Warm ...................................................................................................................................................................... EN-17
Proof ....................................................................................................................................................................... EN-18
Slow cook ............................................................................................................................................................. EN-18
Dehydrate ............................................................................................................................................................ EN-19
Care and cleaning ............................................................................................................................................. EN-20
Specication ........................................................................................................................................................ EN-21
One year limited warranty ............................................................................................................................. EN-22
EN-01
IMPORTANT SAFEGUARDS
BASIC SAFETY PRECAUTIONS
When using electrical appliance, basic safety precautions should
always be followed, including the following:
Read all instructions.
Close supervision is
necessary when any
appliance is used by or
near children.
Unplug from the outlet
when not in use and before
cleaning. Allow to cool
before putting on or taking
off parts.
The use of accessory
attachments is not
recommended by the
appliance manufacturer.
This may cause injuries.
Extreme caution must be
used when you move an
appliance containing hot
oil or other hot liquids.
Avoid contacting moving
parts.
For household use only.
Remove the plug from the
outlet when the appliance
is not in use, before putting
on or taking off parts, and
before cleaning. Allow to
cool before handling.
Extreme caution should be
exercised when you use
containers constructed of
materials other than metal
or glass.
Caution-To ensure
continued protection
against risk of electric
shock, connect to properly
EN-02
grounded outlets only.
( If the appliance is of the
grounded type)
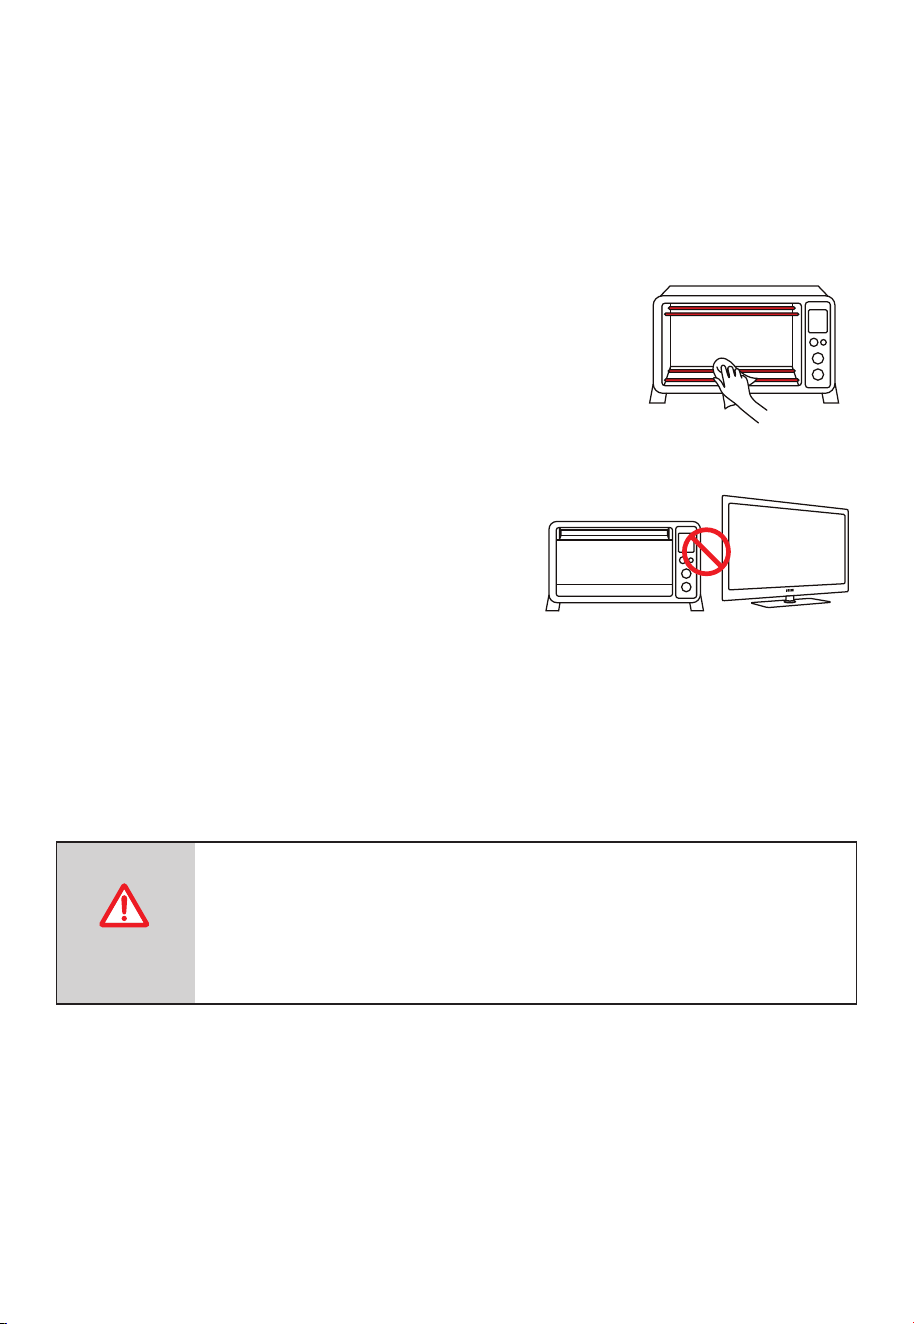
The outside of the oven,
including the door, is hot
during and after use.
A fire may occur if the
toaster-oven is covered
or touching flammable
material, including
curtains, draperies, walls,
etc., when in operation. Do
not store any flammable
materials on top of
the appliance when in
operation.
Always attach plug to
appliance rst, then plug
cord into the wall outlet.
To disconnect, turn any
control to " ", then
remove plug from wall
outlet.
Always use heat-resistant
gloves, pads, or oven
mitts when handling
hot materials, and when
placing items in or
removing items from the
oven, including trays, racks,
accessories, or containers.
To protect against electrical
shock, do not immerse
the cord, plugs, or (state
specific part or parts in
question) in water or other
liquid.
Do not clean with metal
scouring pads. Pieces can
break off the pad and
touch electrical parts,
creating parts, creating a
risk of electric shock.
Oversize foods or metal
utensils must not be
EN-03
inserted in a toaster-oven
as they may create a fire or
risk of electric shock.
Do not store any materials,
other than manufacturers
recommended accessories,
in this oven when not in
use.
Do not operate any
appliance with a damaged
cord or plug or after the
appliance malfunctions
or has been damaged
in any manner. Return
appliance to the nearest
authorized service facility
for examination, repair, or
adjustment.
Do not touch hot surfaces.
Use handles or knobs.
Do not let cord hang over
edge of table or counter, or
touch hot surfaces.
Do not use the appliance
outdoors.
Do not place on or near a
hot gas or electric burner,
or in a heated oven.
Do not place any of the
following materials in
the oven: (that is, paper,
cardboard, plastic, and the
like).
Do not cover crumb tray or
any part of the oven with a
metal foil.
This will cause over-
heating of the oven.
Do not use the appliance
for other intended use.
During operation, press
" " can stop cooking.
Use extreme caution when
removing tray or disposing
of hot grease.

EN-04
Do not insert your fingers into any gaps or holes. This
may cause injuries.
SAVE THESE INSTRUCTIONS
CAUTION
EN-05
SHORT CORD INSTRUCTION
(DETACHABLE POWER-SUPPLY CORD)
1. A short power-supply cord (or detachable power-supply cord)
should be used to reduce the risk resulting from becoming
entangled in or tripping over a longer cord.
2. Longer detachable power-supply cords or extension cords are
available and may be used if care is exercised in their use.
3. If a longer detachable power-supply cord or extension cord is
used:
(1). The marked electrical rating of the cord set or extension
cord should be at least as great as the electrical rating of the
appliance.
(2). The cord should be arranged so that it will not drape over
the countertop or tabletop where it can be pulled on by
children or tripped over unintentionally.
(3). If the appliance is of the grounded type, the extension cord
should be a grounding-type 3-wire cord.
EN-06
BEFORE FIRST USE
1. Remove all accessories and shipping materials packed inside
the Oven.
2. Wash the Rack and Grill Tray in warm soapy
water. Wipe the inside of the Oven with a
damp cloth or sponge. Blot dry with paper
towels to make sure that the unit is dry
before using.
3. Place Oven on a flat counter or other
stable surface.
DO NOT OPERATE ON THE SAME
CIRCUIT WITH ANOTHER APPLIANCE.
4. Make sure that the crumb tray is properly installed before using.
For the first time only, set the temperature Knob to MAX, the
function setting on timer to 15 minutes. This will burn off any oils
that are still on the oven.
The oven may smoke during this process. This is
normal for a new oven and will not last more than
10-15 min.
CAUTION
EN-07
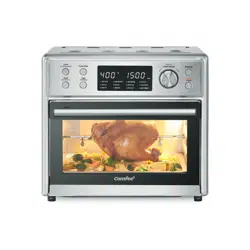
PRODUCT INSTRUCTION
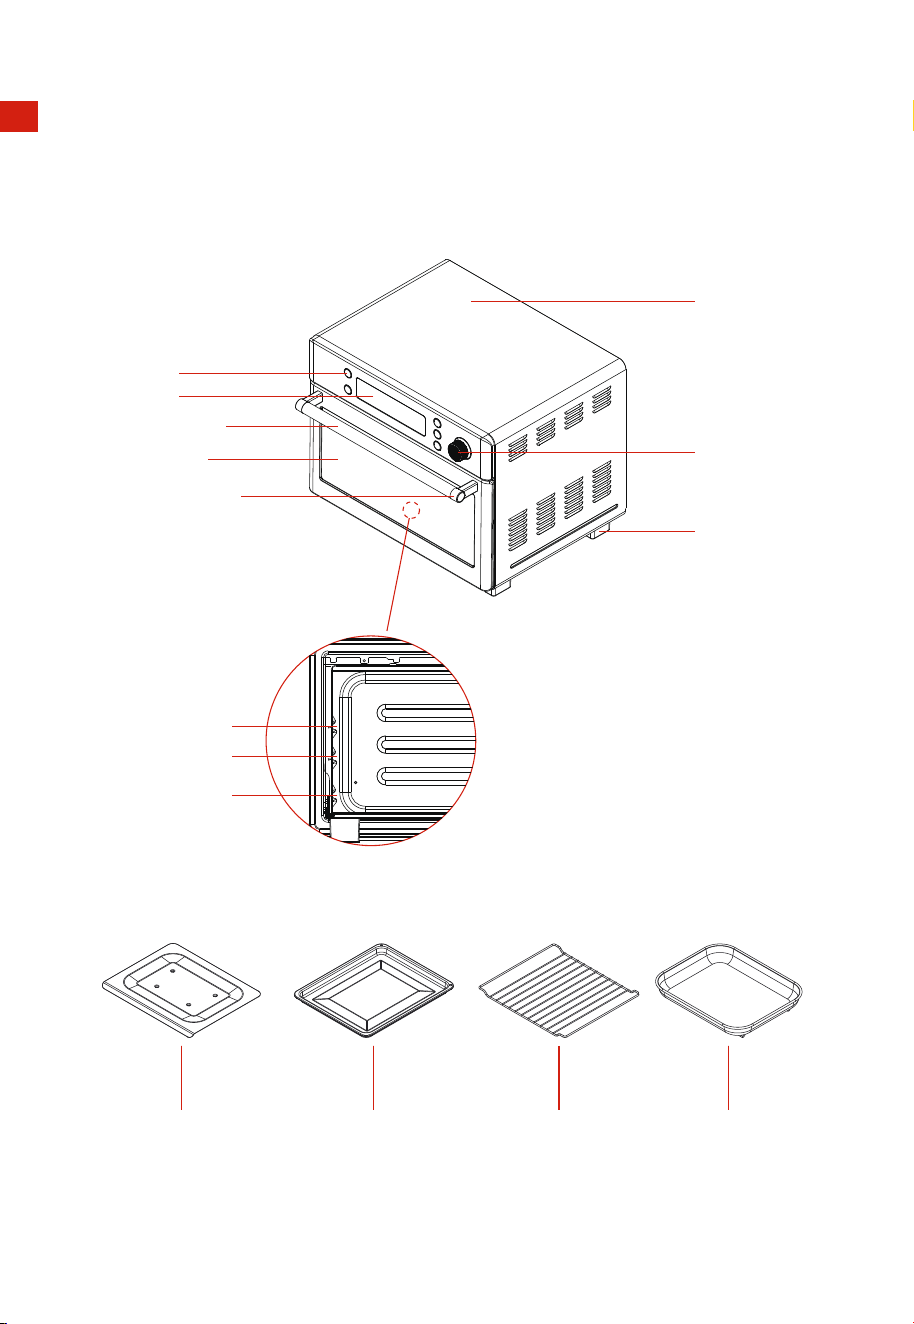
NAME OF PARTS
Housing
Button
Knob
Foot
Display
Crumb Tray
Door Handle
Door Glass
Handle Holder
Grill Tray Rack Cooking Basket
Layer 3
Layer 2
Layer 1
EN-08
OPERATION
HOW TO USE
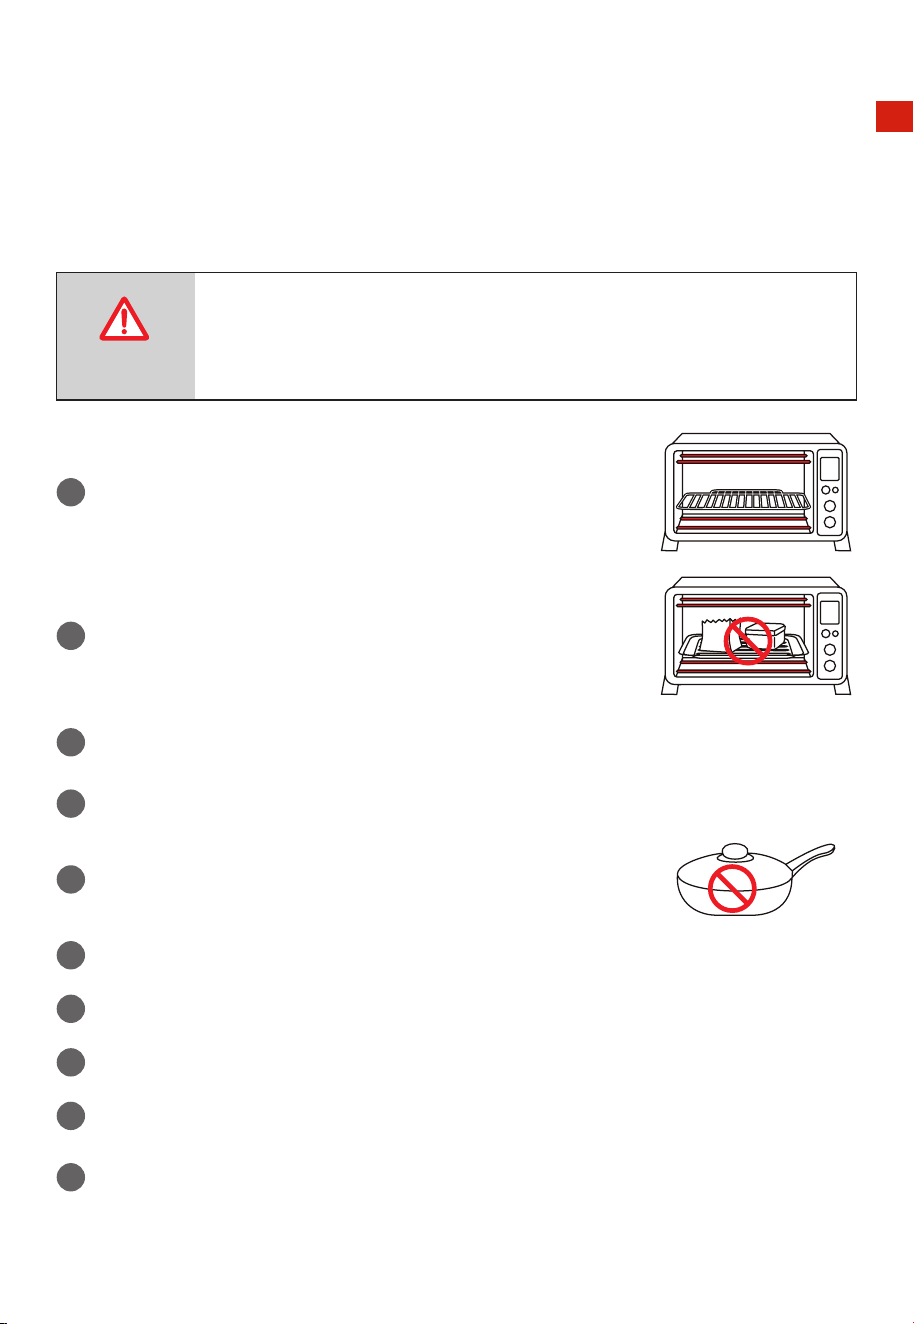
THE OVEN SURFACES ARE HOT DURING AND AFTER
USE GENERAL INSTRUCTIONS
1
Place the rack and grill tray in position that will accommodate the
height of the food to be cooked.
2
The food must be put into the Grill Tray to avoid the re danger
that caused by the accumulation of food chipping on the
heating pipes.
3
Make sure that you always use an ovenproof container in the oven, never use plastic or
cardboard containers in the oven.
4
Clean the heating pipe periodically.
5
Never use glass or ceramic pans or lids.
6
DO NOT let juices run to the bottom of the oven. Use the Crumb Tray when cooking.
7
Set the temperature as suggested by the recipe or as desired.
8
Securely shut the door and set the cooking time to begin operating the oven.
9
When you use the rack, please put the convex upward
10
Please don’t unplug the power cord when the oven nishes working, the fan will stop
delay working 1 min.
CAUTION
EN-09
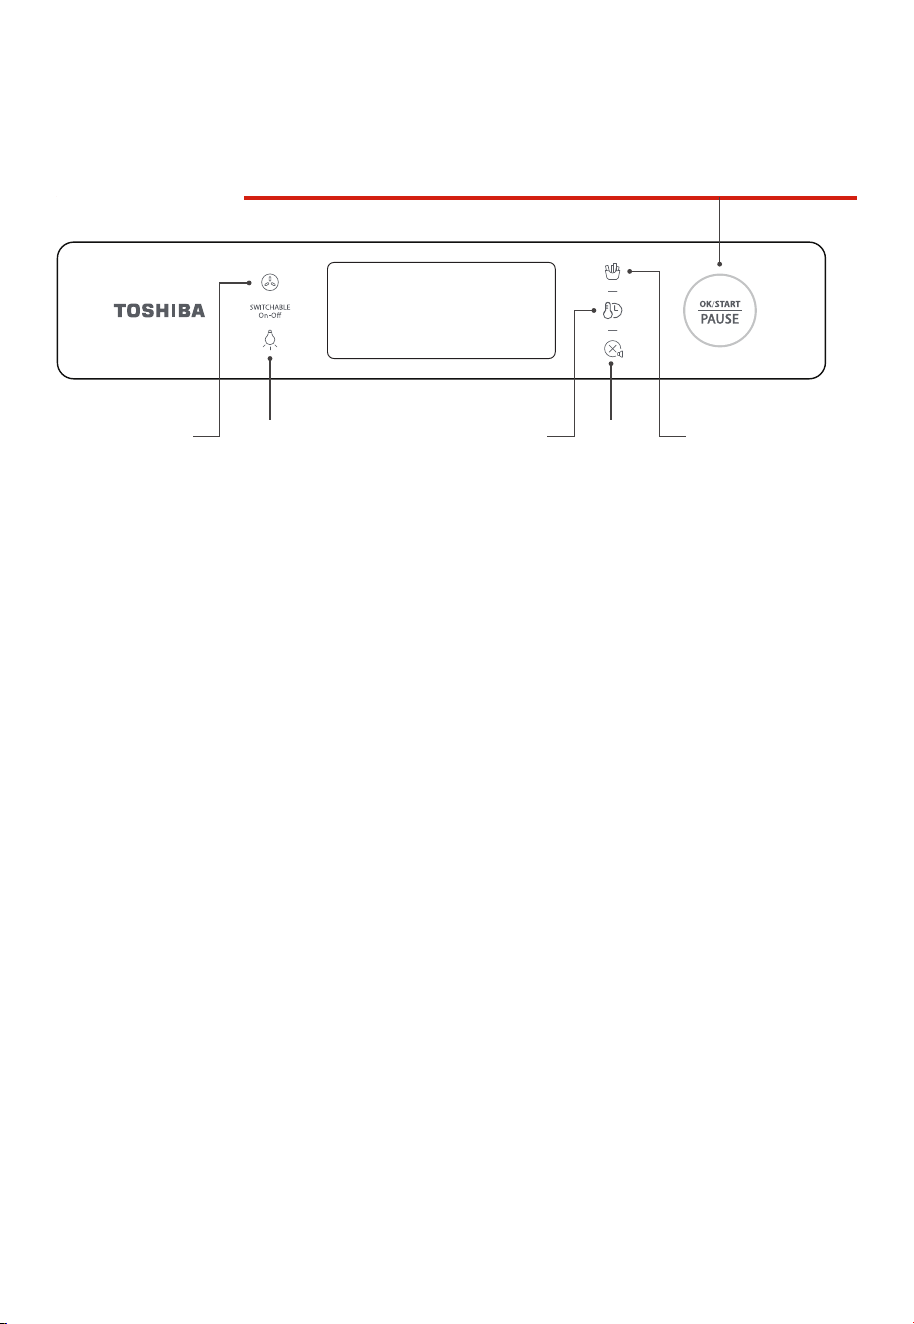
Control panel
Fan for
convection
button
Light button Time/ Temperature
button
Start/Pause knob
Back/
Cancel/
Mute
button
Airfry menu button
HOW TO USE
EN-10
When the oven is electried, the buzzer will ring once. The default function is AIRFRY. In the
process of cooking , you can press " OK/START/PAUSE " to pause cooking.
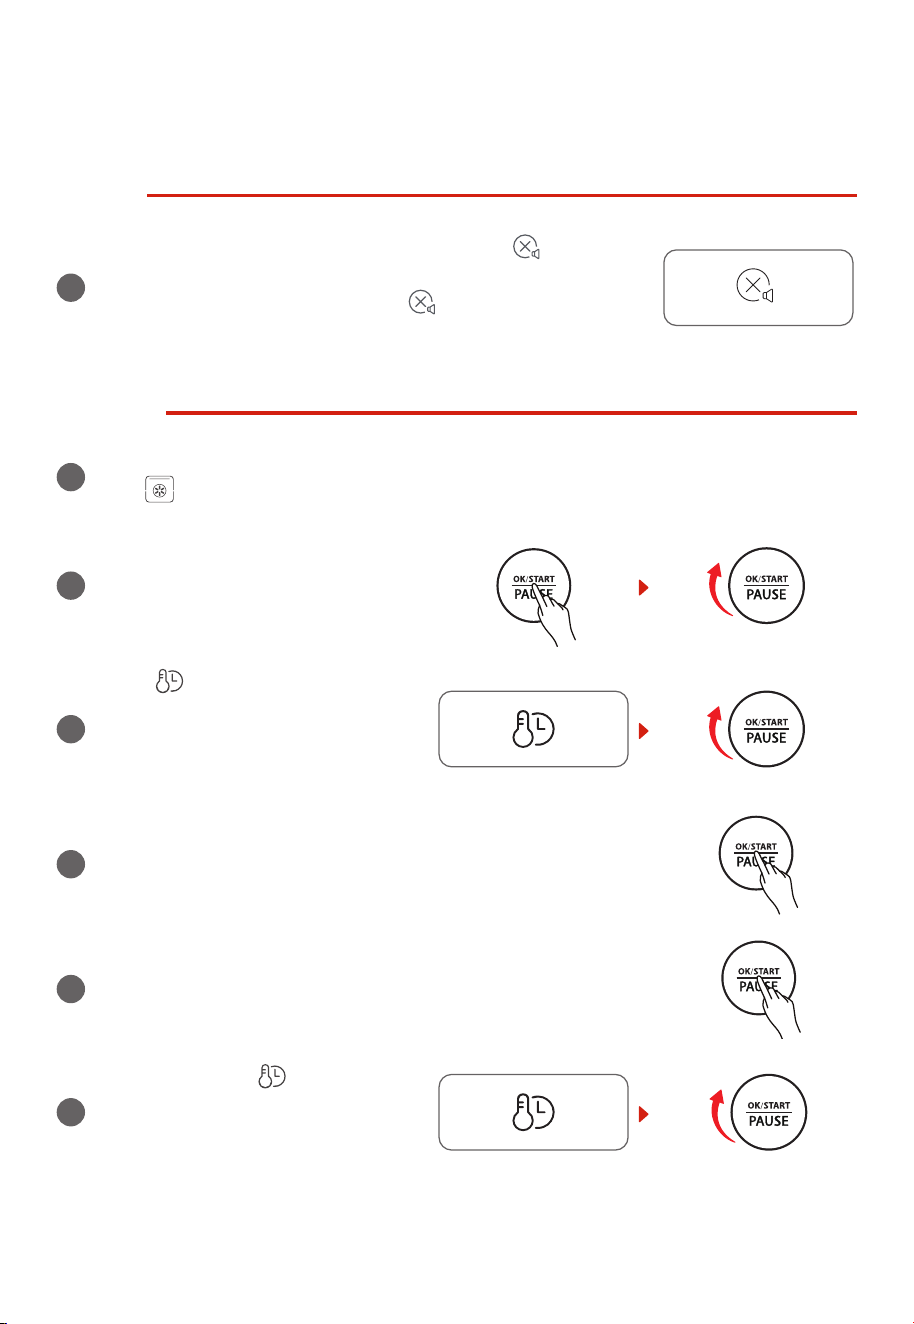
MUTE
1
When you want the oven to go silent, long press “ ” for 3
seconds. The display screen will show “oFF”. Then the machine will
be in the mute function. Long press “ ” 3 seconds, the mute
function will be canceled. The display screen will show “on”.
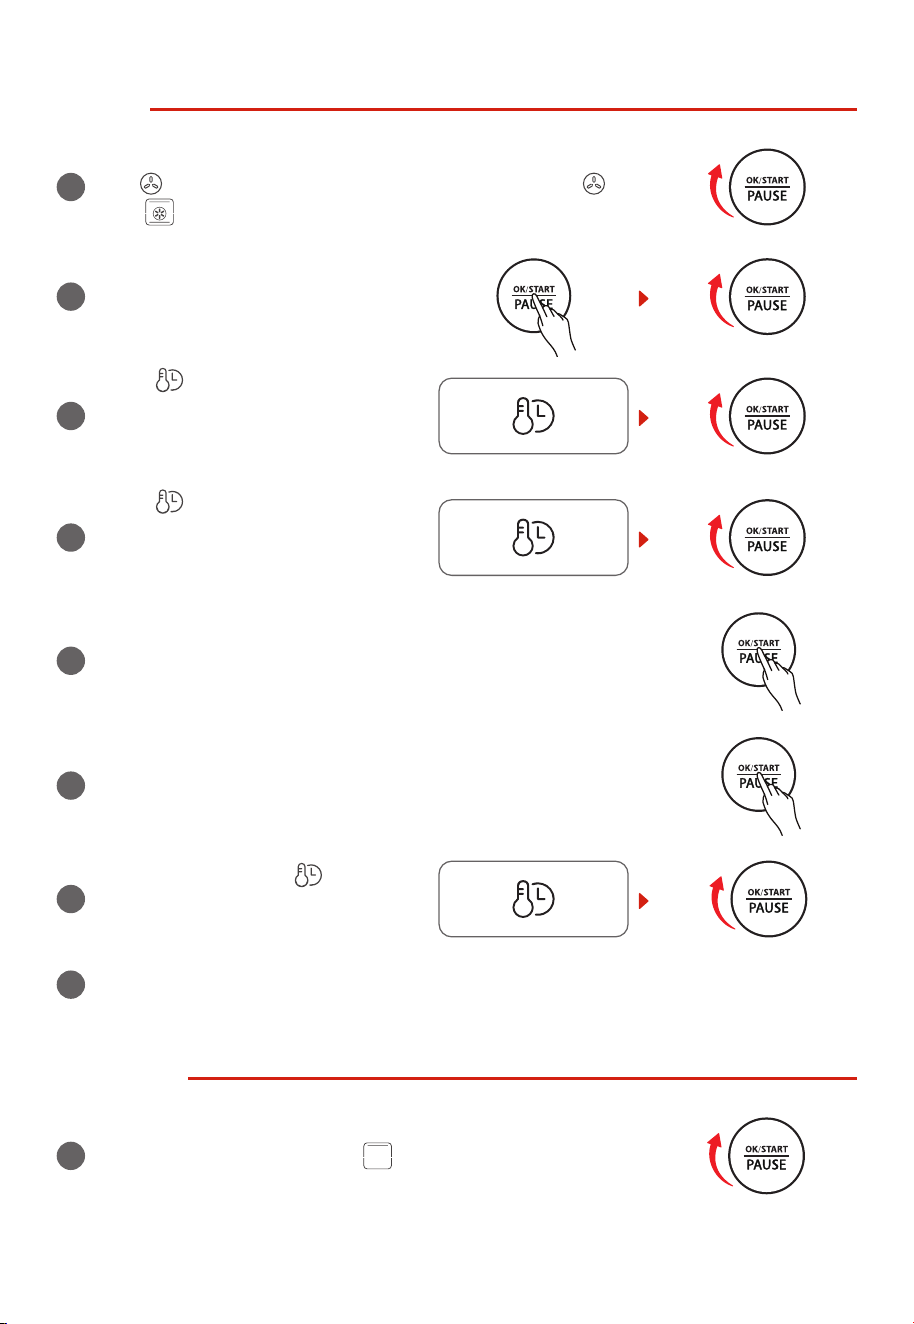
AIRFRY
1
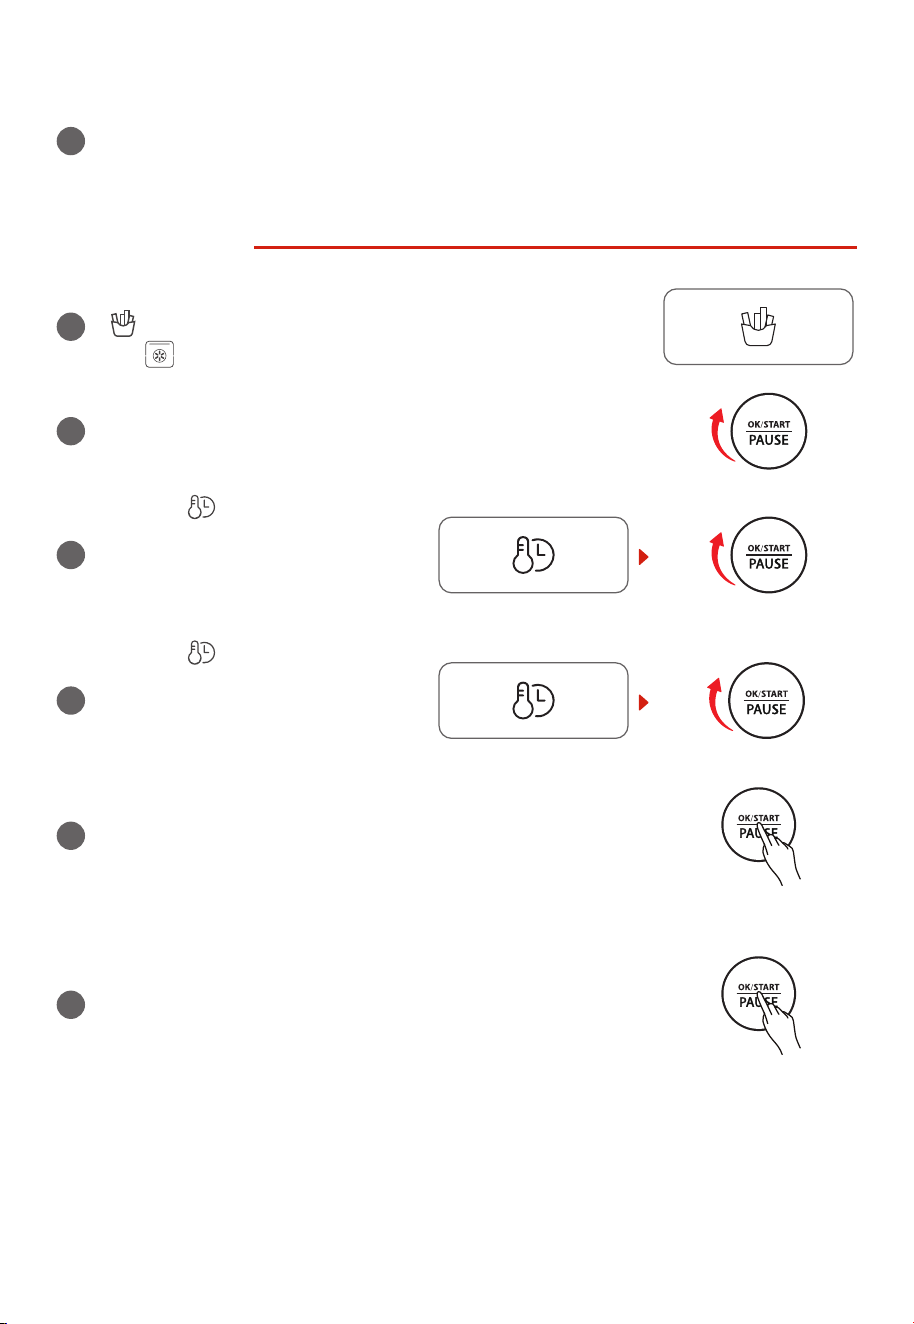
Power on to enter initial state, the default function is AirFry. The screen displays “AIRFRY”
and “ ”.
2
Press and rotate “OK/START/PAUSE”
knob to adjust the temperature. The
default temperature is 400°F. This
temperature is the cooking temperature
after preheating.
3
Press “ ” button, rotate
“OK/START/PAUSE” knob to adjust
cooking time. The default cooking time
is 15 minutes. This time is the cooking
time after preheating.
4
Press “OK/START/PAUSE” button to preheat.
5
After preheating, put the food into the cooking machine and
close the door. Press the “OK/START/PAUSE” button to start
cooking.
6
You can press the “ ” button and
rotate the “OK/START/PAUSE” knob to
adjust the temperature and the time
during cooking process.
EN-11
7
After the cooking nishes, the machine will beep 3 times and the display screen will show
“End”. Pay attention to the high temperature of both the food and the machine when you
take out the food.
AIRFRY MENU
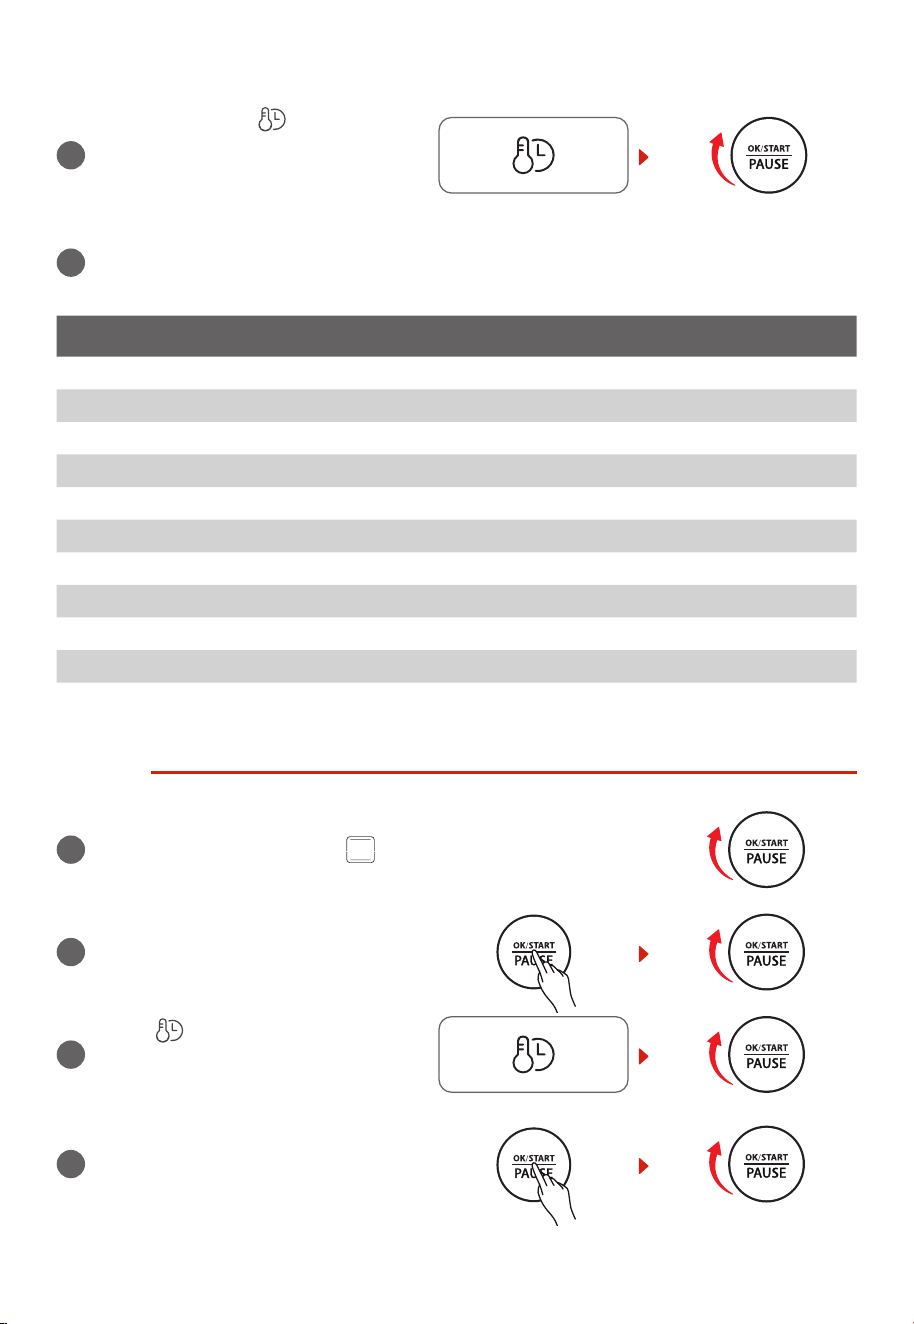
1
When the function is AirFry, press the
“ ” button once, it will into the AirFry menu. “ AIRFRY”, A01”
and “ ” will display on the display screen.
2
Rotate the “OK/START/PAUSE” knob and you can choose
functions from A01-A11 in the menu. The default function is
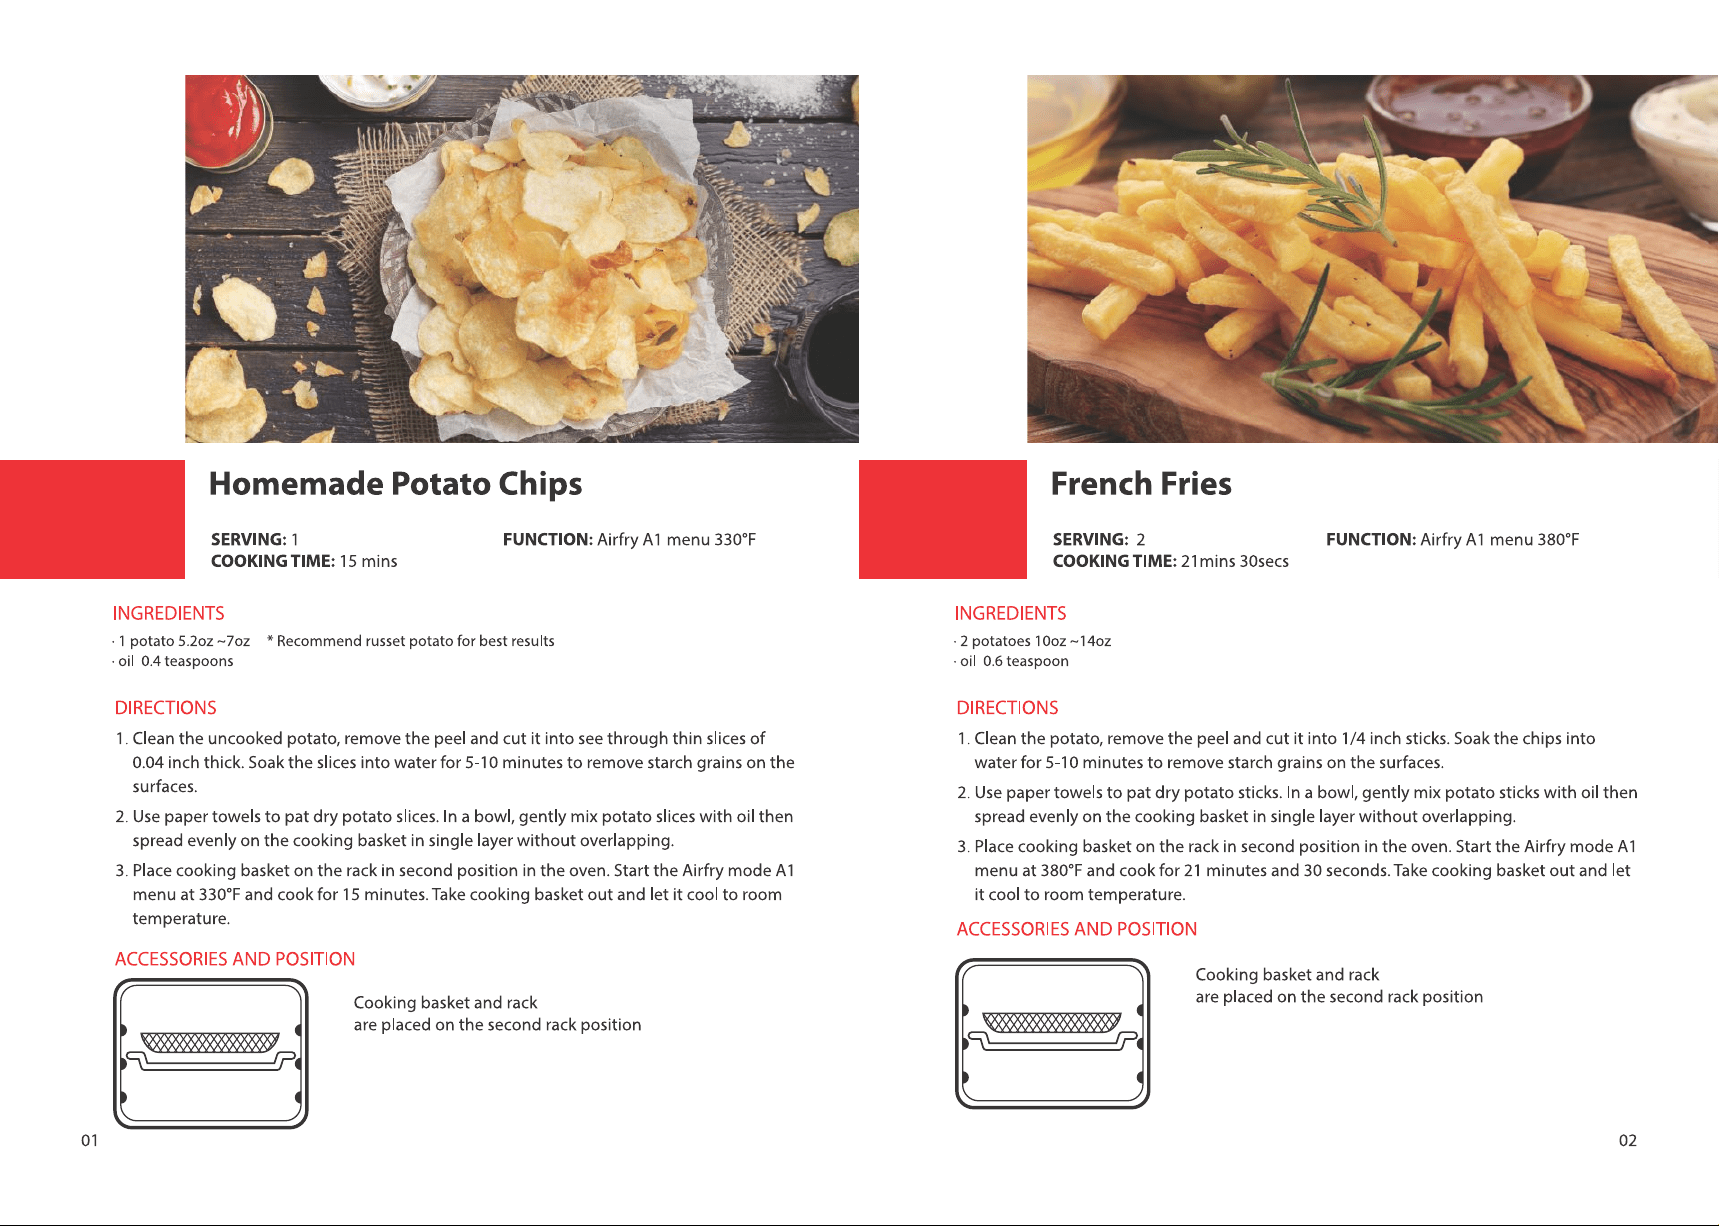
A01 (Frozen French fries).
3
Press the “ ” button and rotate the
“OK/START/PAUSE” knob to adjust the
temperature. The default temperature
of A01 is 400˚F. This temperature is the
cooking temperature after preheating.
4
Press the “ ” button and rotate the
“OK/START/PAUSE” knob to set the
cooking time. The default cooking time
of A01 is 18 minutes. This time is the
cooking time after preheating.
5
Press the “OK/START/PAUSE” button to preheat.( A01/A11 does
not need to preheat)
6
After preheating, put the food into the cooking machine and
close the door.
Press the “OK/START/PAUSE” button to start cooking. (If
A01 is selected, put french fries in the cooking basket. It is
recommended to use the default temperature and cooking
time, or you can adjust the temperature and cooking time after
start. If A04 is selected, the buzzer will sound 3 times to remind
you to turn over when there is 10min left.)
EN-12
7
You can press the “ ” button and
rotate the “OK/START/PAUSE” knob to
adjust the temperature and the time
during cooking process.
8
After the cooking nishes, the machine will beep 3 times and the display screen will show
“End”. Pay attention to the high temperature of both the food and the machine when you
take out the food.
DISPLAY AIR FRY MENU
A01 Frozen French fries
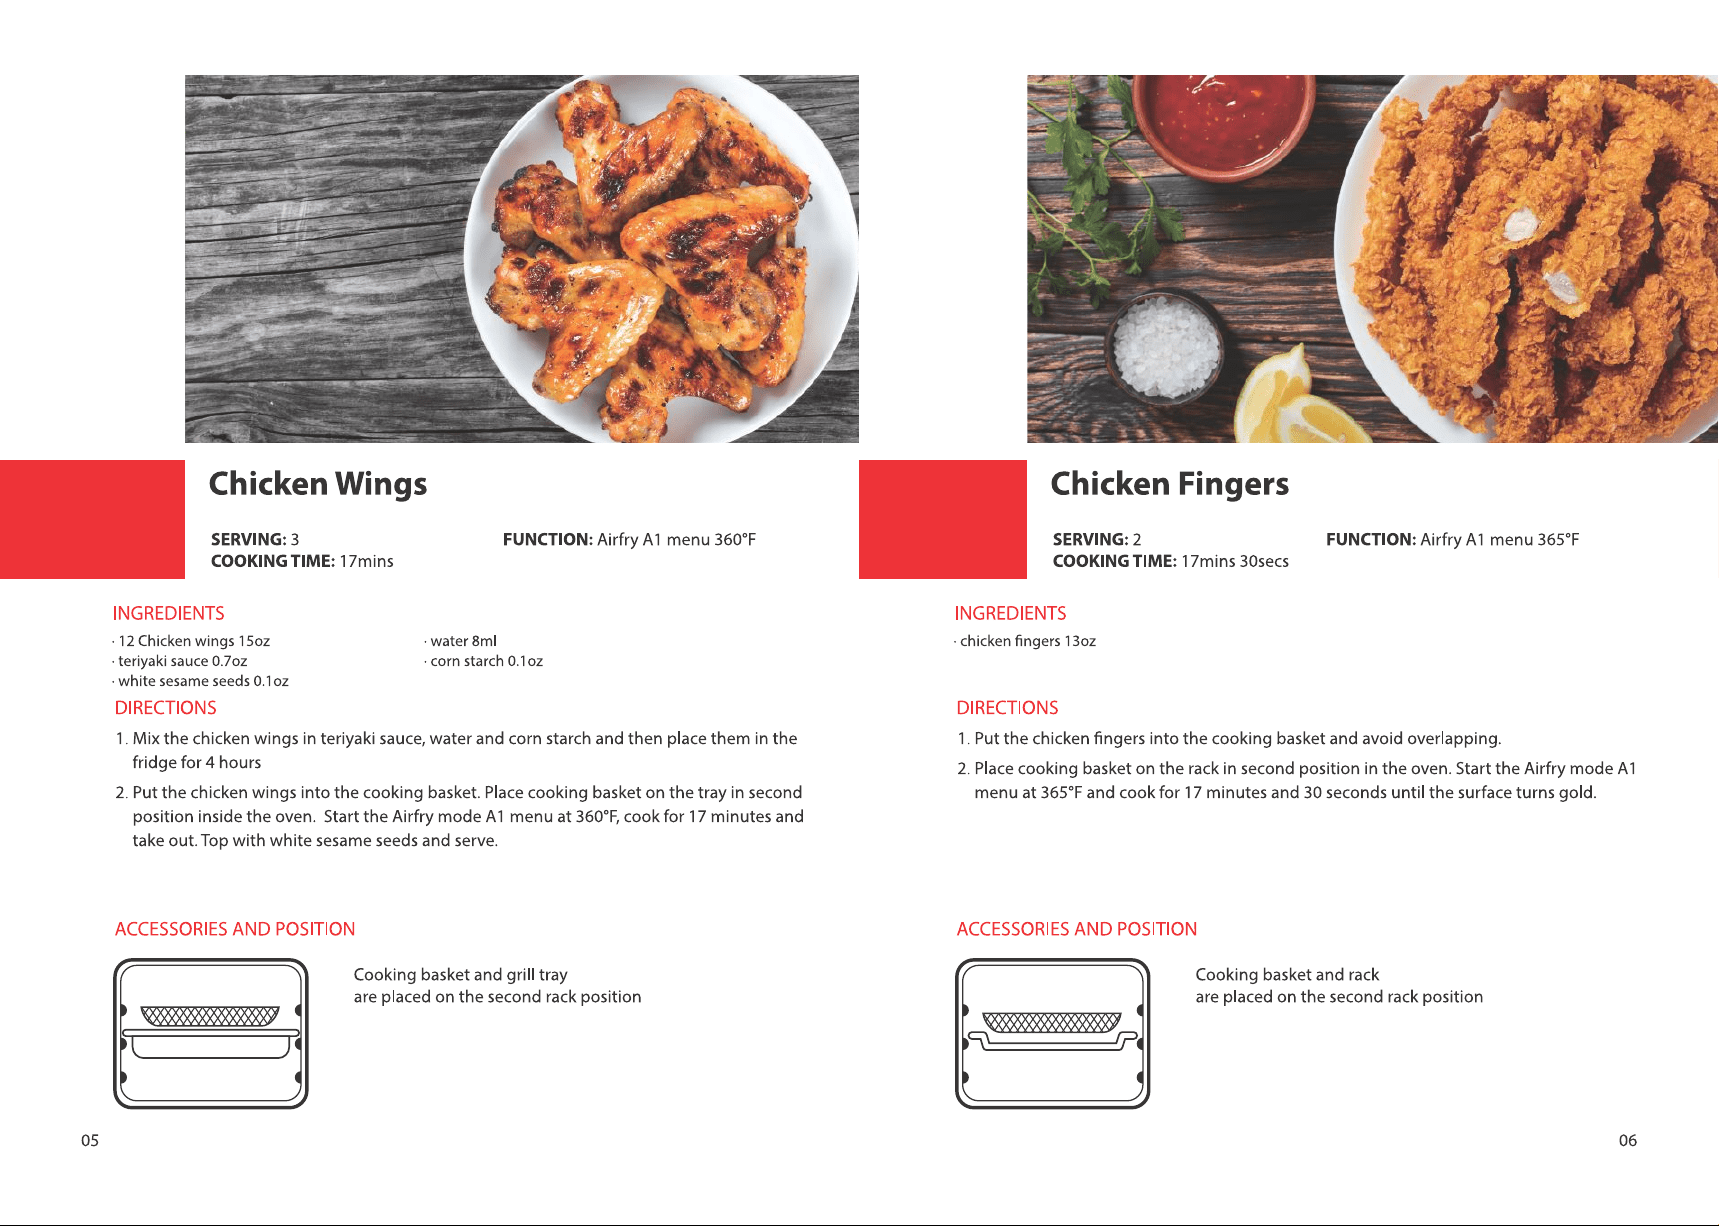
A02 Chicken wings
A03 Chicken nuggets
A04 Chicken leg
A05 Cod llets
A06 Fried sh llets
A07 Squid rings
A08 Potato cheese strips
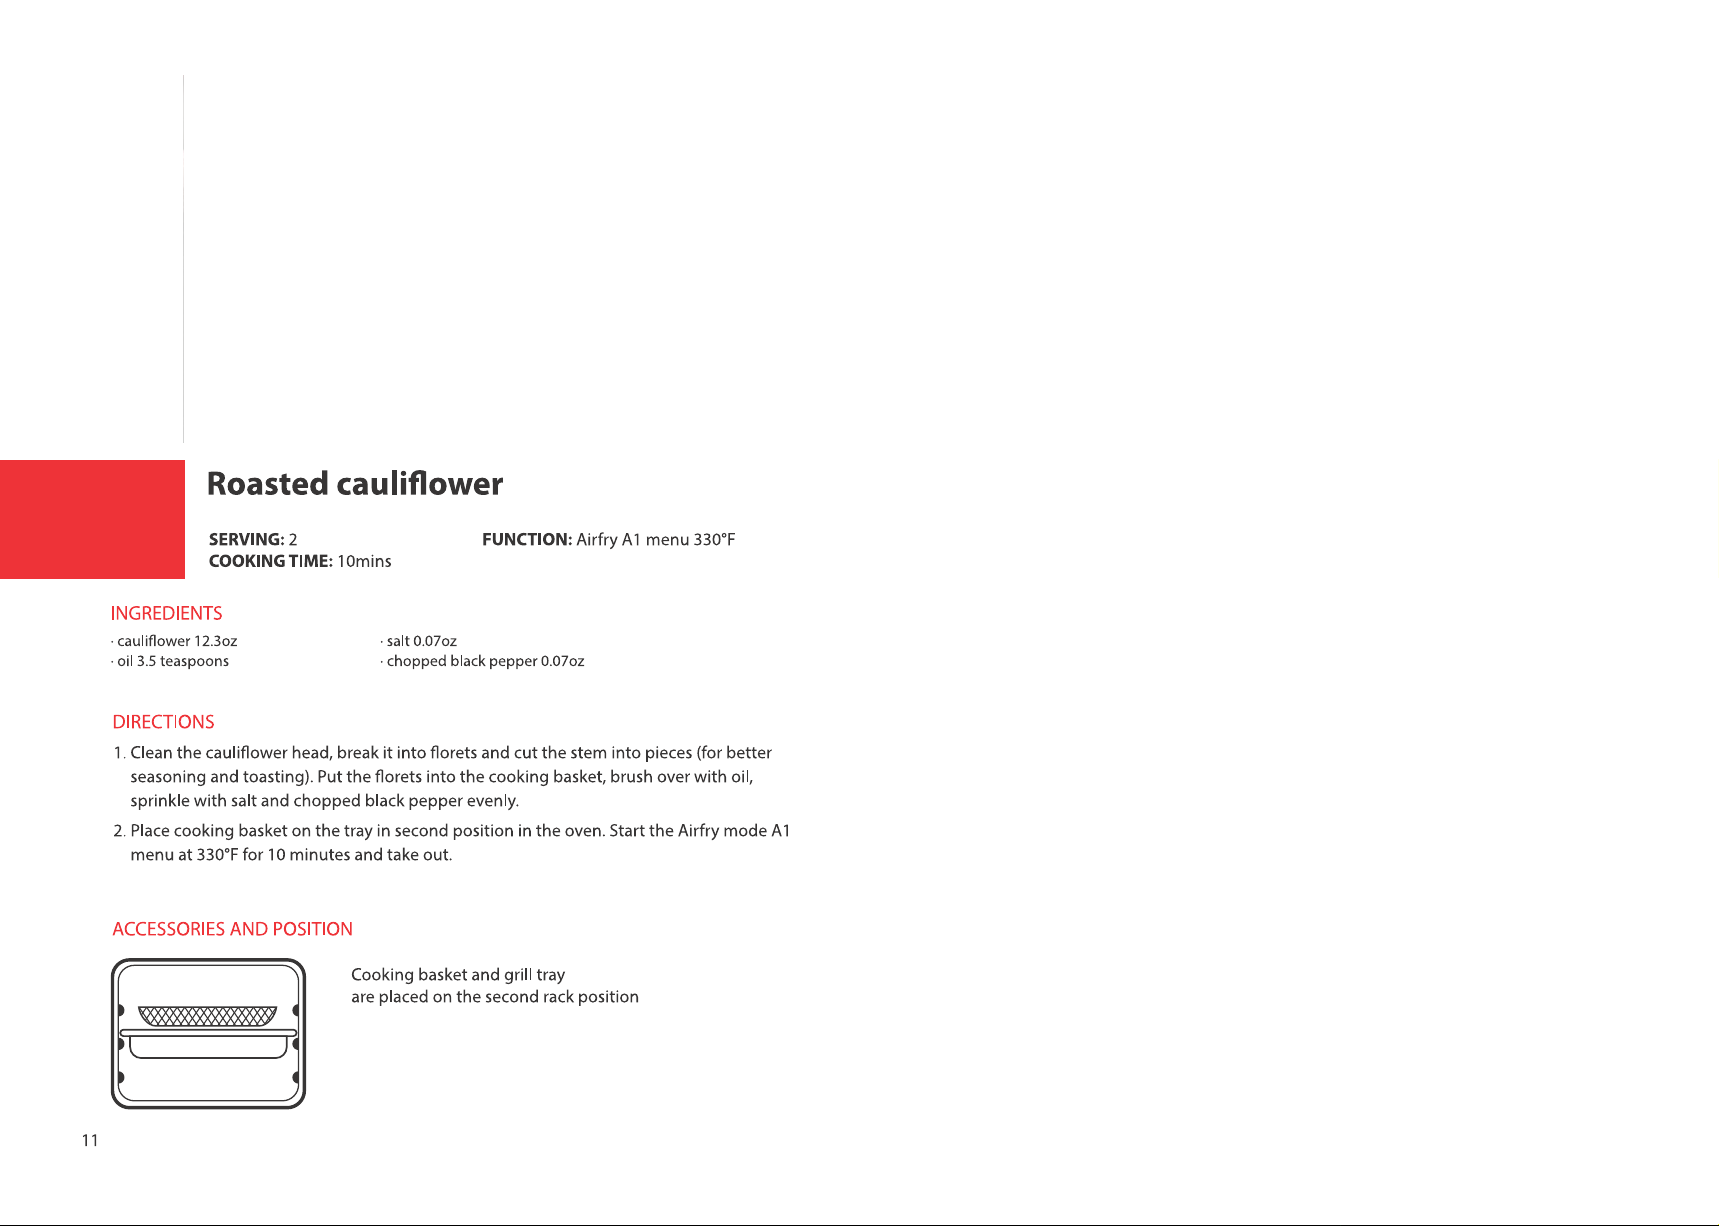
A09 Vegetables
A10 Potato wedges
A11 Spring rolls
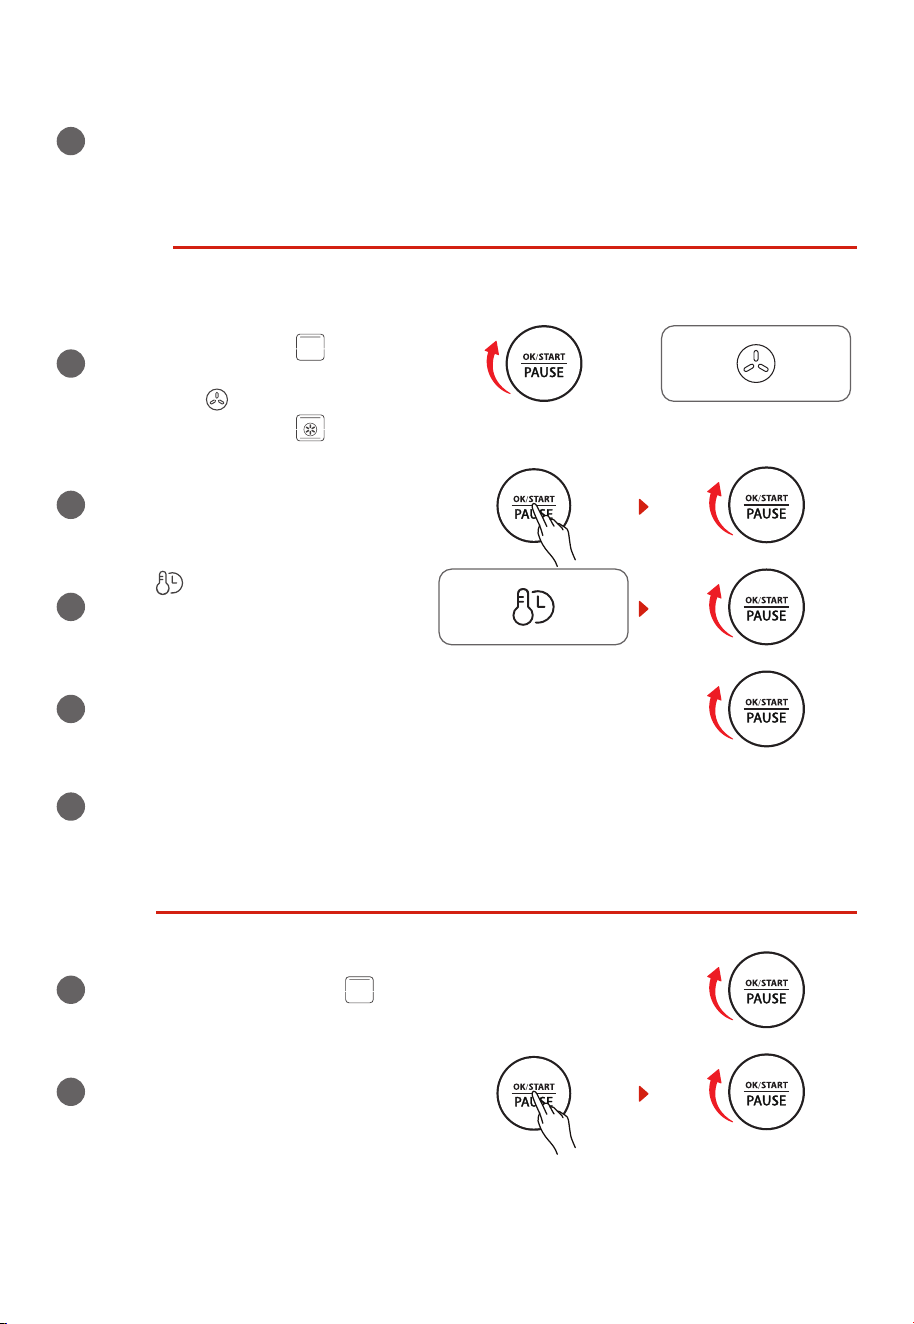
TOAST
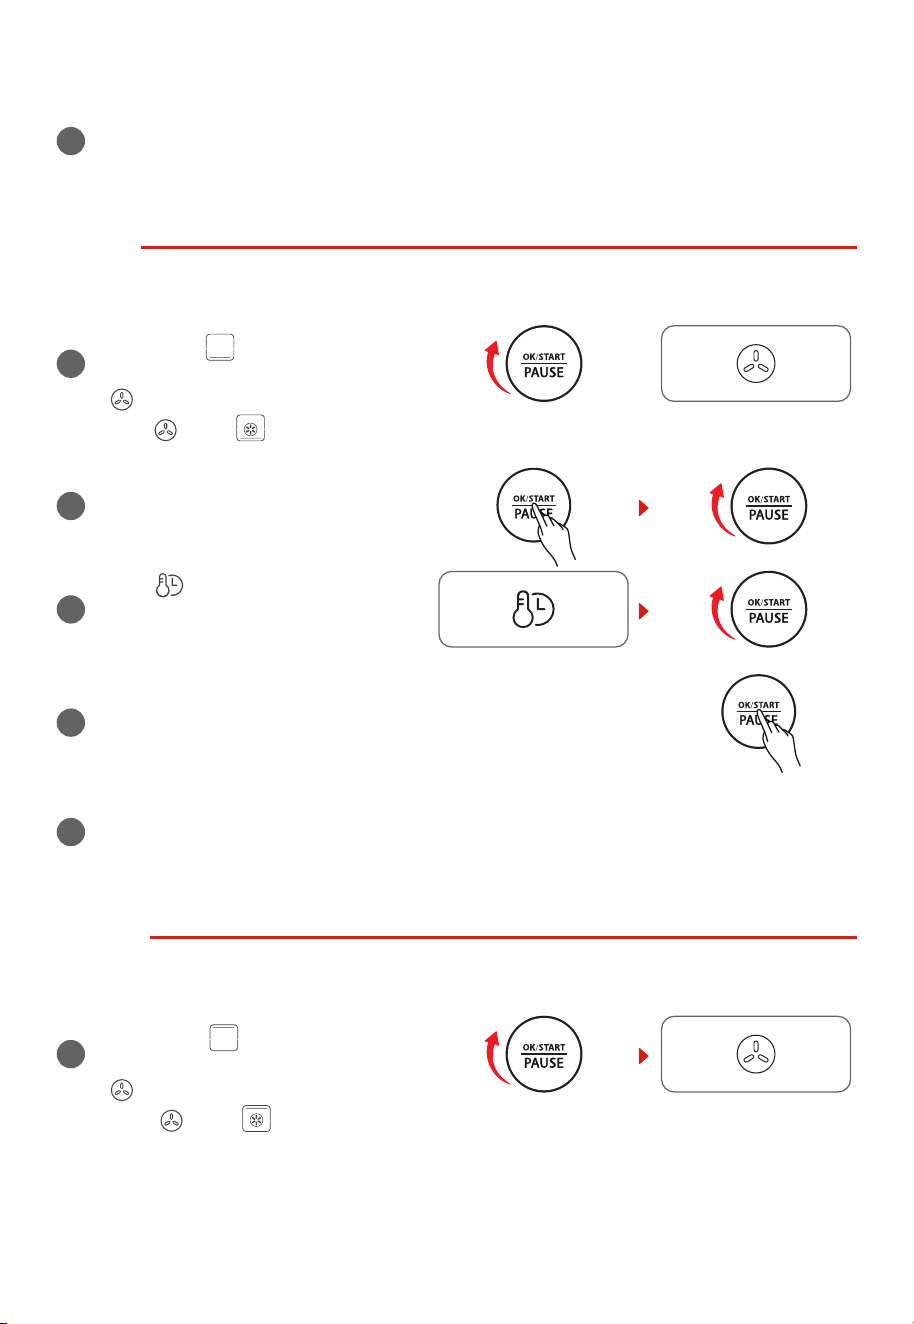
1
Rotate the “OK/START/PAUSE” knob to the right once. The
screen displays “TOAST” and “ ”. The oven will enter the
TOAST function.
2
Press and rotate the “OK/START/PAUSE”
knob to set the quantity of bread. The
default value is 4.
3
Press “ ” button, rotate “OK/START/
PAUSE” knob to set power level. The
default level is 4.
4
Press “OK/START/PAUSE” to start
cooking. The default temperature is
450˚F. The temperature and time can’t
be adjusted during cooking.
EN-13
5
The buzzer will sound 3 times to remind you when cooking is nished, the screen displays
“End”. Always pay attention when taking out food, because the food and oven are very
hot.
BAKE
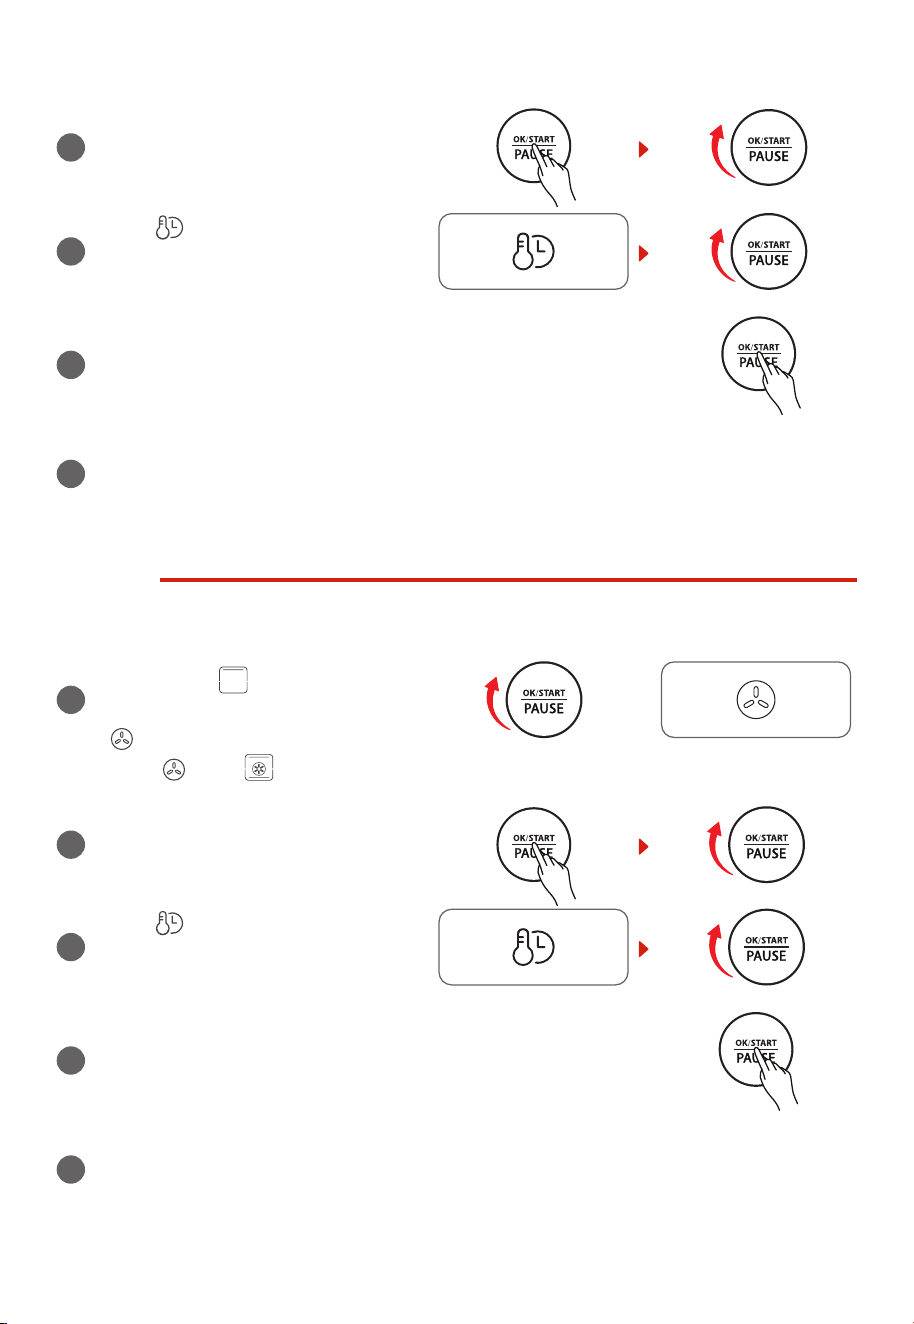
1
Rotate the “OK/START/PAUSE” knob
to the right twice. The screen displays
“BAKE” and “ ”and the fan is off
(default). You can choose to turn on fan
“ ”. After that, the screen displays
“BAKE ” and “ ”.
or
2
Press and rotate the “OK/START/PAUSE”
knob to set temperature. The default
temperature is 350°F.
3
Press “ ” button, rotate “OK/START/
PAUSE” knob to set cooking time. The
default cooking time is 25min.
4
Press “OK/START/PAUSE” to start cooking.
5
The buzzer will sound 3 times to remind you when cooking is nished, the screen displays
“End”. Always pay attention when taking out food, because the food and oven are very
hot.
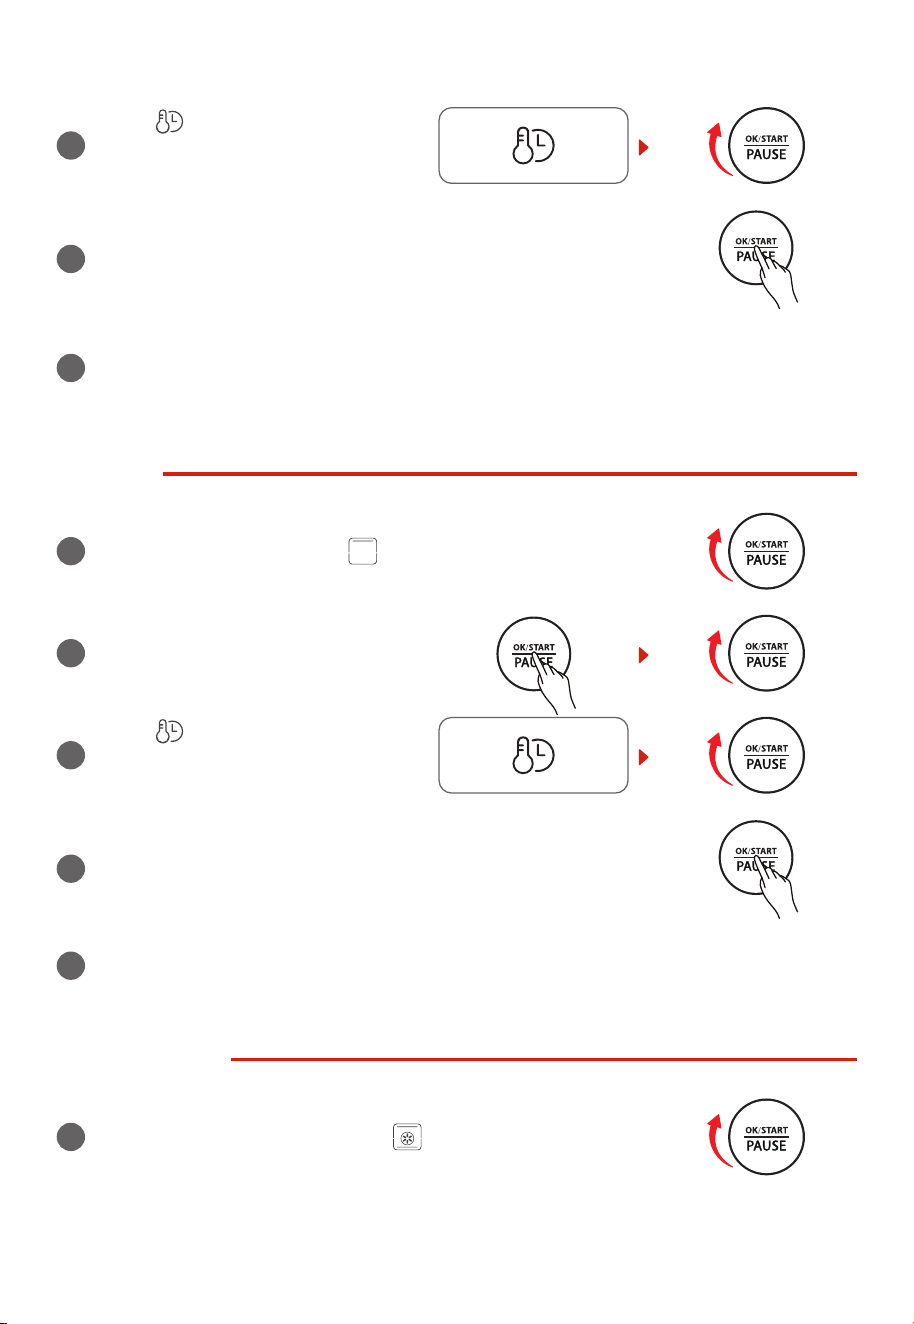
BROIL
1
Rotate the “OK/START/PAUSE” knob
to the right thrice, the screen displays
“BROIL” and “ ” and the fan is off
(default). You can choose to turn on fan
“ ”. After that, the screen displays
“BROIL ” and “ ”.
EN-14
2
Press and rotate “OK/START/PAUSE”
knob to set temperature. The default
temperature is 350°F.
3
Press “ ” button, rotate “OK/START/
PAUSE” knob to set cooking time. The
default cooking time is 10min.
4
Press “OK/START/PAUSE” to start cooking.
5
The buzzer will sound 3 times to remind you when cooking is nished, the screen displays
“End”. Always pay attention when taking out food, because the food and oven are very
hot.
ROAST
1
Rotate the “OK/START/PAUSE” knob to
the right four times, the screen displays
“ROAST” and “ ” and the fan is off
(default). You can choose to turn on fan
“ ”. After that, the screen displays
“ROAST ” and “ ”
or
2
Press and rotate “OK/START/PAUSE”
knob to set temperature. The default
temperature is 350°F.
3
Press “ ” button, rotate “OK/START/
PAUSE” knob to set cooking time. The
default cooking time is 10min.
4
Press “OK/START/PAUSE” to start cooking.
5
The buzzer will sound 3 times to remind you when cooking is nished, the screen displays
“End”. Always pay attention when taking out food, because the food and oven are very
hot.
EN-15
PIZZA
1
Rotate the “OK/START/PAUSE” knob to the right ve times, the
fan “ ” displays (default), and the screen displays “PIZZA ”
and “ ”. The oven will enter the PIZZA function.
2
Press and rotate “OK/START/PAUSE”
knob to set the size of pizza (6 inches, 9
inches, and 12 inches). The default size
is 9 inches.
3
Press “ ” button, rotate the “OK/
START/PAUSE” knob to set temperature,
temperature ashes. The default
temperature is 330°F for 9 inches.
4
Press “ ” button, rotate “OK/START/
PAUSE” knob to adjust cooking time,
then the time ashes. The default
cooking time for 9 inches is 11min30sec.
5
Press “OK/START/PAUSE” to start preheating, and preheat icon
ashes.
6
After preheating, put the food in and close the oven door. Press
“OK/START/PAUSE” to start cooking.
7
During cooking, press “ ” and
rotate “OK/START/PAUSE” to adjust
temperature and cooking time.
8
The buzzer will sound 3 times to remind you when cooking is nished, the screen displays
“End”. Always pay attention when taking out food, because the food and oven are very hot.
COOKIES
1
Rotate the “OK/START/PAUSE” knob to the right six times, the
screen displays “COOKIES” and “ ”, the oven will enter COOKIES
function.

EN-16
2
Press and rotate “OK/START/PAUSE”
knob to set temperature. The default
temperature is 375˚F.
3
Press “ ” button, rotate “OK/START/
PAUSE” knob to set cooking time. The
default cooking time is 10min.
4
Press “OK/START/PAUSE” to start preheating, and preheat icon
ashes.
5
After preheating, put the food in and close the oven door. Press
“OK/START/PAUSE” to start cooking.
6
The buzzer will sound 3 times to remind you when cooking is nished, the screen displays
“End”. Always pay attention when taking out food, because the food and oven are very
hot.
BAGEL
1
Rotate the “OK/START/PAUSE” knob to the right seven times, the
screen displays “BAGEL” and “ ”. The oven will enter BAGEL
function.
2
Press and rotate “OK/START/PAUSE”
knob to set the quantity (2, 4 and 6). The
default value is 4.
3
Press “ ” button, rotate “OK/START/
PAUSE” knob to set power level. The
default power level is 4.
4
Press “OK/START/PAUSE” to start cooking. The default temperature/
cooking time is 400˚F/4min30sec. The cooking time is adjustable
and the temperature is not adjustable.
EN-17
5
The buzzer will sound 3 times to remind you when cooking is nished, the screen displays
“End”. Always pay attention when taking out food, because the food and oven are very
hot.
REHEAT
1
Rotate the “OK/START/PAUSE” knob
to the right eight times, the screen
displays “REHEAT” and “ ” and the
fan is off (default). You can choose to
turn on fan “ ”. After that, the screen
displays “REHEAT” and “ ”.
or
2
Press and rotate “OK/START/PAUSE”
knob to set temperature. The default
temperature is 350˚F.
3
Press “ ” button, rotate “OK/START/
PAUSE” knob to set cooking time. The
default cooking time is 3min.
4
Press “OK/START/PAUSE” to start cooking.
5
The buzzer will sound 3 times to remind you when cooking is nished, the screen displays
“End”. Always pay attention when taking out food, because the food and oven are very
hot.
WARM
1
Rotate the “OK/START/PAUSE” knob to the right nine times, the
screen displays “WARM” and “ ”. The oven will enter WARM
function.
2
Press and rotate “OK/START/PAUSE”
knob to set temperature. The default
temperature is 180˚F.
EN-18
3
Press “ ” button, rotate “OK/START/
PAUSE” knob to set cooking time. The
default cooking time is 1hour.
4
Press “OK/START/PAUSE” to start working.
5
The buzzer will sound 3 times to remind you when cooking is nished, the screen displays
“End”. Always pay attention when taking out food, because the food and oven are very
hot.
PROOF
1
Rotate the “OK/START/PAUSE” knob to the right ten times, the
screen displays “PROOF” and “ ”. The oven will enter PROOF
function.
2
Press and rotate “OK/START/PAUSE”
knob to set temperature. The default
temperature is 100˚F.
3
Press “ ” button, rotate “OK/START/
PAUSE” knob to set cooking time. The
default cooking time is 50min.
4
Press “OK/START/PAUSE” to start working.
5
The buzzer will sound 3 times to remind you when cooking is nished, the screen displays
“End”.
SLOW COOK
1
Rotate the “OK/START/PAUSE” knob to the right eleven times, the
screen displays “SLOW COOK” and “ ”. The oven will enter SLOW
COOK function.

EN-19
2
Press and rotate “OK/START/PAUSE”
knob to set temperature. The default
temperature is 200˚F.
3
Press “ ” button, rotate “OK/START/
PAUSE” knob to set cooking time. The
default cooking time is 1hour.
4
Press “OK/START/PAUSE” to start working.
5
The buzzer will sound 3 times to remind you when cooking is nished, the screen displays
“End”. Always pay attention when taking out food, because the food and oven are very
hot.
DEHYDRATE
1
Rotate the “OK/START/PAUSE” knob to the right twelve times, the
screen displays “DEHYDRATE” and “ ”. Then the oven will enter
DEHYDRATE function.
2
Press and rotate “OK/START/PAUSE”
knob to set temperature. The default
temperature is 150˚F.
3
Press “ ” button, rotate
“OK/START/PAUSE” knob to set cooking
time. The default cooking time is
4hours.
4
Press “OK/START/PAUSE” to start working.
5
The buzzer will sound 3 times to remind you when cooking is nished, the screen displays
“End”. Always pay attention when taking out food, because the food and oven are very
hot.
EN-20
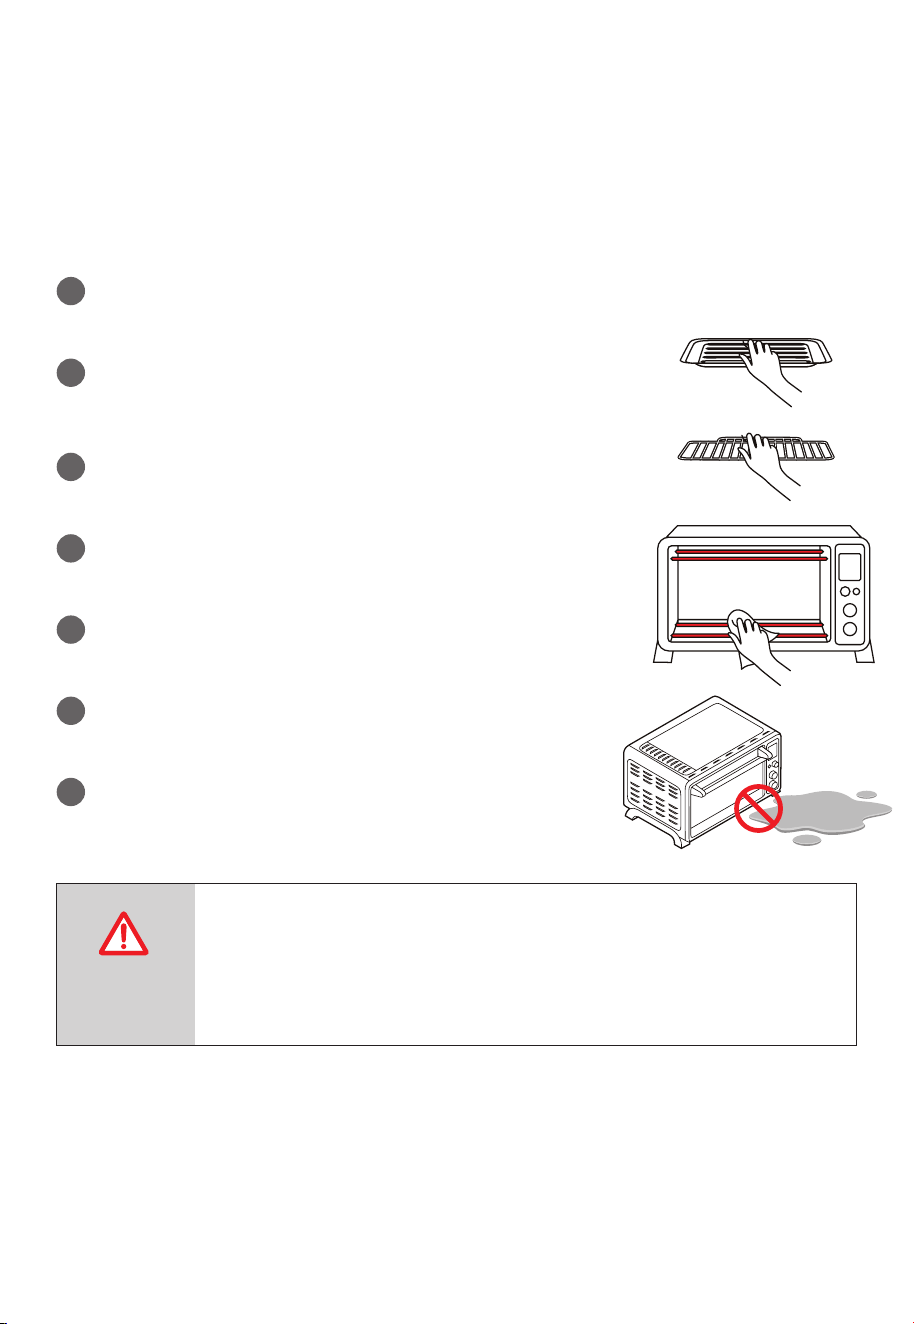
CARE AND CLEANING
With reasonable care and cleaning, your appliance will retain its appearance and remain fully
functioning for a long time. We will explain here how you should correctly care for and clean
your appliance. Do not use glass cleaners or metal/glass scrapers for cleaning.
1
Before cleaning unplug the toaster oven and allow it to cool
completely.
2
Wash all the attachments with mild, soaped water including the
rack and the grill Tray.
3
Do not use abrasive cleansers, scrubbing brushes and chemical
cleaner as this will cause damage to the non-stick coating of baking
Tray.
4
Using a wet cloth to wipe the inner of the oven.
5
To clean the door by using a wet cloth saturated with detergent
or soap.
6
Never immerse the unit in water or other liquid.
7
Any other servicing should be performed by an authorized
service representative.
Warning: Hot Surface!
Advertencia: ¡Supercie Caliente!
Avertissement: Surface Chaude!
CAUTION: HOT
SURFACE

EN-21
SPECIFICATION
MODEL TL2-AC25GZA(GR)
RATED VOLTAGE 120V~ 60Hz
POWER 1750W

EN-22
ONE YEAR LIMITED WARRANTY
This product carries a warranty stating that it will be free from defects in material and
workmanship for a period of one year from the date of purchase. This warranty is valid for the
original retail purchaser from the date of initial retail purchase and is not transferable. Keep your
original sales receipt.
IMPORTANT:
1. This warranty does not cover damages resulting from accident, misuse or abuse, lack of
reasonable care, the affixing of any attachments not provided with the product, loss of parts,
or subjecting the appliance to any but the specified voltage. ( Read directions carefully. )
2. This warranty is void if this product is ever used for other than private household purposes.
3. This warranty is void if this product is ever used outside of United State.
If service is required during the warranty period, properly pack your unit. We recommend using
the original carton and packing materials.
If additional assistance is needed, please contact customer assistance at:
customercare@us.toshiba-lifestyle.com
855-204-5313
Midea America Corp
5 Sylvan Way,
Parsippany, NJ 07054
Midea America Corp. expressly disclaims all responsibility for consequential damages or
incidental losses caused by use of the appliance. Some states do not allow this exclusion or
limitation of incidental or consequential losses so the foregoing disclaimer may not apply to you.
This warranty gives you specific legal rights, and you may also have other rights which may vary
from state to state.
The serial number can be found on the back cabinet. We suggest that you record the serial
number of your unit in the space below for future reference.
Model Number : ____________________
Serial Number : _____________________
SAVE THIS FOR YOUR RECORDS
Made in China


#
Details
Matter
Customer Assistance: 855-204-5313
Midea America Corp
5 Sylvan Way, Parsippany, NJ 07054