INSTRUCTION MANUAL
Please review this instruction manual before operating.
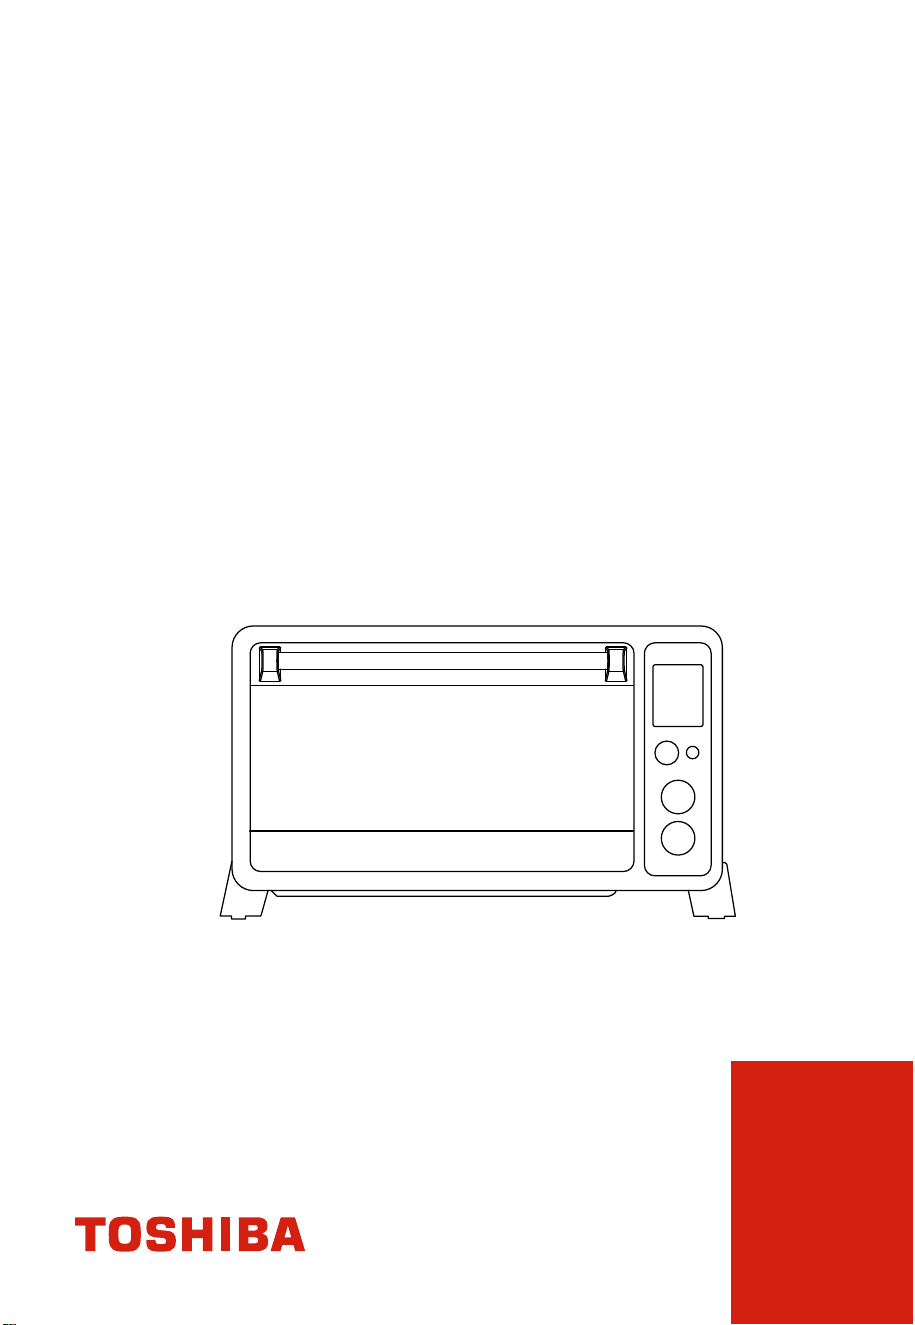
TOASTER OVEN
AC25CEW-SS-V

IMPORTANT SAFEGUARDS
BASIC SAFETY PRECAUTIONS.......................................................................................... EN-3
BEFORE FIRST USE............................................................................................................... EN-8
PRODUCT INSTRUCTION
NAMES OF PARTS..................................................................................................................EN-9
OPERATION
HOW TO USE...............................................................................................????????................????..??....??.....EN-10
FUNCTION INSTRUCTION..............................................................................................????....EN-11
BEFORE OPERATING THIS PRODUCT, READ, UNDERSTAND, AND
FOLLOW THESE INSTRUCTIONS.
BE SURE TO SAVE THIS BOOKLIST FOR FUTURE REFERENCE
NOTE
CONTENTS
EN-2
CARE AND CLEANING..........................................................................................................EN-15
SPECIFICATION.......................................................................................................................EN-15
OVEN FUNCTION..............................................................................................................????....EN-11
ROTISSERIE FUNCTION....................................................................................................????....EN-13
ROTISSERIE FUNCTION USING THE ROTISSERIE FORKS......................................EN-13
MAINTENANCE
ONE YEAR LIMITED WARRANTY ...............................................................................................EN-16
IMPORTANT SAFEGUARDS
EN-3
When using electrical appliance, basic safety precautions should
always be followed, including the following:
Read all instructions.
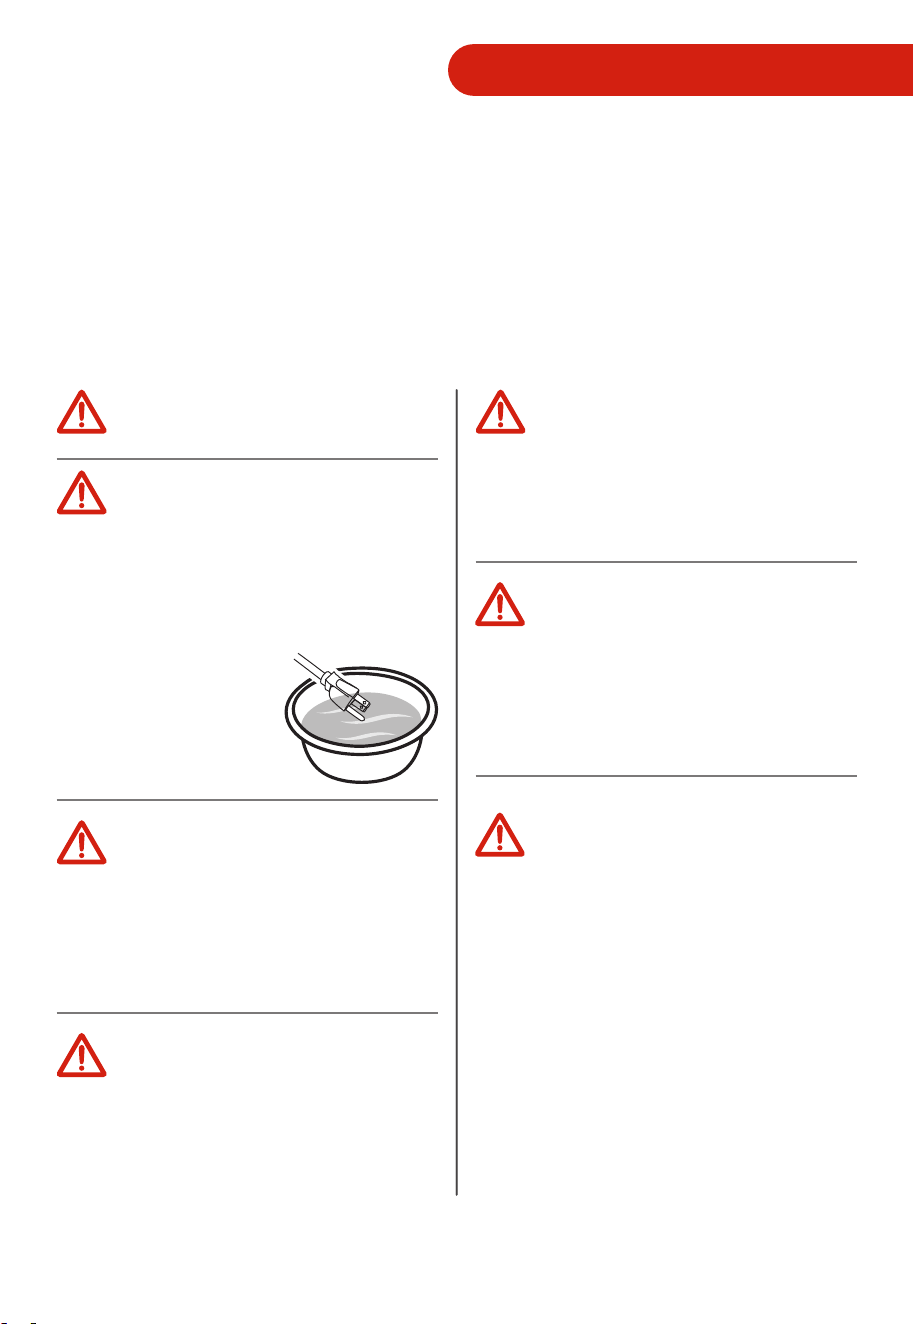
To protect against electrical
shock do not immerse
cord, plugs, or any electrical
parts in water or other
liquid.
Close supervision is
necessary when any
appliance is used by or
near children.
Unplug from outlet when
not in use and before
cleaning. Allow to cool
before putting on or taking
o parts.
The use of accessory
attachments not
recommended by the
appliance manufacturer
may cause injuries.
Extreme caution must be
used when moving an
appliance containing hot
oil or other hot liquids.
Always attach plug to
appliance rst, then plug
cord into the wall outlet.
To disconnect, turn any
control to " o ", then
remove plug from wall
outlet.
Use extreme caution when
removing tray or disposing
of hot grease.
IMPORTANT SAFEGUARDS
EN-4
Extreme caution should
be exercised when using
containers constructed
of other than metal or
glass.
Oversize foods or metal
utensils must not be
inserted in a toaster-oven
as they may create a re or
risk of electric shock.
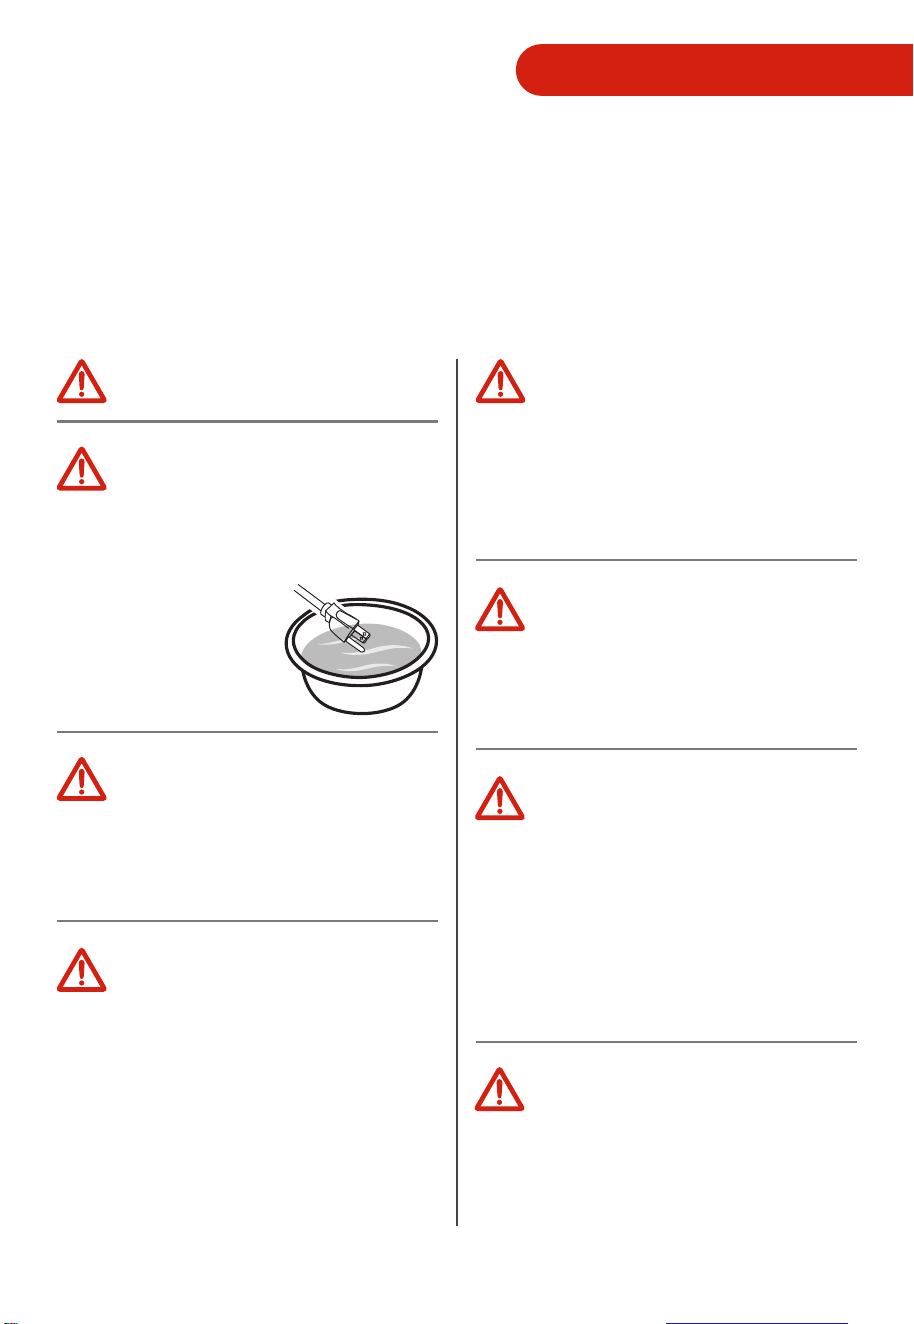
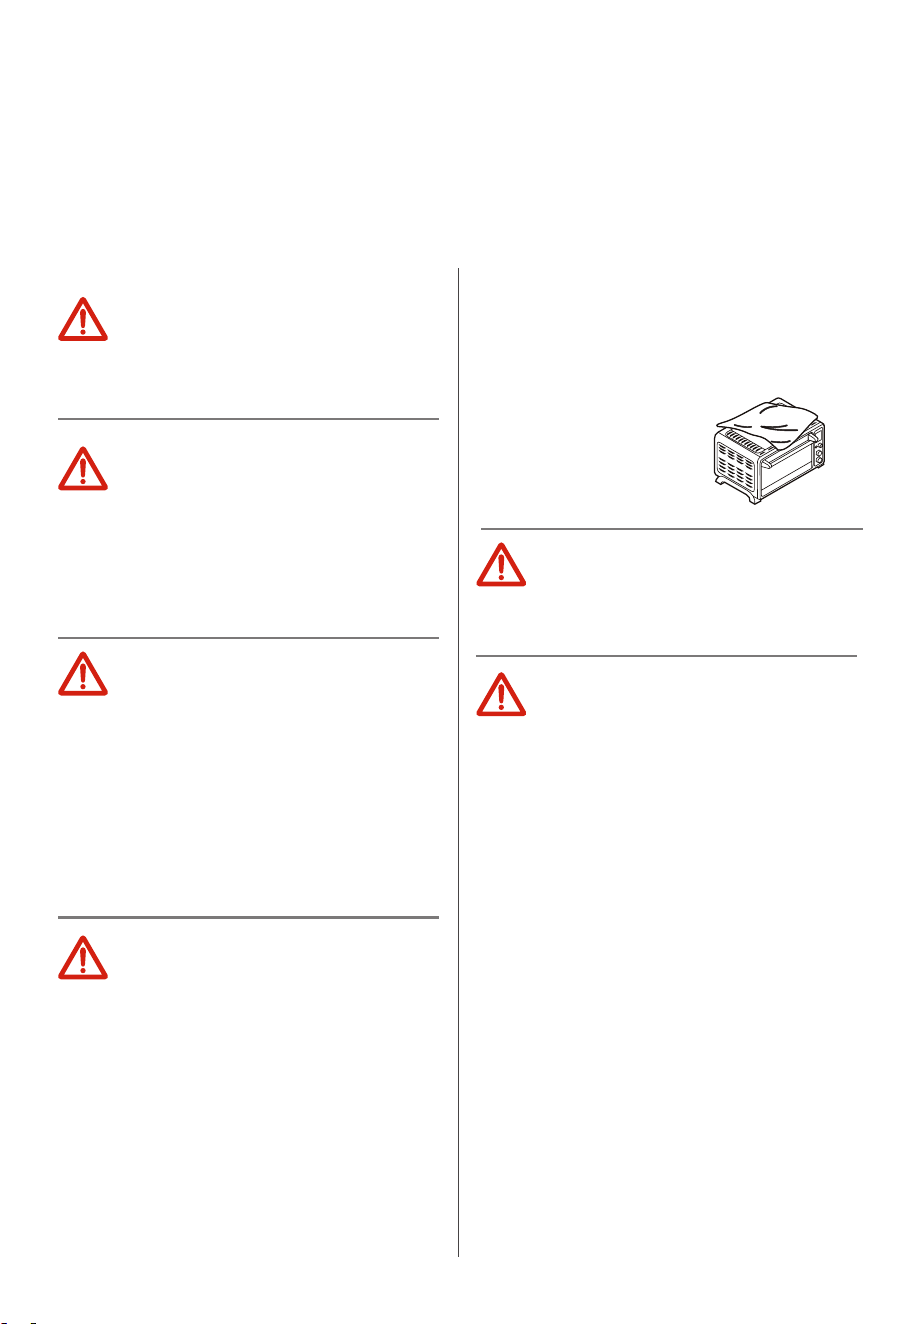
A re may occur if the
toaster-oven is covered
or touching ammable
material, including
curtains, draperies,
walls, and the like, when
in operation. Do not
store any item on top of
the appliance when in
operation.
During operation, press
"
Stop/Start" can stop
cooking.
Caution-To ensure
continued protection
against risk of electric
shock, connect to properly
grounded outlets only.
Remove plug from outlet
when the appliance is not
in use, before putting on or
taking o parts, and before
cleaning. Allow to cool
before handing.
Avoid contacting moving
parts.
For household use only.
IMPORTANT SAFEGUARDS
EN-5
IMPORTANT SAFEGUARDS
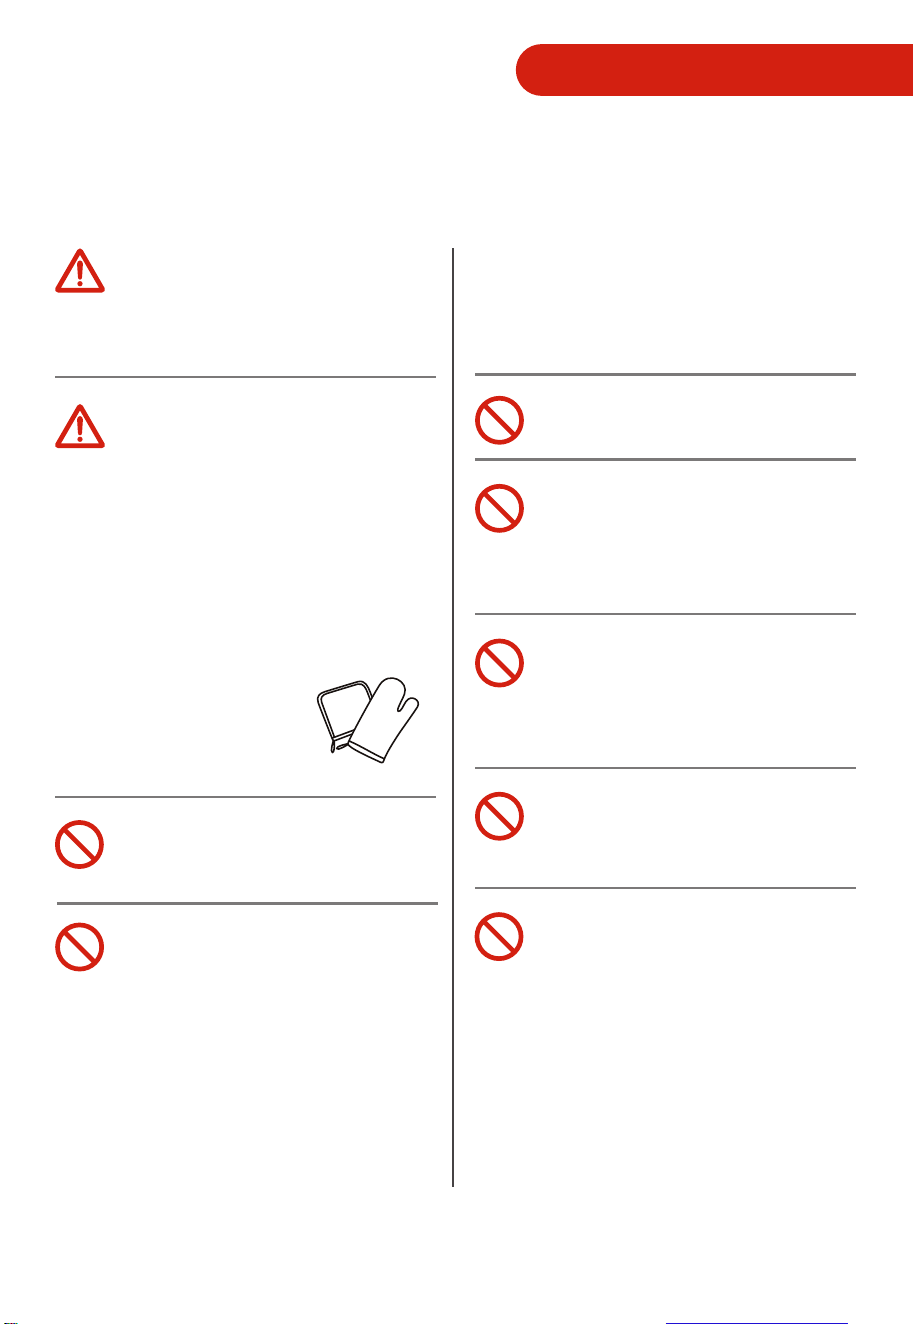
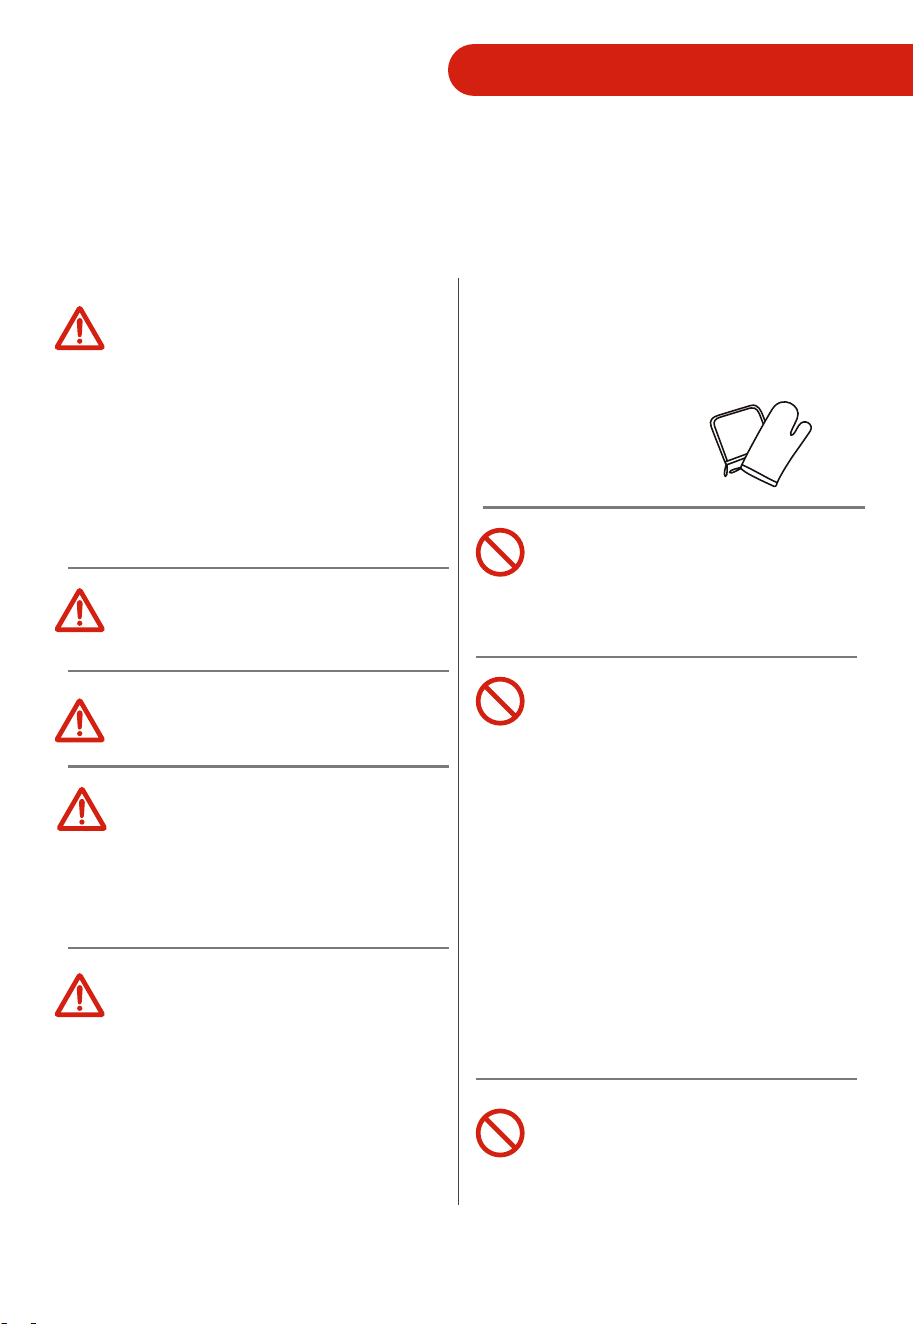
The outside of the oven,
including the door, is hot
during and after use.
Always use heat-resistant
gloves, pads, or oven
mitts when handling
hot materials, and when
placing items in or
removing items from the
oven, including trays, racks,
accessories, or containers.
Do not touch hot surfaces.
Use handles or knobs.
Do not operate any
appliance with a damaged
cord or plug or after the
appliance malfunctions
or has been damaged
in any manner. Return
appliance to the nearest
authorized service facility
for examination, repair, or
adjustment.
Do not use outdoors.
Do not let cord hang over
edge of table or counter, or
touch hot surfaces.
Do not place on or near a
hot gas or electric burner,
or in a heated oven.
Do not use appliance for
other than intended use.
Do not clean with metal
scouring pads. Pieces can
break o the pad and
touch electrical parts,
creating parts, creating a
risk of electric shock.
IMPORTANT SAFEGUARDS
SAVE THESE INSTRUCTIONS
HOUSEHOLD INDOOR USE ONLY
Do not store any materials,
other than manufacturers
recommended accessories,
in this oven when not in
use.
Do not cover crumb tray or
any part of the oven with
metal foil. This will cause
overheating of the oven.
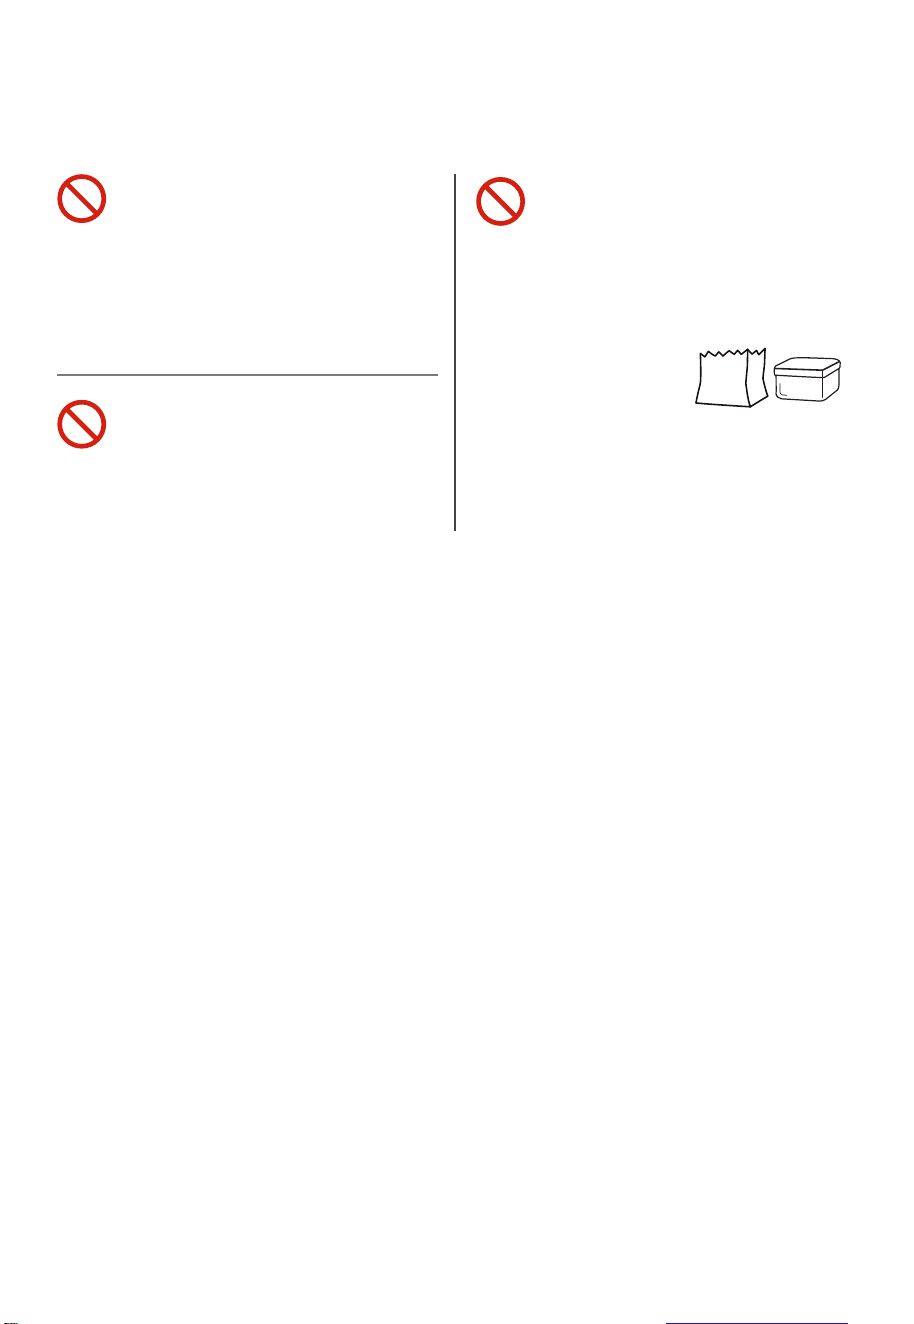
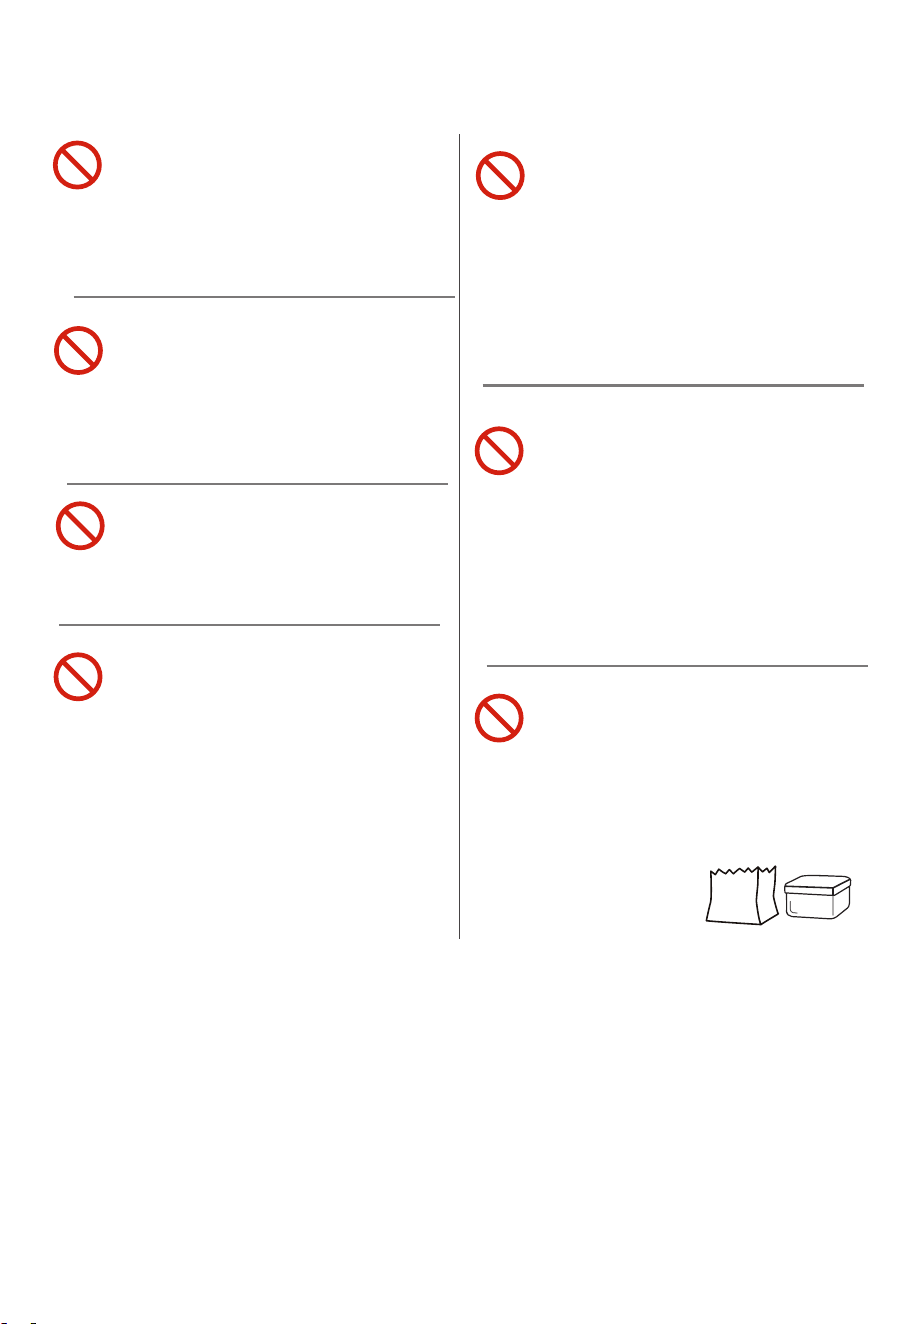
Do not place any of the
following materials in
the oven: (that is, paper,
cardboard, plastic, and the
like).
EN-6
IMPORTANT SAFEGUARDS

SHORT CORD INSTRUCTION
(DETACHABLE POWER-SUPPLY CORD)
1. A short power-supply cord (or detachable power-supply cord)
should be used to reduce the risk resulting from becoming
entangled in or tripping over a longer cord.
2. Longer detachable power-supply cords or extension cords are
available and may be used if care is exercised in their use.
3. If a longer detachable power-supply cord or extension cord is
used:
(1). The marked electrical rating of the cord set or extension
cord should be at least as great as the electrical rating of the
appliance.
(2). The cord should be arranged so that it will not drape over
the countertop or tabletop where it can be pulled on by
children or tripped over unintentionally.
If the appliance is of the grounded type, the extension cord
should be a grounding-type 3-wire cord.
EN-7

BEFORE FIRST USE
1. Remove all accessories and shipping materials packed inside
the Oven.
2. Wash the Rack and Pan in warm soapy water. Wipe the inside
of the Oven with a damp cloth or sponge. Blot dry with paper
towels to be sure the unit is dry before using.
3. Place Oven on a flat counter or other stable surface DO NOT
OPERATE ON THE SAME CIRCUIT WITH ANOTHER APPLIANCE.
4. Make sure the Crumb Tray is properly installed before using.
For the first time only, set the Temperature Knob to MAX, the
function setting on toast and the timer to 15 minutes. This will
burn off any oils still on the Oven.
The oven may smoke during this process. This is normal
for a new oven and will not last more than 10-15 minutes.
NOTA
EN-8
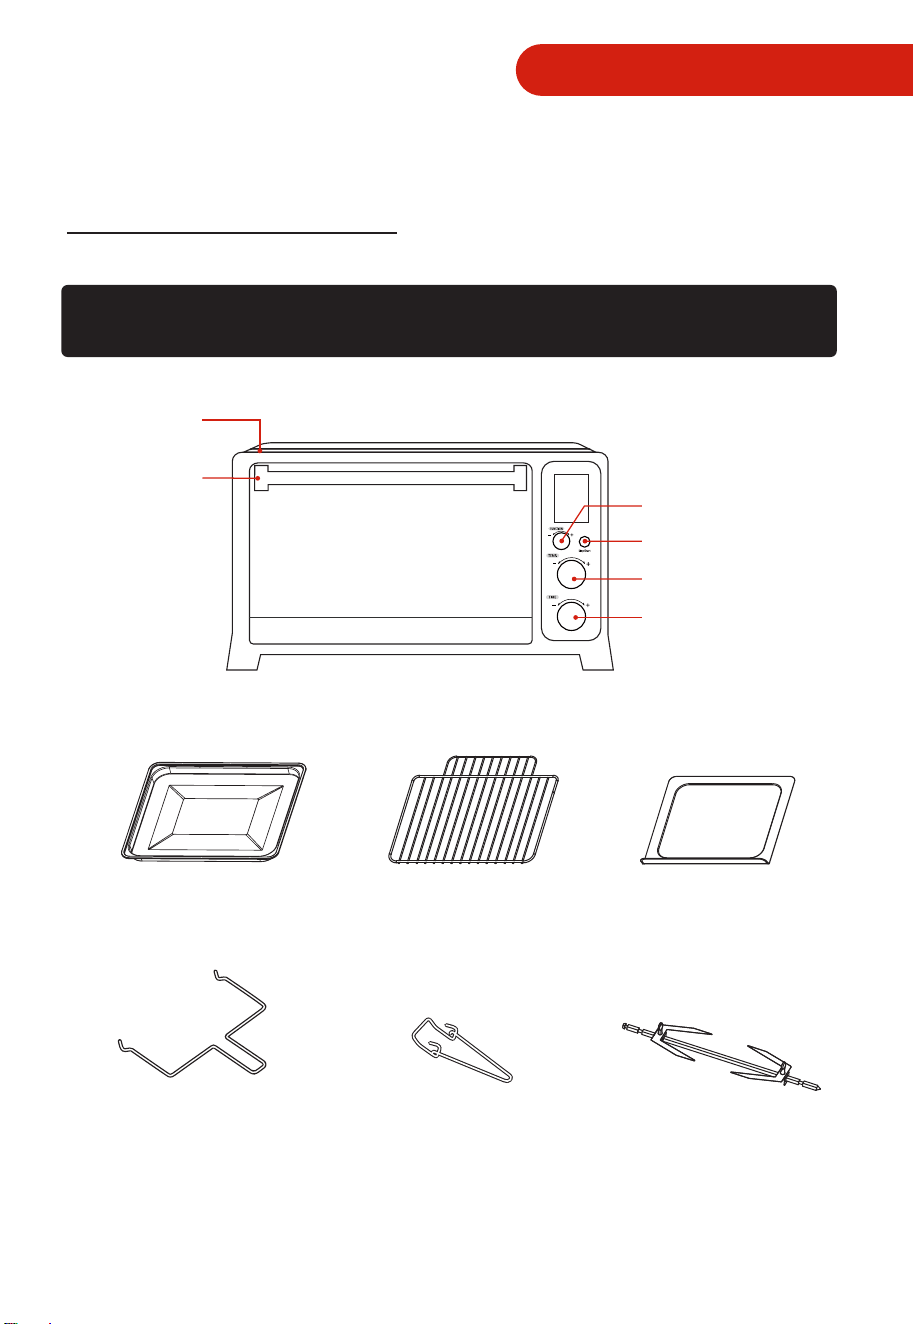
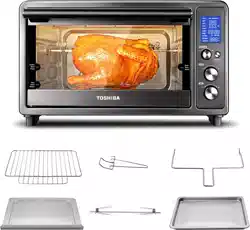
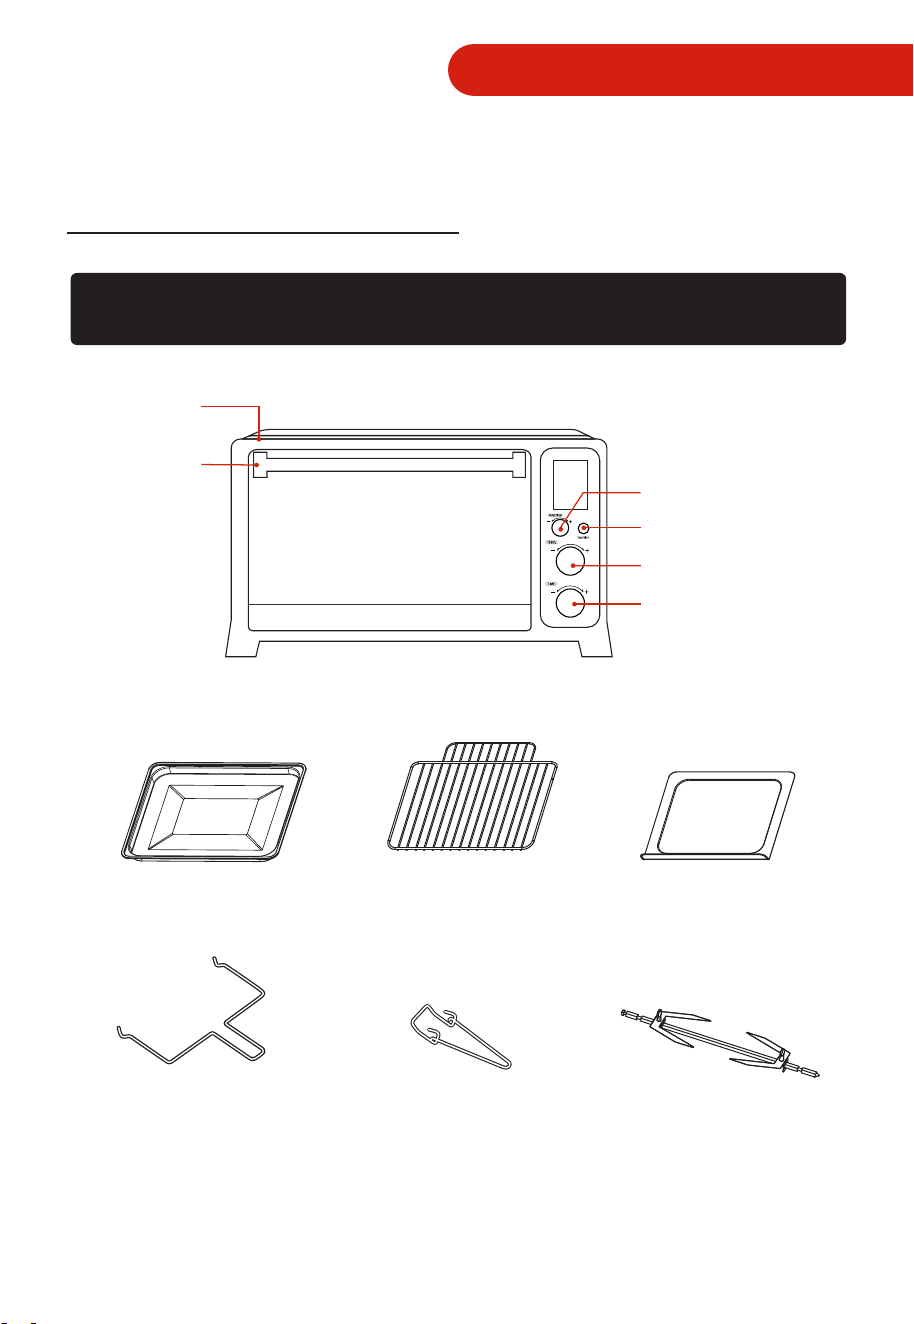
NAMES OF PARTS
PRODUCT INSTRUCTION
Door handle
Baking Pan Baking Rack Crumb Tray
Rack clamp
Rotisserie Kit
Housing
Function knob
Stop/Start button
Temperature knob
Timer knob
When using electrical appliance, basic safety precautions should always be followed,
including the following:
Helper Handle
EN-9
HOW TO USE
1. Place the Baking Rack in position that will accommodate the height of the food to
be cooked.
2. The food must be put into the baking pan to avoid the fire danger that caused by
the accumulation of food chipping on the heating pipes.
or cardboard containers in the Oven.
When the oven is electrified, the buzzer will ring once. The default function is TOAST.
In the process of cooking , pressing " Stop/Start " can stop cooking.
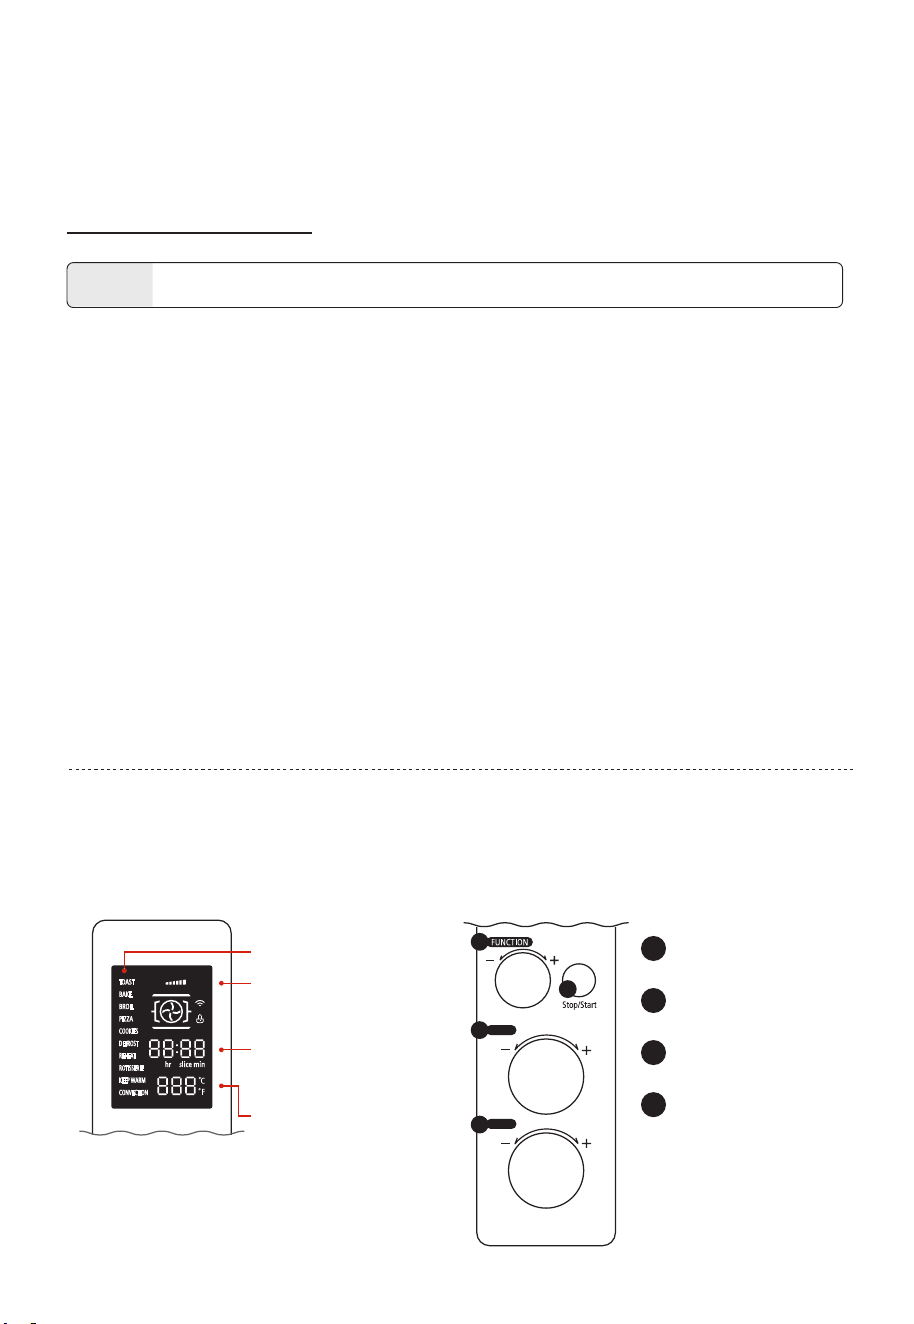
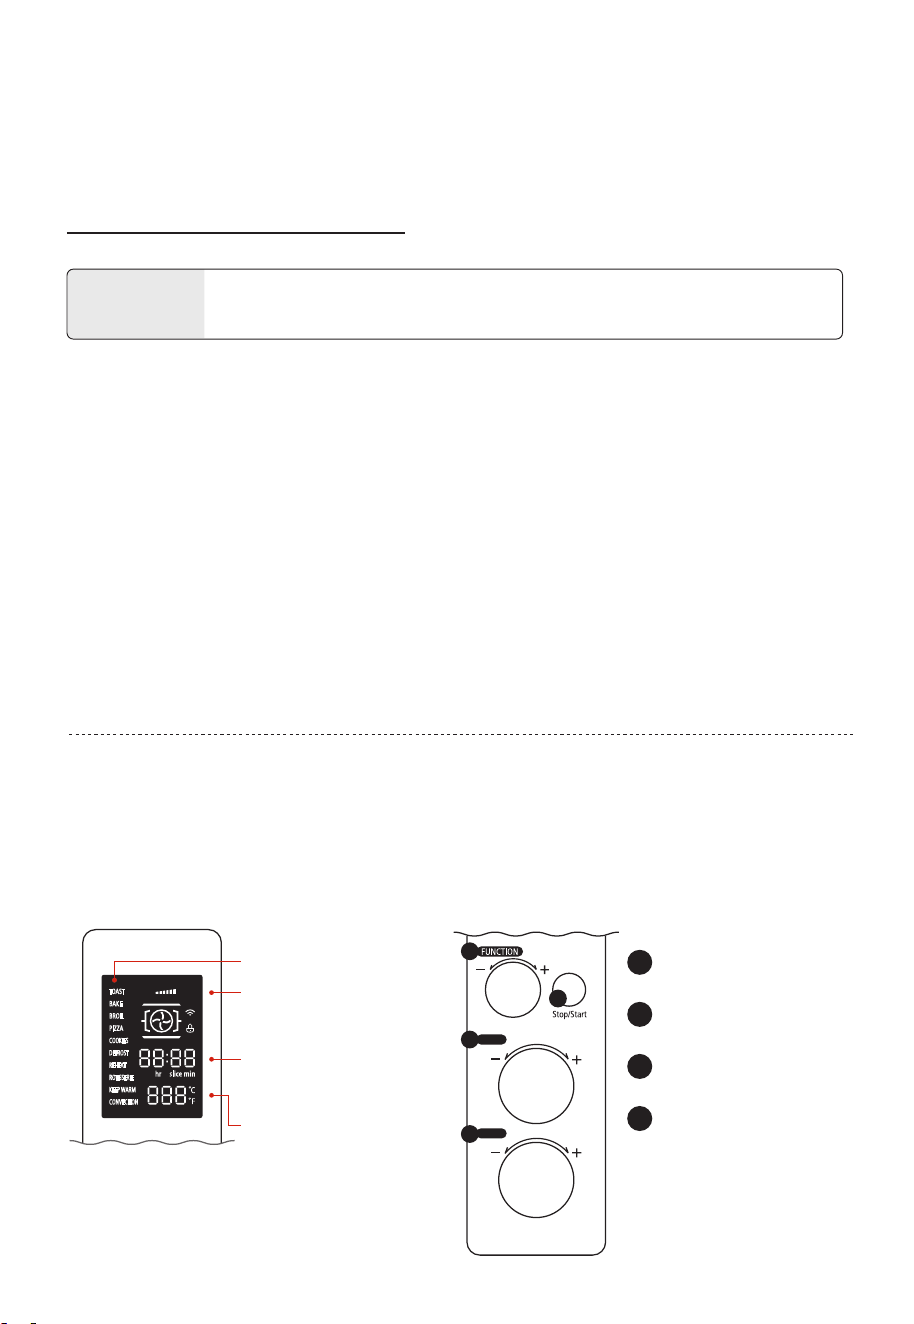
CONTROL PANEL
Stop/Start button
Temperature knob
Timer knob
2
3
4
Function knob
1
Bake level
(only Toast function)
Time / Slice
(only Toast function)
Temperature
Cooking Function
3. Make sure that you always use an ovenproof container in the oven, never use plastic
4. Clean the heating pipe periodically.
5. Never use glass or ceramic pans or lids.
6. DO NOT let juices run to the bottom of the oven. Use the Crumb Tray when cooking.
7. Set the temperature as suggested by the recipe or as desired.
8. Securely shut the door and set the cooking time to begin operating the oven.
TIME
TEMP.
2
3
4
1
TOAST
BAKE
BROIL
PIZZA
COOKIES
DEFROST
REHEAT
ROTISSERIE
KEEP WARM
CONVECTION
LIGHT DARK
COOKING STEP
THE OVEN SURFACES ARE HOT DURING AND AFTER USE.
CAUTION
INSTRUCTIONS
EN-10
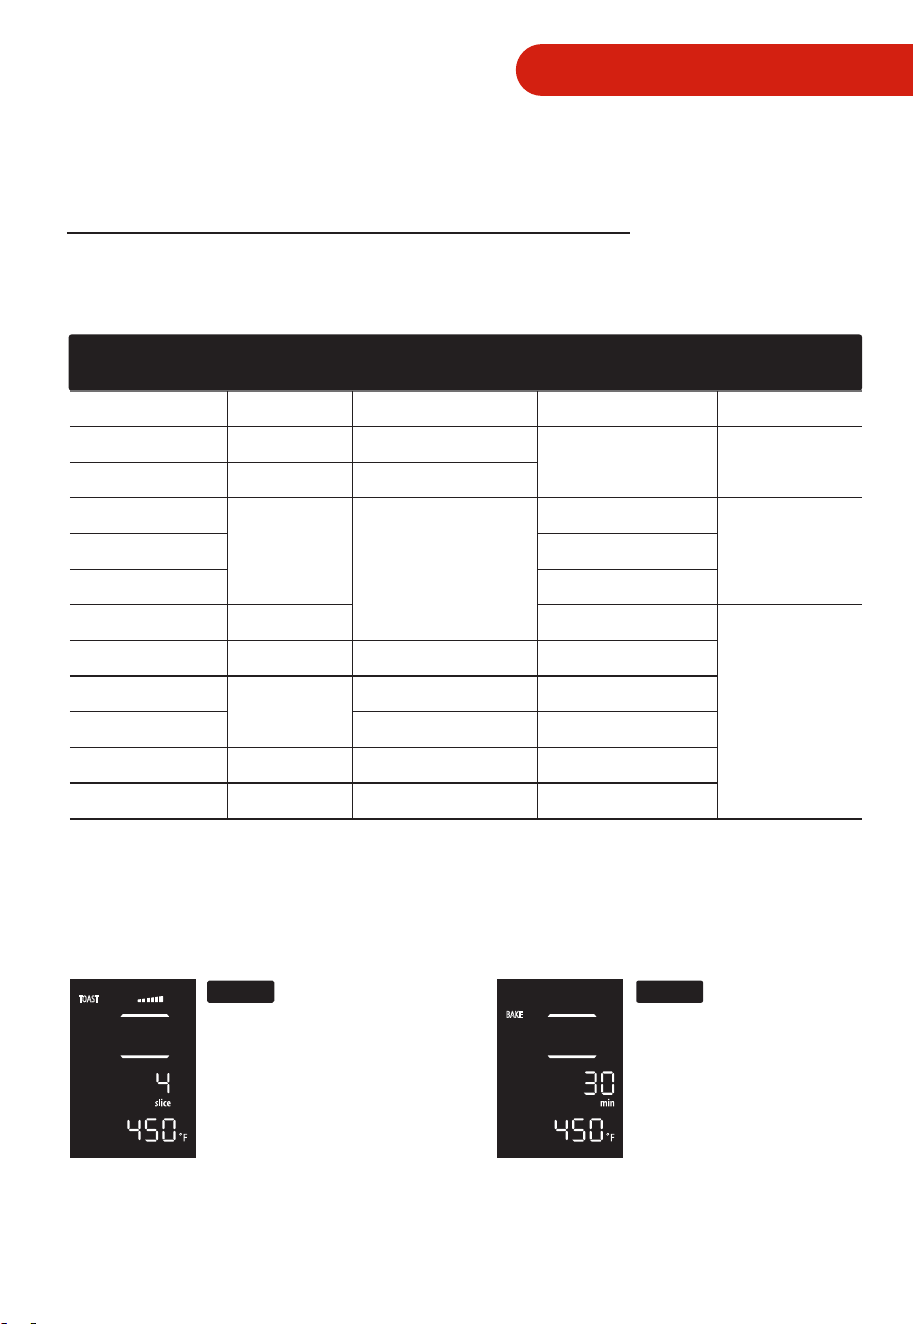
FUNCTION INSTRUCTION
OPERATION
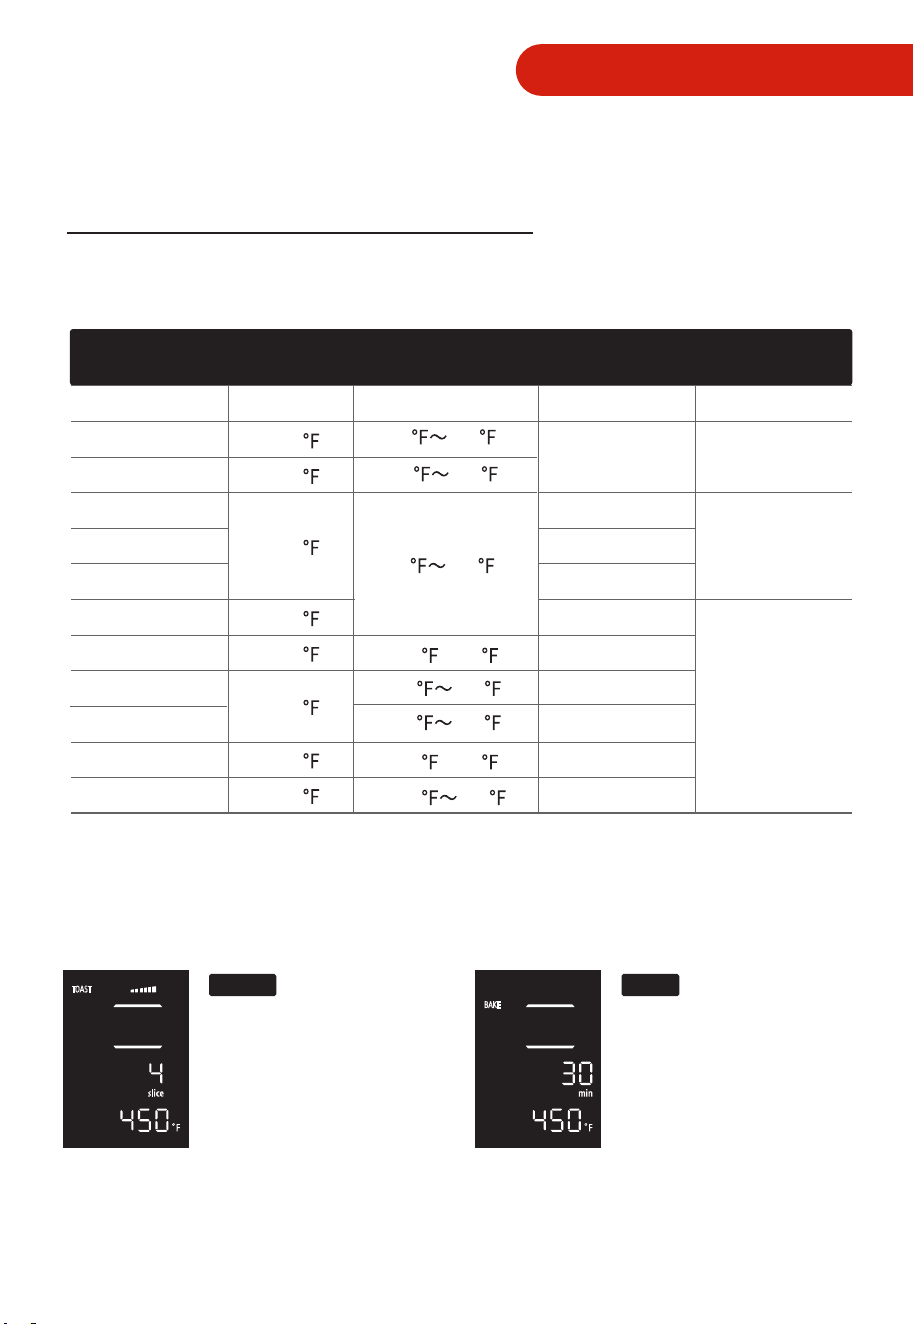
OVEN FUNCTION
TOAST BAKE
Fixed temperature & time
Preset power level : 4
Power level range : 1-6 level
Preset toast quantity : 4
Toast quantity range : 1-6 slice
Preset temperature : 450 °F
Temp range : 150 °F - 450 °F
Preset time : 30min
Time range : 0.01~2 Hours
TOAST
LIGHT DARK
BAKE
COOKING
FUNCTION
Toast
Bake
Broil
Pizza 6 inch
Pizza 9 inch
Pizza 12 inch
Cookie
Defrost
Reheat
Rotisserie
Keep warm
Convection
30min
7min30seconds
30min
1hour30min
30min
1hour
1hour30min
30min
Fixed Temp Fixed Time
1min~30min
0.01~2Hours
0.01~2Hours
PRESET
TEMP
TEMP RANGE PRESET TIME TIME RANGE
10min
10min30seconds
450
350
450
350
180
350
180
450
150 450
100 ~180
150 450
100 ~180
150 450
150 350
150
450
150 350
EN-11
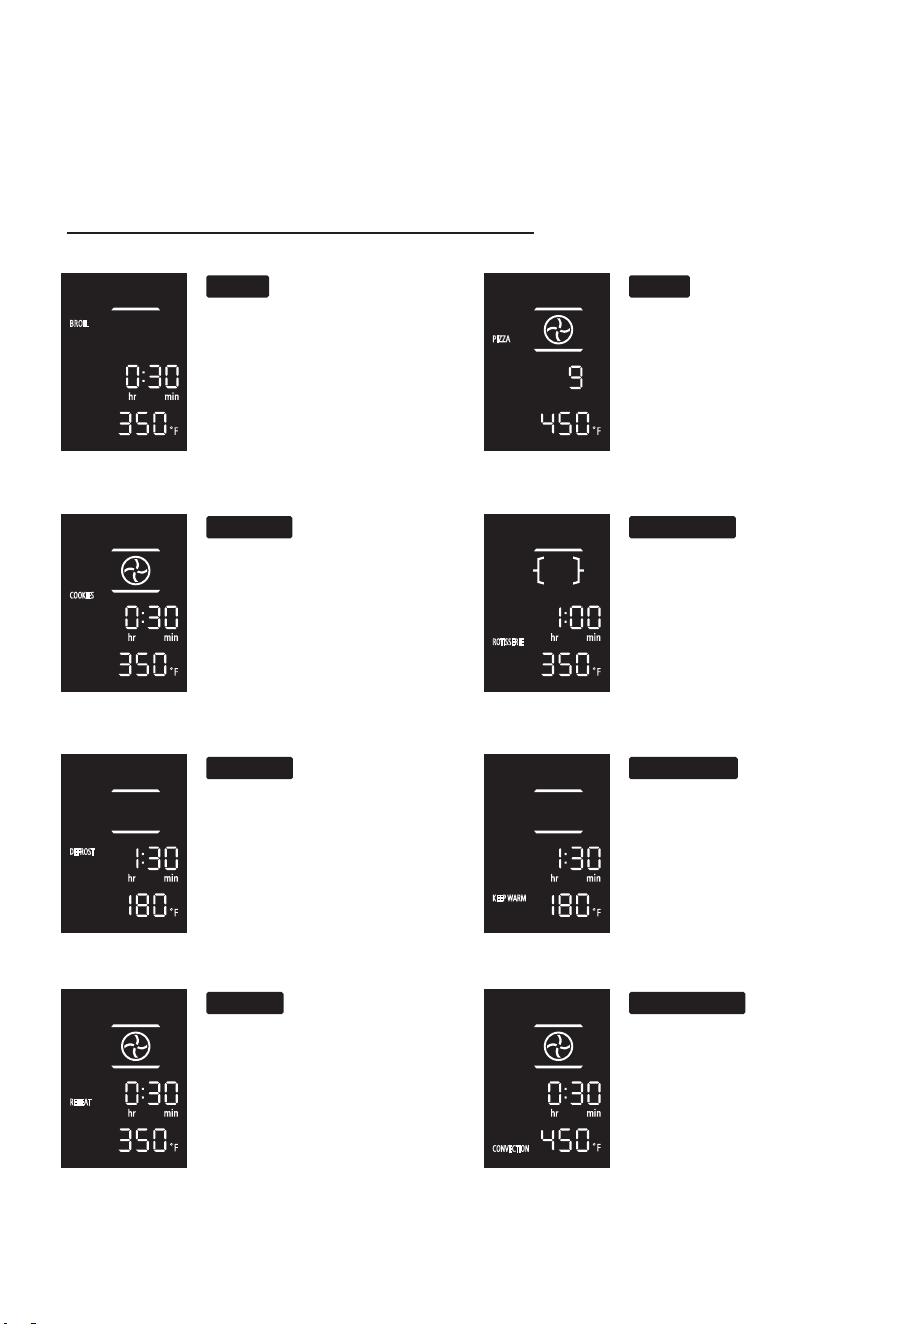
FUNCTION INSTRUCTION
Preset temperature : 350
°F
Temp range : 150
°F
- 350
°F
Preset time : 30min
Time range : 0.01~2 Hours
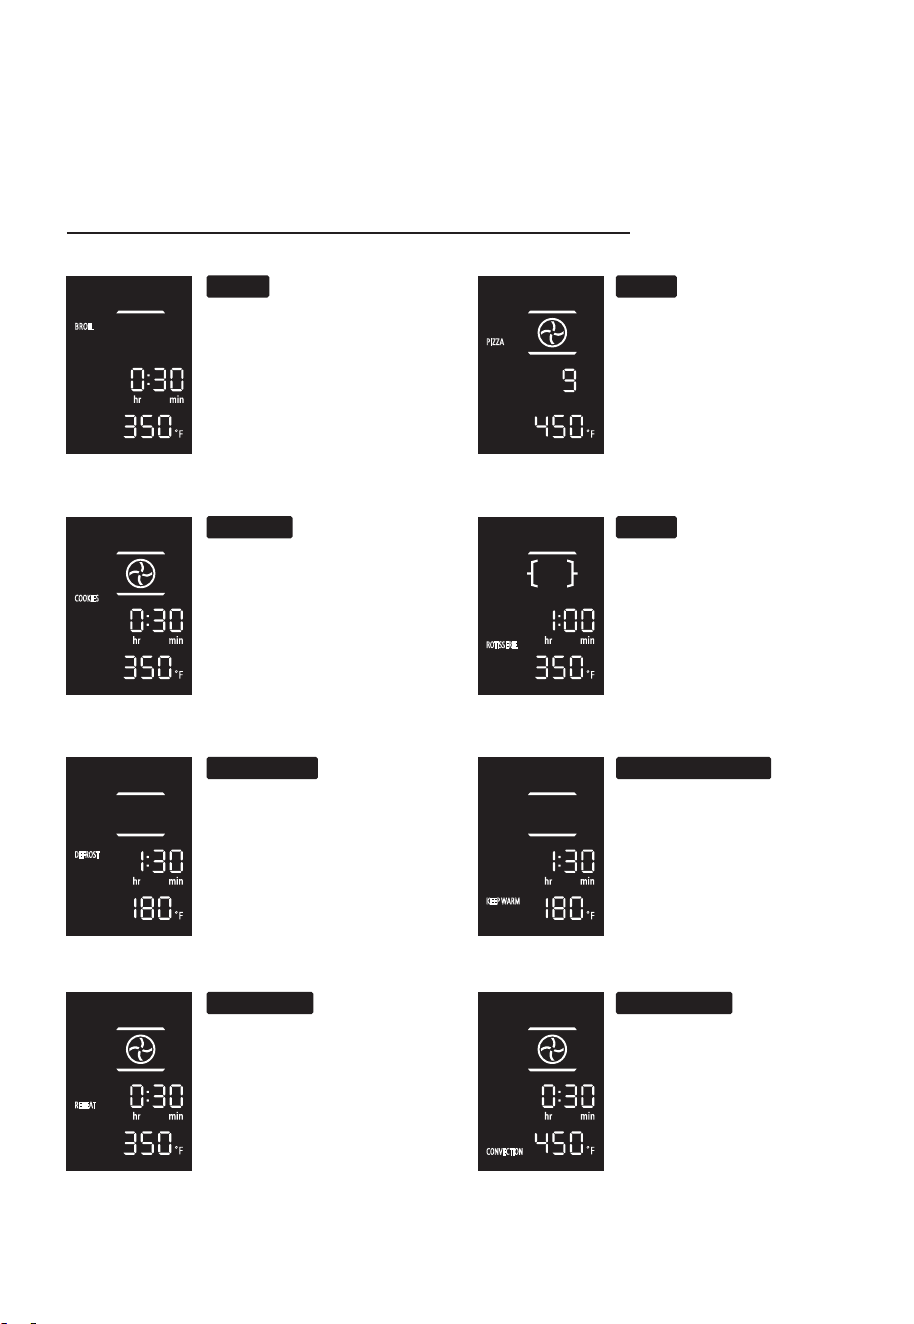
NOTE Do not preheat when using this fuction
NOTE Do not preheat when using this fuction
NOTE Do not preheat when using this fuction
Preset temperature : 350
°F
Temp range : 150
°F
- 450
°F
Preset time : 30min
Time range : 0.01~2 Hours
Preset temperature : 350
°F
Temp range : 150
°F
- 450
°F
Preset time : 30min
Time range : 0.01~2 Hours
Preset temperature : 450
°F
Temp range : 150
°F
- 450
°F
Preset time : 30min
Time range : 0.01~2 Hours
Preset temperature : 350
°F
Temp range : 150
°F
- 350
°F
Preset time : 1hour
Time range : 0.01~2 Hour
Preset temperature : 180
°F
Temp range : 100
°F
- 180
°F
Preset time : 1hour 30min
Time range : 0.01~2 Hours
Preset temperature : 180
°F
Temp range : 100
°F
- 180
°F
Preset time : 1hour 30min
Time range : 0.01~2 Hours
Preset temperature : 450
°F
Temp range : 150
°F
- 450
°F
Preset time : 10min
~
BROIL PIZZA
COOKIES ROTISSERIE
DEFROST KEEP WARM
REHEAT CONVECTION
s
EN-12
BROIL
COOKIES
KEEP WARM
CONVECTION
PIZZA
DEFROST
REHEAT
ROTISSERIE
Time range: 1min 30min

FUNCTION INSTRUCTION
ROTISSERIE FUNCTION
1. Remove the Baking Rack from the oven and set aside.
2. Place the Baking Pan in the lowest level of the oven.
This will catch all the drippings from the food that is on the Rotisserie Forks as it
cooks.
Do Not attemp to use the Rotisserie Function without placing the Baking Pan in
the correct position of the oven.
3. Set the Function knob to "ROTISSERIE".
4. Select the length of time you want to Rotisserie the food.
5. Rotate the Temperature knob clockwise to desired temperature.
ROTISSERIE FUNCTION USING THE ROTISSERIE FORKS
1. Secure the food with weight centered on the forks.
2. Slide the Holding Forks onto each of the forks and press firmly into the food,
piercing the food to hold in place on the forks. Insert the Holding Forks at different
angles to hold the food more firmly. Tighten the screws, turning clockwise so that
the holding forks will stay in place during the Rotisserie cooking session.
3. Insert the pointed end of the Rotisserie forks into the Rotisserie Socket on the
inside right side of the oven.
4. Lift the Rotisserie Forks on the left side just a bit to allow the notch to fit into the
Rotisserie Bracket on the left side of the oven.
5. Set the Temperature knob and the Time knob to begin operating the oven.
6. Once the cooking time has been complete and you have checked the internal
temperature of the food to ensure that it has cooked properly, you can remove the
Rotisserie Forks with the Rotisserie Helper Handle.
7. Hold the handle in your right hand and support handle in your left hand.
8. Place the hooks on the Helper Hander underneath the Rotisserie Forks.
9. Lift the left side of the Rotisserie Forks out of the Bracket first and pull slightly
toward.
OPERATION
EN-13
FUNCTION INSTRUCTION
10. Gently remove the right pointed side of the Rotisserie Forks from the Rotisserie
Socket and remove the food on the forks out of the oven.
11. Place the food on a heat safe plate or dish when you have removed from the
oven. Let it cool slightly before attempting to remove the holding forks and
Rotisserie Forks from the food
12. To remove the Holding Forks, turn the screws counterclockwise and pull the
Holding.
Warning: Hot Surface!
Avertissement: Surface Chaude!
CAUTION
hot surface
EN-14

1. Before cleaning, unplug the toaster oven and allow it to cool completely.
2. Wash all the attachments with mild, soaped water including the Baking rack and the
Baking pan.
3. Do not use abrasive cleansers, scrubbing brushes and chemical cleaner as this
will cause damage to the non-stick coating of baking pan.
4. Using a wet cloth to wipe the inner of the oven.
5. To clean the door by using a wet cloth saturated with detergent or soap.
6. Never immerse the unit in water or other liquid.
7. Any other servicing should be performed by an authorized service representative.
CARE AND CLEANING
SPECIFICATION
OPERATION
MODEL
POWER
AC25CEW-SS-V
1500 W
EN-15
120VAC 60Hz
RATED VOLTAGE/FREQUENCY

EN-16
p
l
s
g
l
f
y
e.
r
ONE YEAR LIMITED WARRANTY
This product carries a warranty stating that it will be free from defects in material and workmanshi
for a period of one year from the date of purchase. This warranty is valid for the original retai
purchaser from the date of initial retail purchase and is not transferable. Keep your original sale
receipt.
IMPORTANT:
1. This warranty does not cover damages resulting from accident, misuse or abuse, lack of reasonable
care, the axing of any attachments not pr
ovided with the product, loss of parts, or subjecting
the appliance to any but the specified voltage. ( Read directions carefully. )
2. This warranty is void if this product is ever used for other than private household purposes.
3. This warranty is void if this product is ever used outside of United State.
If service is required during the warranty period, properly pack your unit. We recommend usin
the original carton and packing materials.
If additional assistance is needed, please contact customer assistance at:
Midea America Corp. expressly disclaims all responsibility for consequential damages or incidenta
losses caused by use of the appliance. Some states do not allow this exclusion or limitation o
incidental or conse quential losses so the foregoing disclaimer may not apply to
you. This warrant
gives you specific legal rights, and you may also have other rights which may vary from state to stat
The serial number can be found on the back cabinet. We suggest that you record the serial numbe
of your unit in the space below for future reference
Model Number : ____________________
Serial Number : _____________________
SAVE THIS FOR YOUR RECORDS
Product registration is not mandatory. Failure to complete and return the card or form does
not diminish the consumer' s warranty rights.
customercare@us.toshiba-lifestyle.com
855-204-5313
MAINTENANCE
MAINTENANCE
AC25CEW-SS-V
MANUAL DE INSTRUCCIONES
HORNO TOSTADOR
Lea este manual de instrucciones antes de usar el aparato.

CONTENIDO
ES-2
SALVAGUARDIAS IMPORTANTES
MEDIDAS DE SEGURIDAD BÁSICAS.................................................................................ES-3
ANTES DEL PRIMER USO......................................................................................................ES-8
INSTRUCCIONES DEL PRODUCTO
NOMBRES DE PIEZAS............................................................................................................ES-9
FUNCIONAMIENTO
CÓMO UTILIZAR.....................................................................................................................ES-10
INSTRUCCIÓN DE LA FUNCIÓN.........................................................................................ES-11
ANTES DE UTILIZAR ESTE PRODUCTO, LEA, ENTENDA Y SIGA ESTAS
INSTRUCCIONES. ASEGÚRESE DE GUARDAR ESTA LISTA DE LIBROS
PARA SU CONSUL-TA EN EL FUTURO
NOTA
CUIDADO Y LIMPIEZA...........................................................................................................ES-15
ESPECIFICACIONES..................................................................................................... ...........ES-15
FUNCIÓN DEL HORNO..........................................................................................................ES-11
FUNCIÓN DE ASADO.............................................................................................................ES-13
FUNCIÓN DE ASADO UTILIZANDO LAS HORQUILLAS DE ASADO .......................ES-13
MANTENIMIENTO
GARANÍTA LIMITADA POR UN AÑO ............................................................................... ES-16
MEDIDAS DE SEGURIDAD BÁSICAS
SALVAGUARDIAS IMPORTANTES
ES-3
Al usar un aparato eléctrico, siempre se deben seguir las precau-
ciones básicas de seguridad, incluidas las siguientes:
Lea todas las instrucciones.
Para protegerse contra
descargas eléctricas, no
sumerja el cable, los
enchufes ni ninguna parte
eléctrica en agua u otro
líquido.
El uso de accesorios no
recomendados por el
fabricante del aparato
puede causar lesiones.
Se debe tener extrema
precaución al mover un
aparato que contenga
aceite caliente u otros
líquidos calientes.
Siempre conecte el
enchufe al electrodomésti-
co primero y luego
enchufe el cable en la
toma de corriente de la
pared.
Para desconectar, gire
cualquier control a "o". A
continuación, retire el
enchufe de la toma de
corriente de pared.
Es necesaria una estrecha
supervisión cuando cual-
quier aparato es utilizado
por niños o cerca de ellos.
Desenchufe de la toma de
corriente cuando no esté
en uso y antes de limpiar-
la.Deje enfriar antes de
poner o quitar partes.
MEDIDAS DE SEGURIDAD BÁSICAS
ES-4
Tenga mucho cuidado al
retirar la bandeja o eliminar
la grasa caliente.
Se debe tener extrema
precaución cuando se
utilicen recipientes con
otros materiales que no
sean de metal o vidrio.
Los alimentos de gran
tamaño o los utensilios de
metal no se deben insertar
en un horno tostador, ya
que pueden crear un
incendio o riesgo de des-
carga eléctrica.
Puede ocurrir un incendio
si el horno tostador está
cubierto o tocando materi-
al inamable, incluidas
cortinas, cortinas, paredes
y similares, cuando está en
funcionamiento. No colo-
que ningún objeto encima
del aparato cuando esté en
funcionamiento.
Durante el funcionamiento,
pulse "Stop/Start" para
detener la coccion.
Precaución: para garantizar
una protección continua
contra el riesgo de descar-
ga eléctrica, conéctelo
únicamente a una toma de
corriente debidamente
conectada a tierra.
MEDIDAS DE SEGURIDAD BÁSICAS
ES-5
SALVAGUARDIAS IMPORTANTES
El exterior del horno,
incluida la puerta, está
caliente durante y
después de su uso.
Solo para uso doméstico.
Evite el contacto con las
piezas móviles.
Extraiga el enchufe de la
toma de corriente cuando
el aparato no esté en uso,
antes de poner o quitar
piezas y antes de limpiar-
lo.Deje enfriar antes de
entregar.
Utilice siempre guantes,
almohadillas o manoplas
resistentes al calor cuando
manipule materiales
calientes y cuando colo-
que o retire elementos del
No opere ningún electro-
doméstico con un cable o
enchufe dañado o después
de que el electrodomésti-
co haya funcionado mal o
haya sido dañado de
alguna manera.Devuelva el
aparato al centro de servi-
cio autorizado más cerca-
no para que lo examinen,
reparen o ajusten.
No toque supercies
calientes.Use asas o peril-
las
No lo use al aire libre.
horno, incluidas bandejas,
parrillas, accesorios o
recipientes.
No lo coloque sobre o
cerca de un quemador de
gas o eléctrico caliente, o
en un horno caliente.
No deje que el cable cuel-
gue del borde de la mesa o
mostrador, ni toque super-
cies calientes.
No coloque ninguno de
los siguientes materia-
les en el horno: (es
decir, papel, cartón,
plástico y similares).
No cubra la bandeja para
migas ni ninguna parte
del horno con papel
metálico.Esto provocará
un sobrecalentamiento
del horno.
No almacene ningún
material, excepto los
accesorios recomendados
por el fabricante, en este
horno cuando no esté en
uso.
No limpie con almohadillas
para fregar metales.Las
piezas pueden despren-
derse de la almohadilla y
tocar piezas eléctricas,
creando piezas y creando
un riesgo de descarga
eléctrica.
No utilice el aparato para
otro uso que no sea el
previsto.
GUARDE ESTAS INSTRUCCIONES
SOLO PARA USO DOMÉSTICO EN INTERI-
ORES
ES-6
MEDIDAS DE SEGURIDAD BÁSICAS

INSTRUCCIONES DE CABLE CORTO
(CABLE DE ALIMENTACIÓN DES-
MONTABLE)
1.Se debe utilizar un cable de alimentación corto (o un cable de
alimentación desmontable) para reducir el riesgo de enredarse
o tropezarse con un cable más largo.
2.Hay disponibles cables de suministro de energía extraíbles más
largos o cables de extensión y se pueden usar si se tiene cuida-
do en su uso.
3.Si se utiliza un cable de alimentación o un cable de extensión
extraíble más largo:
(1). La clasicación eléctrica marcada del juego de cables o del
cable de extensión debe ser al menos tan buena como la
clasicación eléctrica del aparato.
(2). El cable debe colocarse de manera que no cuelgue de la
encimera o de la mesa donde los niños puedan tirar de él o
tropezar sin querer.
Si el aparato es del tipo con conexión a tierra, el cable de
extensión debe ser un cable de 3 hilos con conexión a
tierra.
ES-7

ANTES DEL PRIMER USO
1. Retire todos los accesorios y materiales de envío embalados
dentro del horno.
2. Lave la rejilla y la bandeja en agua jabonosa tibia. Limpie el
interior del horno con un paño húmedo o una esponja. Seque
con toallas de papel para asegurarse de que la unidad esté seca
antes de usarla.
3. Coloque el Horno en un mostrador plano u otra superficie
estable. NO HAGA FUNCIONAR EN EL MISMO CIRCUITO CON
OTRO APARATO.
4. Asegúrese de que la bandeja de migas esté instalada
correctamente antes de usarla.
Sólo por primera vez, ajuste el mando de temperatura en MAX, la
configuración de la función en tostar y el temporizador a 15
minutos. Esto quemará cualquier aceite que quede en el horno.
• El horno puede echar humo durante este proceso.
Esto es normal en un horno nuevo.
NOTA
ES-8
Cuando utilice aparatos eléctricos, siempre debe seguir las precauciones básicas de
seguridad, incluyendo las siguientes:
NOMBRES DE PIEZAS
Mango de
la puerta
Bandeja para hornear Rejilla para hornear Bandeja de para migas
Kit para asar
Alojamiento
Perilla de función
Botón Parar/Iniciar
Botón de Temperatura
Perilla de Temporizador
INSTRUCCIONES DEL PRODUCTO
Mango auxiliar
Abrazadera de rack
ES-9
TIME
TEMP.
2
3
4
1
TOAST
BAKE
BROIL
PIZZA
COOKIES
DEFROST
REHEAT
ROTISSERIE
KEEP WARM
CONVECTION
LIGHT DARK
CÓMO UTILIZARO
1. Coloque la rejilla para hornear en la posición que se adapte a la altura de los
alimentos a cocinar.
2. Coloque los alimentos en el estante. Asegúrese de que siempre usa un recipiente
para horno en el horno, nunca use recipientes de plástico o cartón en el horno.
3. Nunca utilice recipientes o tapas de vidrio o de cerámica.
4. NO deje que los jugos corran hasta el fondo del horno. Utilice la bandeja de goteo
y la bandeja de migas al cocinar.
5. Ajuste la temperatura según lo sugerido por la receta o como se desee.
6. Cierre firmemente la puerta y ajuste el tiempo de cocción para comenzar a utilizar
el horno.
Cuando el horno está conectado, el timbre suena una vez. La función predeterminada
es TOSTAR. En el proceso de cocción, presionar "Parar/Iniciar" puede detener la cocción.
PANEL DE CONTROL
Botón parar/iniciar
Botón de temperatura
Perilla de temporizador
2
3
4
Botón de función
1
Nivel de horneado
(sólo función Tostar)
Tiempo/Rebanada
(sólo función Tostar)
Temperatura
Función de cocción
PASO PARA COCINAR
PRECAUCIÓN
las superficies del horno están calientes durante y después del uso.
ES-10
INSTRUCCIÓN DE LA FUNCIÓN
FUNCIONAMIENTO
TOSTAR HORNEAR
FUNCION DE
COCCIÓN
Tostar
Hornear
Asar
Pizza 6 pulgadas
Pizza 9 pulgadas
Pizza 12 pulgadas
Galletas
Descongelar
Recalentar
Asado
Mantener caliente
Convección
30min
7min30segundos
30min
1hour30min
30min
1hour
1hour30min
30min
Temp. fija Temp. fija
1min~30min
TEMP
PREESTAB.
RANGO TEMP
TIEMPO
PREESTAB.
INTERVALO
DE TIEMPO
Temperatura y tiempo fijos
Nivel de potencia preestablecido: 4
Rango de nivel de potencia: Nivel 1-6
Cantidad de tostadas preestablecida: 4
Cantidad de tostadas: 1-6 rebanadas
Temp. preestablecida: 450 °F
Rango temp.: 150 °F - 450 °F
Tiempo preestablecido: 30min
Intervalo de tiempo : 0.01~2h
150 °F~450 °F
100 °F~180 °F
350 °F
180 °F
350 °F
180 °F
450 °F
150 °F~450 °F
100 °F~180 °F
150 °F~450 °F
0.01~2Horas
0.01~2Horas
10min
TOAST
LIGHT DARK
BAKE
FUNCIÓN DEL HORNO
150 °F~450 °F
150 °F~350 °F
150 °F~350 °F
10min30segundos
450 °F
450 °F
350 °F
ES-11
Temp. preestablecida: 350
°F
Rango temp.: 150
°F
- 350
°F
Tiempo preestablecido: 30min
Intervalo de tiempo : 0.01~2h
NOTA No precaliente cuando use esta función
NOTA No precaliente cuando use esta función
NOTA No precaliente cuando use esta función
Temp. preestablecida: 350 °F
Rango temp.: 150 °F - 450 °F
Tiempo preestablecido: 30min
Intervalo de tiempo : 0.01~2h
Temp. preestablecida: 350 °F
Rango temp.: 150 °F - 450 °F
Tiempo preestablecido: 30min
Intervalo de tiempo : 0.01~2h
Temp. preestablecida: 450 °F
Rango temp.: 150 °F - 450 °F
Tiempo preestablecido: 30min
Intervalo de tiempo : 0.01~2h
Temp. preestablecida: 350 °F
Rango temp.: 150 - 350 °F
Tiempo preestablecido: 1h
Intervalo de tiempo : 0.01~2h
Temp. preestablecida: 180 °F
Rango temp.: 100 °F - 180 °F
Tiempo preestablecido: 1h30min
Intervalo de tiempo : 0.01~2H
Temp. preestablecida: 180 °F
Rango temp.: 100 °F - 180 °F
Tiempo preestablecido: 1h30min
Intervalo de tiempo : 0.01~2H
Temp. preestablecida: 450
°F
Rango temp.: 150
°F
- 450
°F
Tiempo preestablecido: 10min
Intervalo de tiempo : 1min~
PIZZA
DESCONGELAR
RECALENTARA
ASAR
GALLETAS ASADO
30min
ES-12
BROIL
COOKIES
KEEP WARM
CONVECTION
PIZZA
DEFROST
REHEAT
ROTISSERIE
°F
CONVECCIÓN
MANTENER CALIENTE
INSTRUCCIÓN DE LA FUNCIÓN

1. Retire la rejilla del horno y déjela a un lado.
2. Coloque la bandeja de hornear en el nivel más bajo del horno.
Esto atrapará todos los goteos de la comida que está en las horquillas para
asar cuando cocine. No intente utilizar la función del asador sin colocar la
bandeja de hornear en la posición correcta del horno.
3. Ajuste el mando de Función a "ROTISSERIE".
4. Seleccione la duración de tiempo que desea asar el alimento.
5. Gire la perilla de temperatura hacia la derecha hasta la temperatura deseada.
1. Asegure el alimento con el peso centrado en las horquillas.
2. Deslice las horquillas de sujeción en cada uno de los tenedores y presione
firmemente en los alimentos, perforando los alimentos para colocarlos en las
horquillas. Inserte las horquillas de sujeción en ángulos diferentes para sostener
los alimentos más firmemente. Apriete los tornillos, girando en el sentido de las
agujas del reloj para que las horquillas de sujeción se mantengan en su lugar
durante la sesión de asado.
3. Inserte el extremo puntiagudo de las horquillas para asar en el casquillo del asador
en el lado derecho interior del horno.
4. Levante las horquillas para asar en el lado izquierdo un poco para permitir que la
muesca encaje en el soporte de las horquillas en el lado izquierdo del horno.
5. Ajuste la perilla de temperatura y la perilla de tiempo para comenzar a utilizar el horno.
6. Una vez que haya terminado el tiempo de cocción y haya comprobado la temperatura
interna de los alimentos para asegurarse de que se ha cocina-do adecuadamente,
puede quitar las horquillas del asador con el mango auxiliar del asador.
7. Sostenga el mango en la mano derecha y apoye la manija en la mano izquierda.
8. Coloque los ganchos en el soporte debajo de las horquillas para asar.
9. Levante el lado izquierdo de las horquillas fuera del soporte y tire ligera-mente.
FUNCIONAMIENTO
ES-13
FUNCIÓN DE ASADO
FUNCIÓN DE ASADO UTILIZANDO LAS HORQUILLAS DE ASADO
INSTRUCCIÓN DE LA FUNCIÓN
INSTRUCCIÓN DE LA FUNCIÓN
10. Retire suavemente el lado apuntado a la derecha de las horquillas para asar
de la toma del asador y retire los alimentos de las horquillas del horno.
11. Coloque los alimentos en una placa o plato de calor seguro cuando se haya
retirado del horno. Deje enfriar un poco antes de intentar sacar las horquillas
de sujeción y las horquillas para asar de la comida
12. Para quitar las horquillas de sujeción, gire los tornillos en sentido contrario a las
agujas del reloj y tire de la sujeción.
Warning: Hot Surface!
Advertencia: ¡Superficie Caliente!
Avertissement: Surface Chaude!
CAUTION
hot surface
ES-14

CUIDADO Y LIMPIEZA
FUNCIONAMIENTO
1. Antes de limpiar, desenchufe el horno tostador y déjelo enfriar completa-mente.
2. Lave todos los accesorios con agua, incluyendo la rejilla y la bandeja para hornear.
3. No utilice limpiadores abrasivos, cepillos de limpieza y limpiadores quími-cos, ya
que esto puede dañar el revestimiento antiadherente de la bandeja para hornear.
4. Utilice un paño húmedo para limpiar el interior del horno.
5. Limpie la puerta con un paño húmedo saturado con detergente o jabón.
6. Nunca sumerja la unidad en agua u otro líquido.
7. Cualquier otro servicio debe ser realizado por un representante de servicio autorizado.
ESPECIFICACIONES
MODELO
TENSIÓN
RECUENCIA CA
POTENCIA
AC25CEW-SS-V
1500 W
ES-15
/
120VAC 60Hz

ES-16
GARANTÍA LIMITADA DE UN AÑO
Este producto tiene una garantía que establece que estará libre de defectos de material y mano
de obra durante un período de un año a partir de la fecha de compra. Esta garantía es válida para
el comprador al detal original a partir de la fecha de la compra al detal inicial y no es transferible.
Guarde su factura de compra original.
IMPORTANTE:
1. Esta garantía no cubre los daños resultantes de accidentes, mal uso o abuso, falta de cuidado
razonable, la colocación de cualquier accesorio no proporcionado con el producto, la pérdida
de piezas, o someter el aparato a cualquier voltaje que no sea el especificado. (Lea
atentamente las instrucciones ).
2. Esta garantía queda anulada si este producto se llega a utilizar para fines distintos de los
domésticos.
3. Esta garantía queda anulada si este producto se llega a utilizar fuera de los Estados Unidos.
Si requiere servicio técnico durante el período de garantía, empaque adecuadamente el
producto. Se recomienda utilizar la caja y los materiales de embalaje originales.
Si requiere asistencia adicional, póngase en contacto con el servicio de atención al cliente en:
Midea America Corp. renuncia expresamente a toda responsabilidad por daños consecuentes o
pérdidas incidentales causadas por el uso del electrodoméstico. Algunos estados no permiten
esta exclusión o limitación de pérdidas incidentales o consecuentes, por lo que es posible que el
descargo de responsabilidad anterior no se aplique a usted. Esta garantía le otorga derechos
legales específicos, además usted también puede tener otros derechos que varían de un estado a
otro.
El número de serie se puede encontrar en la parte trasera. Le sugerimos que anote el número de
serie de su unidad en el espacio siguiente para futuras referencias
Número de Modelo: ____________________
Número de Serie: _____________________
GUARDE ESTA INFORMACIÓN
No es obligatorio registrar el producto. En caso no complete ni devuelva el certificado o el
formulario no disminuirá los derechos de garantía del consumidor.
855-204-5313
MANTENIMIENTO


#
Details
Matter