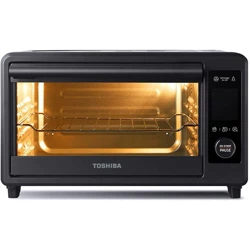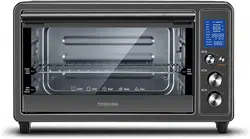
INSTRUCTION MANUAL
TOASTER OVEN
TL1-AC25CZA(BS)

BEFORE OPERATING THIS PRODUCT,
READ, UNDERSTAND, AND FOLLOW THESE INSTRUCTIONS.
BE SURE TO SAVE THIS BOOKLIST FOR FUTURE REFERENCE
NOTE
CONTENTS
PRODUCT SAFETY
SAFETY PRECAUTIONS ............................................................................................... EN-2
INSTRUCTION FOR USE
BEFORE FIRST USE ......................................................................................................... EN-5
NAME OF PARTS .............................................................................................................. EN-5
HOW TO USE ................................................................................................................... EN-7
OPERATION ........................................................................................................................ EN-8
CARE AND CLEANING .................................................................................................... EN-12
. .................................................................................................. EN-12SPECIFICATION .............

When using electrical appliances, basic safety precautions should
always be followed including the following :
1. Read all instructions.
2. Do not touch hot surfaces. Use handles or knobs.
3. To protect against electrical shock do not immerse cord, plugs,
or any electrical parts in water or other liquid.
4. Close supervision is necessary when any appliance is used by
or near children.
5. Unplug from outlet when not in use and before cleaning.
Allow to cool before putting on or taking off parts.
6. Do not operate any appliance with a damaged cord or plug or
after the appliance malfunctions or has been damaged in any
manner. Return appliance to the nearest authorized service
facility for examination, repair, or adjustment.
7. The use of accessory attachments not recommended by the
appliance manufacturer may cause injuries.
8. Do not use outdoors.
9. Do not let cord hang over edge of table or counter, or touch
hot surfaces.
10. Do not place on or near a hot gas or electric burner, or in a
heated oven.
11. Extreme caution must be used when moving an appliance
containing hot oil or other hot liquids.
12. To disconnect, turn any control to " off ", then remove plug
from wall outlet.
13. Do not use appliance for other than intended use.
14. Use extreme caution when removing tray or disposing of hot
grease.
SAFETY WARNING
PRODUCT SAFETY
EN-2
IMPORTANT SAFEGUARDS

SAFETY WARNING
EN-3
15. Do not clean with metal scouring pads. Pieces can break off the
pad and touch electrical parts, creating parts, creating a risk of
electric shock.
16. Oversize foods or metal utensils must not be inserted in a
toaster-oven as they may create a fire or risk of electric shock.
17. A fire may occur if the toaster-oven is covered or touching
flammable material, including curtains, draperies, walls, and the
like, when in operation. Do not store any item on top of the
appliance when in operation.
18. Extreme caution should be exercised when using containers
constructed of other than metal or glass.
19. Do not store any materials, other than manufacturers
recommended accessories, in this oven when not in use .
20. Do not place any of the following materials in the oven: paper,
cardboard, plastic, and like.
21. Do not cover crumb tray or any part of the oven with metal foil.
This will cause overheating of the oven.
22. Caution-To ensure continued protection against risk of electric
shock, connect to properly grounded outlets only.( If the
appliance is of the grounded type)
23. Remove plug from outlet when the appliance is not in use,
before putting on or taking off parts, and befor cleaning. Allow
to cool before handing.
24. Avoid contacting moving parts.
25. For household use only.
26. During operation, press " Stop/Start " can stop cooking.
READ CAREFULLY AND KEEP FOR
IMPORTANT SAFEGUARDS
FUTURE REFERENCE

EN-4
IMPORTANT SAFEGUARDS
SAFETY WARNING
PRODUCT SAFETY
Short cord instruction
a) A short power-supply cord should be used to reduce the risk
resulting from becoming entangled in or tripping over a longer
cord.
b) Longer extension cords are available and may be used if care is
exercised in their use.
c) If a longer or extension cord is used:
• The marked electrical rating of extension cord should be at
least as great as the electrical rating of the appliance.
• The cord should be arranged so that it will not drape over the
countertop or tabletop where it can be pulled on by children
or tripped over unintentionally.
• If the appliance is of the grounded type, the extension cord
should be a grounding-type 3-wire cord.
EN-5
BEFORE FIRST USE
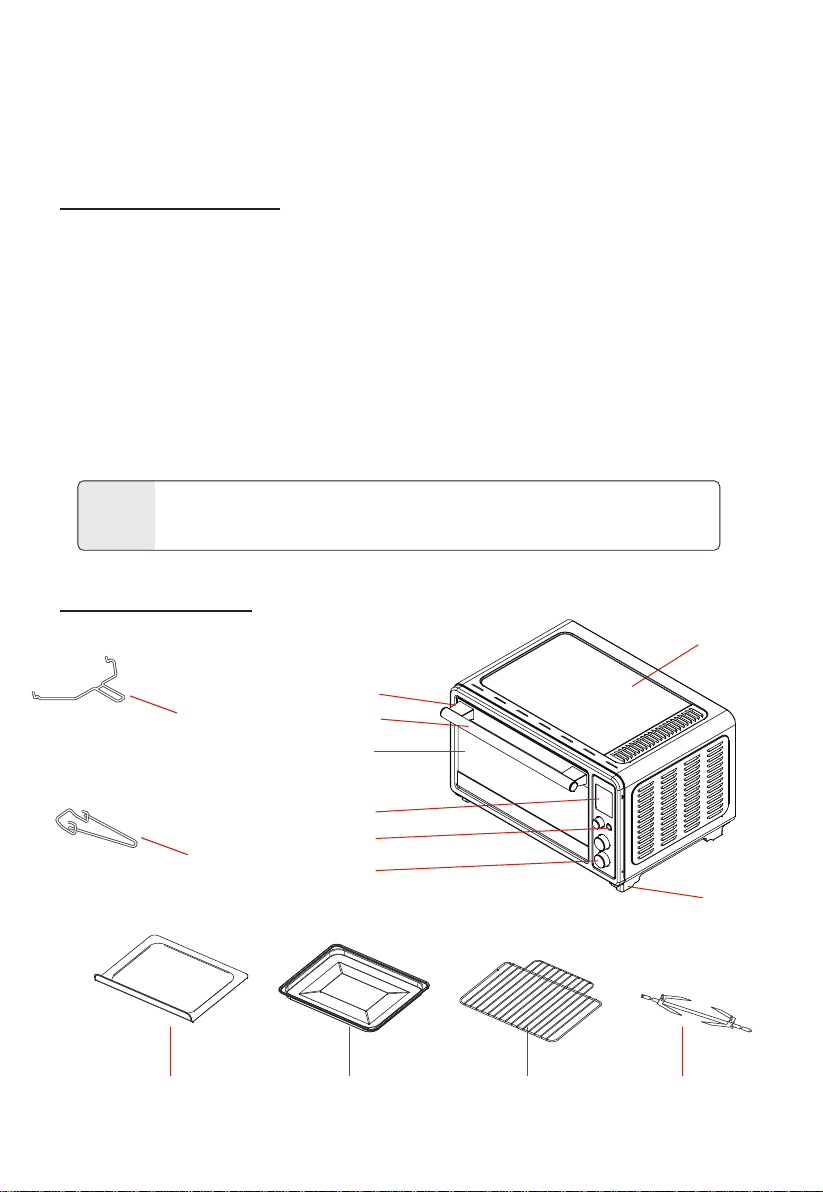
NAME OF PARTS
1. Remove all accessories and shipping materials packed inside the Oven.
2. Wash the Rack and Grill tray in warm soapy water. Wipe the inside of the Oven with
a damp cloth or sponge. Blot dry with paper towels to be sure the unit is dry before
using.
3. Place Oven on a at counter or other stable surface DO NOT OPERATE ON THE
SAME CIRCUIT WITH ANOTHER APPLIANCE.
4. Make sure the Crumb Tray is properly installed before using.
For the rst time only, Set the Temperature Knob to MAX, the function setting on
toast and the timer to 15 minutes. This will burn o any oils still on the Oven.
The oven may smoke during this process. This is normal for a new
Oven and will not last more than 10-15 minutes.
NOTE
Housing
Foot
Handle Holder
Door Handle
Door Glass
Display Screen Cover
Button
Knob
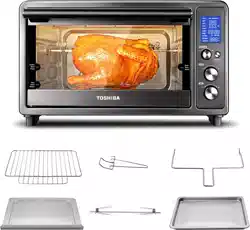
Crumb Tray Rack Rotisserie ForkGrill Tray
Rotisserie kit
Rack clamp
EN-6
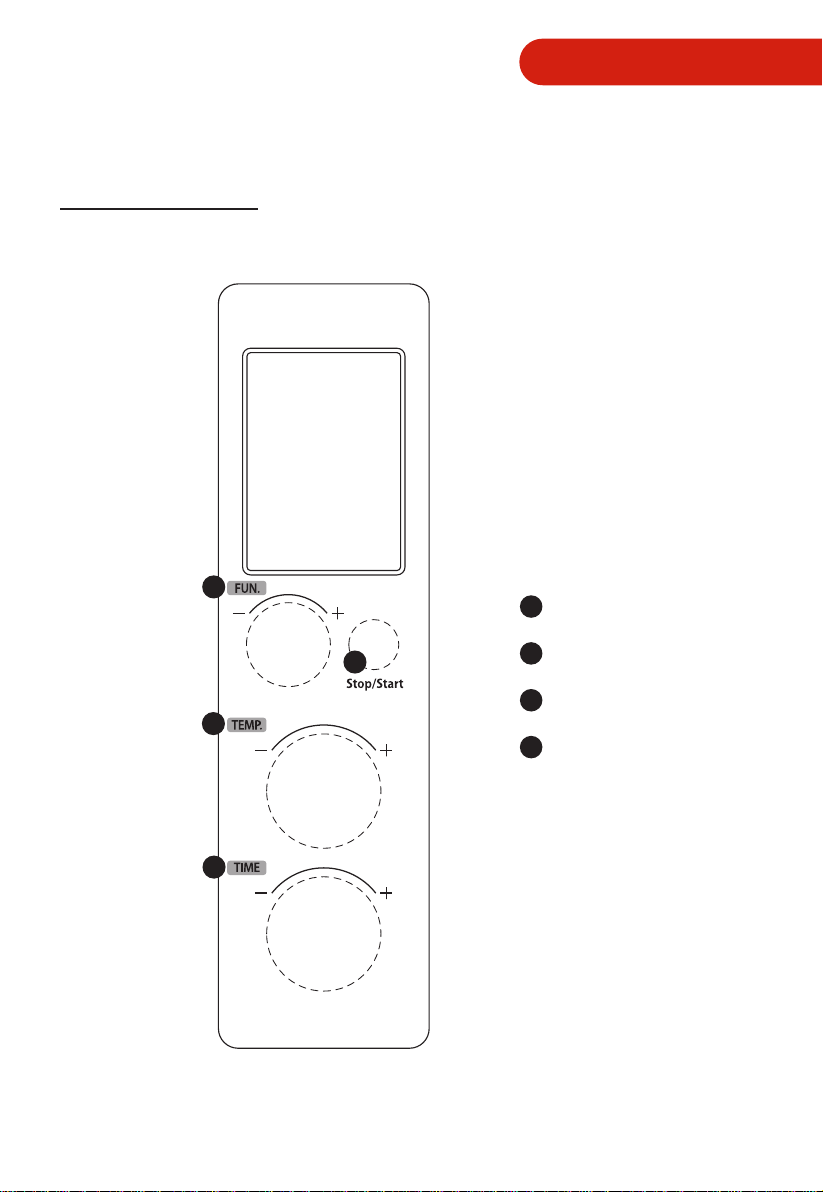
INSTRUCTION FOR USE
CONTROL PANEL
2
3
4
1
Stop/Start button
2
3
4
Function knob
1
Time knob
TEMP. knob
EN-7
HOW TO USE
THE OVEN SURFACES ARE HOT DURING AND AFTER USE GENERAL
INSTRUCTIONS
CAUTION
a. Place the Rack in position that will accommodate the height of the food to be
cooked.
b. The food must be put into the Grill Tray to avoid the re danger that caused by the
accumulation of food chipping on the heating pipes.
c. Make sure that you always use an ovenproof container in the oven, never use plastic
or cardboard containers in the Oven.
d. Clean the heating pipe periodically.
e. Never use glass or ceramic pans or lids.
f. DO NOT let juices run to the bottom of the oven. Use the Crumb Tray when cooking.
g. Set the temperature as suggested by the recipe or as desired.
h. Securely shut the door and set the cooking time to begin operating the oven.
Toast: The upper and lower heating elements are working during this function.
Bake: The upper and lower heating elements are working during this function.
Broil: The upper heating elements are working during this cycle.
Pizza: The upper and lower heating elements, along with the motor fan are working.
Cookies: The upper and lower heating elements, along with the motor fan are
working.
Defrost: It is suitable for defrost food and so on.
Reheat: The upper and lower heating elements, along with the motor fan are
working.
Rotisserie: The upper straight electric heating elements, along with the Rotisserie
Motor is working. Follow Rotisserie instruction for proper use.
Keep warm: The upper and lower heating elements are working during this function.
Convection: The upper and lower heating elements, along with the motor fan are
working.
FUNCTION SETTING
This oven offer 10 different functions for versatile cooking all in one appliance.

EN-8
INSTRUCTION FOR USE
OPERATION
TOAST FUNCTION:
a. Power on to enter initial state, the default mode is TOAST, the screen display
“TOAST” and " ".
b. Rotate the “TEMP.” knob to set the power level from 1-6, the default level is 4.
c. Rotate the “TIME” knob to set the quantity of bread from 1-6. The default quantity
is 4 slices.
d. Press “Stop/Start” button to start cooking. The default temperature is 450
。
F and it
cannot be changed.
e. The buzzer will sound 3 times to remind you when cooking is nished. Always pay
attention when taking out food, the food and oven are very hot.
BAKE FUNCTION:
a. Rotate the “FUNCTION” knob, until the screen display "BAKE" and " ", the oven
will enter the BAKE function.
b. Rotate the “TEMP.” knob to set temperature. The default temperature is 450
O
F.
c. Rotate the “TIME” knob to set the cooking time. The default time is 30min.
d. Press “Stop/Start” button to start cooking.
e. The buzzer will sound 3 times to remind you when cooking is nished. Always pay
attention when taking out food, the food and oven are very hot.
BROIL FUNCTION:
a. Rotate the “FUNCTION” knob, until the screen display "BROIL" and " ", the
oven will enter the BROIL function.
b. Rotate the “TEMP.” knob to set temperature. The default temperature is 350
O
F.
c. Rotate the “TIME” knob to set the cooking time. The default time is 30min.
d. Press “Stop/Start” button to start cooking.
e. The buzzer will sound 3 times to remind you when cooking is nished. Always pay
attention when taking out food, the food and oven are very hot.
When the oven is electrified, the buzzer will ring once. The default function is
TOAST. In the process of cooking , press " Stop/Start " can stop cooking.

EN-9
PIZZA FUNCTION:
a. Rotate the “FUNCTION” knob, until the screen display "PIZZA" and " ", the oven
will enter the PIZZA function.
b. Rotate the “TIME” knob to set the size of pizza (6 inches, 9 inches, and 12 inches).
The default size is 9 inches.
c. Rotate the “TEMP.” knob to set temperature. The default temperature is 450
O
F for
9 inches.
d. Press “Stop/Start” button to start cooking.
e. The buzzer will sound 3 times to remind you when cooking is nished. Always pay
attention when taking out food, the food and oven are very hot.
COOKIES FUNCTION:
a. Rotate the “FUNCTION” knob, until the screen display "COOKIES" and " ", the
oven will enter the COOKIES function.
b. Rotate the “TEMP.” knob to set temperature. The default temperature is 350
O
F.
c. Rotate the “TIME” knob to set the cooking time. The default time is 30min.
d. Press “Stop/Start” button to start cooking.
e. The buzzer will sound 3 times to remind you when cooking is nished. Always pay
attention when taking out food, the food and oven are very hot.
DEFROST FUNCTION:
a. Rotate the "FUNCTION" knob, until the screen display "DEFROST" and " ", the
oven will enter the DEFROST function.
b. Rotate the "TEMP." knob to set temperature. The default temperature is 180
O
F.
c. Rotate the "TIME" knob to set the cooking time. The default time is 1hour 30min.
d. Press "Stop/Start" button to start cooking.
e. The buzzer will sound 3 times to remind you when cooking is nished. Always pay
attention when taking out food, the food and oven are very hot.
OPERATION

EN-10
INSTRUCTION FOR USE
REHEAT FUNCTION:
a. Rotate the “FUNCTION” knob, until the screen display "REHEAT" and " ", the
oven will enter the REHEAT function.
b. Rotate the “TEMP.” knob to set temperature. The default temperature is 350
O
F.
c. Rotate the “TIME” knob to set the cooking time. The default time is 30min.
d. Press “Stop/Start” button to start cooking.
e. The buzzer will sound 3 times to remind you when cooking is nished. Always pay
attention when taking out food, the food and oven are very hot.
ROTISSERIE FUNCTION:
a. Rotate the “FUNCTION” knob, until the screen display "ROTISSERIE" and " ",
the oven will enter the ROTISSERIE function.
b. Rotate the “TEMP.” knob to set temperature. The default temperature is 350
O
F.
(The maximum temperature shall not exceed 350
O
F).
c. Rotate the “TIME” knob to set the cooking time. The default time is 1 hour.
d. Press “Stop/Start” button to start cooking.
e. The buzzer will sound 3 times to remind you when cooking is nished. Always pay
attention when taking out food, the food and oven are very hot.
KEEP WARM FUNCTION:
a. Rotate the “FUNCTION” knob, until the screen display “KEEP WARM" and " ",
the oven will enter the KEEP WARM function.
b. Rotate the “TEMP.” knob to set temperature. The default temperature is 180
O
F.
c. Rotate the “TIME” knob to set the cooking time. The default time is 1hour30min.
d. Press “Stop/Start” button to start cooking.
e. The buzzer will sound 3 times to remind you when cooking is nished. Always pay
attention when taking out food, the food and oven are very hot.
OPERATION

EN-11
OPERATION
CONVECTION FUNCTION:
a. Rotate the “FUNCTION” knob, until the screen display “CONVECTION" and " ",
the oven will enter the CONVECTION function.
b. Rotate the “TEMP.” knob to set temperature. The default temperature is 450
O
F.
c. Rotate the “TIME” knob to set the cooking time. The default time is 30min.
d. Press “Stop/Start” button to start cooking.
e. The buzzer will sound 3 times to remind you when cooking is nished. Always pay
attention when taking out food, the food and oven are very hot.
ROTISSERIE FUNCTION USING THE ROTISSERIE FORKS:
1. Secure the food with weight centered on the forks.
2. Slide the Holding Forks onto each of the forks and press rmly into the food,
piercing the food to hold in place on the forks. Insert the Holding Forks at dierent
angles to hold the food more rmly. Tighten the screws, turning clockwise so that
the holding forks will stay in place during the Rotisserie cooking session.
3. Insert the pointed end of the Rotisserie forks into the Rotisserie Socket on the
inside right side of the oven.
4. Lift the Rotisserie Forks on the left side just a bit to allow the notch to t into the
Rotisserie Bracket on the left side of the oven.
5. Set the Temperature knob and the Time knob to begin operating the oven.
6. Once the cooking time has been complete and you have checked the internal
temperature of the food to ensure that it has cooked properly, you can remove the
Rotisserie Forks with the Rotisserie Helper Handle.
7. Hold the handle in your right hand and support handle in your left hand.
8. Place the hooks on the Helper Hander underneath the Rotisserie Forks.
9. Lift the left side of the Rotisserie Forks out of the Bracket rst and pull slightly
toward you.
10. Gently remove the right pointed side of the Rotisserie Forks from the Rotisserie
Socket and remove the food on the forks out of the oven.
11. Place the food on a heat safe plate or dish when you have removed from the oven.
Let it cool slightly before attempting to remove the holding forks and Rotisserie
Forks from the food
12. To remove the Holding Forks, turn the screws counterclockwise and pull the
Holding.
EN-12
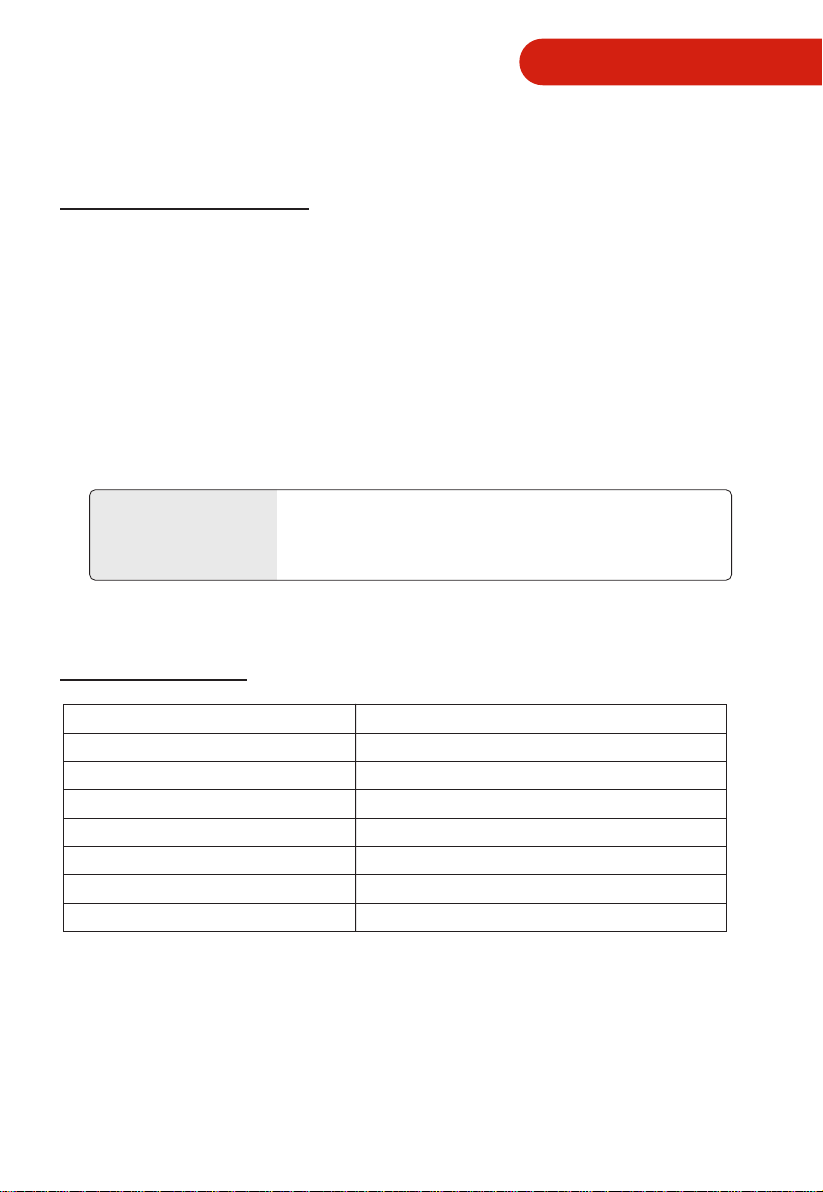
SPECIFICATION
MODEL
CUBAGE
VOLTAGE
AC FREQUENCY
POWER
Product Size(L x W x H):
Package Size(L x W x H)
GW:
TL1-AC25CZA(BS)
25L
120V~
1700W
18.98 x 15.59 x 10.79 inches
60Hz
21.42 x 17.87 x 14.65 inches
CARE AND CLEANING
1. Before cleaning unplug the toaster oven and allow it to cool completely.
2. Wash all the attachments with mild, soaped water including the rack and the grill
Tray.
3. Do not use abrasive cleansers, scrubbing brushes and chemical cleaner as this will
cause damage to the non-stick coating of baking Tray.
4. Using a wet cloth to wipe the inner of the oven.
5. To clean the door by using a wet cloth saturated with detergent or soap.
6. Never immerse the unit in water or other liquid.
7. Any other servicing should be performed by an authorized service representative.
Warning: Hot Surface!
Advertencia: ¡Supercie Caliente!
Avertissement: Surface Chaude!
CAUTION : HOT
SURFACE
INSTRUCTION FOR USE
18.08 lbs

EN-13
ONE YEAR LIMITED WARRANTY
This product carries a warranty stating that it will be free from defects in
material and workmanship for a period of one year from the date of purchase.
This warranty is valid for the original retail purchaser from the date of initial
retail purchase and is not transferable. Keep your original sales receipt.
IMPORTANT:
1. This warranty does not cover damages resulting from accident, misuse or
abuse, lack of reasonable care, the affixing of any attachments not provided
with the product, loss of parts, or subjecting the appliance to any but the
specified voltage. ( Read directions carefully. )
2. This warranty is void if this product is ever used for other than private
household purposes.
3. This warranty is void if this product is ever used outside of United State.
If service is required during the warranty period, properly pack your unit. We
recommend using the original carton and packing materials.
If additional assistance is needed, please contact customer assistance at:
Midea America Corp. expressly disclaims all responsibility for consequential
damages or incidental losses caused by use of the appliance. Some states do
not allow this exclusion or limitation of incidental or conse quential losses so
the foregoing disclaimer may not apply to you. This warranty gives you
specific legal rights, and you may also have other rights which may vary from
state to state.
customercare@us.toshiba-lifestyle.com
855-204-5313
Midea Am erica Corp
5 Sylvan Way,
Parsippany, NJ 07054
Model Number:_______
________________
Serial Number:________________________
SAVE THIS FOR YOUR RECORDS
PN:16171000A12989


Customer Assistance: 855-204-5313
Midea America Corp
5 Sylvan Way, Parsippany, NJ 07054