
Troubleshooting
Troubleshooting
13
Product Specifications
Product Specifications
14
1
Index
Product Introduction
Product Introduction
05
Safety and Precautions
Symbols
Warning
Caution
Note
02
03
04
04
Product Usage
How to Attach
How to Pair
Function Chart by Press Duration
How to Replace the Battery
06
08
10
11
2 Safety and Precautions
Symbols
Symbols
Warning
Provides important information related to the safety of the user. Failure to comply may lead to death or
serious injury.
Caution
Information provided for the safety of the user and the proper use of the product. Failure to comply
may result in personal injury or property damage.
Note
Information provided for user convenience.
• FINEDIGITAL INC. assumes no liability for any accidents or damages occurring while driving.
• This product is designed to record and store video footage only. It does not automatically contact emergency services such as
119 or 112, nor does it prevent or detect accidents.
• Before use, please read all precautions carefully and use the product correctly.
3
Safety and Precautions
Safety and Precautions
Warning
Failure to comply with the following instructions may result in death or serious injury of the user.
• Product specifications and the contents of this user manual are subject to change without notice to improve product
performance.
• No part of this user manual may be reproduced without permission.
• We are not liable for any damages resulting from data loss or product loss caused by product malfunction in the event of
an accident or any other circumstances.
Safety
•
Keep out of reach of children, as swallowing the battery can lead to serious injuries such as esophageal damage.
•
Do not disassemble, heat, or strike the battery, or place it near open flames. This may cause rupture or fire.
Usage
•
Do not take your eyes off the road to operate the buttons while driving.
•
Do not attempt to disassemble or modify the product.
4 Safety and Precautions
Caution
Failure to comply with the following instructions may cause personal injury or property damage
to the user.
Attach
•
Do not install within the airbag deployment range, in locations that obstruct the driver's view, on vehicle sensors,
or on the instrument panel.
•
Do not expose to direct sunlight, high temperatures, or high humidity for extended periods.
Usage
•
Do not drop the product or subject it to strong impacts.
•
Do not use batteries other than those specified.
•
Avoid use in wet or humid environments.
Connect
•
Bluetooth connectivity with the dash cam may not be stable depending on internal vehicle structures or
obstacles.
Information
Information provided for user convenience.
Attach
•
The attachment location may vary depending on the vehicle environment.
Usage
•
The battery features a power-saving design with a standby time of up to approximately 4 months; actual usage
time may vary depending on the environment.
•
If the buttons are unresponsive, try removing and reinserting the battery.
Connect
•
The effective Bluetooth range is approximately 10m.
5
Product Introduction
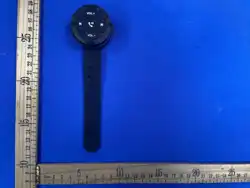
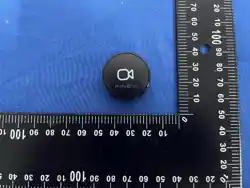
Quick Button is an auxiliary device for vehicle dash cams that connects via Bluetooth, allowing you to instantly record and save
footage of critical moments with just the press of a button.
With this product, you can capture important moments without missing them — no additional software installation required.
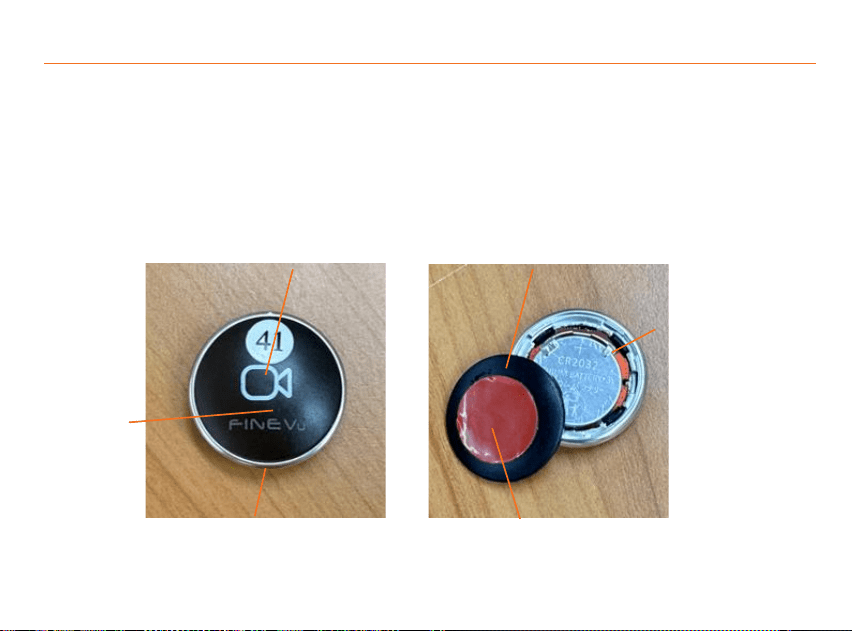
Button
Press briefly to start emergency recording.
LED
Indicates the operating status by flashing.
Ring
Used to detach or attach the battery cover.
Attachment Surface
The side with double-sided tape.
Remove the protective film before use.
Battery Holder
Holds the battery in place.
Battery Cover
Covers and protects the battery.
Product Introduction
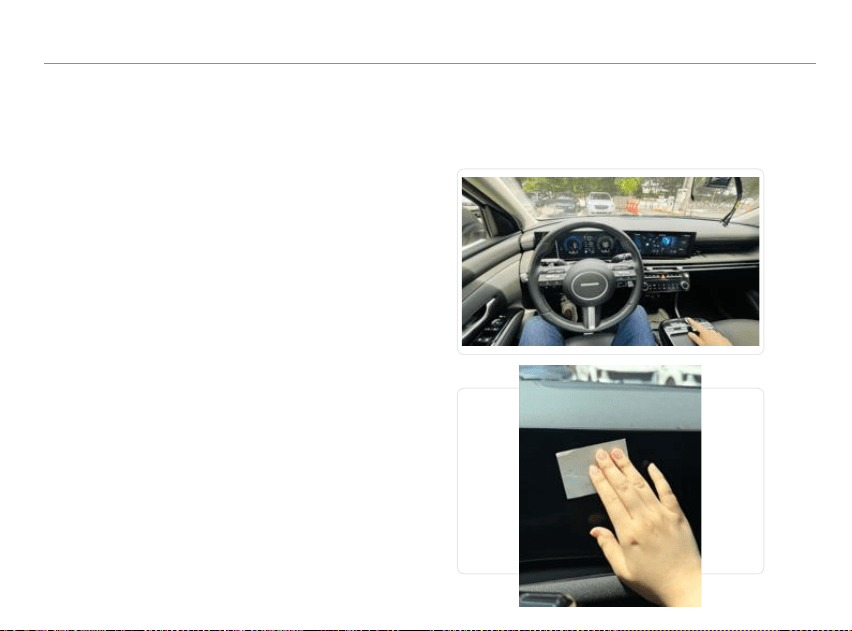
1. Select the attachment location.
•
Choose a spot that is within easy reach while driving
and does not obstruct your view.
•
The tape does not adhere well to uneven or
absorbent materials such as leather or fabric. Attach
to a flat, smooth plastic surface.
(e.g., center fascia, between the instrument cluster
and the infotainment screen)
How to Attach
2. Prepare the attachment surface.
•
Use a dry cloth to wipe away any dust, moisture, or
oil from the surface. Any remaining contaminants
may reduce adhesive strength.
6 Product Usage
7
Product Usage
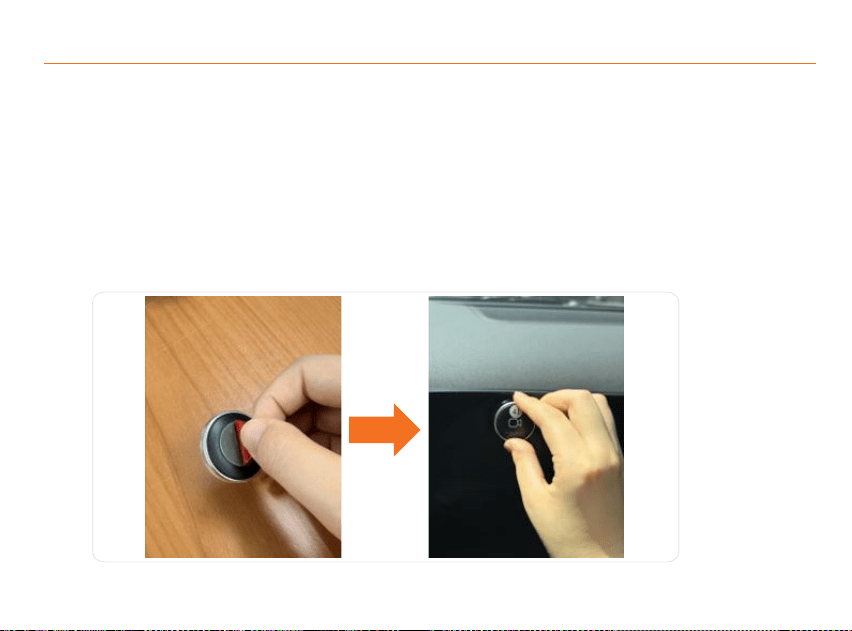
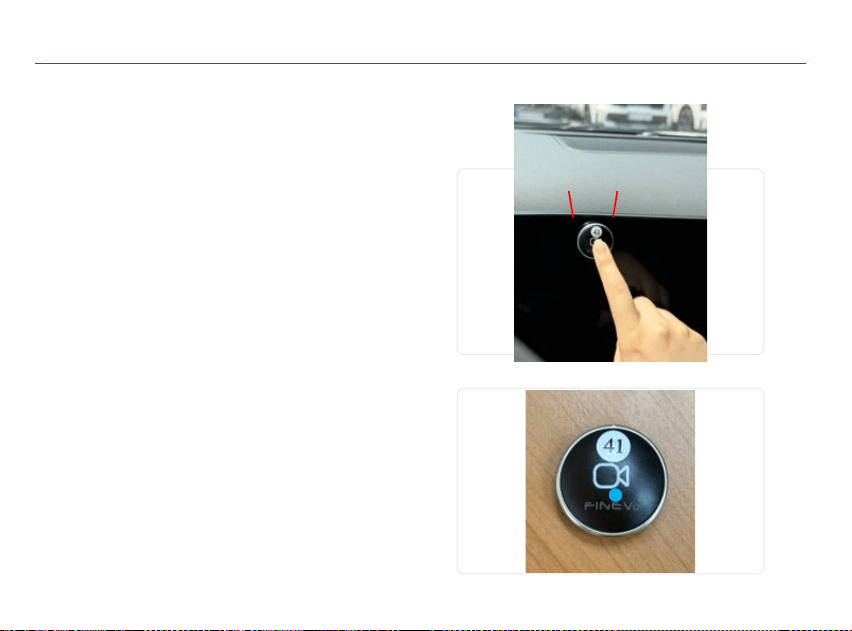
3. Attach the product.
•
Remove the protective film from the 3M double-sided tape on the battery cover, place it on the selected
location, and press firmly for 3 to 5 seconds.
•
Since it connects via Bluetooth, it operates normally regardless of the direction or angle of attachment.
•
The adhesive may not be fully set immediately after attachment. Avoid applying excessive force or removing
and reattaching the product for approximately 24 hours.
•
Repeated repositioning or removal may reduce adhesive strength. If this occurs, replace with new tape.
8 Product Usage
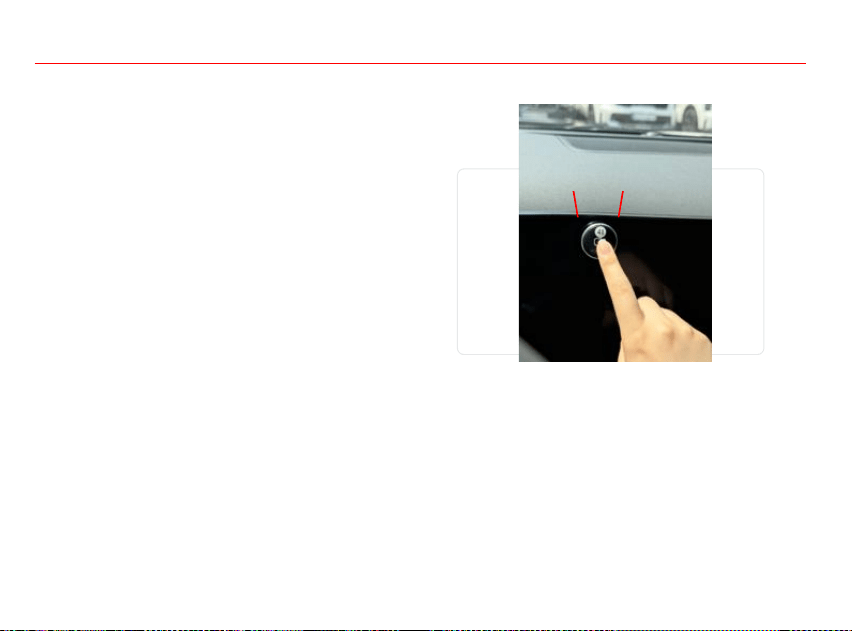
1. When the dash cam is on in driving mode, press and
hold the button for 5 seconds, then release.
•
Check that your dash cam model supports the Quick
Button function. If not, the button will not connect.
•
Check that the dash cam's Wi-Fi is turned on. If Wi-Fi
is OFF, the button will not connect.
•
The button will not connect when the vehicle ignition
is off (parking mode).
How to Pair
2. Wait briefly until a voice prompt is heard from the dash
cam.
•
When successfully connected, a voice prompt saying
"Quick Button connected" will play.
•
If no voice prompt plays, the button's battery may be
dead. Check if the LED at the bottom of the button
flashes when pressed.
If the LED does not light up, replace the battery.
5sec
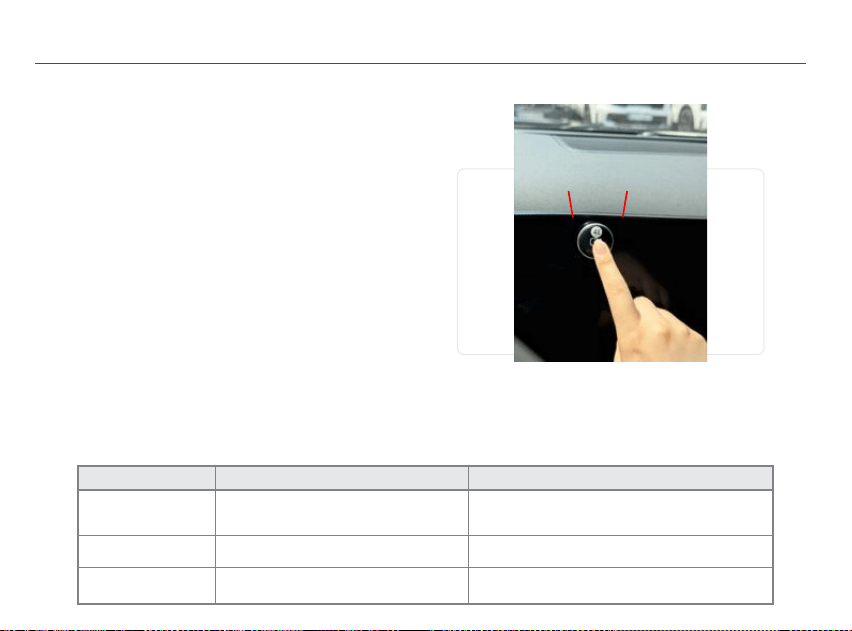
3. While driving, briefly press the button whenever
recording is needed to start emergency recording.
•
Emergency recording lasts 20 seconds and is saved
automatically.
•
Pressing the button again during emergency
recording will not extend or stop the recording.
1sec
4. Recorded footage can be viewed after connecting to the smartphone app.
•
For LCD models, footage can be viewed directly in playback mode on the
dash cam screen.
9
Product Usage
10 Product Usage
5. To disconnect the button from the dash cam, press and
hold the button for 10 seconds, then release.
•
When successfully disconnected, a voice prompt
saying "Quick Button disconnected" will play.
Button Operation Function Confirmation
Press briefly and release
Start Emergency Recording (automatically
records and saves for 20 seconds)
Voice Prompt (Start) "Starting emergency recording.“
Voice Prompt (Complete) "Emergency recording is
complete."
Press and hold for 5
seconds, then release
Pair (Connect) with Dash Cam Voice Prompt "Quick Button connected."
Press and hold for 10
seconds, then release
Disconnect from Dash Cam Voice Prompt "Quick Button disconnected."
Function Chart by Press Duration
10sec
11
Product Usage
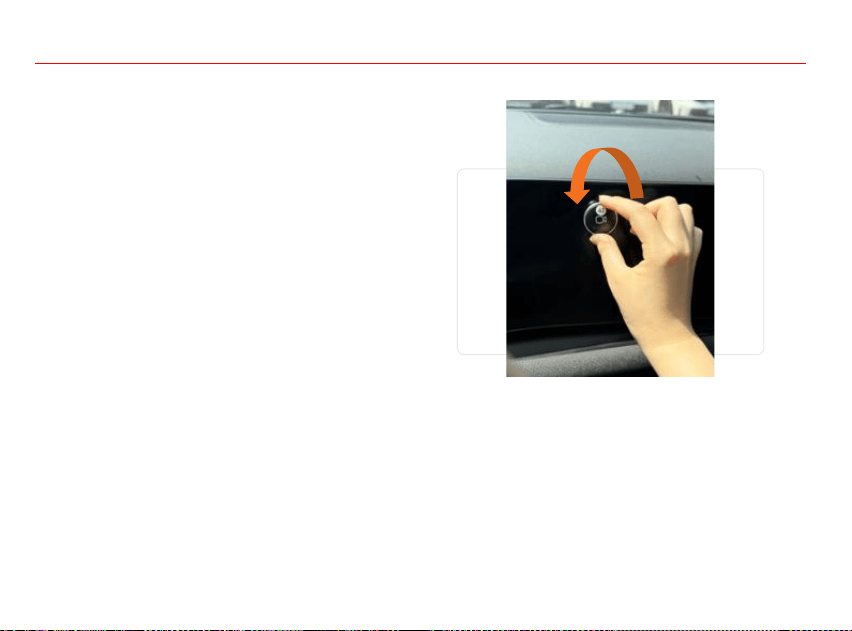
How to Replace the Battery
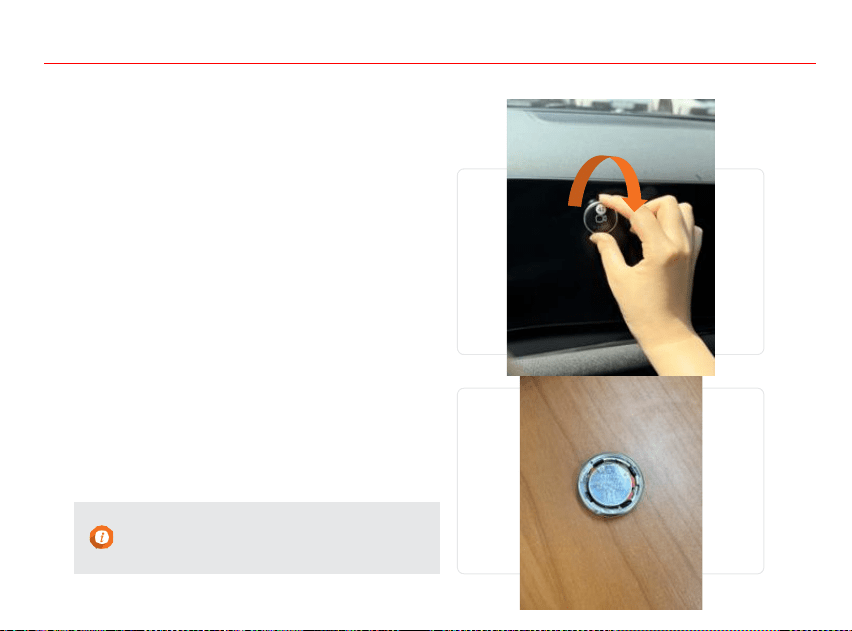
1. Hold the ring and rotate it clockwise (right) to detach it.
•
If the product is not attached to a surface, hold the
battery cover and rotate it to detach.
•
Take care when removing the battery cover, as the
battery may fall out.
2. Remove the battery and replace it with a new one.
•
When inserting the new battery, ensure the "+"
symbol faces upward.
•
Gently push the new battery into the battery holder
to secure it.
· This product operates on a lithium coin battery
(CR2032). Using a battery that does not meet the
specifications may cause the product to malfunction.
12 Product Usage
3. Align the product body with the battery cover, then
rotate it counterclockwise (left) to reassemble.
•
The ring has a groove that must align with the cover
before it can be locked. If the groove is difficult to
locate, place the front of the cover against the body
and rotate it slowly until you feel it click into place,
then rotate left to lock.
•
The battery may fall out during reassembly. Hold the
battery in place while attaching the cover.

Troubleshooting
The dash cam is not connecting.
· First, check if your dash cam model supports the Quick Button function. If not, the button will not
connect.
· If the model supports it, the button's battery may be dead. Check if the LED at the bottom of the
button flashes when pressed.
· If the LED does not light up, replace the battery by referring to the [How to Replace Battery] section.
13
Troubleshooting
Emergency recording does not start when the button is pressed.
· The dash cam may be off, or out of Bluetooth range (approx. 10m). Check and try again.
If the connection to the dash cam has been lost, reconnect by following the [How to Pair]
instructions.
The button is frequently triggered unintentionally.
· The button may be attached in a location where hands or clothing frequently brush against it.
Reattach it to a location that is easily accessible but less prone to accidental contact.
A new button was purchased to replace a lost one, but it is not connecting.
· This occurs when connection information from the previous button remains on the dash cam,
preventing it from pairing with the new button.
· Refer to the user manual for your dash cam model to format the device, then attempt to
reconnect.(Formatting will delete all saved footage. Back up any necessary videos beforehand.)
14 Product Specifications
Product Specifications
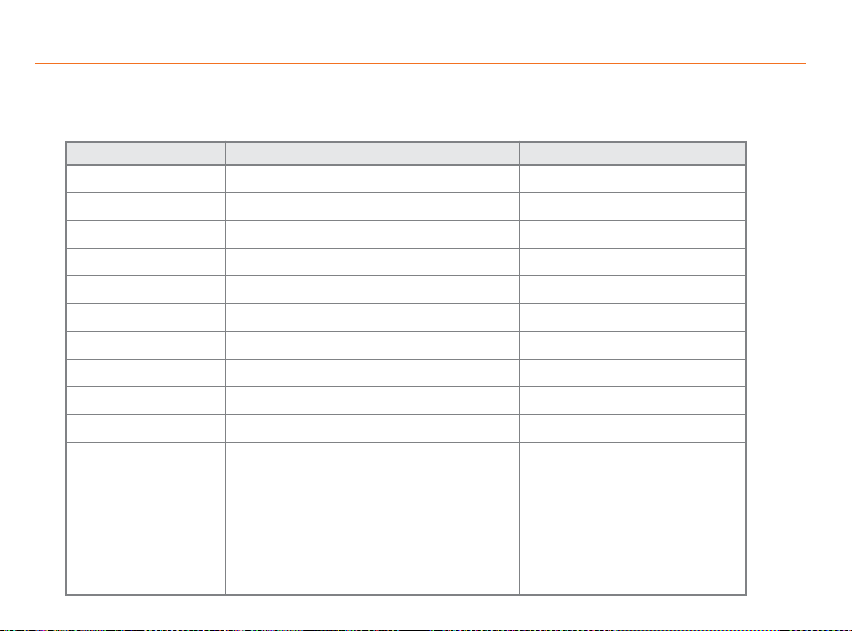
Item Specification Remarks
Model Name
Quick Button
Size / Weight
Diameter 30mm x Thickness 10mm / 7g
Operating Temperature
-45℃ ~ 85℃
Operating Humidity
80% RH or less
Material
ABS+PC
Battery
CR2032
Bluetooth Version
5.3
Bluetooth Effective Range
10m
Button Lifespan
Approx. 200,000 times or more
Warranty
1 Year
Regulartory Compliance
R-R-FDK-FineA086
Model Name :
Quick Button
Year of
Manufacture:
Marked separately
Name : Bluetooth Remote
control
Distributor:
FINEDIGITAL INC.
Manufacturer :
DONGQIXING
TECHNOROGY
CO.,LTD
Certification
Holder :
FINEDIGITAL INC.
Country of
Manufacture :
China

FCC Warnning:
This equipment has been tested and found to comply with the limits for a Class B digital device,
pursuant to part 15 of the FCC Rules. These limits are designed to provide
reasonable
protection against harmful interference in a residential installation. This equipment generates,
uses and can radiate radio
frequency
energy
and,
if
not
installed
and
used
in
accordance
with
the
instructions,
may cause
harmful
interference
to
radio
communications.
However,
there
is
no
guarantee
that interference
will
not
occur
in
a
particular
installation.
If
this
equipment
does
cause
harmful interference to radio or television reception, which can be
determined by turning the equipment off
and
on,
the
user
is
encouraged
to
try
to
correct
the interference
by
one
or
more
of
the following measures:
•
Reorient or relocate the receiving antenna.
•
Increase the separation between the equipment and receiver.
•
Connect the equipment into an outlet on a circuit different from that to which the receiver is
connected.
• Consult the dealer or an experienced radio/TV technician for help.
Caution:
Any
changes
or
modifications
to
this
device
not
explicitly
approved
by
manufacturer
could void your authority to operate this equipment.
This
device
complies
with
part
15
of
the
FCC
Rules.
Operation
is
subject
to
the
following
two
conditions:
(1)This
device
may
not
cause
harmful
interference,
and
(2)
this
device
must
accept
any
interference received, including interference that may cause undesired operation.
This
equipment
complies
with
FCC
radiation
exposure
limits
set
forth
for
an
uncontrolled
environment.
This
equipment
should
be
installed
and
operated
with
minimum
distance
0cm
between the radiator and your body.