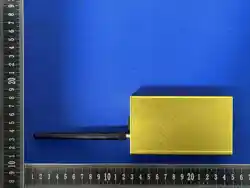

Multi-function Visual Laser Timer Instruction Manual
1. Power On:
Turn on the power switch on the side of the timer. The display screen will show
"88.888", then display a number "XXX", where "XXX" indicates the current
remaining battery percentage. After 2 seconds, it will display "- X X - -",
indicating the current timing mode of the timer. After another 2 seconds, the
display will emit a laser, entering the operational state.
2. Mode Selection:
After powering on, you can modify the mode settings on the timer. Press and
hold the metal button on the left side of the timer for about 3 seconds to enter
the mode setting state. Tap this metal button to cycle through the timer modes:
"1, 2, 3, 4, 5, 6, 7, L1, L2, L3, F1, F2, F3". After selecting the desired mode, press
the power switch to turn off the timer, then turn it on again. The timer will now
operate in the selected timing mode.
3. Alignment:
Adjust the position of the timer and the reflector so that the laser emitted by
the timer shines onto the reflector. The red indicator light will stay on when
properly aligned. If not aligned, the red indicator light will flash.
4. Usage:
Modes 1-7:Used for shuttle run (single unit) or dual-unit mode. Timing starts
as soon as any unit is triggered. After triggering, the display shows the
remaining count. Timing stops after the final trigger. Press the (detector's
button) side button to clear the time value and restart.
L1 Mode:The timer's laser detection function is disabled. The detector controls
the timing: trigger to start timing, trigger again to stop timing, trigger again to
reset the time to zero and restart timing.
L2 Mode:Timing can only be started by triggering the detector. If triggered
again before the timer is triggered, the time display resets (the internal timer
continues running). If the detector is triggered again at this point, it resets and
restarts timing. When the timer is triggered, it displays the elapsed time from
start until the timer was triggered, showing the current triggered time value. If
the detector's laser beam is triggered at this point, it resets and restarts.
L3 Mode:Whether triggered by the detector or the timer, the first trigger starts
timing, the second trigger stops timing, and a subsequent trigger resets and
restarts timing.
F1 Mode:Single timer mode. Trigger to start timing. The next trigger records
the time elapsed from the start to that point. Subsequent triggers display the
cumulative time from the start.
F2 Mode:Single timer mode. Trigger to start timing. The next trigger displays
the time elapsed from start to that trigger. The next trigger displays the time
interval between the two triggers.

F3 Mode:Used for channel switching. Set to F3, and upon next power-on, it will
enter channel selection. After selection, turn on the detector; it will
automatically sync to the channel and then power off automatically. After the
timer syncs, turning it off will make it display Mode 1.
Mode F3: Changing the Timing System Channel (Use with Caution)
When two sets of our products using the same channel are used in the same
venue, they may interfere with each other. You can change the channel for one
of the systems. During operation, all devices must be powered off first to
prevent misoperation.
Select F3 in the mode settings. Power off and then on again. After displaying
F3, the timer will show two digits "0-X--". The "0" represents the screen ID of
the detector about to be added, and the following number indicates the
current channel used by this timer set. Tap the "Side Button" touch key on the
left side of the timer to cycle through channels "0-9". After selecting the
desired channel, power on or connect the devices that need their channel
changed, one by one. They will sync sequentially based on the boot order, and
the screen ID will increase accordingly. Detectors will automatically power off
after the channel is modified. Devices that do not need channel modification
must not be powered on. Remember this! After modifying all devices, power
off the main unit. The channel change operation is now complete.
Charging Indicator:
After inserting the adapter, the charging indicator light will turn red. When fully
charged, the indicator light will change from red to green.
FCC WARNING
This device complies with part 15 of the FCC Rules. Operation is subject to the
following two conditions:
(1) This device may not cause harmful interference;
(2) this device must accept any interference received, including interference
that may cause undesired operation.
Note:
This equipment has been tested and found to comply with the limits for a
Class B digital device, pursuant to part 15 of the FCC Rules. These limits are
designed to provide reasonable protection against harmful interference in a
residential installation. This equipment generates, uses and can radiate radio
frequency energy and, if not installed and used in accordance with the
instructions, may cause harmful interference to radio communications.
However, there is no guarantee that interference will not occur in a particular
installation. If this equipment does cause harmful interference to radio or
television reception, which can be determined by turning the equipment off
and on, the user is encouraged to try to correct the interference by one or
more of the following measures: —Reorient or relocate the receiving antenna.
—Increase the separation between the equipment and receiver. —Connect
the equipment into an outlet on a circuit different from that to which the

receiver is connected. — Consult the dealer or an experienced radio/TV
technician for help. Note: The Grantee is not responsible for any changes or
modifications not expressly approved by the party responsible for compliance.
such modifications could void the user's authority to operate the equipment.
The device has been evaluated to meet general RF exposure requirement. This
equipment complies with FCC's RF radiation exposure limits set forth for an
uncontrolled environment. This device and its antenna(s) must not be
co-located or conjunction with any other antenna or transmitter.

