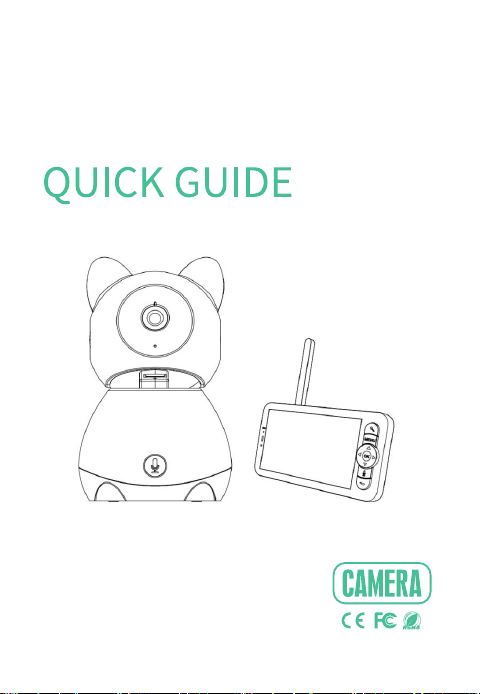
Baby1T&1M
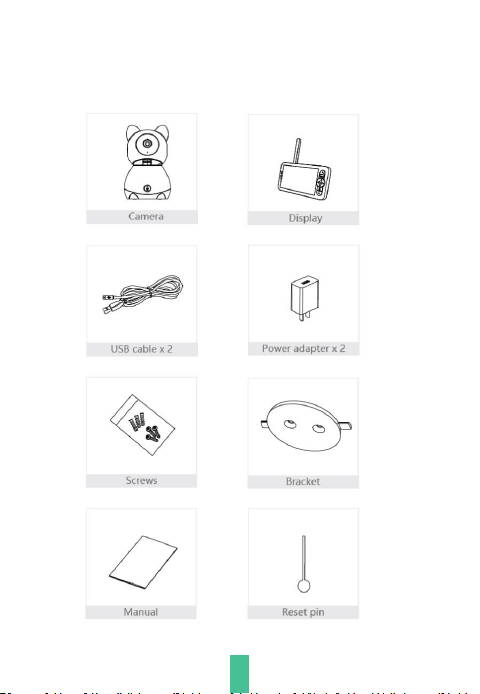
Please consult this checklist for all pas.
In the Box
1
Description
2
DC 5V/1A
Power supply
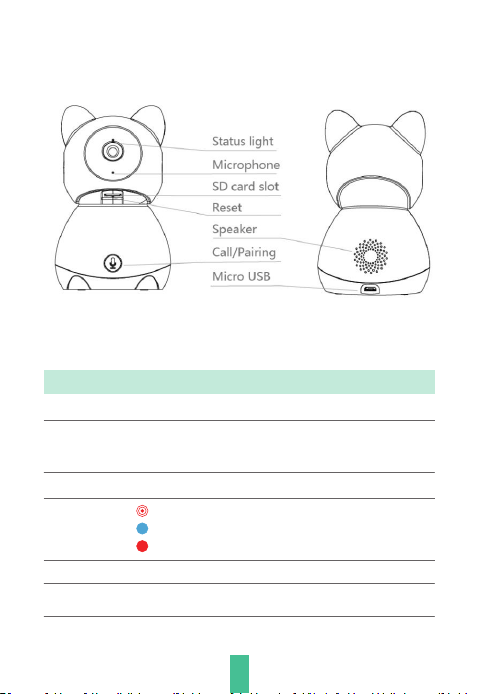
DescriptionName
Status light Blinking red fast: Waiting for network conguration
Solid blue: Functioning properly
Solid red: Network malfunction
TF card slot
RESET
Press and hold for 5 seconds to reset the device (all
settings will be restored to facto defaults)
TF card storage (up to 256GB)
Tempeure
& humidity
sensor
Detect the temperature and humidity of the environment
Pair
Long press to pair camera with screen
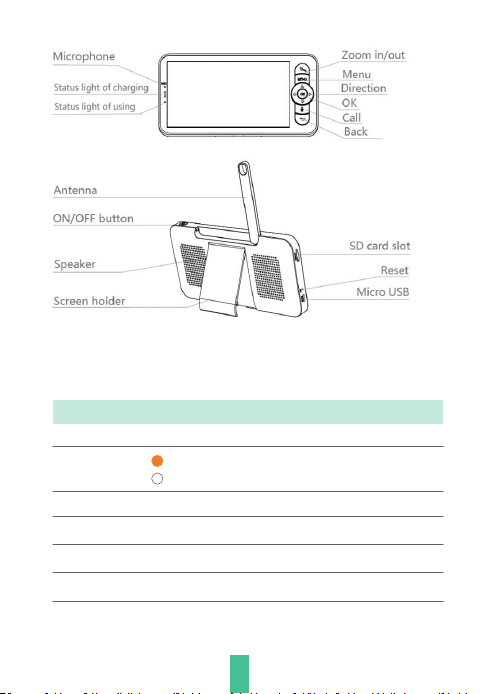
3
DC 5V/1APower supply
DescriptionName
ON/OFF button
Zoom in/out
Adjust the image magnication in 1X, 2X or 4X
Long press 5 seconds to turn on/turn o the monitor
Status light
Orange light: Working
No light: Power o
Antenna
Adjust the angle to get better signals
Menu
Access the settings and options

4
Direction Navigate and select options
OK
Conrm selections or wake the screen
Call
Make a call after pressing the button
Back
Press to back up; Long press to stop playing music
TF card slot
TF card storage (up to 128GB)
RESET Press with pin to reset the monitor
DescriptionName
Getting the App
AndroidiOSiPad
Download App1
Note: Suppo
Tuya is available for both iOS and Android. Search for
"SmaLife", "Tuya Sma" in App Store or Google Play, or
scan the QR Code to download the App.
You can select the App according to needs.
•If you are new to Tuya
Skip this section.
•If you already have an account
Download App (iOS & Android)
5
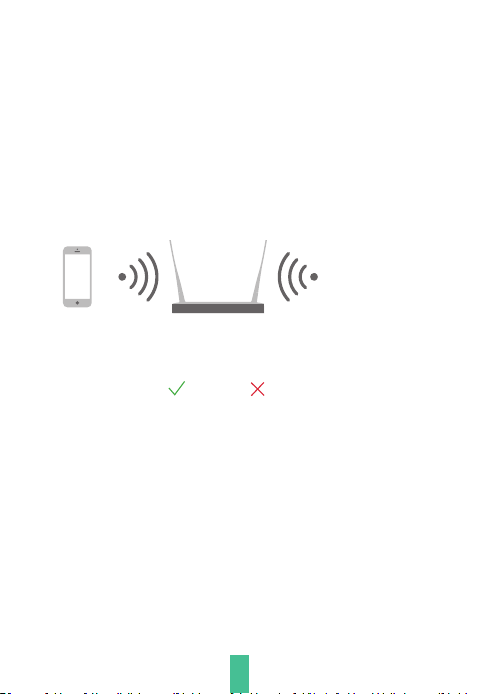
Set up router2
The device suppos only 2.4GHz Wi-Fi (5GHz Wi-Fi is not
suppoed).
Ensure your router is set to 2.4GHz Wi-Fi and you have the
SSID and password.
Note: Device suppos 2.4GHz Wi-Fi network only.
The length of the Wi-Fi SSID and password should not exceed 24
characters.
If your device has trouble connecting to the Wi-Fi network, or if you
wish to switch networks, press and hold the RESET button for 5
seconds to reset the device.
2.4GHz 5GHz
Please keep network available
6
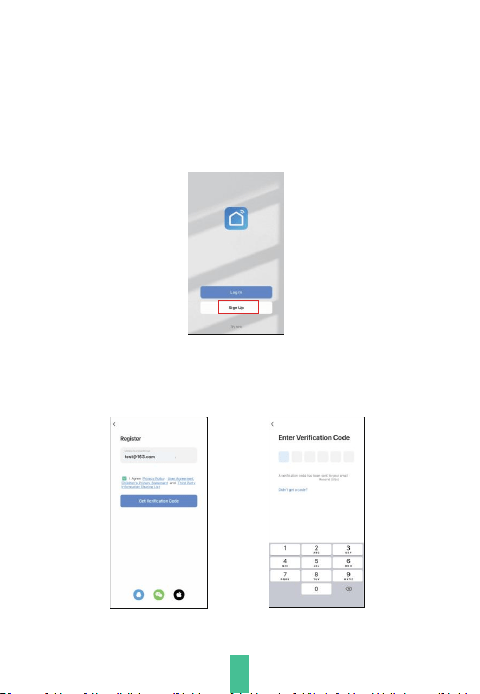
Registration
Note: The App inteace may va due to version updates. Please check the
App Store for the latest updates.
Open the App, and tap Sign up to register.
If you already have an account, tap Log In to access it.
Sign up1
Enter a valid email address, agree to the privacy agreement,
then set your nickname and password.
Complete registration2
Note: Before creating a new account, please read the Privacy Policy and
Terms of Use carefully.
7
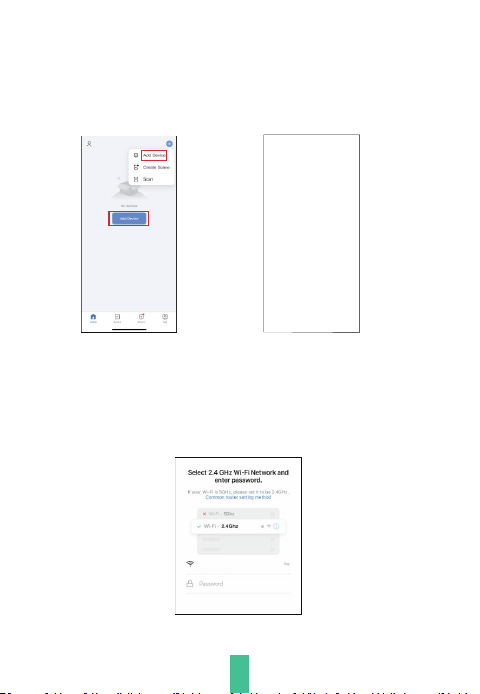
8
In the App, tap Add Device or + > Add Device. Select the
icon according to actual camera.
a.
Follow the App instructions and Ensure that your phone has
connected to a fluentand steady Wi-Fi network already.
b.
Pair device to the App2
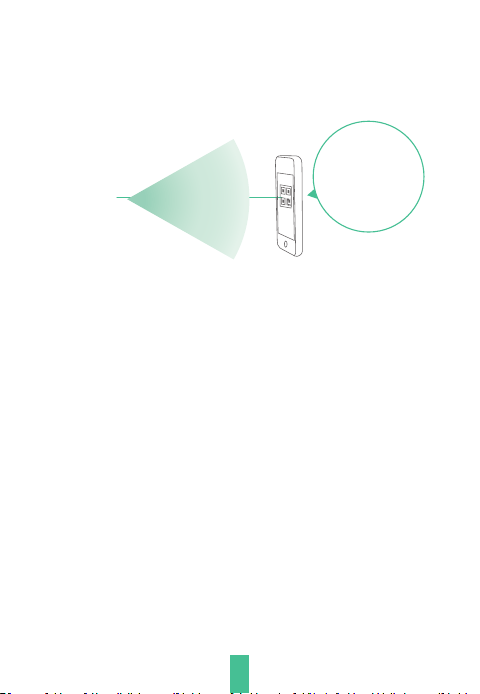
Use the device to scan the QR code displayed in the App
on your phone. Place your router, phone, and device close
together for best connectivity.
c.
Complete the network conguration.
d.
Scan the
QR code
in App
9
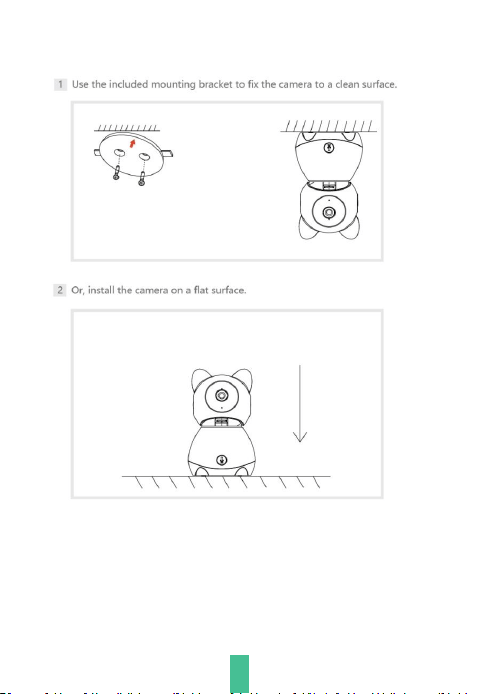
Installation
10
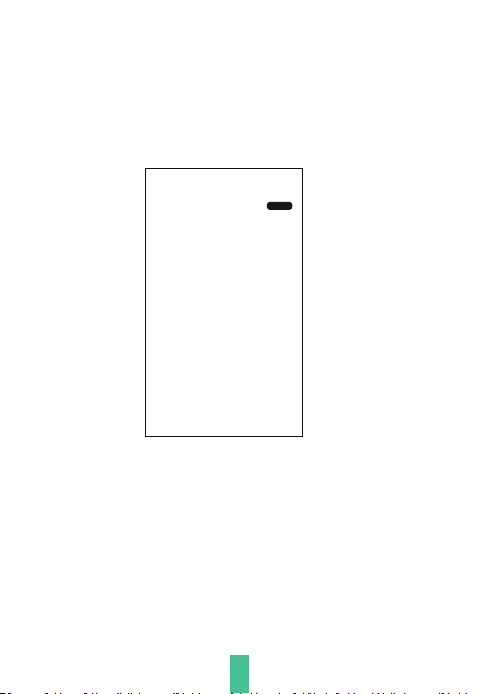
Live View
Note: The App inteace may va due to version updates. Please check the
App Store for the latest updates.
Open the App to view live feed, take snapshots, talk, record
videos, and use other functions as needed.
1
1
2021-12-22 17:59: 40
72kB/S
Monitor Using Tips
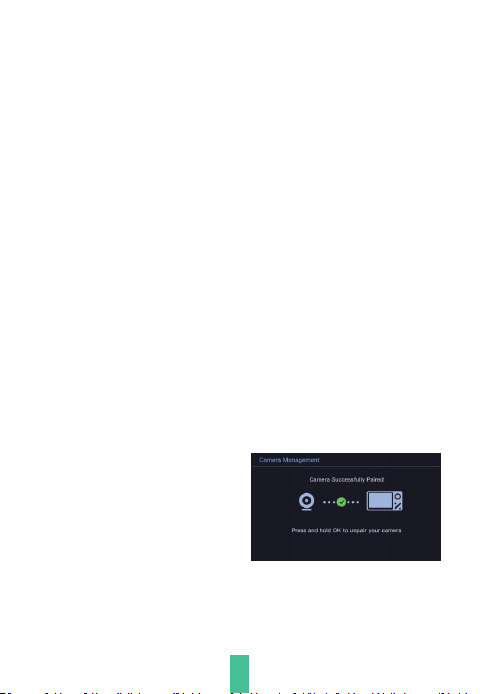
Pairing of camera and monitor1
Power on the camera and the monitor, and they will
automatically connect. If the connection fails, please follow
the steps below to pair.
•Unbind the monitor and camera
•Bind the monitor and camera
1. Press the Menu button on the monitor, and select > Camera.
Select Camera 1 or Camera 2 which you need to pair.
2. Long press the camera pairing button until you hear the prompt tone.
3. Press the OK button on the monitor to sta pairing.
4. If you need pair 2 cameras, please repeat step 2~ step 4.
1. Press the Menu button on the monitor, and select > Camera.
2. Select Camera 1 or Camera 2 which you need to unbind.
3. Long press the OK button to release the binding.
1
2

Camera switching method2
Note: If you have added 2 cameras, the monitor will display 2 live views at
the same time. If you want to set parameters or enable functions of
one of the cameras, you need to select and switch to the camera rst
(the number shown in the represents the selected camera).
On the home page, press button and use the Direction button
to switch the camera between Cam1 or 2 if you have added 2
cameras. Select one camera you need and press the OK button
on the monitor to enter full-screen viewing mode. And then you
can press button again to zoom in and zoom out. (Zooming
function does not work when the screen is not in full screen.)
Rotate the camera3
You can adjust the monitoring angle for better vision.
The Direction buttons on the monitor screen are available when the
camera is powered on. Press the Direction buttons to rotate the
camera horizontally and veically for better vision.
13

Photo & video4
•Take a photo
You can take a photo when you want to capture an interesting scene of the
baby. Press Menu button on the monitor, select and press OK to take a
photo.
•Record a video
You can record a video when you want to capture a meaningful time for the
baby. Press Menu on the monitor, select and press OK to record a video.
•View the taken photos and recorded videos
1. Press the Menu button on the monitor, select and press OK to enter
the inteace.
2. Select the camera and date, select the photo or video you want to view and
press OK to enter preview mode.
* Press OK to play or pause the vedio in the preview mode.
* Press the Return button to the quit preview or return to the main menu.
Play music5
You can play music when your baby needs to be soothed. There
are various soft music to select.
Press the Menu button on the monitor screen, select and press
OK to enter the music inteace. You can select dierent music,
change the music cycle mode, or adjust the music volume.
14
Feeding reminder6
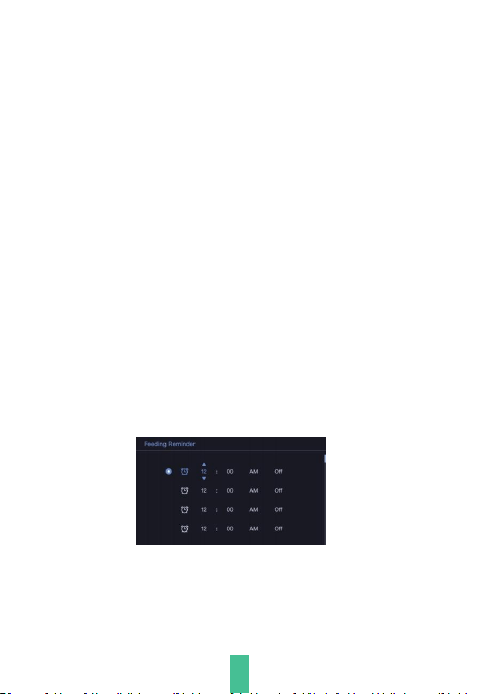
Remind you to feed your baby when you are too busy, or when
you want to give your baby a regular diet.
1. Press the Menu button on the monitor, and select >
Feeding Reminder.
2. Select on or o to open or close feeding reminders. You can
set up to 10 feeding times one day. And when the set time is up,
a feeding alarm will appear on the monitor screen.
3. Press UP and DOWN direction buttons to select between 10
time options, and press OK to sta the time setting.
1
5
Sma care7
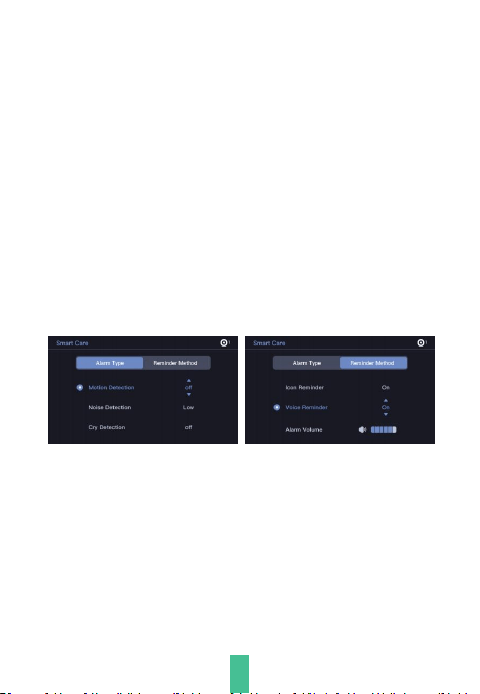
1. Press Menu on the monitor and select > Sma Care.
2. Press UP and DOWN direction buttons to select options
between motion detection, noise detection, c detection and
alarm volume, then press OK to save.
3. When set up one detection mode, please press LEFT and
RIGHT direction buttons to change options, and press UP and
DOWN direction buttons to adjust the sensitivity.
* You can select dierent sensitivity according to your needs. Low refers to
low sensitivity, and high refers to high sensitivity.
4. Select Reminder Method, press UP and DOWN direction
buttons to select reminder methods (icon, voice). To ajust the
alarm volume, you can press LEFT and RIGHT direction buttons.
Temperature and humidity detection 8
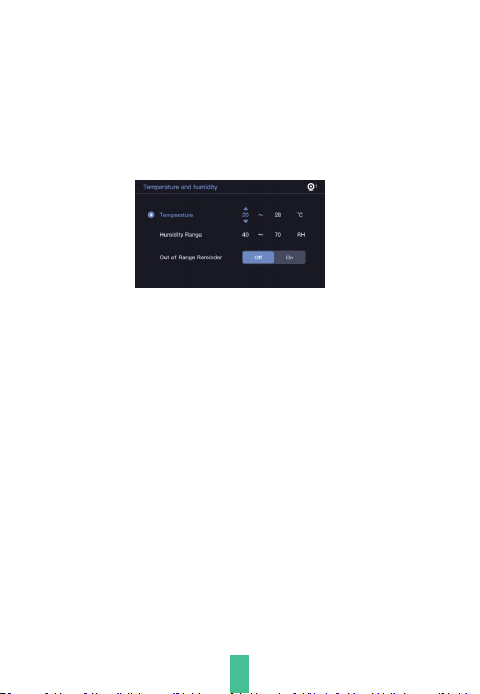
You can monitor the temperature and humidity of your baby's
room in real-time. When the temperature and humidity are out
of range, you will recieve the alarms immediately, so that you
can take measures.
1. Press the Menu button on the monitor, and select > Temperature
and humidity.
16
General settings9
•Set up brightness
1. Press Menu on the monitor, select and press OK to enter.
2. Press UP and DOWN buttons to adjust brightness.
•Set up time:
1. Press Menu on the monitor and select > Date and time.
2. Press the direction buttons to change the date, time, and time displaying
mode.
1
7
•Set up language:
1. Press Menu on the monitor and select > Language.
2. Select the language you need.
2. Press UP and DOWN direction buttons to select options between
temperature range, humidity range and out-of-range reminder, then
press OK to set up.
3. Press LEFT and RIGHT buttons to change options, then press UP and
DOWN buttons to change values and units.
4. In the Out of range reminder option, select to turn on or o the alarm
when the temperature and humidity are out of range.

•Set up sleep mode:
You can set up sleep mode to increase standby time.
1. Press Menu on the monitor and select > Sleep mode.
2. In default mode(Audio o), the audio from the camera can not be heard
after the display is o, so the standby time is long. In Audio on mode, the
audio from camera can still be heard even after the screen is turned o, and
you can choose the time(1,5,10,30 or 60min), but the standby time is shoer.
In Always on mode, the monitor remains on unless the power button is
pressed, with sho standby time.
•Turn on and o status indicator:
If you turn on the status indicator, you can get the working status of the
camera. You can also turn o the status indicator if you think it will aect your
baby's sleep.
Press Menu on the monitor and select > (Or Press the Menu
button, select >Light > Status light.).
•SD card:
1. Press Menu on the monitor and select >SD card management. Then
you can view the total capacity and remaining capacity of your SD card.
2. (Optional) You can format the SD card as you needed, but make sure that
the impoant data is backed up.
•Upgrade:
You can upgrade your camera when the upgrade alarm appears. Or press
Menu on the monitor and select > Device information to check whether
there is an upgrade.
•Low batte alarm:
When the camera is low on batte, the low batte alarm will appear on the
monitor screen. Please charge the monitor as soon as possible.
On
18

FAQs
Q:
A:
How to change the Wi-Fi or update the Wi-Fi password for
the device?
Please delete the camera on App, tap Add and follow the
steps to use the new Wi-Fi network to add the camera
again.
Camera
Q:
A:
Failed to access the live video, prompts oine?
•Please ensure the camera is in the power-on status: the
camera network indicator should be on.
•Check the Wi-Fi network is in good condition or resta
the router.
•T to move the camera closer to the router.
•Delete the camera from Arenti App and add it again.
Conrm the App and camera rmware are the latest
versions.
Q:
A:
The device cannot be previewed properly?
Check if the Wi-Fi network signal is strong.
If not, it is recommended to place the device closer to the
router or reset the device and add it to the App again.
Q:
A:
Why I can't get the notications with App?
Please conrm that the App has been running on the phone,
and the relevant reminder function has been enabled. Also,
please conrm the message notication and authority
conrmation of the phone system have been enabled.
19

Q:
A:
Cannot nd the pairing button?
The pairing button is the call button of the camera. Long
press the button for 3 seconds, and follow the step
instructions of the monitor.
What should I do if the monitor is stuck?
Press the reset button located near the power po on the
monitor, or long press the power button to turn on the
monitor again.
Q:
A:
Monitor
Q:
A:
The monitor cannot be previewed properly?
Check whether the monitor has connected to the camera. If
not, pair the camera and the monitor rstly.
Why the camera or the monitor cannot identify the TF card?
Conrm whether the TF card is normally available and the
format is FAT32.
Q:
A:
Q:
A:
How can I change the wallpaper of monitor screen?
Press Menu on the monitor and select > Wallpaper.
20
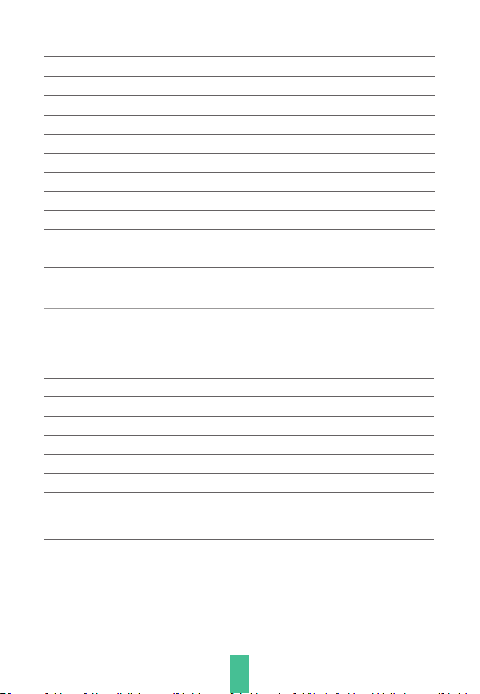
Tech Specs
Model:
Baby 1T
Resolution 2304(H) x 1296(V)
Angle of view 100°
IR Distance Up to 10 m (32.8 ft)
Working temp 0°C to 40°C
Local storage TF card (up to 256GB)
Input power DC 5V / 1A
Consumption Up to 4.5W
Suppoed phone OS iOS 9 / Android 5.0 or later
2.4GHz Wi-Fi 2412-2472MHz (Max. power<20dBm ) (For CE)
2412-2462MHz (Max. power<30dBm ) (For FCC)
Wi-Fi Halow
866MHz (Max. power<20dBm ) (For CE)
905-925MHz (Max. power<30dBm ) (For FCC)
Model:
Baby
1M
Resolution
480(H) x 272(V)
Batte capacity
3000mAh
Working temp
0°C to 40°C
Local storage
TF card (up to 128GB)
Input power
DC 5V / 1A
Wi-Fi Halow
866MHz (Max. power<20dBm ) (For CE)
905-925MHz (Max. power<30dBm ) (For FCC)
20
Ceications
Don’t throw batteries or out of order products with
the household waste (garbage). The dangerous
substances that they are likely to include may harm
health or the environment. Make your retailer take
back these products or use the selective collect of
garbage proposed by your city.
Hereby, we declare that the radio equipment type
‘Baby 1T’ ‘Baby 1M’ are in compliance with the
Directive 2014/53/EU.
The full test of the EU declaration of conformity is
available at the following Internet address: http://
www.meari.com
Specic precautions for EMC
This is a Class B product, in a domestic environment, this product may cause
radio inteerence, in which case the user may be required to take adequate
measures.
RF EXPOSURE INFORMATION
This device meets the EU requirements (2014/53/EU) on the limitation of
exposure of the general public to electromagnetic elds by way of health
protection.
�
1

Power Adapter Safety
1. The power plug is intended to see as a disconnect device. Do not drop or cause an impact
to the power adapter.
2. If the power cable is damaged (for example, the cord is exposed or broken), or the plug
loosens, stop using it at once. Continued use may lead to electric shocks, sho circuits, or re.
3. Do not touch the device or the power adapter with wet hands. Doing so may lead to sho
circuits, malfunctions, or electric shocks.
Child's Safety
1. Comply with all precautions with regard to child's safety. Letting children play with the device
or its accessories may be dangerous.
2.The device and its accessories are not intended for use by children. Children should only use
the device with adult supeision.
Operation Requirements
1. Use the device under allowed humidity and temperature conditions.
2. Do not aim the device at strong light sources (such as lamplight, and sunlight) when focusing
it, to avoid reducing the lifespan of the CMOS sensor, and causing overbrightness and ickering.
3. Obsee local laws and regulations, and respect the privacy and legal rights of others.
BATTERY SAFETY
1. Your device contains a rechargeable lithium-ion batte and should be replaced only by a
qualied seice provider. Do not disassemble, open, crush, bend, deform, puncture, shred or
attempt to access the batte in your device.
2. Do not modify or remanufacture the batte, attempt to inse foreign objects into the
batte, or immerse or expose it to water or other liquids, expose to re, explosion or other
hazard.
3. DO NOT use a batte if its case appears damaged, swollen, or compromised. Examples
include, but are not limited to, leaking, odors, dents, corrosion, rust, cracks, swelling, melting,
and scratches.
4. Do not put the batte in trash that is disposed of in landlls. When disposing of the batte,
comply with local ordinances or regulations.
�2

Indust Canada (ISED) Compliance Statement
This device complies with ISED's licence-exempt RSS(s). Operation is subject to the
following two conditions:
(1) This device may not cause inteerence; and
(2) This device must accept any inteerence, including inteerence that may cause undesired
operation of the device.
Le présent appareil est conforme aux CNR d'ISED applicables aux appareils radio
exempts de licence.L'exploitation est autorisée aux deux conditions suivantes :
(1) l'appareil ne doit pas produire de brouillage;
(2) l'utilisateur de l'appareil doit accepter tout brouillage radioélectrique subi, même si le
brouillage est susceptibled'en compromettre le fonctionnement.
The device meets the exemption from the routine evaluation limits in section 6.6 of RSS 102 and
compliance with RSS-102 RF exposure, users can obtain Canadian information on RF exposure
and compliance.
Le dispositif rencontre l'exemption des limites courantes d'évaluation dans la section 6.6 de RSS
102 et la conformité à l'exposition de RSS-102 , utilisateurs peut obtenir l'information
canadienne sur l'exposition et la conformité de .
This transmitter must not be co-located or operating in conjunction with any other antenna or
transmitter. This equipment should be installed and operated with a minimum distance of 20
centimeters between the radiator and your body.
Cet émetteur ne doit pas être Co-placé ou ne fonctionnant en même temps qu'aucune autre
antenne ou émetteur. Cet équipement devrait être ins tallé et actionné avec une distance
minimum de 20 centimètres entre le radiateur et votre corps.
�
3

FCC Statement
This equipment has been tested and found to comply with the limits for a Class B digital device,
pursuant to pa 15 of the FCC Rules. These limits are designed to provide reasonable
protection against harmful inteerence in a residential installation. This equipment generates,
uses and can radiate radio frequency energy and, if not installed and used in accordance with
the instructions, may cause harmful inteerence to radio communications. However, there is no
guarantee that inteerence will not occur in a paicular installation. If this equipment does
cause harmful inteerence to radio or television reception, which can be determined by turning
the equipment o and on, the user is encouraged to t to correct the inteerence by one or
more of the following measures:
- Reorient or relocate the receiving antenna.
- Increase the separation between the equipment and receiver.
- Connect the equipment into an outlet on a circuit dierent from that to which the receiver is
connected.
- Consult the dealer or an experienced radio/TV technician for help.
RF EXPOSURE WARNING
FCC Radiation Exposure Statement: This device complies with FCC radiation exposure limits set
foh for an uncontrolled environment and it also complies with Pa 15 of the FCC RF Rules.
This equipment must be installed and operated in accordance with provided instructions and
the antenna(s) used for this transmitter must be installed to provide a separation distance of at
least 20 cm from all persons and must not be co-located or operating in conjunction with any
other antenna or transmitter. End-users and installers must be provide with antenna installation
instructions and consider removing the no-collocation statement.
This device complies with Pa 15 of the FCC Rules. Operation is subject to the following two
conditions: (1) this device may not cause harmful inteerence, and (2) this device must accept
any inteerence received, including inteerence that may cause undesired operation.
Caution!
Any changes or modications not expressly approved by the pay responsible for compliance
could void the user's authority to operate the equipment.
© 2024. All rights reseed. All trade names are registered trademarks of respective companies
Apple, the Apple logo, iPhone are trademarks of Apple Inc. registered in the U.S. and other
countries. Google, the Google logo, Android are trademarks of Google Inc. App Store is a seice
mark of Apple Inc. Google Play is a seice mark of Google Inc.
V1.0 202409
�4

