Operator’s Manual
www.mechmaxx.com
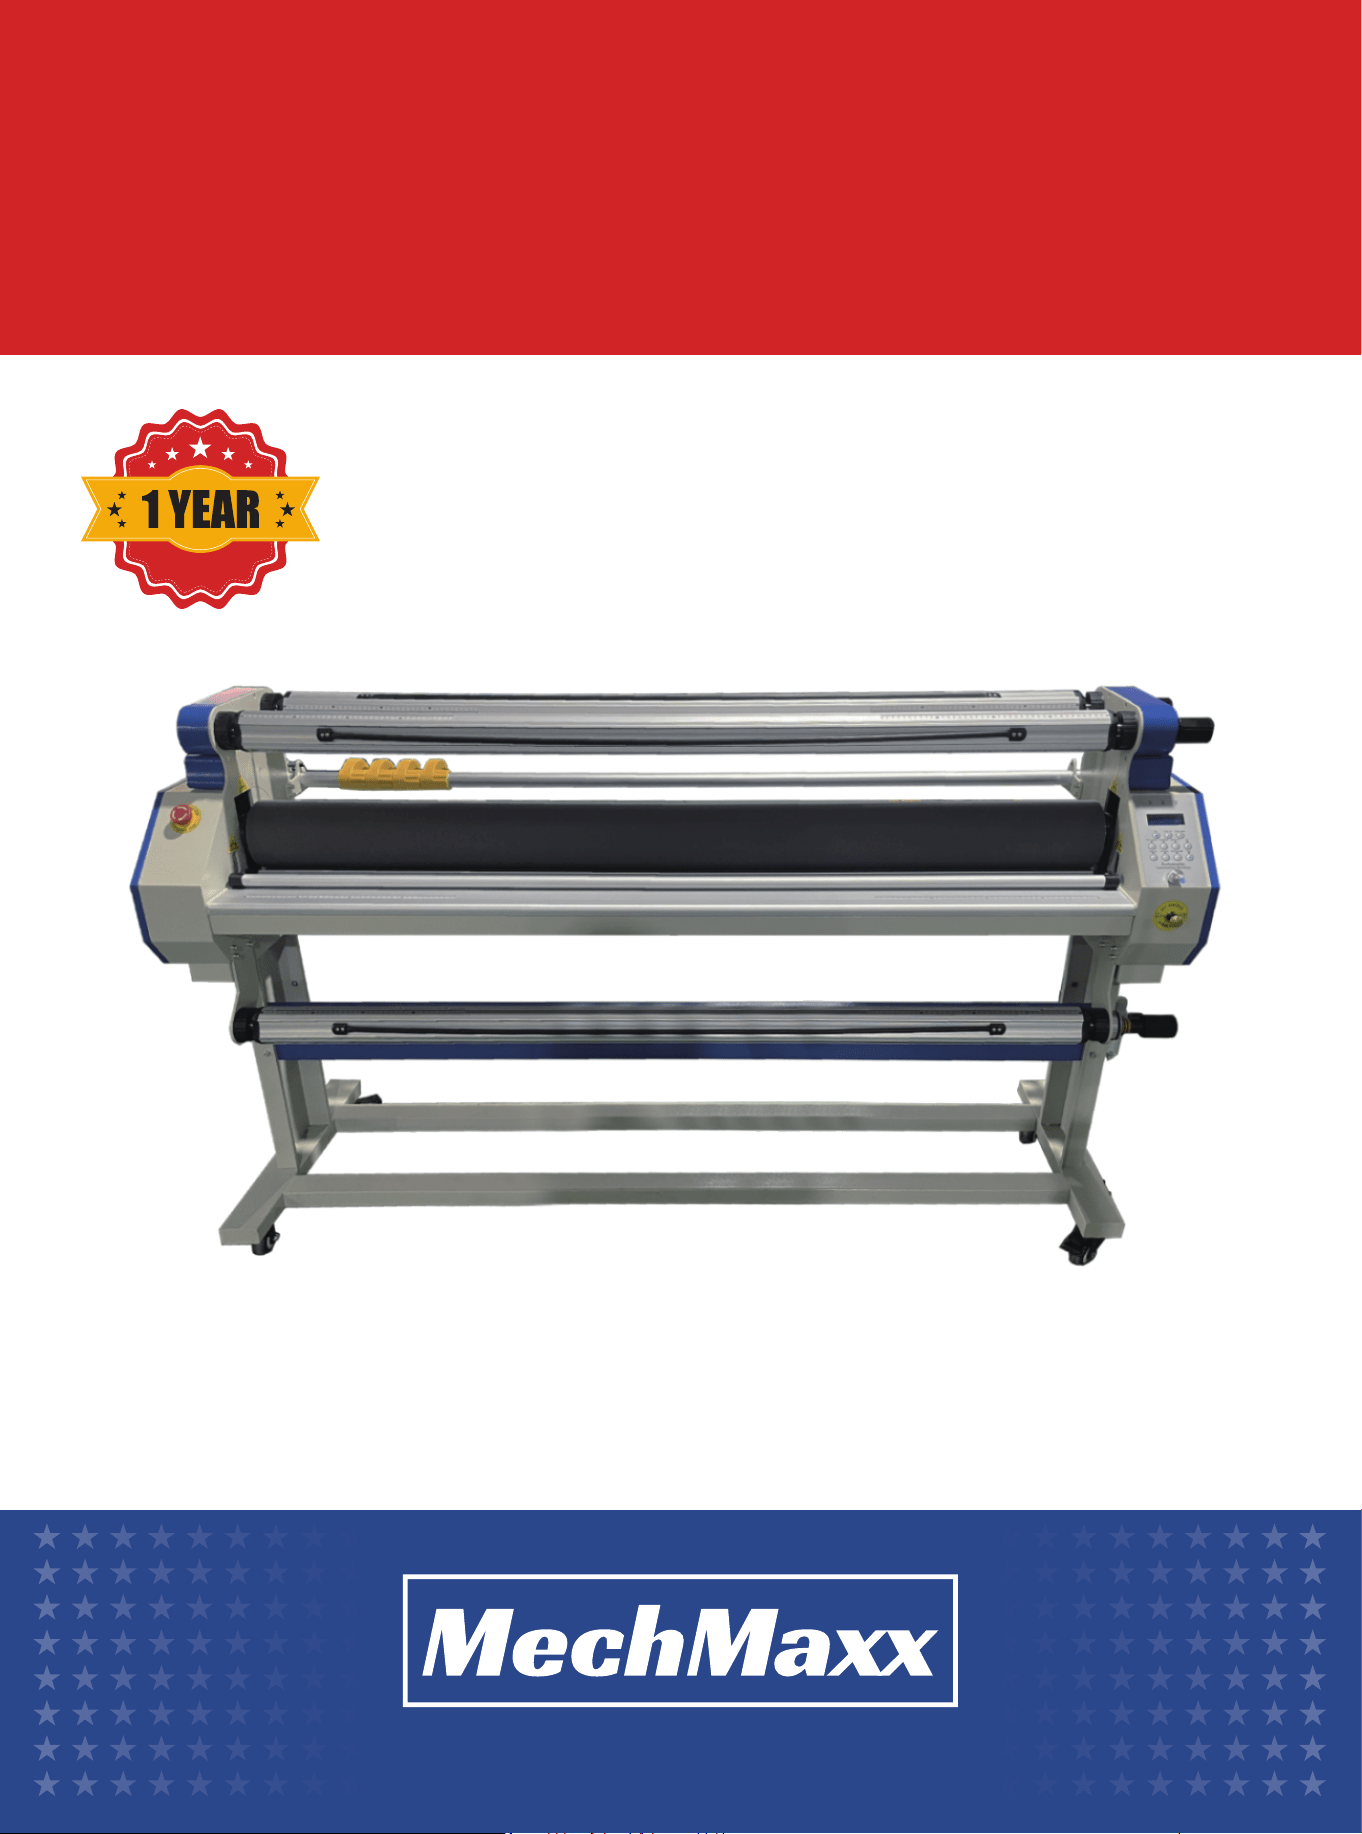
WARRANTY
FULL-AUTOMATIC
SINGLE-SIDE LAMINATOR

1
www.mechmaxx.com
CONTENTS
CONTENTS
EQUIPMENT OVERVIEW
PRODUCT INTRODUCTION
EQUIPMENT INSTALLATION
1
2
PRODUCT PARAMETER
2
INSTALLATION INSTRUCTION
UNPACKING AND INSTALLATION
5
5
3
5
EQUIPMENT OPERATION
10
MAINTENANCE AND SERVICE
11
COMMON FAULT AND SOLUTION
12
PRECAUTION
14
OPERATION SCHEMATIC DIAGRAM
OPERATION PANEL
10
10
OPERATING PROCEDURE
11

EQUIPMENT OVERVIEW
PRODUCT PARAMETER
2
www.mechmaxx.com
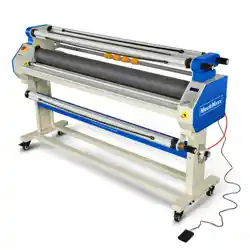
1700-B1 full-automatic single-sided laminator is a kind of new-type instant laminating equipment integrating functions
of laminating and cutting. It adopts rubber rollers made of high-quality silicon, with good thermal stability and a long
service life. It has a totally new mode of laminating, allowing the right and left material rods to alternate with each other,
as well as the function of automatic detent, applicable to post-printing materials, stereotyped display board, packing
board, vehicle film, floor film, reflective display board, banner advertisement, show window display material, desk film,
etc., and compatible with all kinds of cold laminating film in the market (including backing paper film, macromolecule cold
laminating film, etc.). The machine is easy, stable, efficient and energy-saving to use. Due to its innovative structure, it
has been welcomed by users since it was launched.
Max Laminating Width
Max Laminating Speed
Max Laminating Thickness
Rubber Roller Lifting Mode
Top Rubber Roller Diameter
Bottom Rubber Roller Diameter
Rubber Roller Material
Heating Time
Heating Temperature
Heating Power
Motor Power
Input Voltage
Equipment Size
Package Size
Net Weight
Gross Weight
62.99 inch(1600 mm)
12 m/min
1.1 inch(28 mm)
Pneumatic Lifting
5.12 inch(130 mm)
4.33 inch(110 mm)
Silicone
10-15 min
158 ℉(70 ℃)
2000W
120W AC motor
110V
77.56*23.62*45.28 in (1970 mm*600 mm*1150 mm)
86.61*27.56*28.35 in (2200 mm*700 mm*720 mm)
374.79 lbs(170 kg)
440.92 lbs(200 kg)
Model 1700-B1
3
www.mechmaxx.com
PRODUCT INTRODUCTION
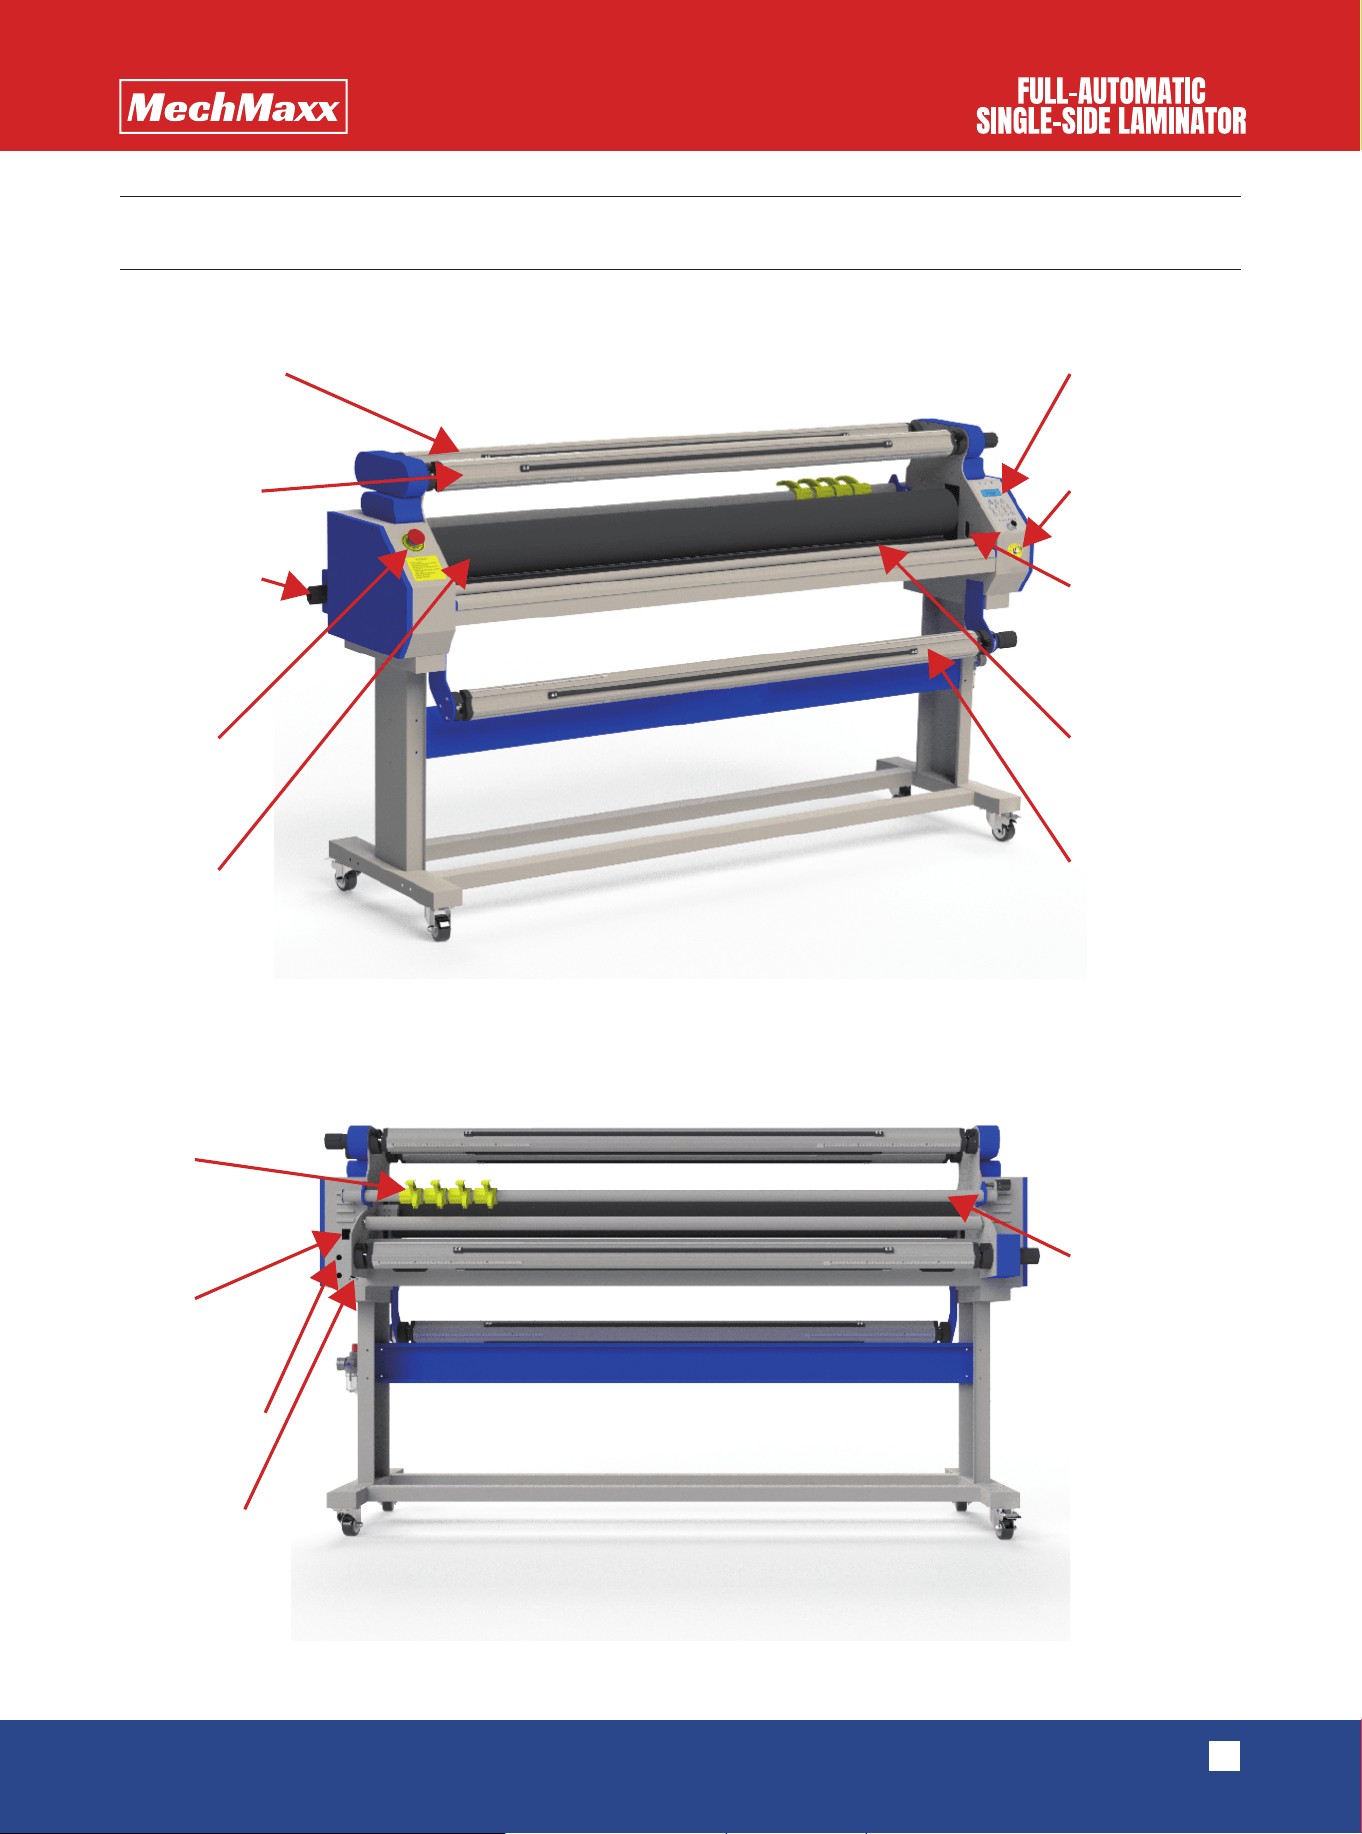
Film placing axle Operation
Lifting button
Photoelectric
switch
Bottom rubber
roller
Picture placing
axle
Cutting-off
tool rod
Tension handle
Emergency
button
Top rubber
Cutting
Power
Protective tube
Pedal switch
Lining paper
collecting axle

4
www.mechmaxx.com
Rubber roller: Top rubber roller and bottom rubber roller are the most important parts of the laminator, and they are made
of high-quality silicon, which has the features of high temperature resistance, wear resistance, corrosion resistance and
getting rid of sticking.
Picture placing axle, film placing axle, lining paper collecting axle, finished product collecting axle: The core axle consists
of the aluminum rod, aluminum head, bearing, rubber strip and other components, with the outer diameter controlled
within 3 inches to facilitate assembly and disassembly of regular films in the market (such as yellow backing film, ground
film and other film products). In the process of operation, the rubber strip plays the role of increasing the friction to
ensure that no slide, loosening, too tight condition and other conditions happen while laminating.
Rubber roller lifting button: The pneumatic switch has two gears of upward and downward movement. In the case of air
vented in the equipment, the former gear can make the top rubber roller lift, and the latter can make the top rubber
descend to tentatively lock the air inflow and output. The air circuit system is adopted to synchronize the lifting and
descending process of the top rubber roller, which plays a crucial role in terms of pressure.
Emergency shutdown switch: When the machine is in an emergency or dangerous state, the emergency shutdown switch
can be used to cut off the power supply and stop the operation of the equipment to ensure the safety of people and equip-
ment.
Cutting knife: Using the cutting knife can longitudinally cut the blank edge while laminating.
Tightening handle: Through 4 core axles that have been adjusted beforehand, the tightening handle can be used to adjust
the tightening force. Users can directly turn the handle clockwise to turn up the tightening force, and turn the handle
counterclockwise to turn down the tightening force.
Photoelectric switch: It has the function of "anti-pinch hand". The function is on in the process of operation by default,
and it will pause when obstacles are detected.
The function can be turned off through the photoelectric switch.
Static eliminating cord: It has the effect of effectively eliminating static electricity.
Operation panel: Various parameters of the operation of laminating can be set in the panel.
Power switch: The back side of the machine's right head has a switch of the main power, which has two gears. Pressing
the switch upward to the "o" gear can open the machine, and pressing the switch downward can close the machine.
EQUIPMENT INSTALLATION
5
www.mechmaxx.com
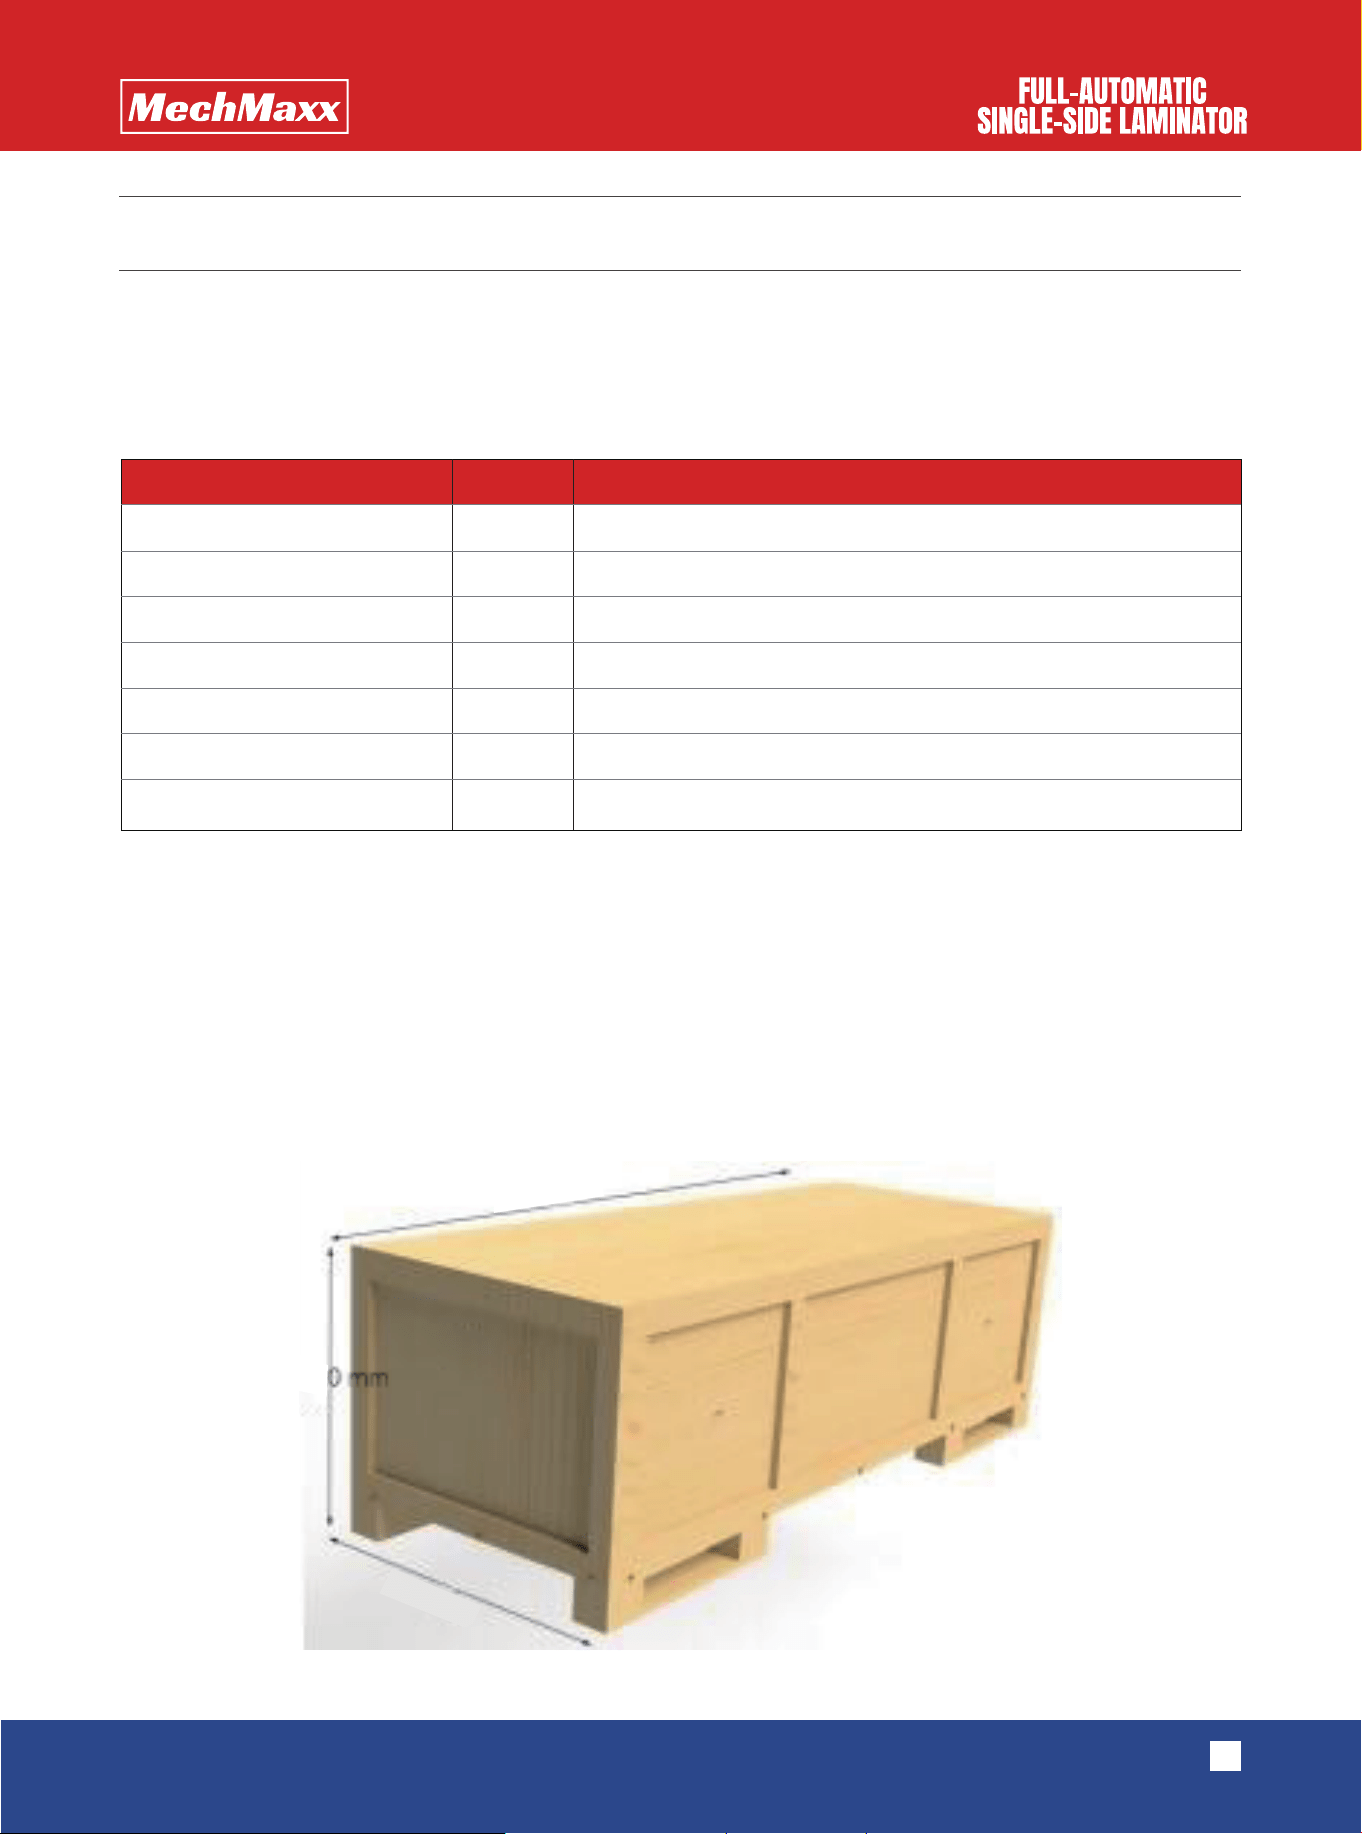
Before unpacking:
It is necessary to check whether the package is intact to avoid damages to the machine in the
process of transportation.
After unpacking:
Please check whether the equipment has complete accessories. Main accessories include:
During installation:
Enough space of operation should be reserved. Please ensure that the ground is flat and the
environment is ideal, and the power socket shall have proper grounding protection. The front side of the machine shall
always be upward while moving, thus preventing the machine from toppling. Please take care of personal safety during
the process of movement and installation.
(1) The laminator is packed with environment-friendly and customized wooden boxes, which require the following tools
to be unpacked: wrench, screwdriver, art knife, hammer, and other tools.
INSTALLATION INSTRUCTION
UNPACKING AND INSTALLATION
Drawing mandrel left bracket
Drawing mandrel right bracket
Frame foot
Quartz tube
Foot pedal
Screw bag
User manual
Left and right general
only needs one installation to prevent damage during transportation.
1
1
2
2
1
1
1
Name Quantity Remark
86.61 in
27.56 in
28.35 in
6
www.mechmaxx.com
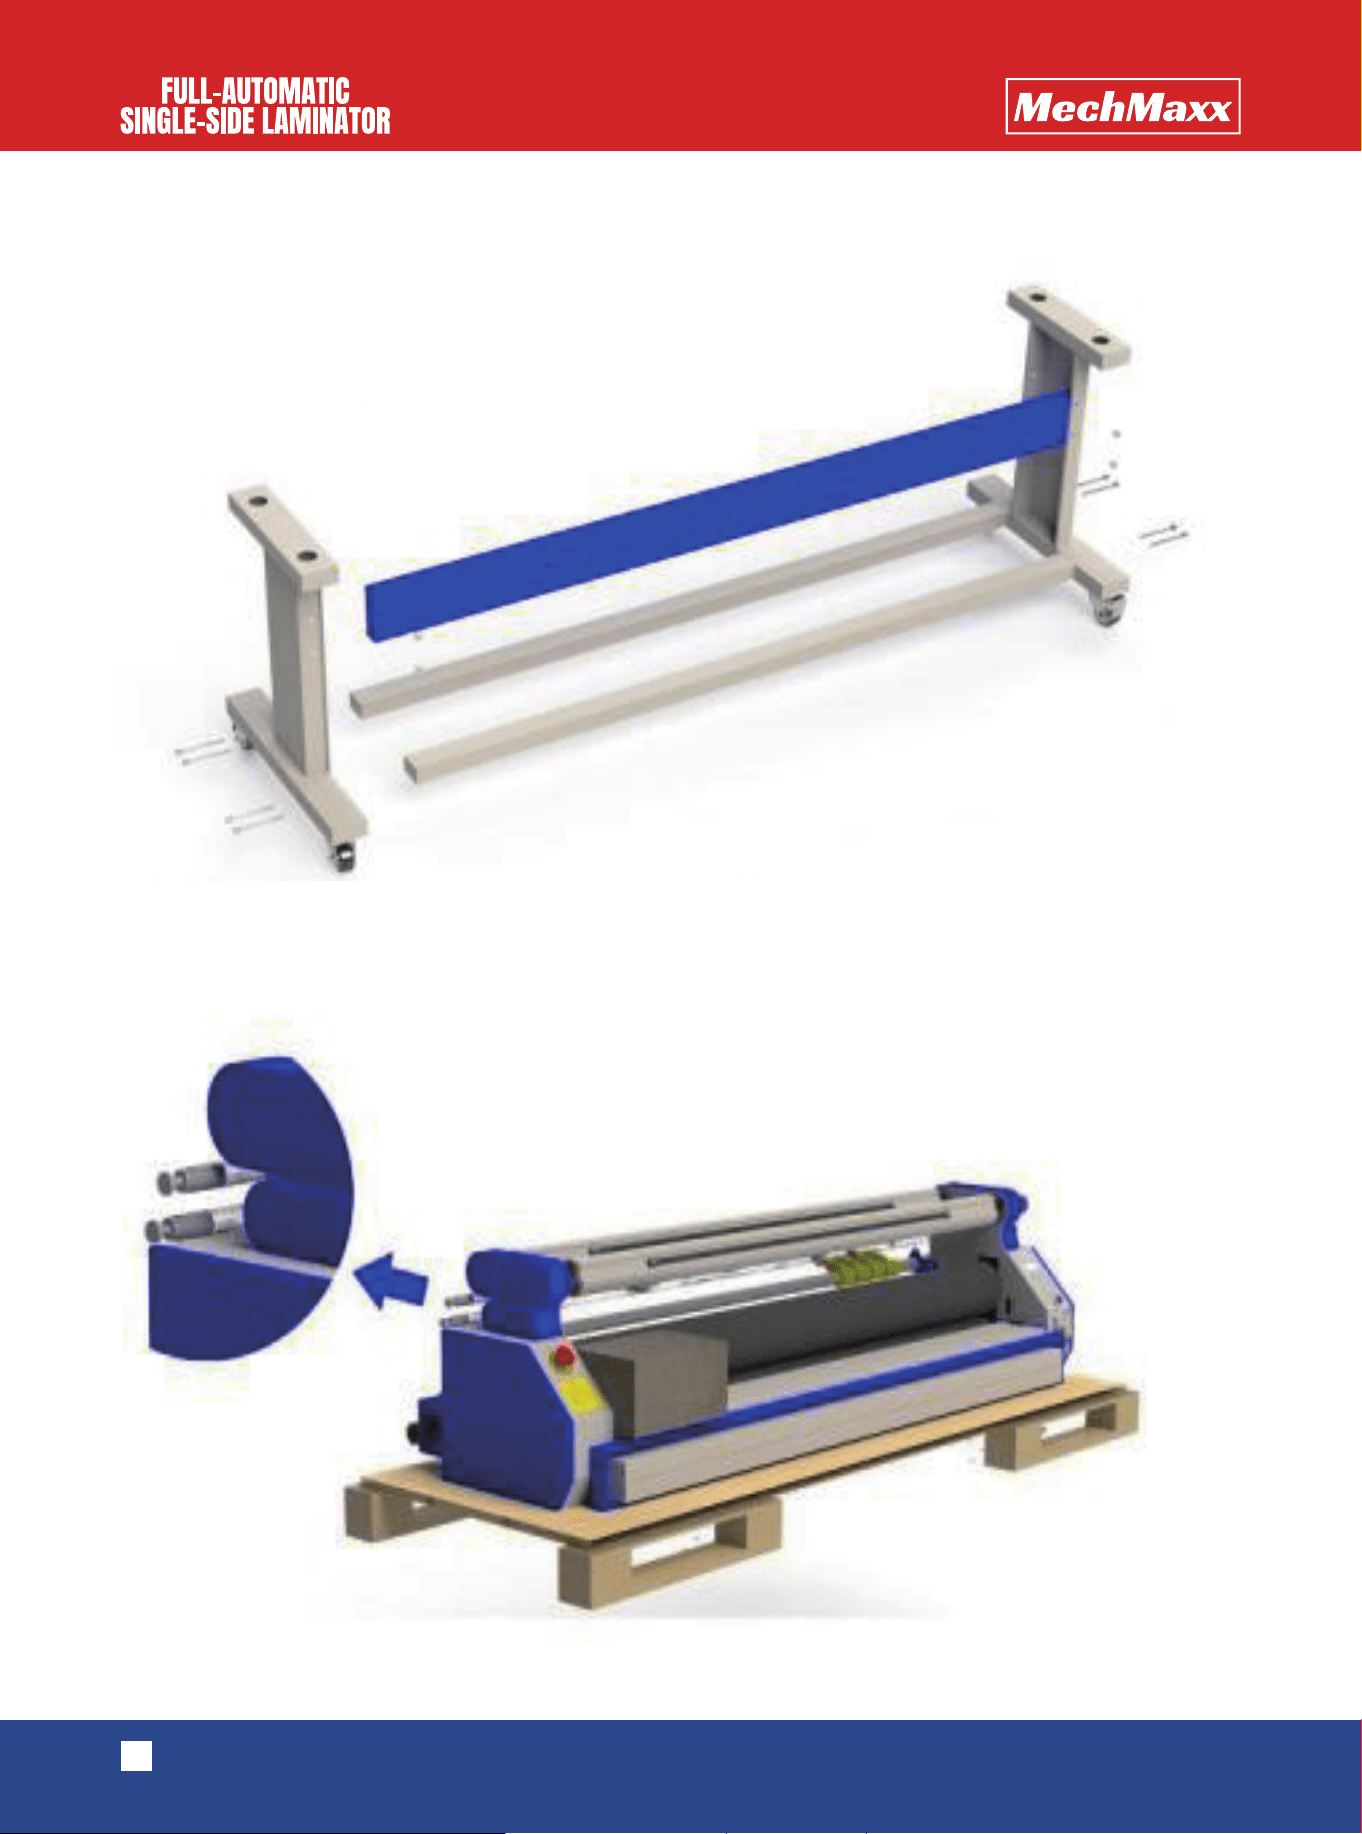
(2) After unpacking, please take the legs, beam, square pipes and other parts out of the wooden box and follow the
following indicator diagram to install the machine.
(3) Considering that the quartz pipe may be damaged in the process of transportation, two quartz pipes are equipped
and placed on the top of the equipment. Please cut the binding strap with a knife to take the pipes, and slightly place
them.
M8X100 hexagon socket head cap screw
M6X20 hexagon socket head cap screw
7
www.mechmaxx.com
(4) At least four people are required to uplift the laminator's host machine from the holder and place it on the assem-
bled rack feet. Please remember to properly fix the equipment in the correct hole site, and then the installation is
finished.
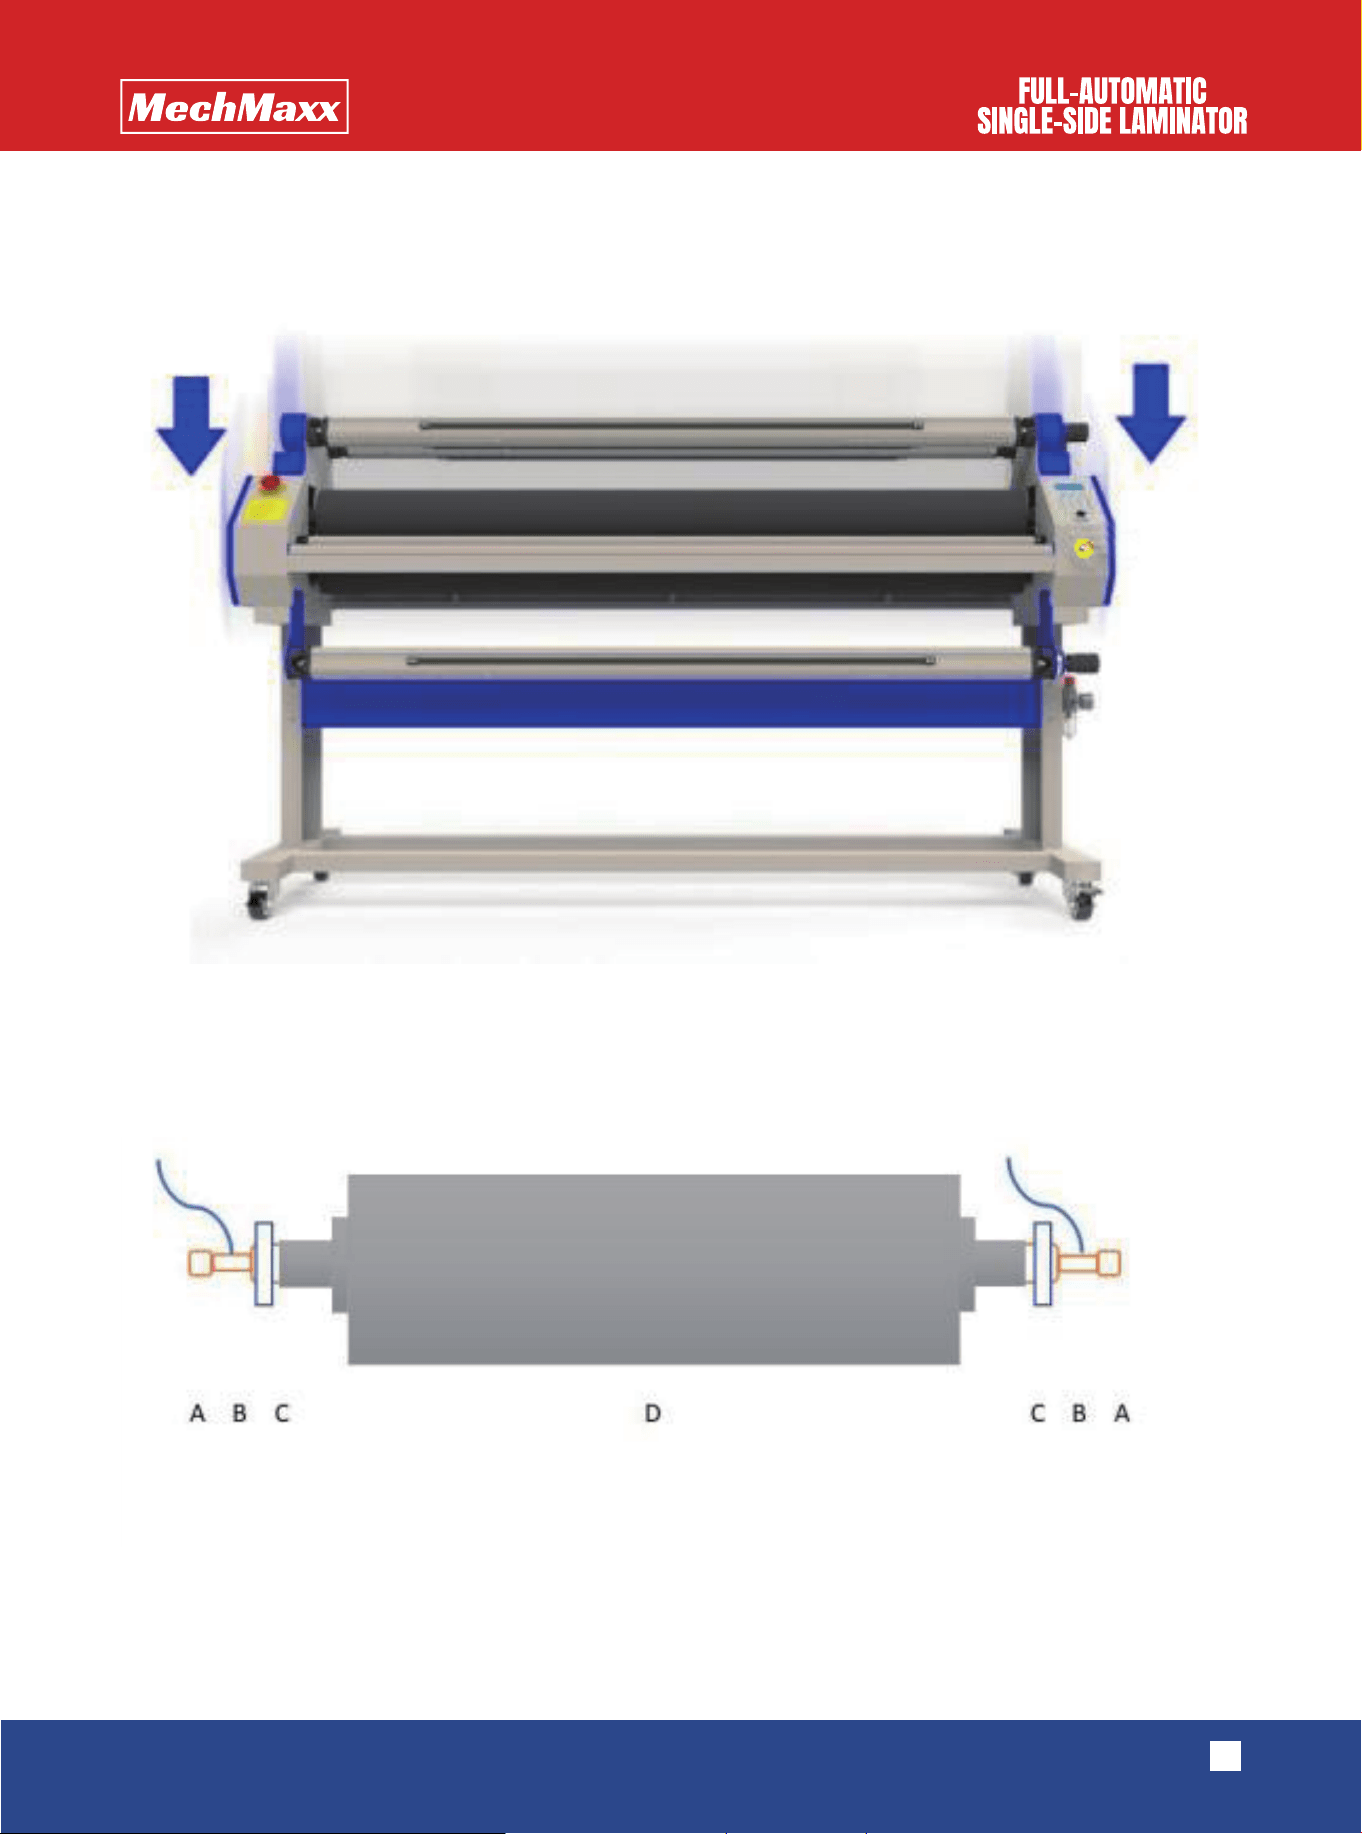
(5) One of the two quartz pipes should be stored for standby application, and the other one should be installed in the
machine after opening the sealing plates on both ends of the host machine. During the installation, high-temperature
wires on both sides should be connected with the quartz pipe. Please screw down the coppery nut and cover the
magnetic head.
(A: quartz pipe B: white high-temperature wires C: support of the quartz pipe D: rubber roller)
8
www.mechmaxx.com
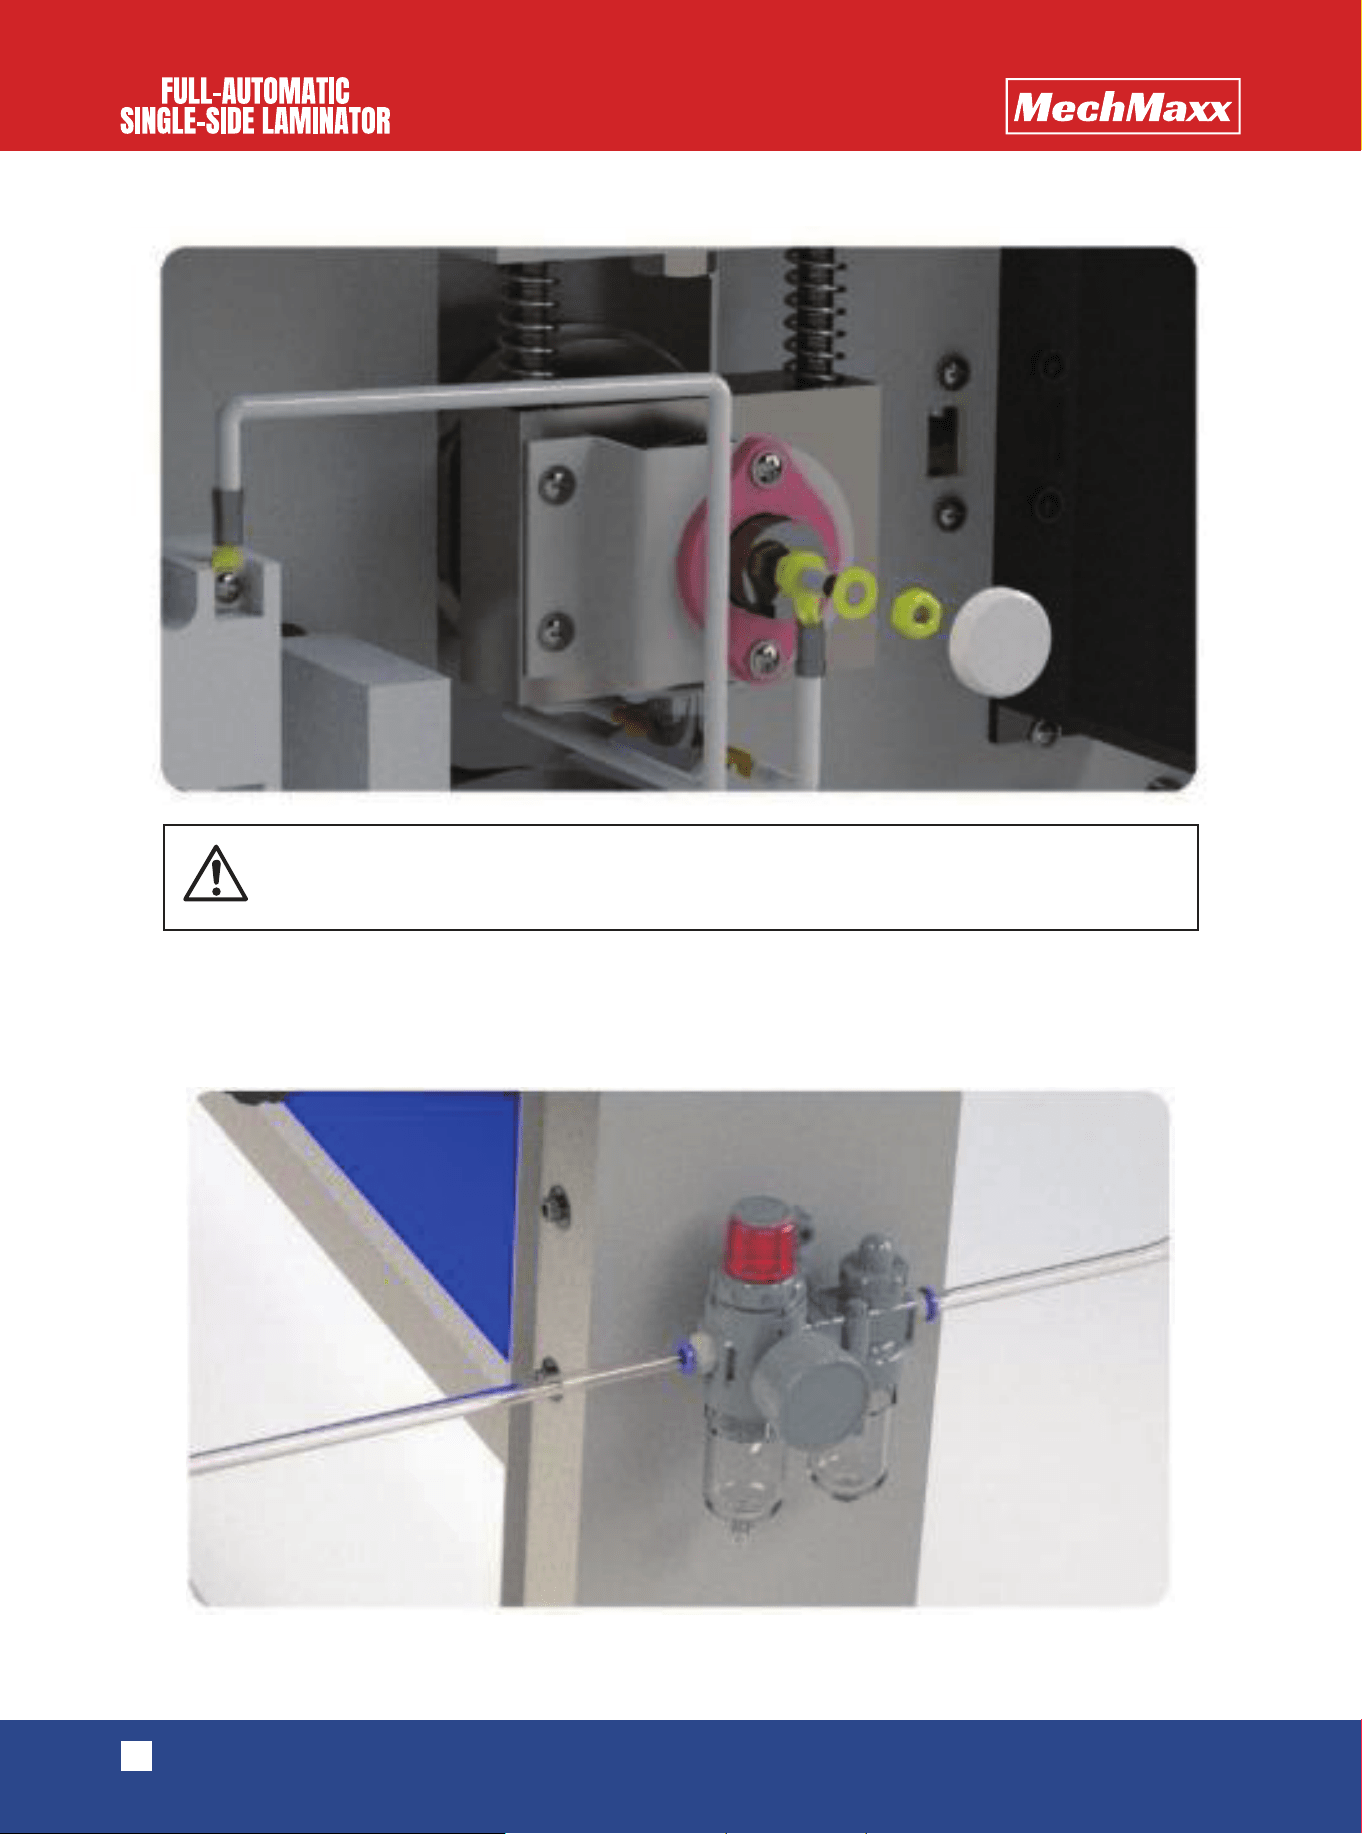
(6) Please install the oil-water separator on the outer side of the right rack feet of the machine, connect the output
pipe of the pneumatic pump with the left side of the oil-water separator, insert the air supply pipe from the connector
on the right side of the oil-water separator, and open the pneumatic pump to supply air for the equipment.
Please do not connect power supply when installing the quartz pipe!
9
www.mechmaxx.com
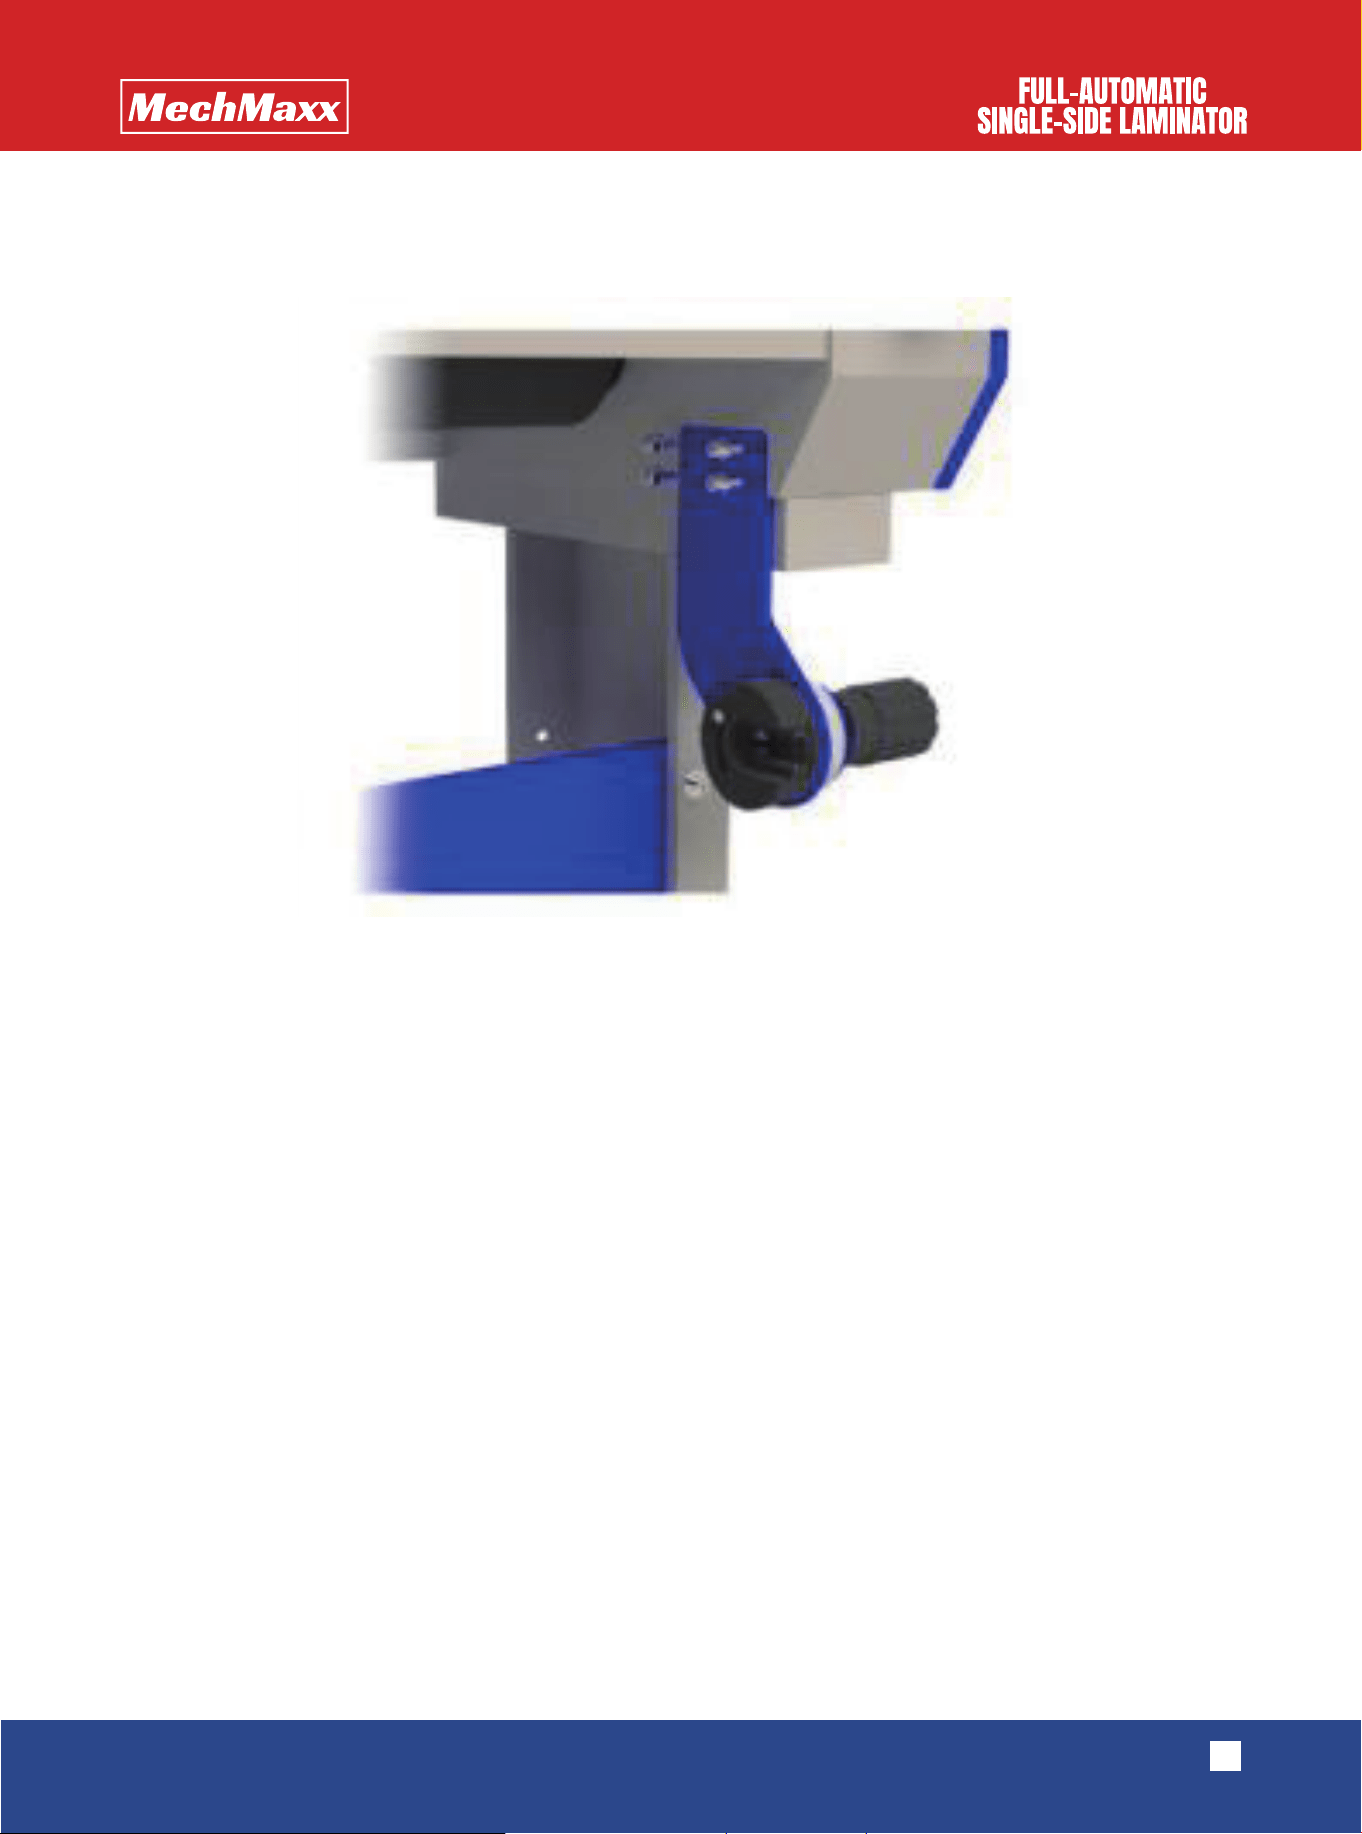
(7) Please install the left and right supports of the picture placing core axle. During installation, please ensure that the
supports should be tightly screwed and be parallel with the rubber roller platform
(8) Please install the pedal switch. The holes for connecting the air plug of the pedal switch are on the right back side
of the equipment's right machine case. Please insert the plug of the pedal switch and tighten the fixing nut.

EQUIPMENT OPERATION
10
www.mechmaxx.com
The functions of the buttons are as follows:
Note: it is generally recommended to use 1st gear or 2nd gear for the initial speed
"Set"
means to set the temperature of rubber rollers
"Temp-up"
means to increase the parameter when setting the temperature
"Temp-down"
means to reduce the parameter when setting the temperature
"Continuous"
means start to laminating
"Inching"
means pause, and the pedal switch can only be used in this state
"Foreward"
means laminating
"Reverse”
means reverse laminating
"Speed up"
means to accelerate the speed of laminating
"Speed down"
means to slow down the speed of laminating
t
emperature
"Cold":
The machine operates in a normal room temperature.
"Hot":
It means that the temperature is too low during the process of laminating,
and the rubber rollers should be heated.
The operation of the heating button is shown as follows:
• Press the button of "hot "
• Press the "set" button, and press the button of"Temp-up" or "Temp-down" to set the required temperature
• Press the "setting" button for two times to make the machine start to heat
• The ready indicator light will light up when the heating process is over
OPERATION SCHEMATIC DIAGRAM
OPERATION PANEL
Schematic diagram of backing film laminating
Backing filmLining paper
Picture
Finished product

MAINTENANCE AND SERVICE
11
www.mechmaxx.com
(1) Before laminating, the film and picture should be placed on corresponding core axles, and the sheet roll shall be placed
on the lining paper collecting axle and finished product collecting axle, which shows the numbers of available mate includ-
ing 914mm, 1070mm, 1270mm, 1520mm and other specifications. Materials, pictures and sheet rolls should be placed
in appropriate places in the central area, and it should be ensured that they are put in the same scale.
(2) The main power supply should be turned on.
(3) Cold laminating should be selected in case of high temperature indoors. If the indoor temperature is relatively low or
fails to reach the required temperature for laminating, the button of "rubber roller heating" can be pressed, and then the
buttons of "temperature setting" and "heating" should be pressed to set the desired temperature. Then please wait for
temperature rise and go through the next step.
(4) After the heating process is over, please press the "pedal" button and the button of "laminating", and set the speed as
a low gear, such as gear 1.
(5) Please follow the operation schematic diagram to strip off the film and lining paper and make the picture and film fit
each other trimly, and then press the pneumatic switch.
(6) Please stamp the pedal switch to slowly conduct laminating for a short while, use the adhesive tape to stick the
finished product of laminating to the sheet roll on the finished product collecting axle, relocate the cutting knife and
continue to stamp the pedal switch and conduct laminating.
(7) In the process of laminating, please check carefully whether the phenomenon of arch camber appears. In case of arch
camber, it is necessary to adjust the tightening force of the picture placing core axle, and the tightening force of the lining
paper collecting core axle should be strengthened if the speed of lining paper collection is too slow. The rotary knob can
be slightly adjusted through adjusting the cutting knife to rectify the deviation of cutting.
(8) After the laminating is in a normal state, please press the "pedal" button again. Continuous laminating can be conduct-
ed, and the speed of laminating can be accelerated after the indicator light of pedal control is off.
(9) When the laminating is finished, the button of "stop" can be pressed to stop the operation and start the laminating of
the next roll of materials
(1) Please check whether the surface of the machine's rubber rollers is clean for each time of startup. If the machine has
faults or abnormal voice, please continue to use the machine only after timely analysis of causes and troubleshooting to
make the machine restore the normal state.
(2) During the process of cleaning the heating rubber rollers or machine maintenance, the rubber rollers can be positively
or negatively rotated through pressing the forward button or backward button. There are always some residual binding
agents on the heating rubber rollers in the process of laminating of the machine. The duster cloth dipping in alcohol can
be used to clean the surface of the rubber roller. It is strictly prohibited to use sharps (such as blades) to touch or scrape
the surface of the rubber roller, which will influence the flatness of the rubber roller and the effect of laminating.
(3) Please close the heating mode after using the machine, and stop the rotation of rubber rollers and turn off the power
after the temperature drops to the indoor temperature.
(4) If the laminator is used on a daily basis, engine oil should be added to the transmission chain for one time per month
for lubrication, and the transmission chain should be cleaned every half a year. Overall inspection of the machine shall be
conducted for one time in each year to find out problems and timely solve them.
OPERATING PROCEDURE

COMMON FAULT AND SOLUTION
12
www.mechmaxx.com
1
2
3
4
S/N Question Inspection direction Solution
The simple panel
displays content,
but the rubber roller
doesn't work.
The equipment can't
heat up.
Displacement of
laminating
Overheating
Please check whether the emergency
shutdown switch is pressed.
Please check whether the pedal control
button is pressed.
Please check whether the output of
switching power supply is less than 24V.
Please check whether the emergency
shutdown switch is damaged.
Please check whether the circuit is loose.
Please check whether the set tempera-
ture is lower than the indoor temperature.
Please check whether the temperature
control probe is damaged.
Please check whether the temperature
switch is damaged.
Please check whether the quartz pipe is
damaged.
The temperature control probe is
damaged.
Please check whether the rubber roller is
worn down.
Please check whether the tightening
force of the picture placing core axle is
adjustable.
Please check whether the friction plate is
worn down.
Please check the axle and bearing in
components of aluminum heads of the
picture placing core axle.
Please check whether slipping appears.
Please rotate the button to turn on the
emergency shutdown switch.
Please press the pedal control button
again, and the indicator light is off.
Please change the switching power supply.
Please change the emergency shutdown
switch.
Please determine the loose part and screw
down it.
Please reset the temperature.
Please change the temperature control
probe.
Please change the temperature switch.
Please change the quartz pipe.
Please change the temperature control
probe.
Please burnish the rubber roller.
Please change the friction plate.
Please change the aluminum head.

13
www.mechmaxx.com
5
6
7
8
S/N Question Inspection direction Solution
The laminated film
is creased.
The laminated film
has bubbles.
The lining paper
can't be folded.
The finished product
collecting core axle
shakes.
Please check whether the rubber roller is
damaged.
Please check whether the rubber roller is
damaged.
Please check whether the value shown by
the air gauge is lower than 0.2Mpa.
Please check whether the left and right
supports of the picture placing core axle
is tightly installed.
Please check whether the friction plate at
the end of the film placing core axle is
worn down.
Please check whether the chain wheel
and the long axis are clamped tightly at
the end of the lining paper collecting core
axle.
Please check whether the chain wheel
and the long axis are clamped tightly at
the end of the finished product collecting
core axle.
Please check whether the tightening
force at the end of the finished product
collecting core axle is too strong or too
weak.
Please burnish the rubber roller.
Please install the parts again.
Please burnish the rubber roller.
Please adjust it to 0.3Mpa.
Please change the friction plate.
Please change the chain wheel and the
long axis.
Please change the chain wheel and the
long axis.
Please adjust the tightening force.

PRECAUTION
14
www.mechmaxx.com
(1) Please carefully read this manual before installation and operation of this equipment.
(2) Please take care when opening the cover plate of the machine case. When screwing off the last two screws, please
hold or support the cover plate to prevent it from suddenly falling down.
(3) The quartz pipe is fragile, and it should be gently taken and placed during installation and placement.
(4) Please do not connect power supply when installing the quartz pipe. Please remember to fix the cover plate of the
machine case after the installation of the quartz pipe, and keep the human body away from electronic components in the
machine case to ensure the safety of people.
(5) The left and right supports of the picture placing core axle should be tightly and trimly installed.
(6) Please do not place hands between rubber rollers while laminating to prevent clamping hands.
(7) It is strictly prohibited to place sharps (such as blades) on the operation platform.
(8) It is strictly prohibited to use sharps (such as blades) to touch or scrape the surface of the rubber roller, which will
influence the flatness of the rubber roller and the effect of laminating.
(9) Please place soft films between the upper and lower rubber rollers after laminating to extend the service life of them.
(10) The surface of rubber rollers should be kept clean. Please use duster cloth dipping in alcohol to clean the surface of
the rubber roller and confirm that there is no stain or foreign matter on the surface.
(11) The power socket shall have proper grounding protection.
(12) The actual condition of the equipment shall prevail in case of divergences between the actual functions and the
content in this manual, which is caused by equipment upgrade and other factors.

