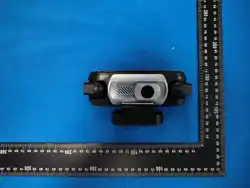
Dash Cam
USER MANUAL
Always read the user manual carefully before using the device and keep it
for future reference. Images shown in the user guide are for illustrative
purposes only and may differ from the actual product.
NOTES
1. If the product has abnormal situations such as machine shell cracking,
wire breakage, etc., please stop using the dashcam immediately and contact
the company's customer service.
2. If you need to clean, please use a soft cloth to wipe gently, do not use
any chemicals for cleaning.
3. Please do not be in a humid, flammable and explosive, corrosive gas or
liquid environment.
4. Do not unplug the TF card during the recording process.
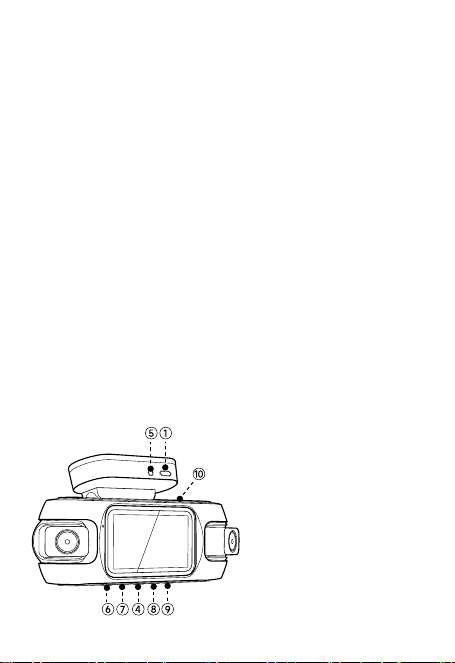
LAYOUT OF THE BUTTONS AND PARTS
(1) Power access hole
The Type-C USB plug of the
power cord is plugged in from
this hole and the other end is
connected to the car power
supply.
(2) TF card slot
The card is inserted from here.
The system requires the use of
C10 or higher TF card,
otherwise it will cause
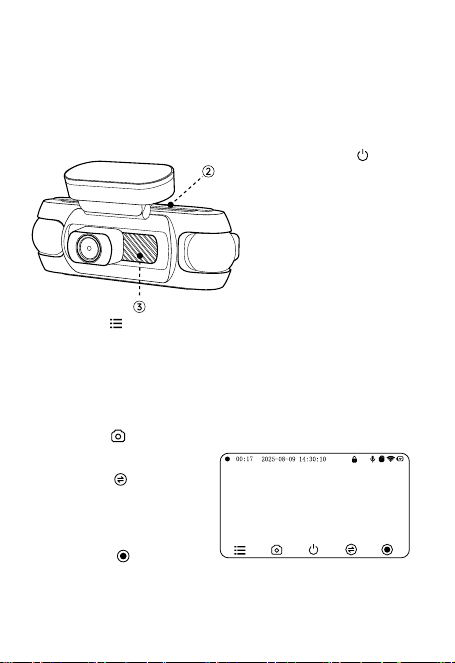
problems such as no boot, no recording, and operation failure.
Maximum support 256GB TF card.
(3) Microphone/MIC
Built-in miniature microphone, which can record sound synchronously
with the video, and turn on/off through the [Video Recording] option of
the mobile APP.
(4) Power switch
Short press to turn off the
screen display; long press to
power off/on.
(5) Rear lens Slot
If equipped with a car rearview
camera, you need to insert the
headset connector into this
hole on the connection line.
(6) Menu Key
While recording: Press once to lock the current video to prevent it from
being overwritten in loop recording.
While recording is Paused: Short press this button to enter the system
settings menu. The functions of each button are displayed at the bottom
of the screen—operate accordingly.
(7) Photo Key
Press once to capture a photo.
(8) Switch Key
Press to switch between
different camera views while
recording.
(9) Record Key
Press to Start/stop recording.
In the system settings and detailed settings screens, the button
functions are as shown at the bottom of the display.
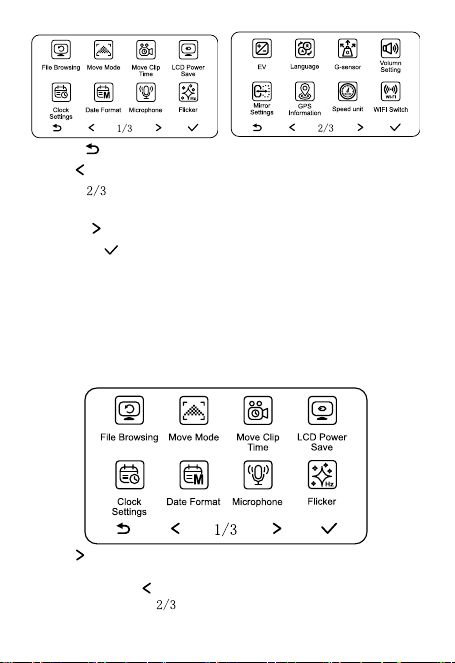
Back Key : Go back one step until exiting the system settings menu.
Up Key : Move the selection left in the function list.
Page Key : Turn pages left or right in the function list. In screens
without page numbers, this functions as the Power key.
Down Key : Move the selection right in the function list.
Confirm Key : After adjusting parameters, press to save and exit the
current item.
In date/time settings, used to confirm and jump to the next item.
SETTINGS OVERVIEW
When recording normally, press the (6) menu key to enter the settings
screen.
Use the key to move the selected item, the order is from top left to
bottom right. When the first row ends, it jumps directly to the first icon of
the second row. Use key to go back to the previous selected item.
Press the third button ( ) to go directly to the next page.
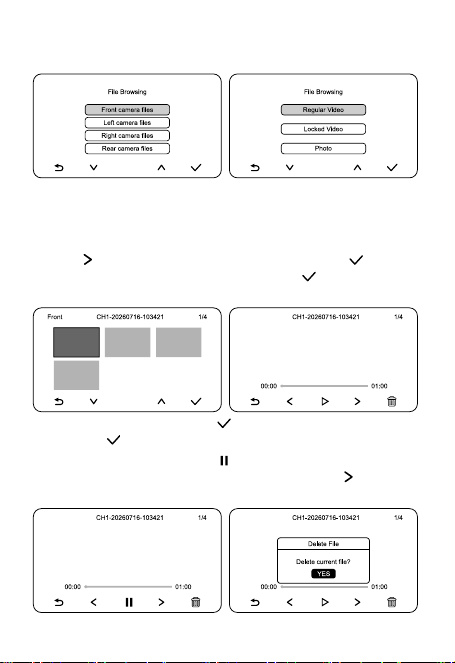
File Browsing
Used for video playback.
Due to factors such as system architecture, the video playback operations
for the four categories here are the same. To avoid dragging out the
content, we will use the front camera video as an example for the
introduction.
Press the key to select 'Front camera files', and press the key to
enter. Keep selecting 'Regular Video' and press the key to enter the
video list.
After selecting the video, press the key to enter the playback interface,
and press the key again to start playing.
During playback, you can press the key at any time to pause, and press
it again to continue playing. You can also directly press the key to play
the next video segment.
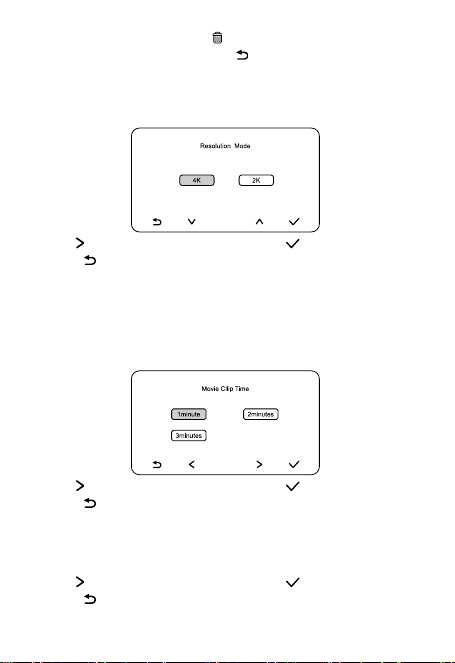
On the playback screen, press the key to delete the current video. If
you do not want to delete it, press the key to close the dialog box.
Move Mode
Used to set and adjust video recording resolution; currently supports up to
4K (3840×2160).
Use the key to move the selection, press the key to confirm, and
press the key to go back.
Move Clip Time
This device operates on a looping recording system, where the newest
video files automatically overwrite the oldest ones, and this cycle repeats
indefinitely.
This setting is used to configure the duration of each video file.
Use the key to move the selection, press the key to confirm, and
press the key to go back.
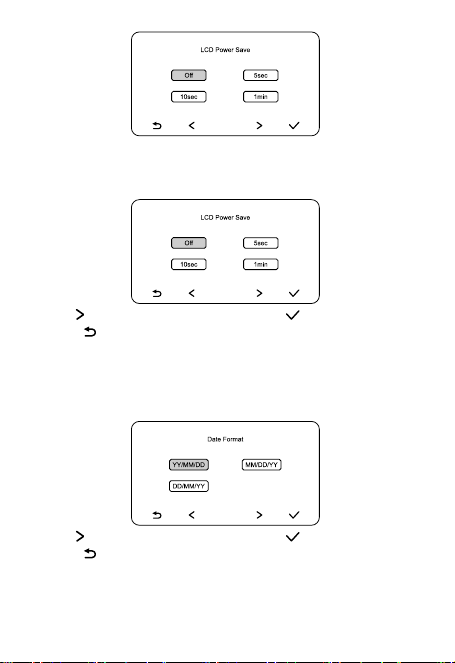
LCD Power Save
Set the wait time before the screen automatically turns off here. After the
screen turns off, press any key to turn it back on.
Use the key to move the selection, press the key to confirm, and
press the key to go back.
Clock Settings
This feature is used to manually set the date and time. The date and time
are displayed at the bottom of each video frame.
Use the key to move the selection, press the key to confirm, and
press the key to go back.
Date Format
Used to set the display format for the date and time. There are three
formats to choose from: “Year-Month-Day,” “Year-Month-Day,” and
“Month-Day-Year.”
Use the key to move the selection, press the key to confirm, and
press the key to go back.
Microphone
The device has a built-in miniature microphone, which is enabled by
default. It is used to record audio simultaneously while recording video.
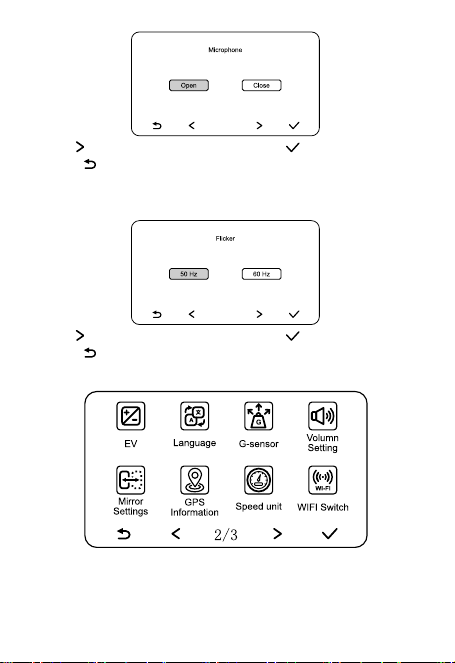
Use the key to move the selection, press the key to confirm, and
press the key to go back.
Flicker
Adjust the screen's refresh rate as needed.
Use the key to move the selection, press the key to confirm, and
press the key to go back.
SECOND PAGE OF THE SCREEN
EV
This is exposure compensation, which is used to adjust the exposure of the
video. If you think the video is too bright, you can reduce the exposure
value here.
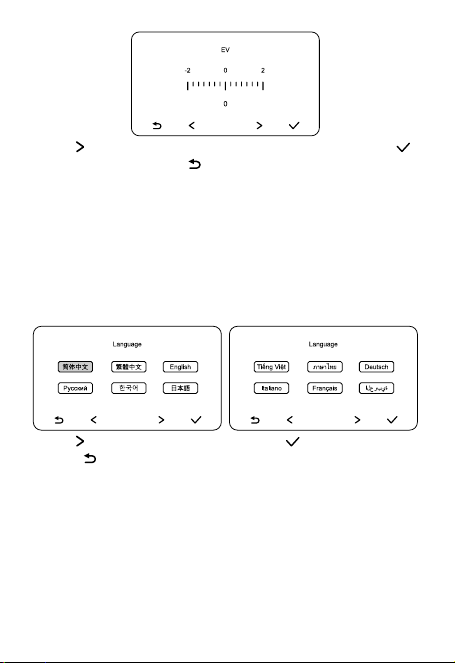
Use the key to increase or decrease the exposure value, press the
key to confirm, and press the key to go back.
Language
This device supports multiple languages, including 简体中文(Simplified
Chinese), 繁體中文(Traditional Chinese), English(English),
Русский(Russian), 한국어(Korean), 日本語(Japanese), Tiế ng
Viế t(Vietnamese), ภาษาไทย(Thai), Deutsch(German), Italiano(Italian),
Français(French), and (Arabic)ةيبرعلا.
When connected to the device via the FinalCamX mobile app, up to 30
languages are supported.
Use the key to move the selection, press the key to confirm, and
press the key to go back.
G-sensor
Built-in gravity sensors are used to detect impacts and lock the current
video file. High sensitivity can result in a large number of locked videos,
which will cause the available space on the memory card to decrease
rapidly.
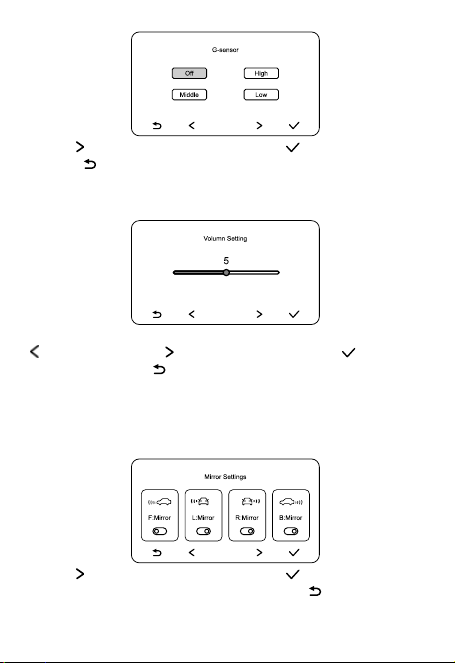
Use the key to move the selection, press the key to confirm, and
press the key to go back.
Volumn Setting
Used to adjust the volume of the external speaker.
to lower the volume, to raise the volume, press the key to
confirm, and press the key to go back.
Mirror Setting
In certain situations, a mirrored image is more practical. This setting is
used to configure a mirrored image, and it can be applied to all four
cameras.
Use the key to move the selection, press the key to turn the mirror
on or off, then press again to confirm, and press the key to go back.
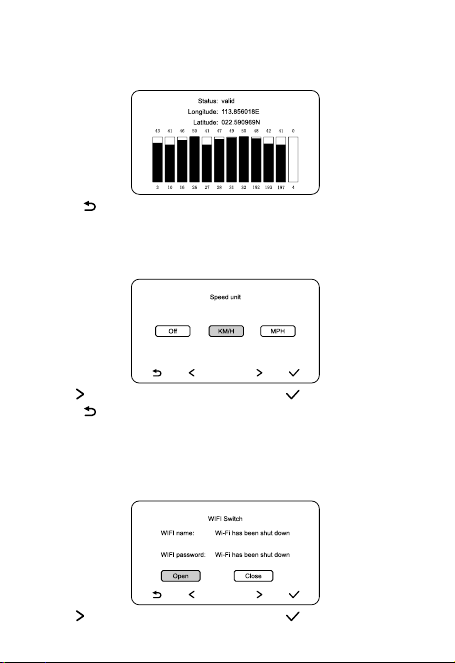
GPS Information
Used to view information such as GPS signal strength; works only
outdoors.
Press the key to go back.
Speed unit
Speed unit selection: Currently supports km/h and mph; you can choose
the appropriate unit based on your specific situation.
Use the key to move the selection, press the key to confirm, and
press the key to go back.
WiFi Switch
It features a built-in Wi-Fi module. Once enabled, you can use the
FinalCamX mobile app to view a live preview, configure the dashcam, and
perform other related operations.
Use the key to move the selection, press the key to confirm, and
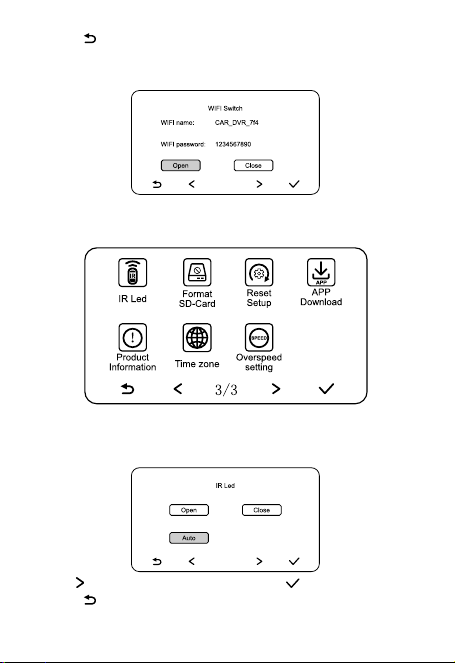
press the key to go back.
When Wi-Fi is turned on, this screen displays the Wi-Fi name and
connection password.
SECOND PAGE OF THE SCREEN
IR Led
The left and right cameras are equipped with infrared capabilities and
feature corresponding LED lights.
Use the key to move the selection, press the key to confirm, and
press the key to go back.
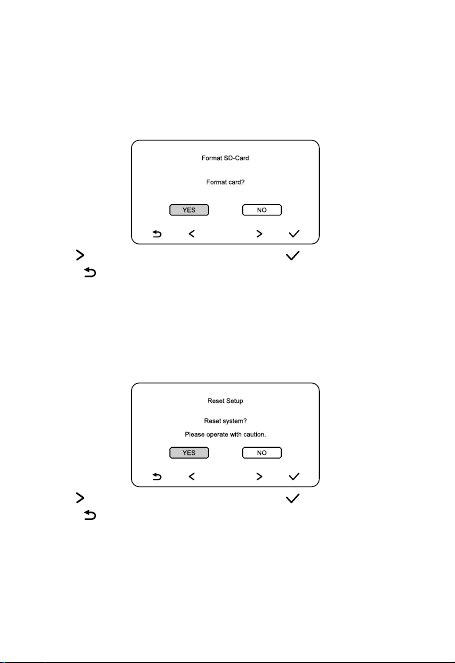
Format SD-Card
When inserting a memory card for the first time, you’ll need to format it to
meet the system’s requirements. Since memory cards are constantly
writing and erasing data, a large number of unnecessary junk files can
accumulate over time. We recommend formatting the card once or twice a
month to ensure optimal performance.
Use the key to move the selection, press the key to confirm, and
press the key to go back.
WARNING: Formatting the memory card will erase all data. Be sure to
back up any important data before proceeding.
Reset Setup
Restore Default Settings: Restore all default settings with a single click. Use
this to resolve issues with disorganized system settings.
Use the key to move the selection, press the key to confirm, and
press the key to go back.
APP Download
If you've lost the user manual and can't remember the name of the app,
you can scan the QR code here to download FinalCamX. It's available for
both Android and iOS; scanning the code will automatically redirect you to
the download page on Google Play or the App Store.
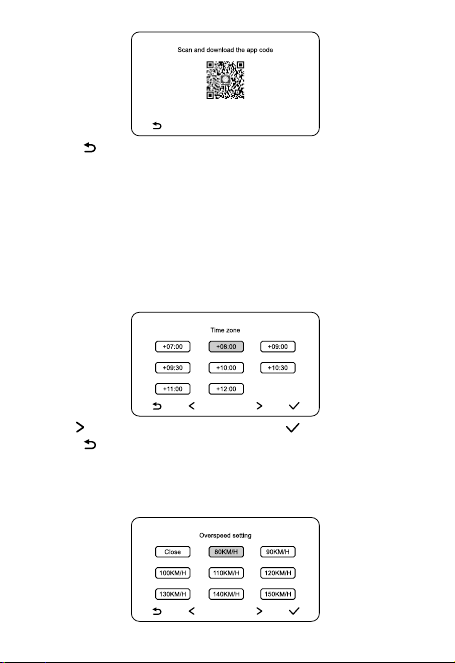
Press the key to go back.
Product Information
The version number of the current system firmware is displayed here. If
you need after-sales service, please provide this version number to the
after-sales department.
Time zone
Set the time zone for the system here. The date and time vary depending
on the time zone. Please adjust this setting according to your actual
needs.
Use the key to move the selection, press the key to confirm, and
press the key to go back.
Overspeed Setting
Used to set speed limit alerts; when the vehicle's speed exceeds a specified
value, the device will issue a speeding alert.
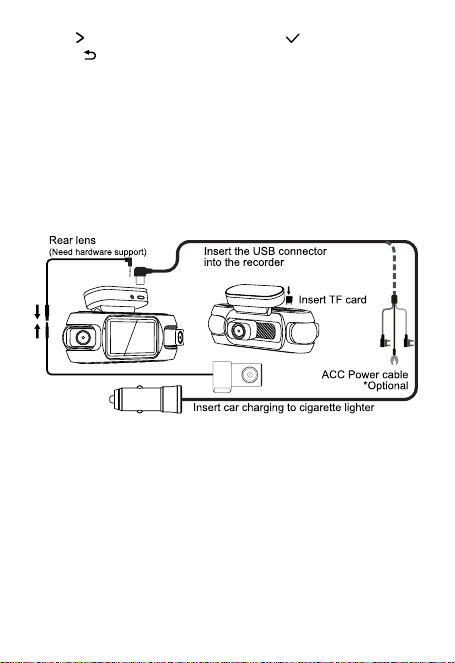
Use the key to move the selection, press the key to confirm, and
press the key to go back.
ABOUT THE DEVICE’S WI-FI
The device is equipped with a built-in 5.8 GHz high-performance WLAN
module, with 2.4 GHz as an option. You can navigate to the Wi-Fi switch
via the menu and buttons, then enter the Wi-Fi settings to make your
selection.
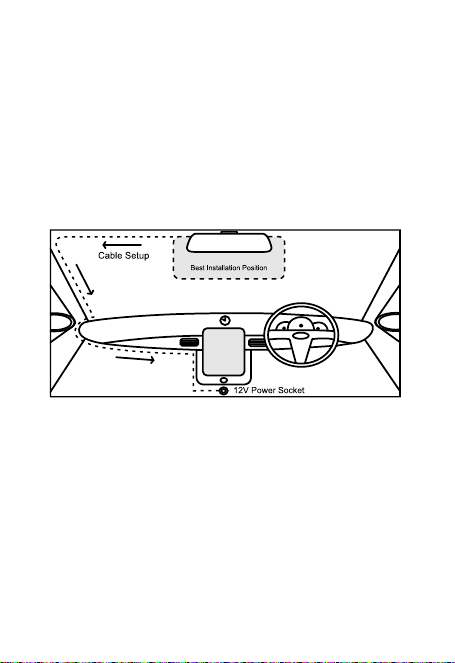
WIRING DIAGRAM
The product is subject to the actual shipment.
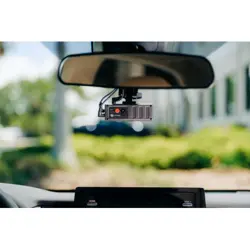
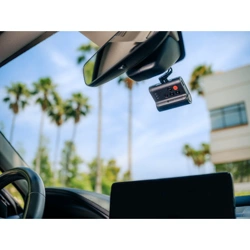
INSTALLING AS A CAR CAMERA
⚫ It is the best to mount the dash camera in the upper edge of the car’s
front windshield, beneath the rear-view mirror or next to it.
⚫ Clean the mounting area carefully and ensure the windshield is not damp.
⚫ Ensure there is unobstructed view to the camera and that the vision of
the driver is not blocked.
⚫ Ensure that the selected mounting area is suitable for the length of the
USB charging cable
⚫ Remove the protective film of the fastening tape of the camera holder
and fasten the holder by pressing it firmly on the windshield
⚫ Insert an empty microSD card in the dedicated slot.
⚫ Connect the camera carefully to camera holder and connect the USB
charging cable. The USB charging cable is long enough so that in most
passenger cars it can be mounted along the edge of the windshield to
the charging socket.
⚫ The camera switches on automatically when the power is turned on.
INSTALL POSITION
MEMORY CARD RELATED TIPS
1. This device does not support the operation of hot plugging and hot
unplugging of memory cards. Pulling out the memory card during normal
recording will cause the device to shut down.
2. Due to system limitations, the minimum supported TF card is of C10 high-
speed type. Otherwise, the device may not work, and even lose WiFi signal.
APP CONNECTION
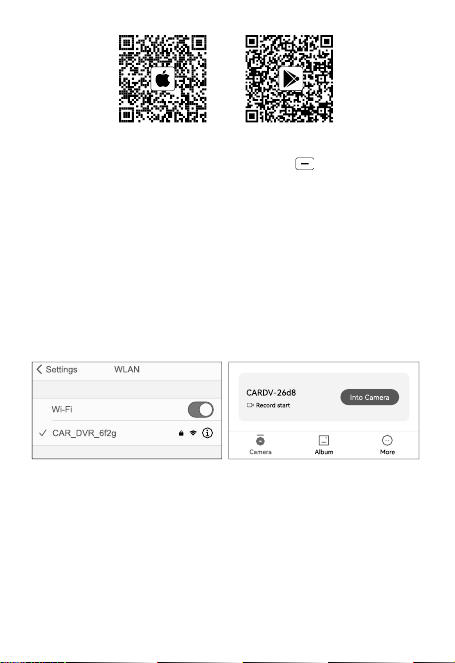
Download FinalCamX mobile app
Download “FinalCamX” app for Android or iOS from Google play or
Apple store. or scan the following QR code to install:
Start the car engine, the camera LED light on
While video is working, press and hold the button to turn on WiFi, the
blue LED flashing; it will automatically turn off if not connected within 5
minutes.
WiFi hotspot NAME and PASSWORD
WiFi hotspot NAME: CAR_DVR_******
Connection PASSWORD: 1234567890
Step1: Go to the WiFi list via Settings - WLAN / Wi-Fi on your phone.
Step2: Connect to the hotspot starting with ‘CAR_DVR’ and enter the
connection password.
Step3: If there is a message ‘
The network cannot be connected to the
Internet
’, please make sure to continue using it.
Step4: Open FinalCamX, tap ‘Into camera’ at the bottom of the main
interface of the app to enter the main interface of the car camera.
Introduction to the main interface of the
FinalCamX
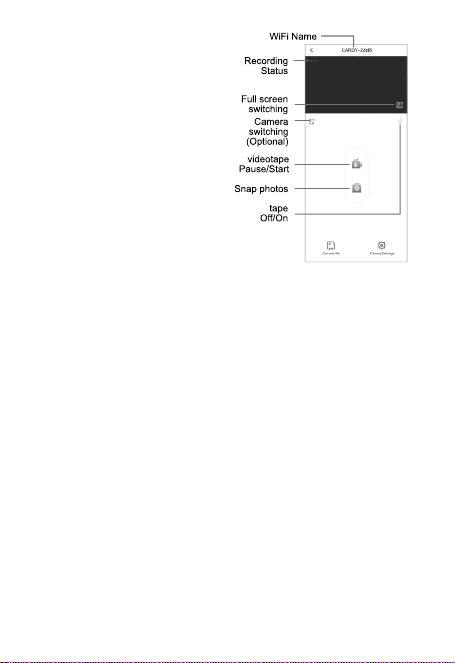
1. In the configuration of front
and rear dual lenses, the lens
switch icon will be displayed.
2. When recording is turned off,
the video is muted. The
recording icon will turn light
gray.
3. When the recording is
paused, the recording status will
display red "Video Paused", and
the icon button will be
displayed.
4. The captured photos will be
automatically stored in the
"Capture Event" of the "Recorder”
VIDEO/PHOTO PLAYBACK
Playback on APP:
Open the mobile APP to find videos and photos
COMPUTER:
The recordings can also be viewed in the computer. For this you need a
separate memory card reader for microSD card. The recordings are in a
separate file on the card and they can be freely used and downloaded in to
the computer. No separate program is needed for downloading or viewing.

GPS FEATURES (OPTIONAL)
Note: GPS functionality is only available on models equipped with the Built-
in GPS Module. Please consult the seller of this equipment for details.
1. How It Works
Built-in Antenna: No external installation is required. The antenna is
integrated inside the camera body.
Signal Requirement: GPS signals require a clear view of the sky.
Outdoors: The signal will stabilize automatically when driving outdoors
(usually takes 1-3 minutes).
Indoors/Underground: GPS will not lock in garages or tunnels. This is
normal behavior.
2. Viewing GPS Data
Real-Time Status: Connect to the camera via WiFi and open FinalCamX.
GPS-related images will be displayed at the bottom of the live preview
screen. Go to Settings to view GPS signal strength and satellite count.
Playback & Trajectory:
1. Download recorded videos to your phone via the FinalCamX app.
2. Play the video within the FinalCamX app player.
3. The interface will display the driving trajectory map, real-time speed,
and location coordinates.
Important: These GPS overlays are only visible in the FinalCamX app.
Standard video players on PCs or phones will not show the map/speed data.
FinalCamX allows dashcams to use the phone's GPS to integrate driving
data into video files. Simply connect to the dashcam WiFi, enable "GPS
Assistant" in FinalCamX, and keep recording while driving.

COMMON TROUBLESHOOTING (FAQ)
Issue
Possible Cause
Solution
WiFi Cannot
Connect
1. Wrong
Password
2. Phone switched
to mobile data
3. Interference
1. Verify password is
1234567890 (case-sensitive).
2. When phone prompts "No
Internet," choose "Keep Connected".
3. Move closer to the camera.
4. Reset camera (Hold
power >15s).
Video Cannot
Download
1. Unstable WiFi
connection
2. SD Card error
3. App permission
denied
1. Ensure Red LED is flashing
(connected) before downloading.
2. Check if SD card is full or
damaged (try formatting).
3. Grant "Storage/Photos"
permission to FinalCamX in
phone settings.
4. Try downloading smaller clips
first.
Camera Won't
Turn On
1. Power cable
lose
2. SD Card
conflict
3. Car charger
faulty
1. Re-plug the USB cable firmly.
2. Remove the SD card and try
powering on (some bad cards
prevent boot).
3. Contact after-sales to replace
the power cord, which may
require a fee.
Recording
Stops/Loops
Erratically
Low Speed SD
Card
Ensure you are using a Class 10
(C10) or U3 high-speed card.
Lower classes cannot sustain HD
video writing.
No Sound in
Video
Microphone
Disabled
Open FinalCamX and connect to
the dashcam WiFi, then tap the
microphone symbol in the lower
right corner of the live preview
screen to switch between them.

Time/Date
Incorrect
1. Not connected
to the phone for
a long time
2. Internal battery
depleted
1. Use FinalCamX to connect to
dashcam WiFi to sync time.
2. Leave the camera powered on
(connected to car) for 10+
minutes to charge the internal
supercapacitor, then sync time
via the App.
GPS No Signal
(Optional
Models)
Indoor usage or
obstruction
Drive the vehicle outdoors to an
open area. Wait 1-3 minutes for
satellite acquisition. GPS does
not work indoors.

FCC Warnning:
This equipment has been tested and found to comply with the limits for a Class B digital device,
pursuant to part 15 of the FCC Rules. These limits are designed to provide
reasonable
protection againstharmful interference in a residential installation. This equipment generates,
uses and can radiateradio
frequency
energy
and,
if
not
installed
and
used
in
accordance
with
the
instructions,
maycause
harmful
interference
to
radio
communications.
However,
there
is
no
guarantee
thatinterference
will
not
occur
in
a
particular
installation.
If
this
equipment
does
cause
harmfulinterference to radio or television reception, which can be
determined by turning the equipmentoff
and
on,
the
user
is
encouraged
to
try
to
correct
the
interference
by
one
or
more
of
thefollowing measures:
•
Reorient or relocate the receiving antenna.
•
Increase the separation between the equipment and receiver.
•
Connect the equipment into an outlet on a circuit different from that to which the receiver is
connected.
• Consult the dealer or an experienced radio/TV technician for help.
Caution:
Any
changes
or
modifications
to
this
device
not
explicitly
approved
by
manufacturer
could void your authority to operate this equipment.
This
device
complies
with
part
15
of
the
FCC
Rules.
Operation
is
subject
to
the
following
two
conditions:
(1)This
device
may
not
cause
harmful
interference,
and
(2)
this
device
must
accept
any
interference received, including interference that may cause undesired operation.
This
equipment
complies
with
FCC
radiation
exposure
limits
set
forth
for
an
uncontrolled
environment.
This
equipment
should
be
installed
and
operated
with
minimum
distance
20cm
between the radiator and your body.