Product Instructions
Product No. 2000288
PORTABLE
SPOT CLEANER
2 3
Need further help?
suppor[email protected]
See our full range at
www.vonhaus.com
Besoin d’aide supplémentaire ?
suppor[email protected]
Découvrez notre gamme complète sur
www.vonhaus.com
Benötigen Sie weitere Hilfe?
suppor[email protected]
Entdecken Sie unser gesamtes
Sortiment auf
www.vonhaus.com
Necesita más ayuda?
suppor[email protected]
Descubra toda nuestra gama en
www.vonhaus.com
Hai bisogno di ulteriore assistenza?
suppor[email protected]
Scopri tutta la nostra gamma su
www.vonhaus.com
Let’s get started!
Visit our product hub for
useful tips and tricks on
getting the most out of
your new product.
SCAN ME
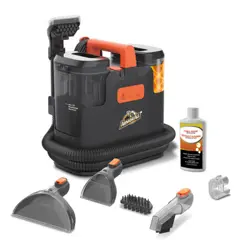
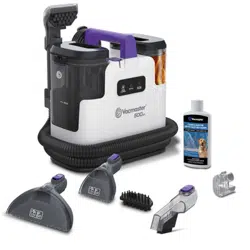
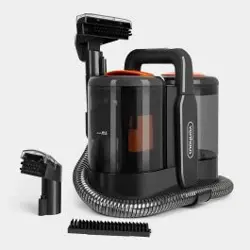
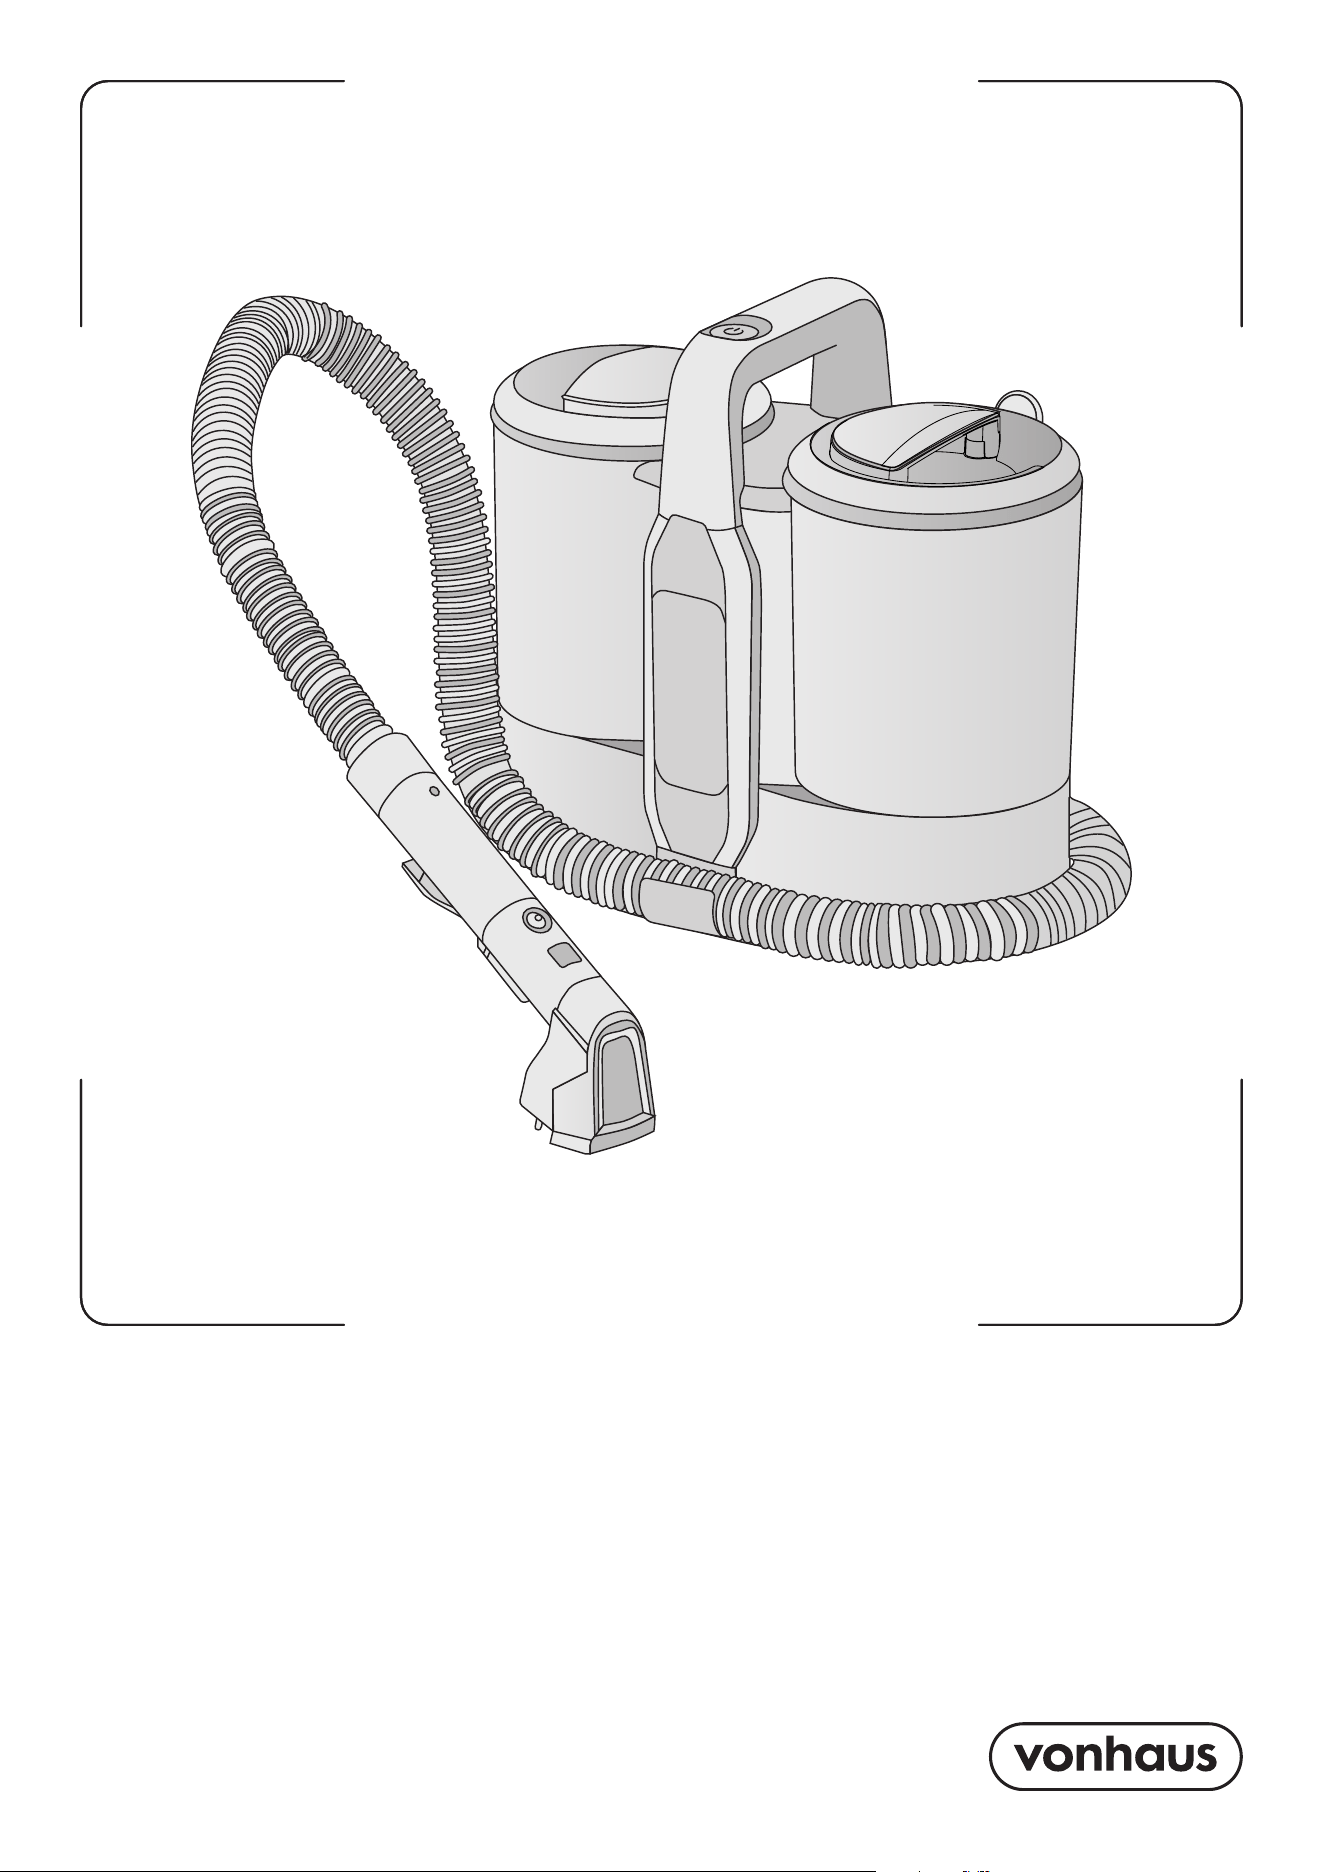
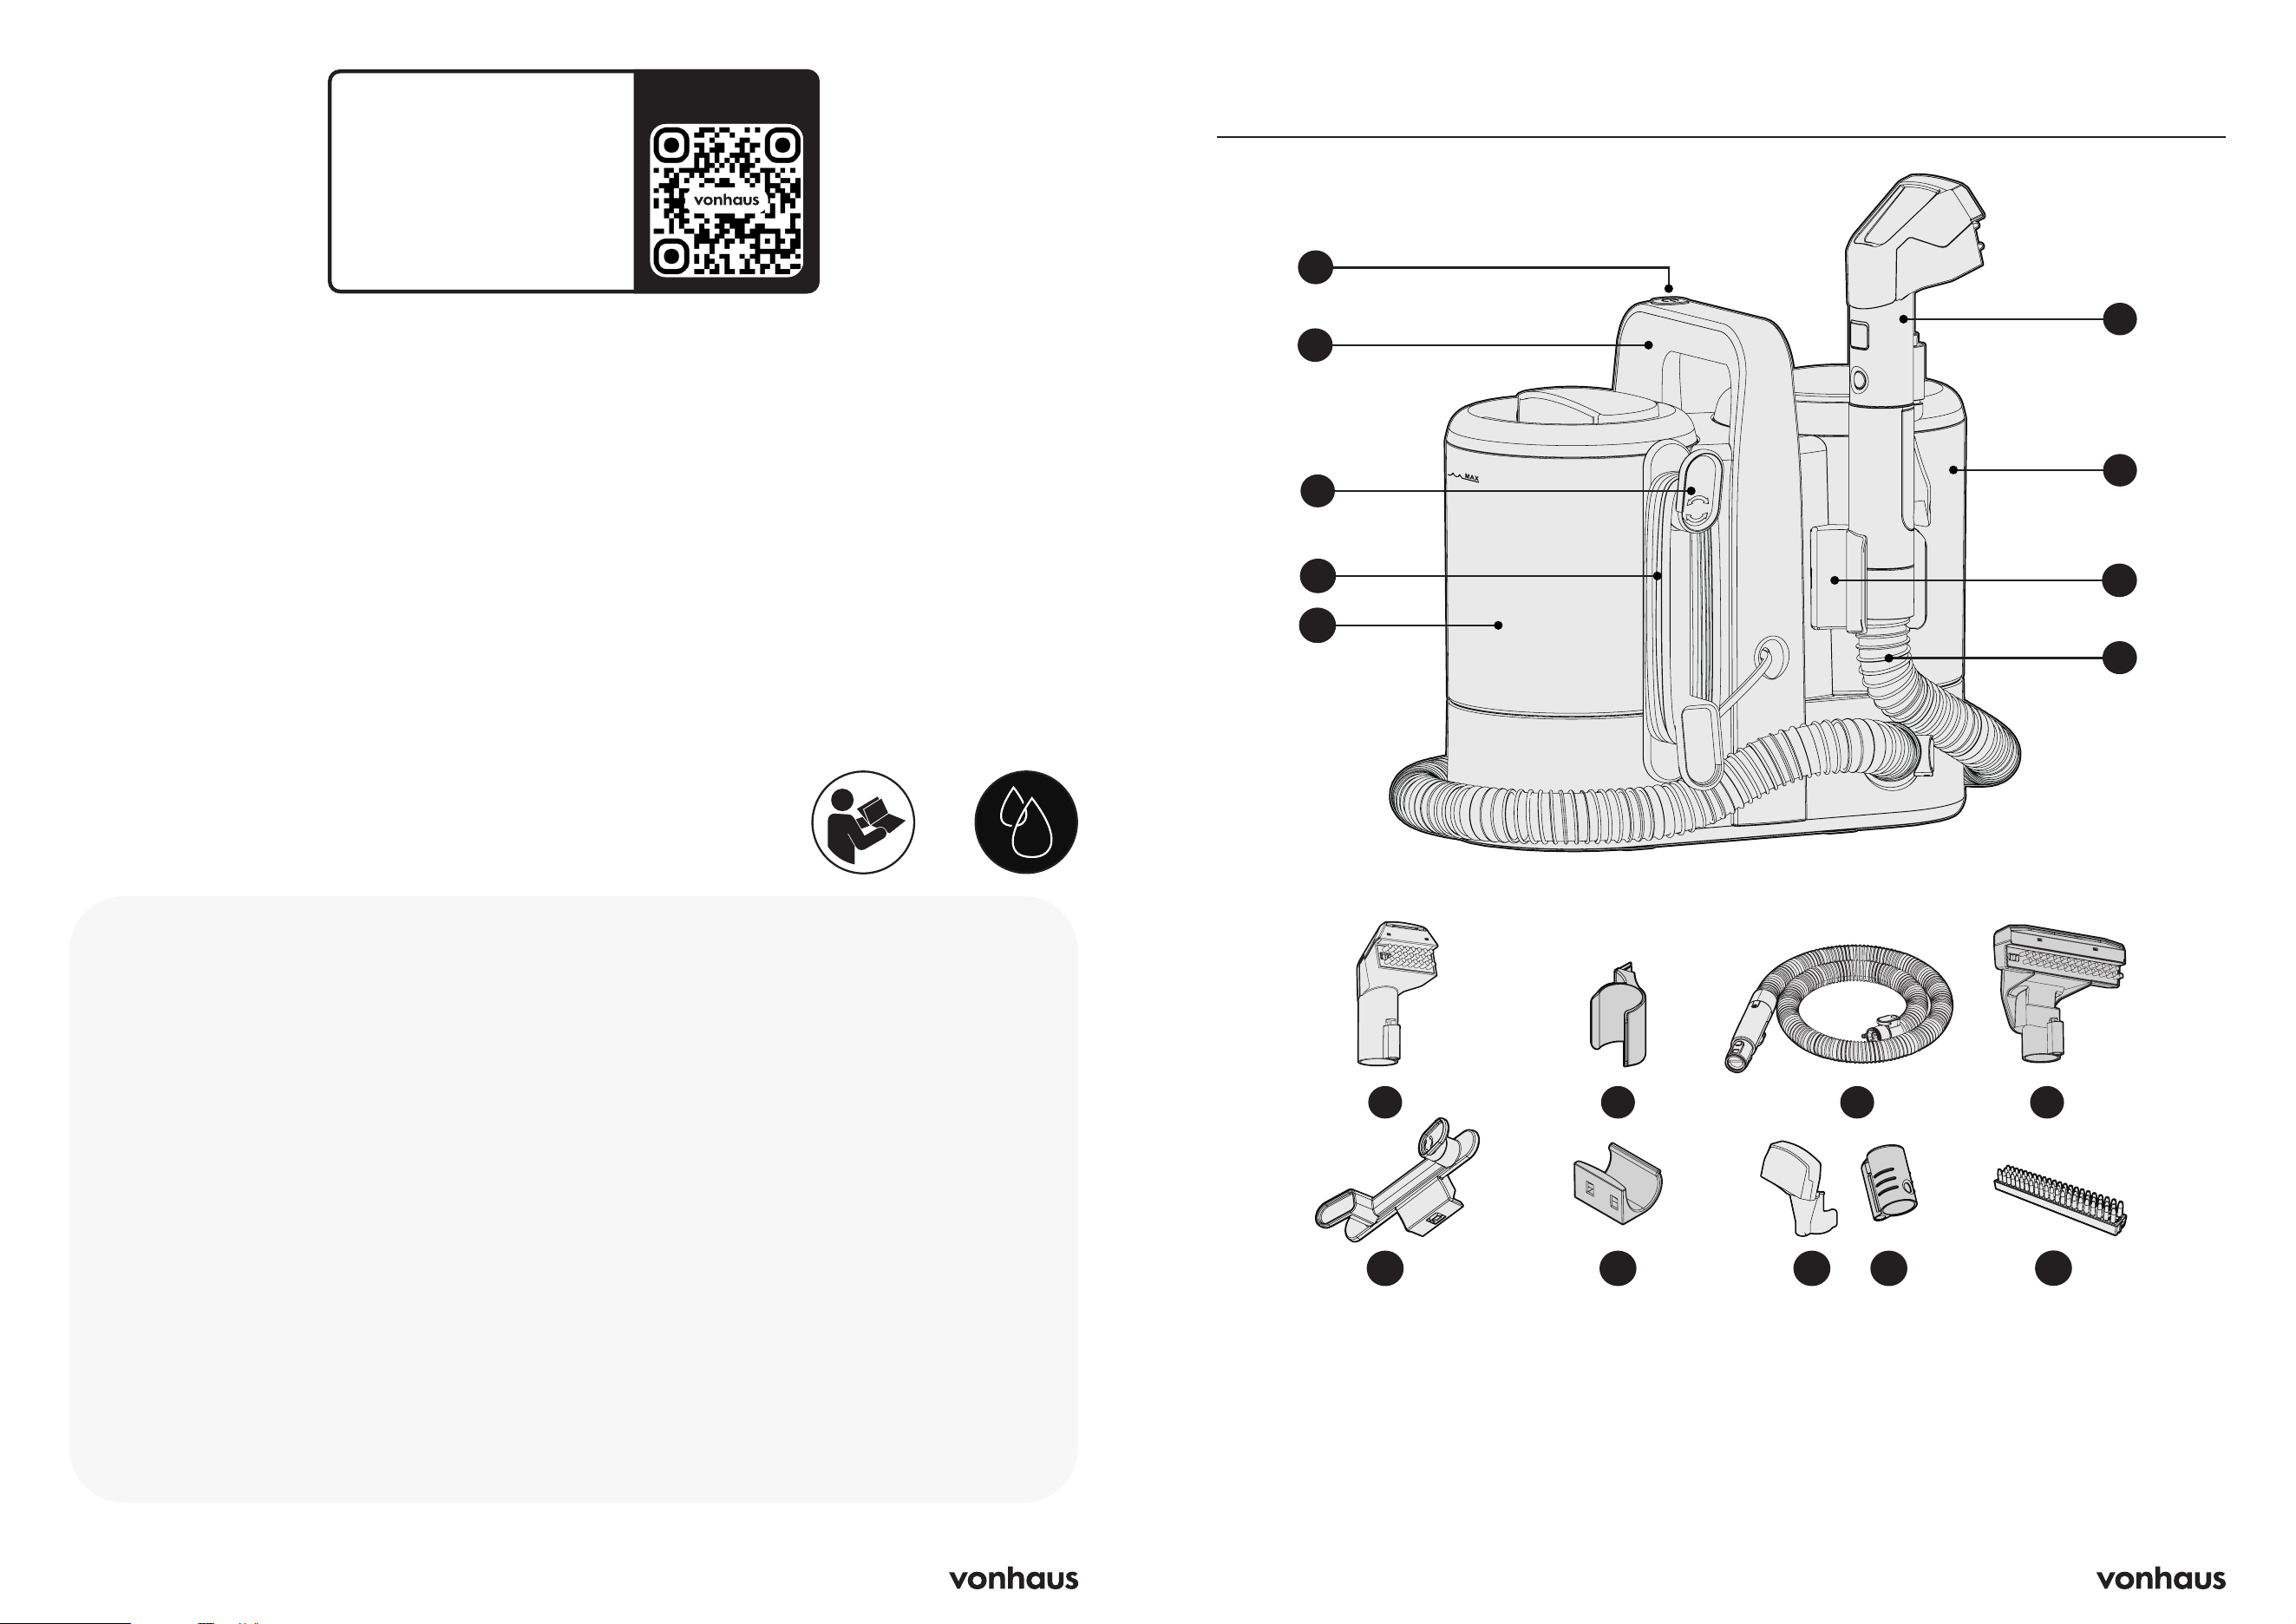
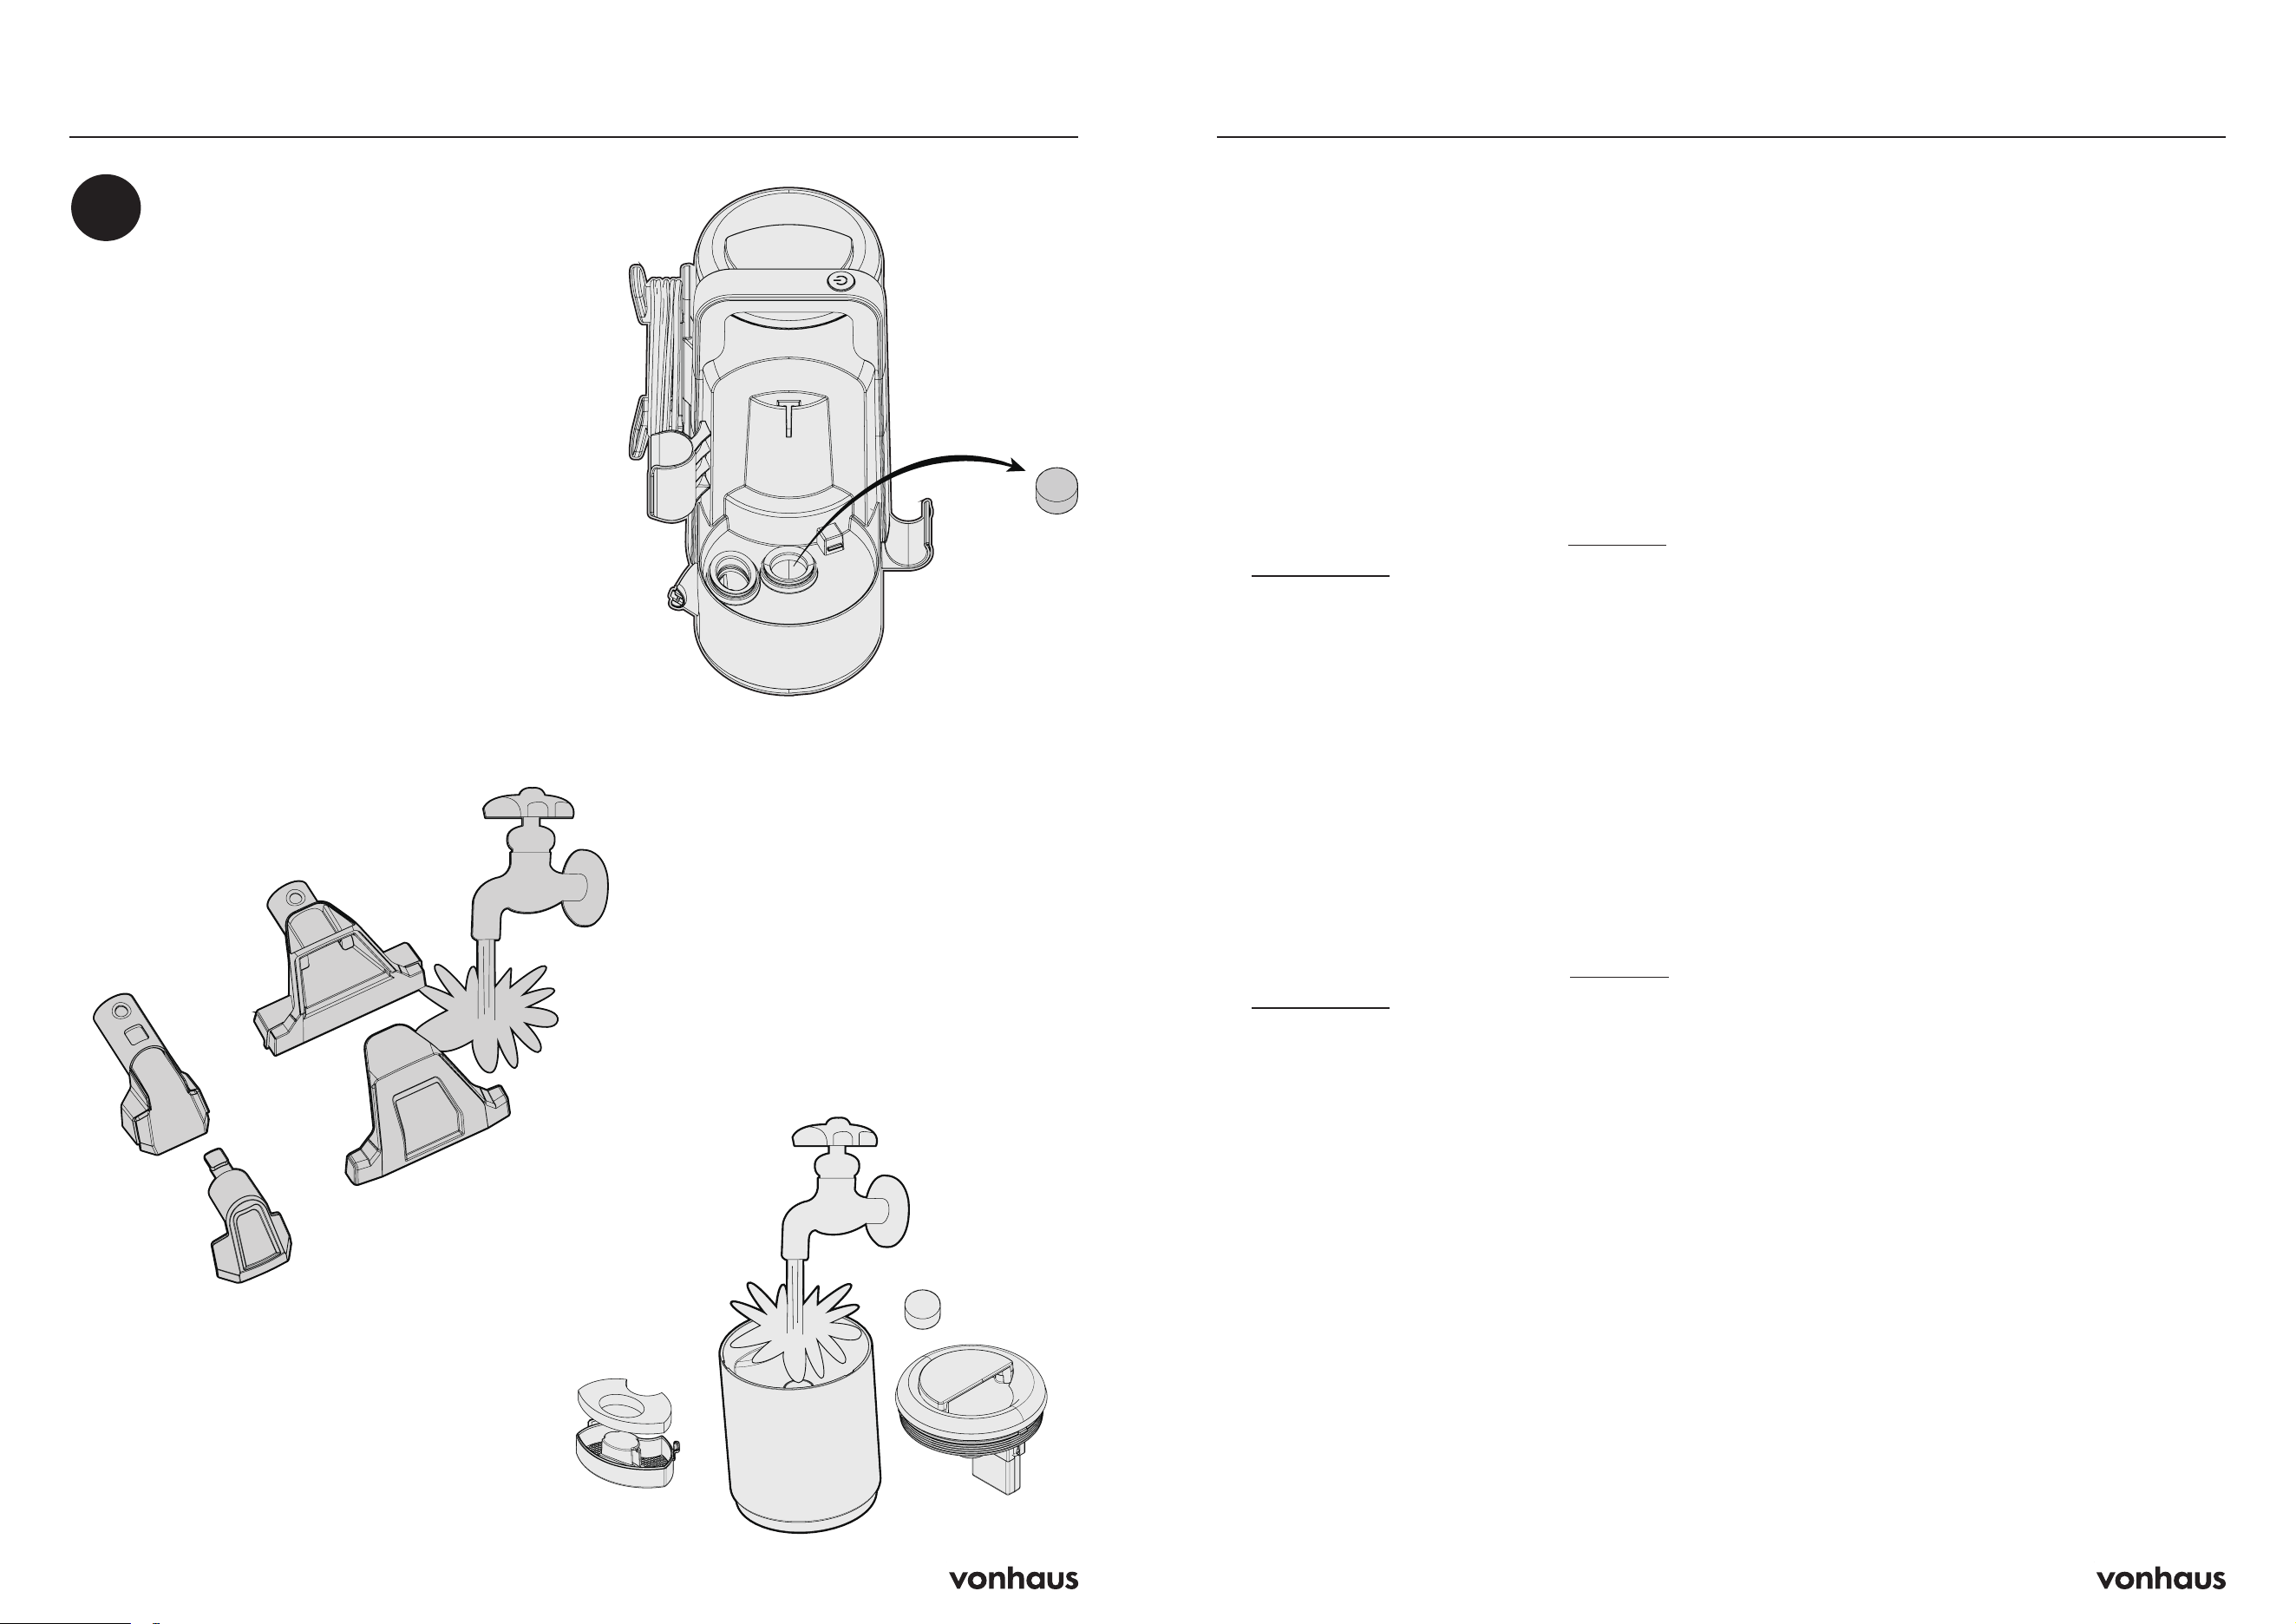
Parts & Components
A
B
D
C
E
G
H
F
A. On/Off Switch
B. Handle
C. Power Cord Hook
D. Power Cord
E. Clean Water Tank
F. Small Brush Head
G. Dirty Water Tank
H. Hook for Brush
I. Hose
J. Large Brush Head
K. Hose Hook
L. Self Cleaning Brush Head
M. Self Cleaning Hose Nozzle
N. Large Pet Brush
I
C K L
Litre
F H I J
N
M
4 5
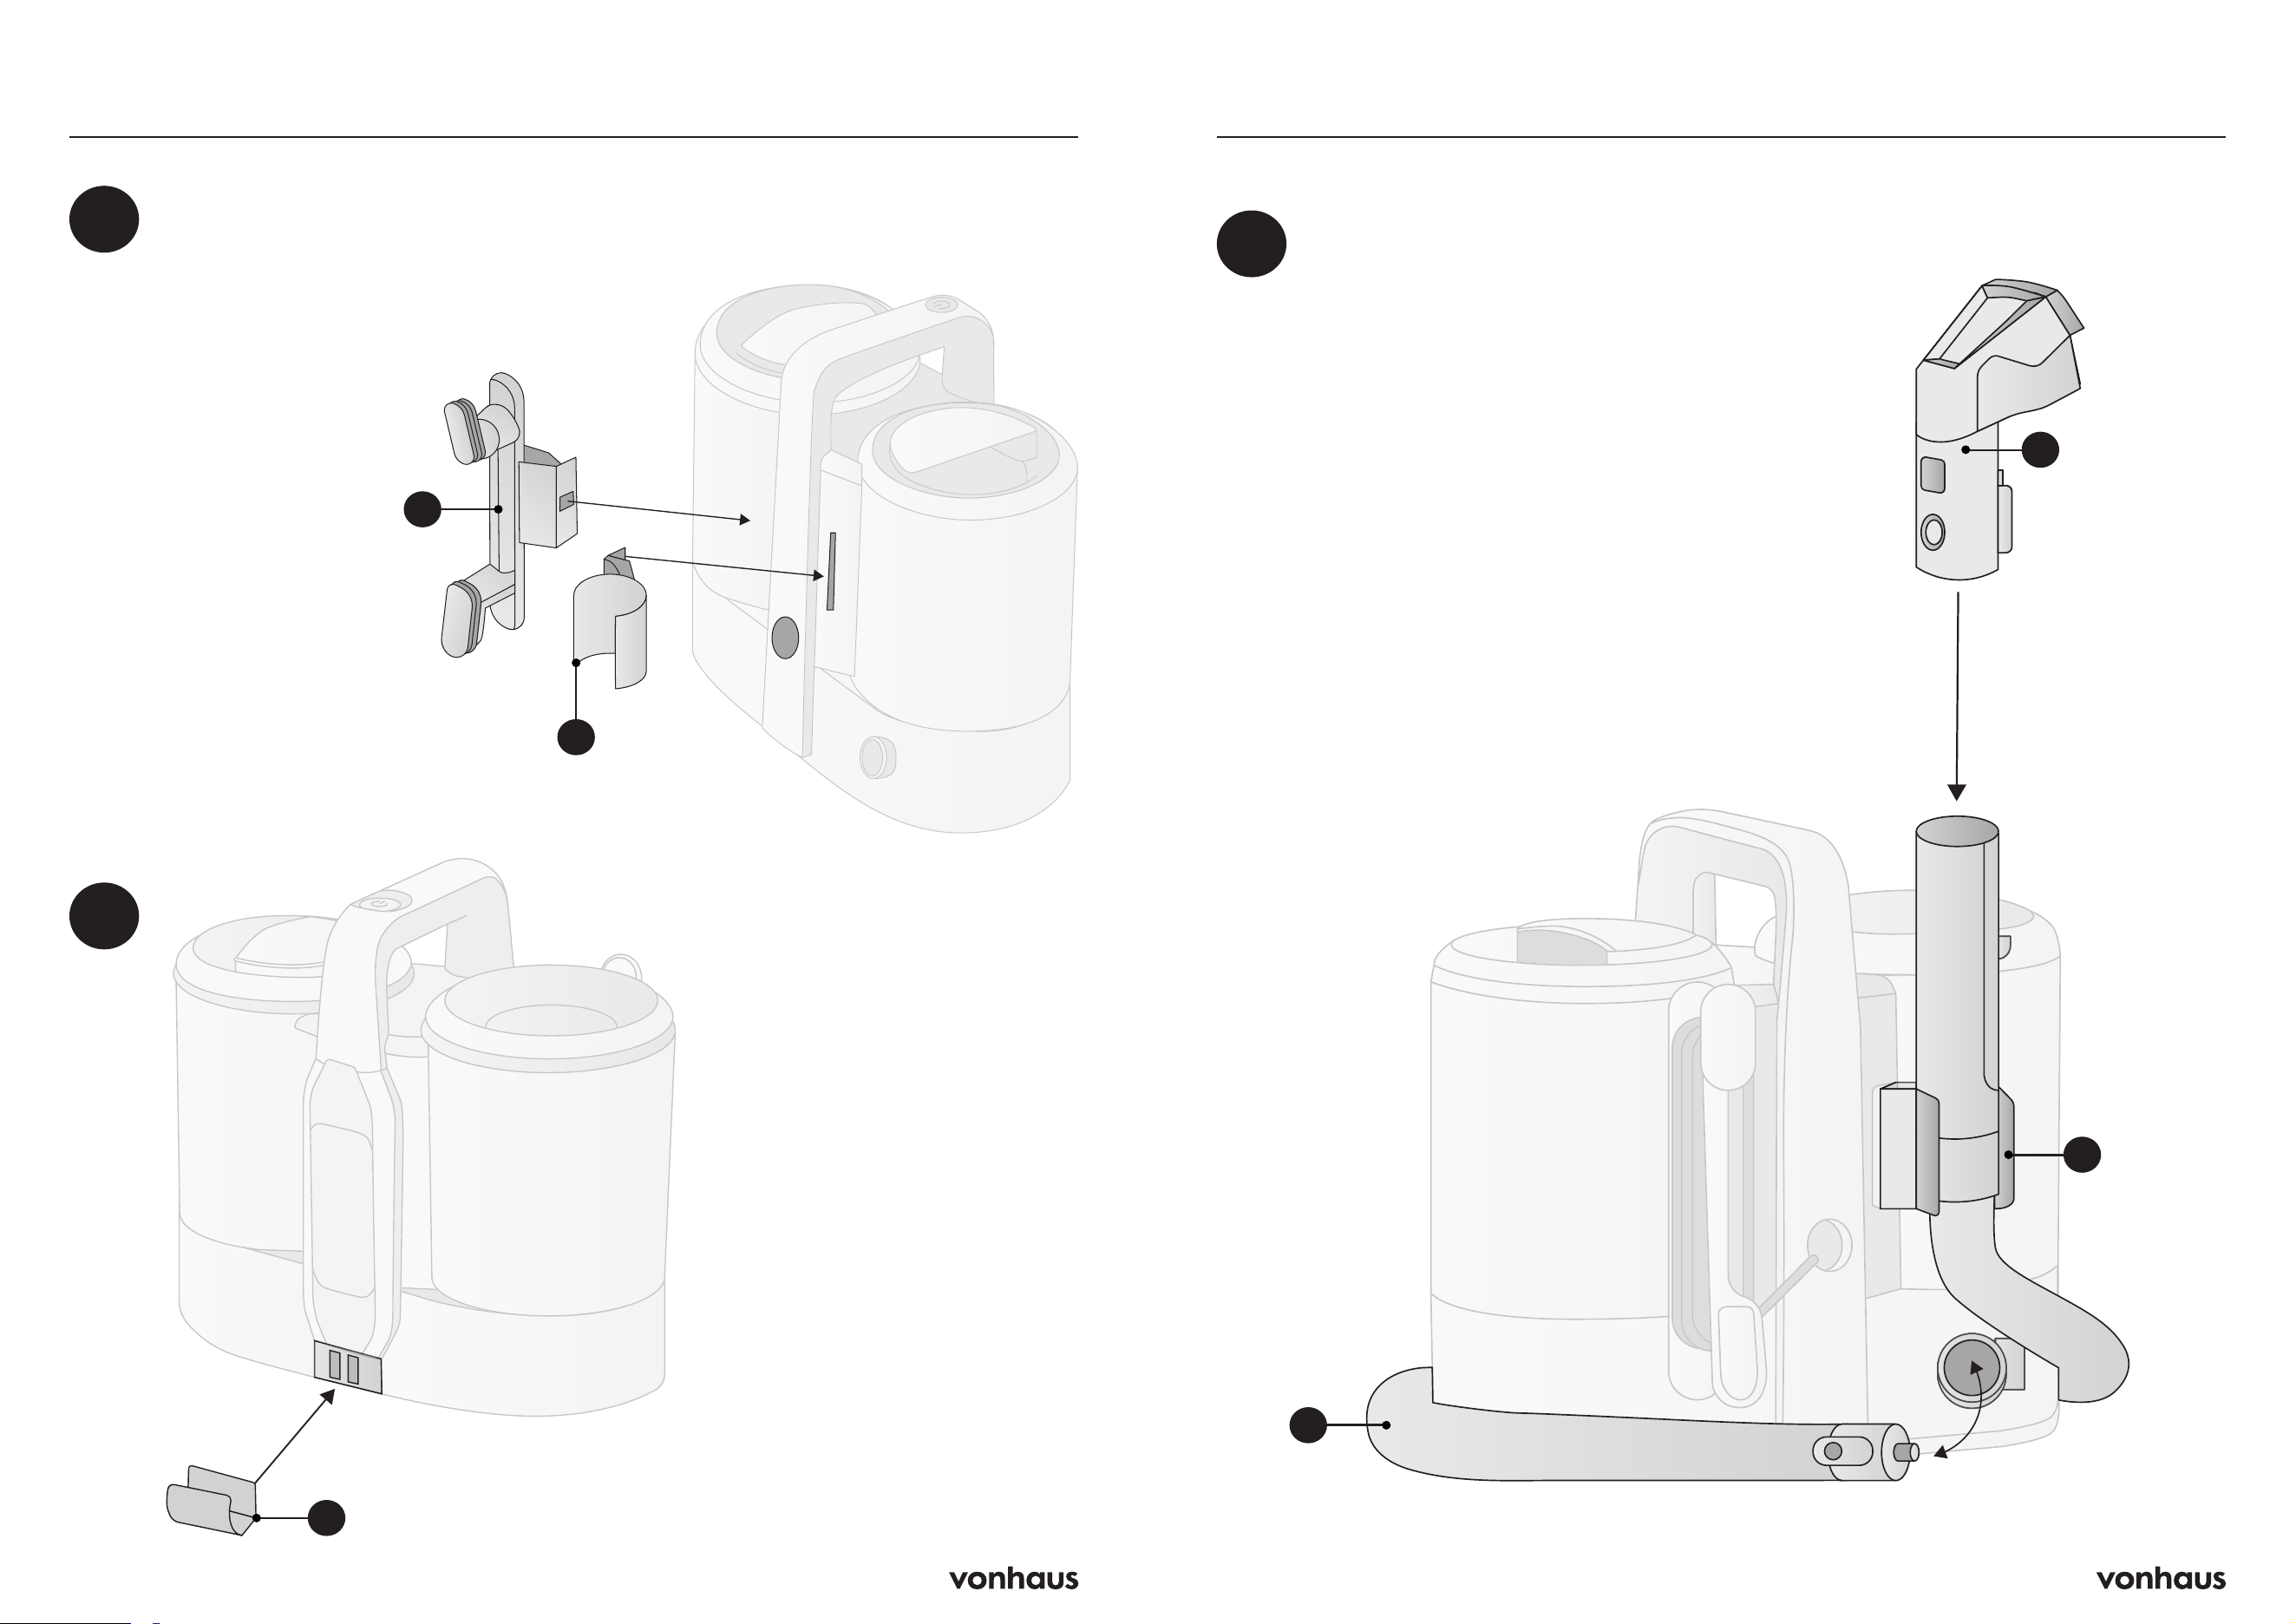
Assembly
Attach the power cord hook (C)
and hook for the brush (H) to the
back of the machine
1
2
H
C
K
Assembly
Insert the hose (I) in to the back of the machine
and ensure it is securely locked in place
• Wrap the hose around the base and secure
in place with the hose hook (K)
• Attach your desired brush head (F or J)
to the end of the hose and secure in place
using the hook for the brush (H)
• When using the large pet brush (N) remove
the brush from the large brush head (J) and
insert the pet brush attachment on to the
large brush head
F
I
3
Attach the hose hook (K) to the
front of the machine by sliding it in
from right to left.
It will be securely fixed when you
hear a lock tone
H
6 7
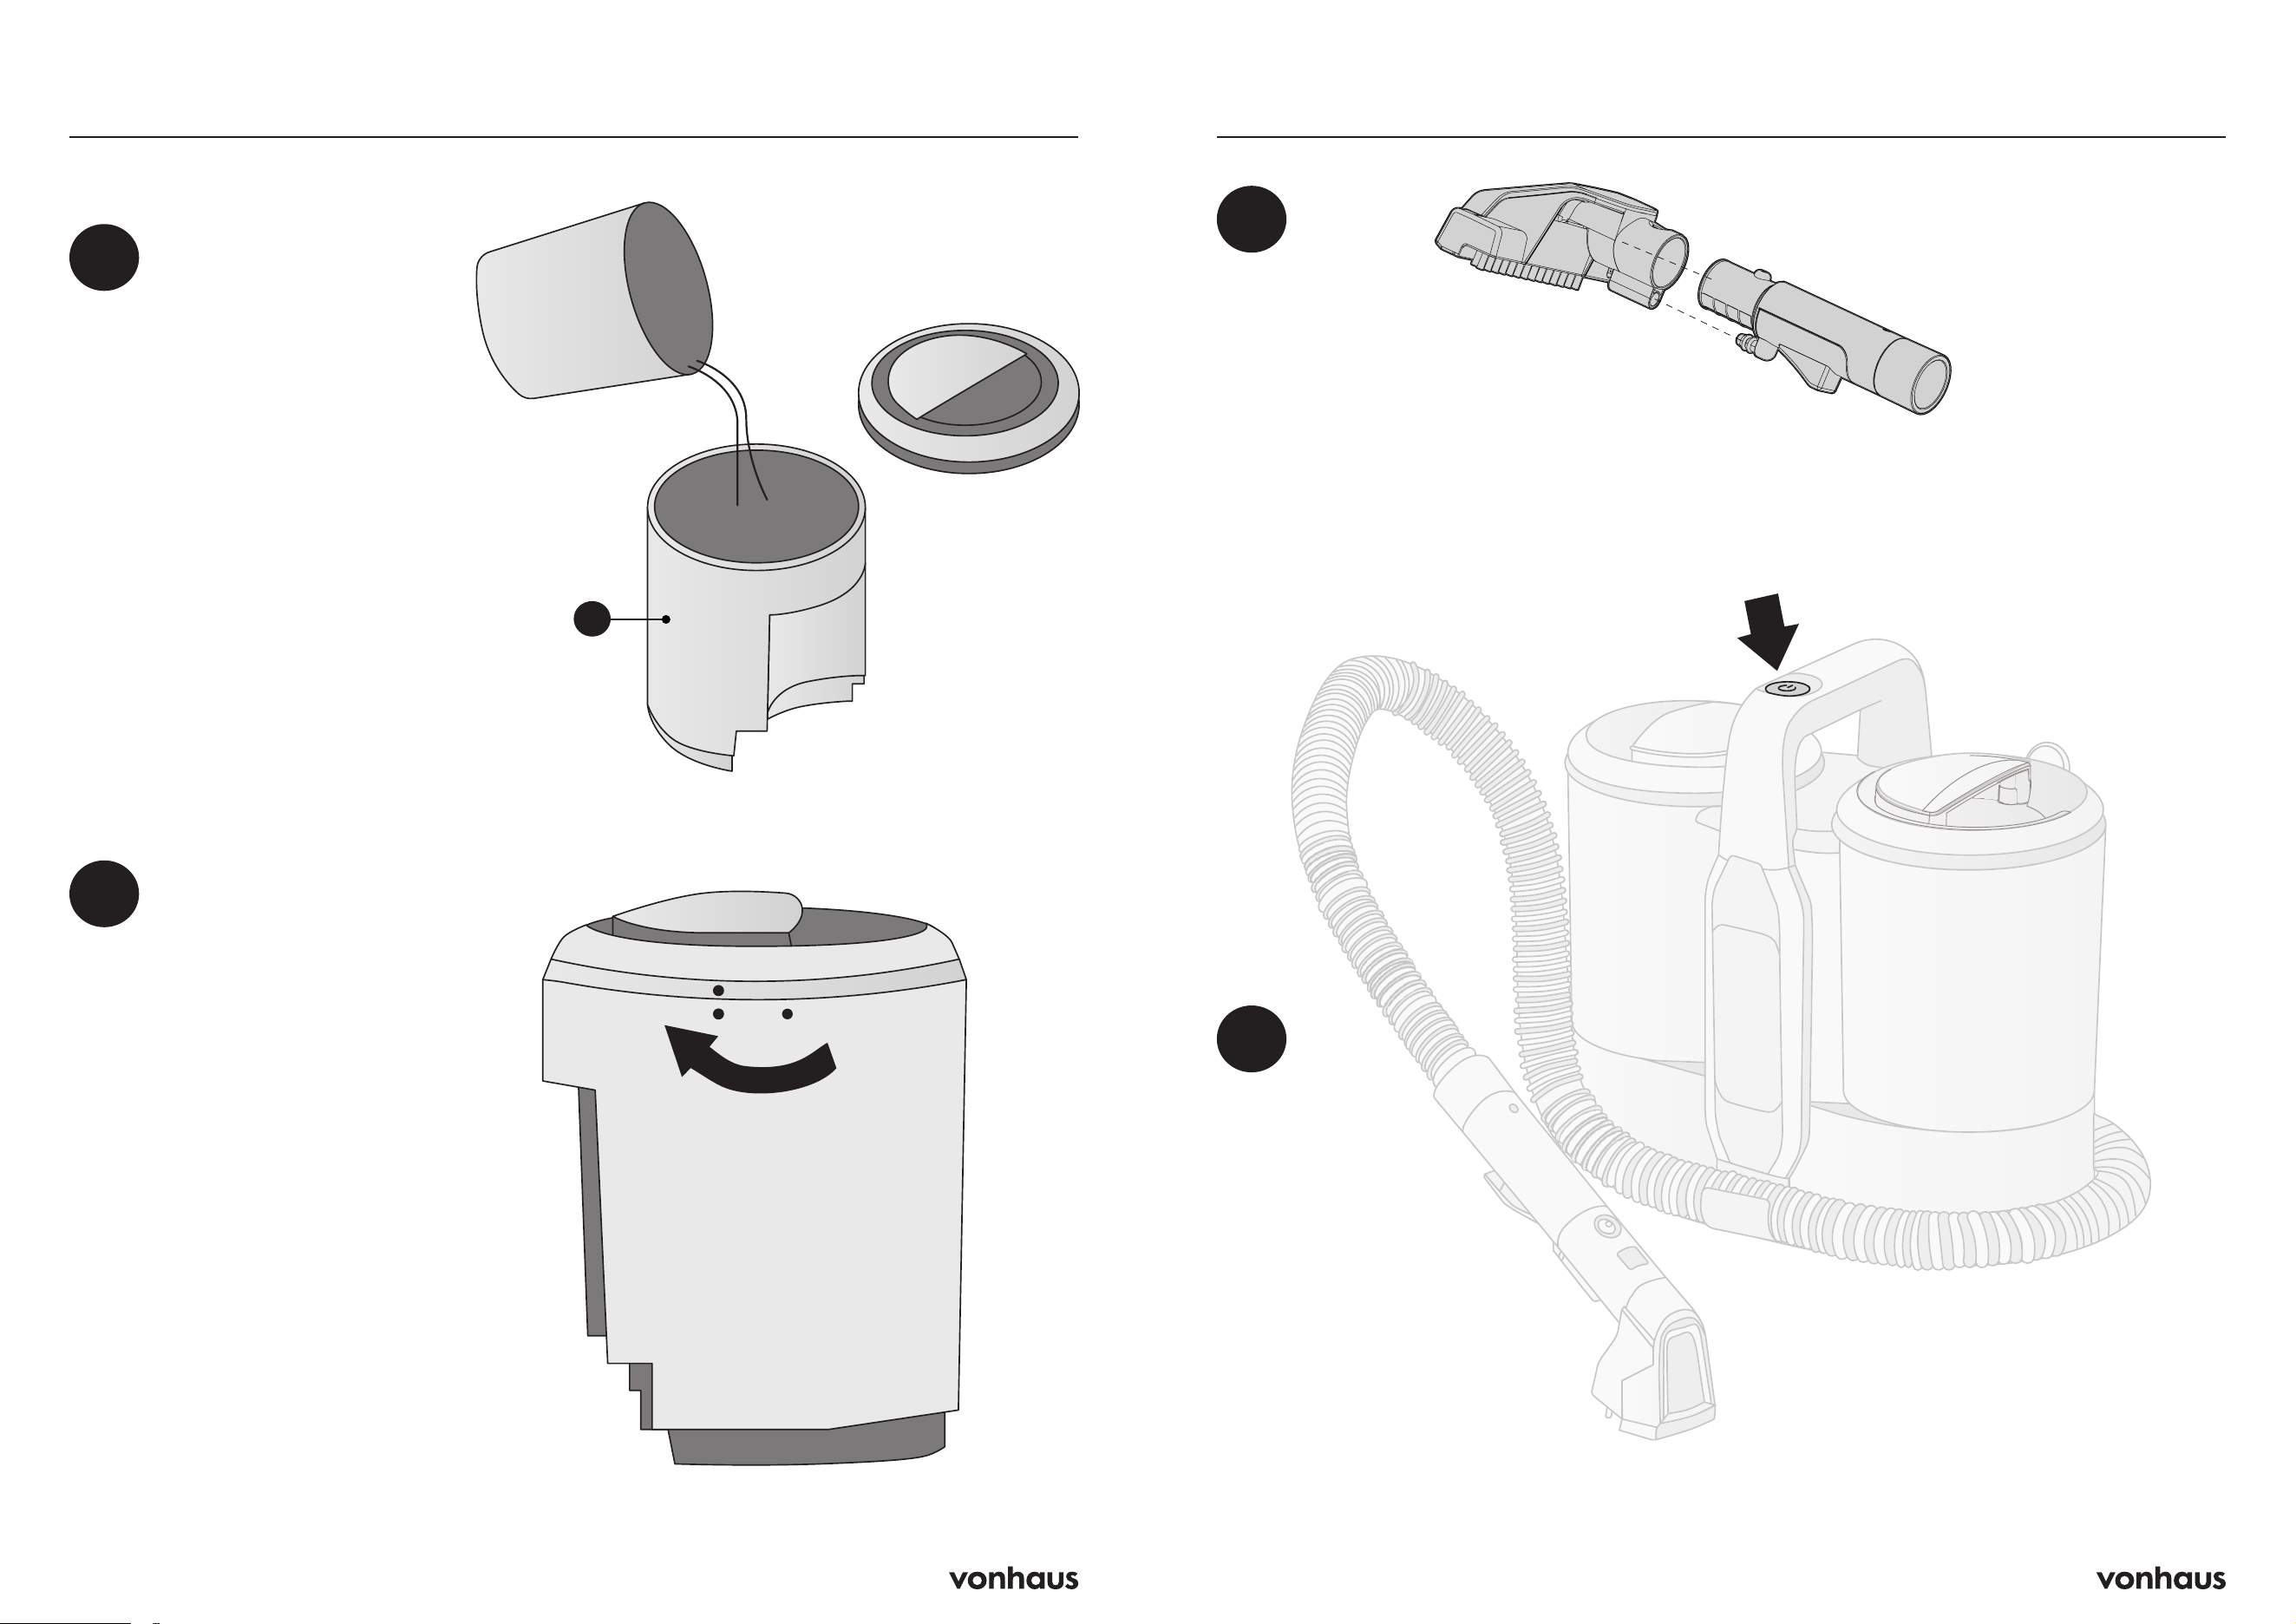
OperationAssembly
4
Unscrew the lid of the clean water
tank by turning anticlockwise. Fill the
tank up with warm water but do not
exceed the maximum fill line
• For stubborn stains, you can mix
water with spot cleaning detergent
directly in the water tank. Follow
the detergent guidelines and
ensure the maximum fill line is not
exceeded
Do not use carpet shampoo as
this foams and it not suitable for
this type of product
5
• Secure the lid back on the
water tank by aligning the
solid circle on the lid with the
hollow circle on the tank
• Turn the cover clockwise until
it clicks and place the water
tank back in to the machine
1
2
Select the desired brush type
and attach on to the hose
Plug in the power cord in to the mains
and press the On/Off switch to turn
on the product
E
8 9
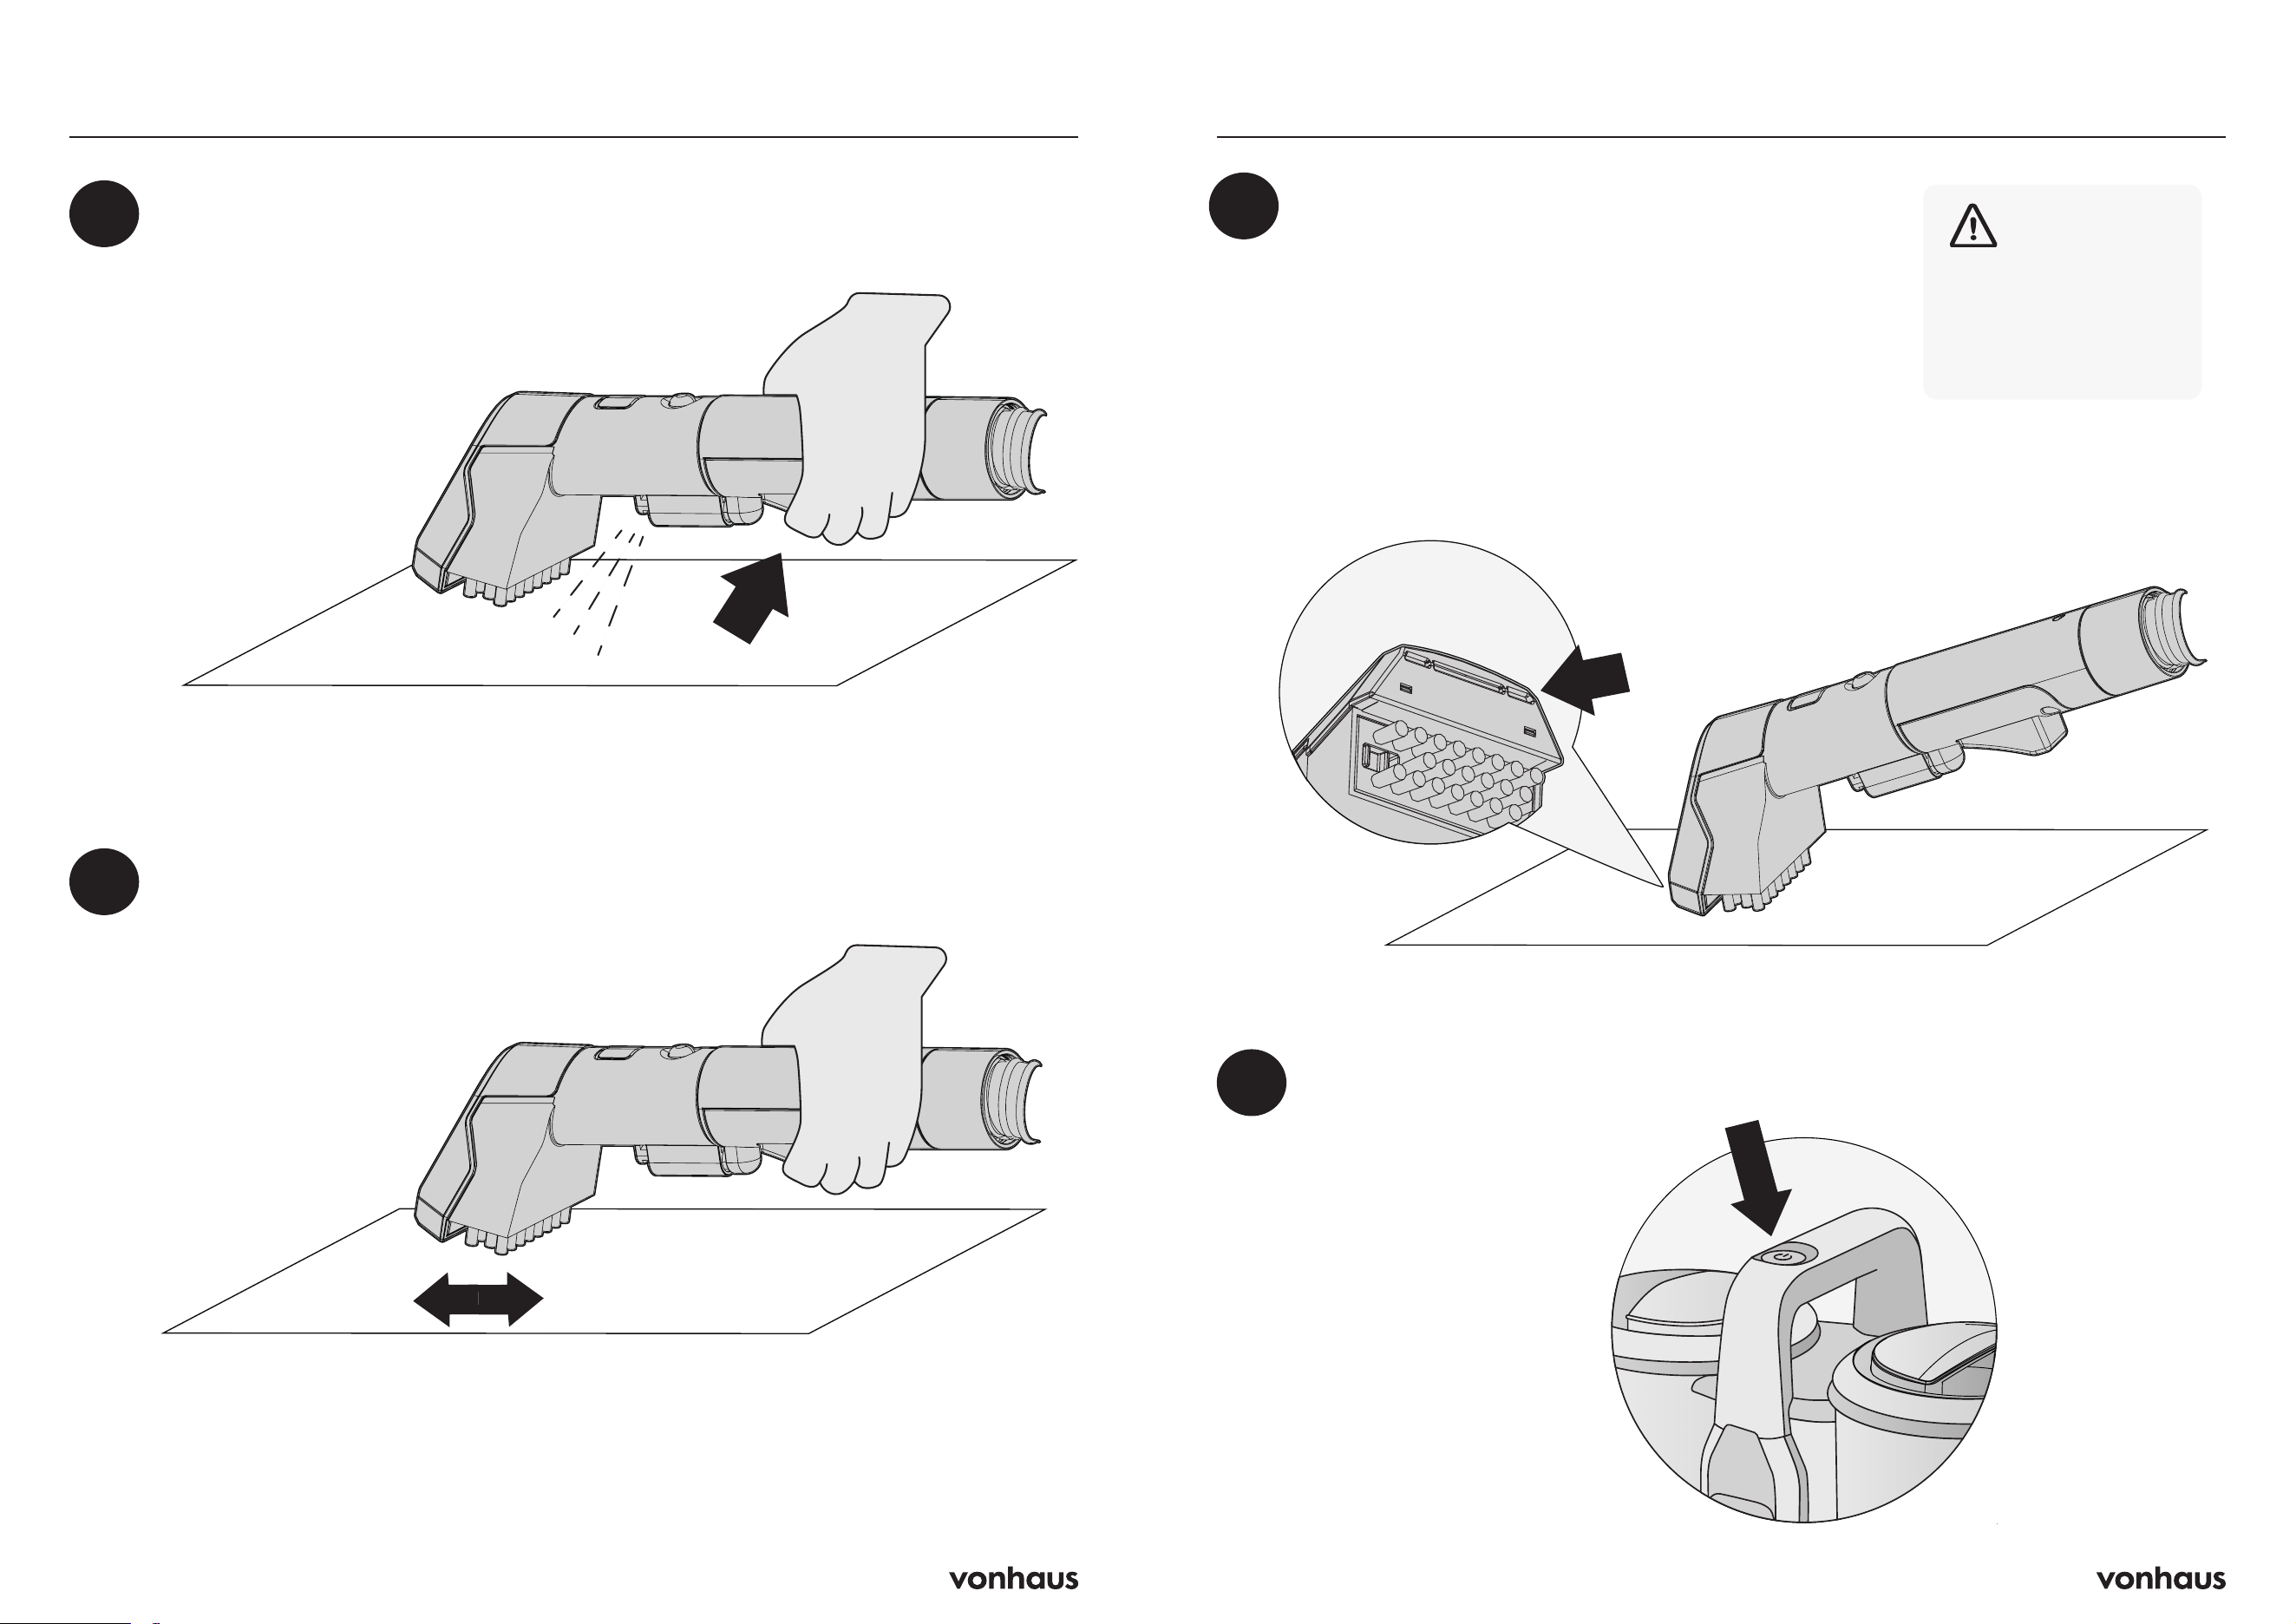
Operation
3
4
Add spot cleaning detergent
on to the spillage and let it
sit, following the detergent
guidelines.
Press the water release button,
on the hose, to spray water on
to the surface
Move the brush head
backwards and forwards to
help to remove the stain from
the surface
5
Stop pressing the water release button and tilt
the brush head forward so the brushes aren’t
in contact with the surface.
Pull the brush head backwards towards
yourself and ensure the suction inlet is
collecting the dirty water
Operation
6
Once you have finished
cleaning, turn the product off
using the On/Off switch and
unplug the power cord
Over or under tilting
the brush tool may
result in poor water
suction
Suction Inlet

10 11
Cleaning & Maintenance
1
To clean the small brush head,
affix the self-cleaning brush head
attachment (L) on to the brush head
and press the water release button.
This will help to self-clean the small
brush head
2
To clean the hose, remove the
brush head and affix the self-
cleaning nozzle (M) on to the
end of the hose.
Press the water release button
and this will help to self-clean
the hose
3
Empty the water from the clean water tank (E) and place back in to the machine.
Press the water release button to remove any excess water from the tank or hose
Cleaning & Maintenance
4
Empty the dirty water tank after every
use, or when the water reaches the
maximum fill line.
The float inside will prevent suction if the
dirty water tank is full
Remove the lid and take out the filter
E
M
G
12 13
Cleaning & Maintenance
5
Remove the small foam filter from underneath
where the dirty water tank was.
Rinse with warm water under the tap and ensure
it is fully dry before replacing it back in to the
cleaner
Clean all the parts with warm water.
Do not use washing up liquid or other chemicals
Ensure all parts are clean and completely dry
before reinstalling back in to the cleaner
Why won’t my machine start?
Possible reasons:
• The plug may not be properly connected.
• The power cord may be damaged.
What to do:
• Switch off the machine and check the plug
is secure.
• If the power cord is damaged contact
the customer services team on support@
vonhaus.com
Why is there no water after
pressing the water-spray
button?
Possible reasons:
• The spray nozzle may be blocked.
• The handle or pump may be damaged.
What to do:
• Remove the brush and clean the spray
nozzle.
• if the problem persists, contact support@
vonhaus.com
Why is there no suction?
Possible reasons:
• The dirty water tank may be full
• The hose might not be properly connected
• The suction inlet on the brush head is
blocked
• The foam filter is blocked
What to do:
• Empty and clean the dirty water tank
• Check the hose is properly connected and
use the self-clean nozzle to check for any
blockages
• Clean the brush head in warm water and
gently scrub to ensure the suction inlet isn’t
blocked
• Clean or replace the foam filter located
under the dirty water tank
Troubleshooting

14 15
Safety Information
Material
Type
Commonly
Found In
Where to Apply
Solution
How to Remove Stains Using a
Wet Vac
Cotton Clothing, bed
linens, towels
Directly on the stain Pre-treat with mild detergent, then use
the spot cleaner to rinse and extract
water.
Polyester Clothing,
upholstery,
curtains
Nylon
Directly on the stain Apply stain remover, let it sit for a few
minutes, then use the spot cleaner to
rinse and extract water
Nylon Carpets, rugs,
clothing
Add to tank Use a carpet cleaner solution, scrub
gently, then use the spot cleaner to
rinse and extract.
Linen Tablecloths,
napkins, summer
clothing
Directly on the stain Pre-treat with mild detergent, then use
the spot cleaner to rinse and extract
water.
Wool Blankets,
rugs, winter
clothing
Directly on the stain Use a wool-safe detergent, gently
scrub (avoid pilling), then use the
spot cleaner to rinse and extract
water.
Silk Luxury bedding,
clothing,
decorative
items
Directly on the stain Use a silk-safe detergent, gently dab
the stain, then use the spot cleaner to
rinse and extract water.
Rayon Doormats, up-
holstery
Directly on the stain Pre-treat with mild detergent, then use
the spot cleaner to rinse and extract
water.
Acrylic Blankets, uphol-
stery
Directly on the stain Apply stain remover, let it sit, then use
the spot cleaner to rinse and extract
water.
Use the recommended guidance for each
material type when treating stubborn stains.
See below for the best process and cleaning
agents to use with your spot cleaner on different
materials. Always test your chosen detergent or
cleaning agent on a small, hidden area (such as
the back corner of a rug or the underside of a
chair cushion) before tackling the main stain to
ensure it does not cause discolouration.
Check the fabric care label before you begin
to make sure you are using the correct cleaning
method
Caution:
Only use the machine for its intended cleaning
purpose.
This appliance is for household use only.
Keep away from open flames and heat
sources.
Stop using the machine if the spray nozzle or
suction hole becomes blocked, or if foreign
objects are sucked in.
Always empty and clean the tanks and remove
blockages before reusing.
Do not tilt, ride, or place excessive weight on
the machine.
Keep out of reach of children; do not use where
children can touch the unit.
Not for outdoor use.
Discontinue use if the machine makes unusual
noises or emits an unusual smell.
Power Cord and Plug Safety
Clean the plug regularly.
Ensure the plug is firmly connected when in
use.
Unplug the appliance when not in use for
prolonged periods, before maintenance,
checking, or moving.
Never plug in or unplug the machine with wet
hands.
Keep the plug away from children.
Do not damage the power cord or remove the
plug forcefully.
Do not use if the power cord or plug is
damaged.
Avoid using overloaded sockets.
If the appliance malfunctions, switch it off and
unplug it immediately.
Don’t Use the Machine For:
• Dry dust
• Large amounts of powder, sand, stones, or
rubbish
• Metal objects such as needles and pins
• Large plastic bags or stockings
• Items likely to clog the machine
Additional Precautions
This is a wet-use machine; do not use it for
large amounts of dry dust.
In extremely cold conditions, dry the clean
water tank, dirty water tank, and hose after
each use to prevent freezing.
Remove foreign objects from the hose before
reusing if blocked.
Use only water below 40°C.
Do not use the machine on items or surfaces
unsuitable for wet cleaning (e.g., delicate
crafts, certain fibres, sensitive surfaces).
Do not tilt the appliance if the tank contains
water to prevent spills.
Stop and empty the dirty water tank when it
reaches the full line.
Use only recommended detergents and check
they are suitable for your items.
Do not use foam detergents.
Do not use with flammable liquids, hot air, oils,
or combustible materials.
Do not use if the hose is damaged or excessively
bent.
Do not block the air outlet.
Never attempt to disassemble or repair the
appliance yourself.
This product can be used to clean cars or
other domestic vehicles. Use only during
dry weather. Do not allow the product to be
exposed to rain, snow or high winds.
Never immerse the appliance in water or other
liquids.
Safety Information

16 17
Do not use to pick up hazardous or infectious
materials.
The dirty water tank must be in place for
operation.
If the supply cord is damaged, it must be
replaced by the manufacturer, their service
agent, or a qualified person.
Important
• Avoid allowing children/ animals in
proximity during use
• Check that any cleaning chemicals used
in combination with the product is suitable
for your home; check if pet friendly/ for
allergens and is suitable to use with the
machine
Note:
This appliance is not a toy and should not be
used by children. Individuals with reduced
physical, sensory or mental abilities should use
it only with support and supervision.
The unit is suitable for use on 50Hz or 60Hz
mains frequency; no adjustment is required.
Disposal Information
This symbol indicates that this product should not
be disposed of with regular household waste.
To help protect the environment and human
health from uncontrolled waste disposal,
please recycle this product responsibly.
Safety Information
Customer Service
If you are having difficulty using this product
and require support, please contact
suppor[email protected]
Warranty
To register your product and find out if you
qualify for a free extended warranty please
go to www.vonhaus.com/warranty
Please retain a proof of purchase receipt or
statement as proof of the purchase date.
The warranty only applies if the product is used
solely in the manner indicated in the warnings
page of this manual, and all other instructions
have been followed accurately.
Any abuse of the product or the manner in
which it is used will invalidate the warranty.
Returns
Returned goods will not be accepted unless
re-packaged in its original packaging and
accompanied by a relevant and completed
returns form. This does not affect your statutory
rights.
No rights are given under this warranty to a
person acquiring the appliance second-hand
or for commercial or communal use.
Copyright
All material in this instruction manual are
copyrighted by DOMU Brands.
Any unauthorised use may violate worldwide
copyright, trademark, and other laws.
Thank You
Thank you for purchasing your product/
appliance.
Should you require assistance with your
purchase, please contact us at
suppor[email protected]
VonHaus is a registered trademark of DOMU
Brands Ltd.
Made in China for DOMU Brands Ltd.
Unit 30, Stakehill Industrial Estate
Middleton, Manchester, M24 2RW
EU Authorised Representative
Authorised Representative Service
77 Camden Street Lower
Dublin, D02 XE80
Ireland
Information
Product No. 2000288
Let’s get started!
Visit our product hub for
useful tips and tricks on
getting the most out of
your new product.
SCAN ME