

Contents
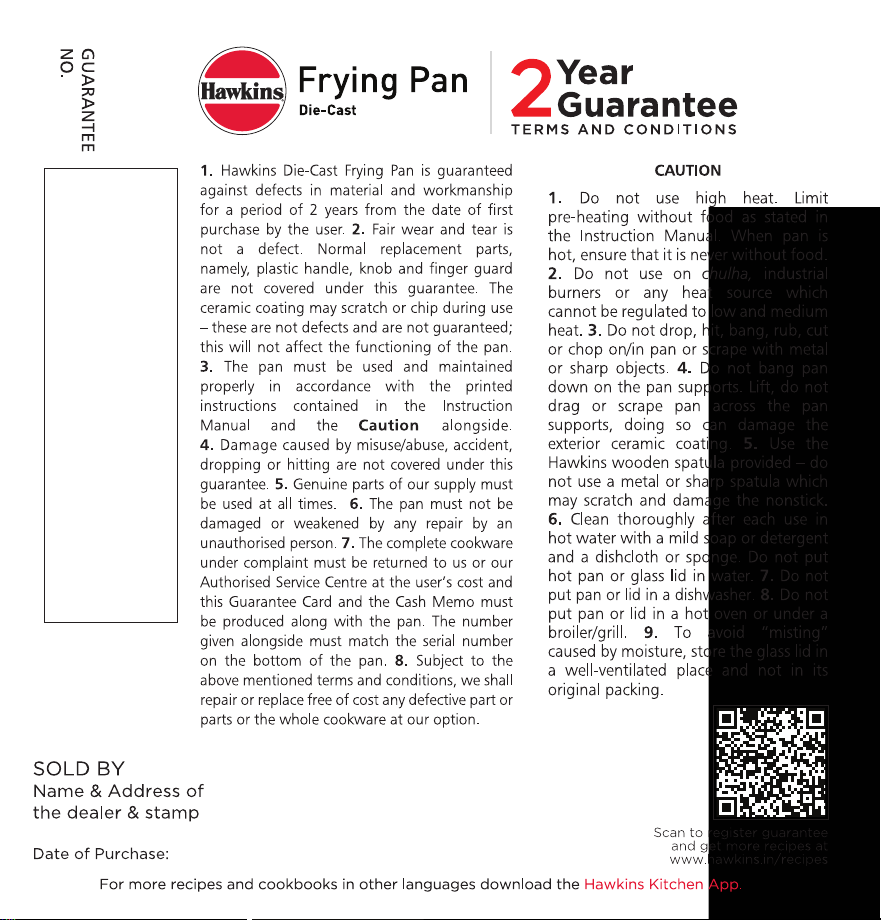
Page
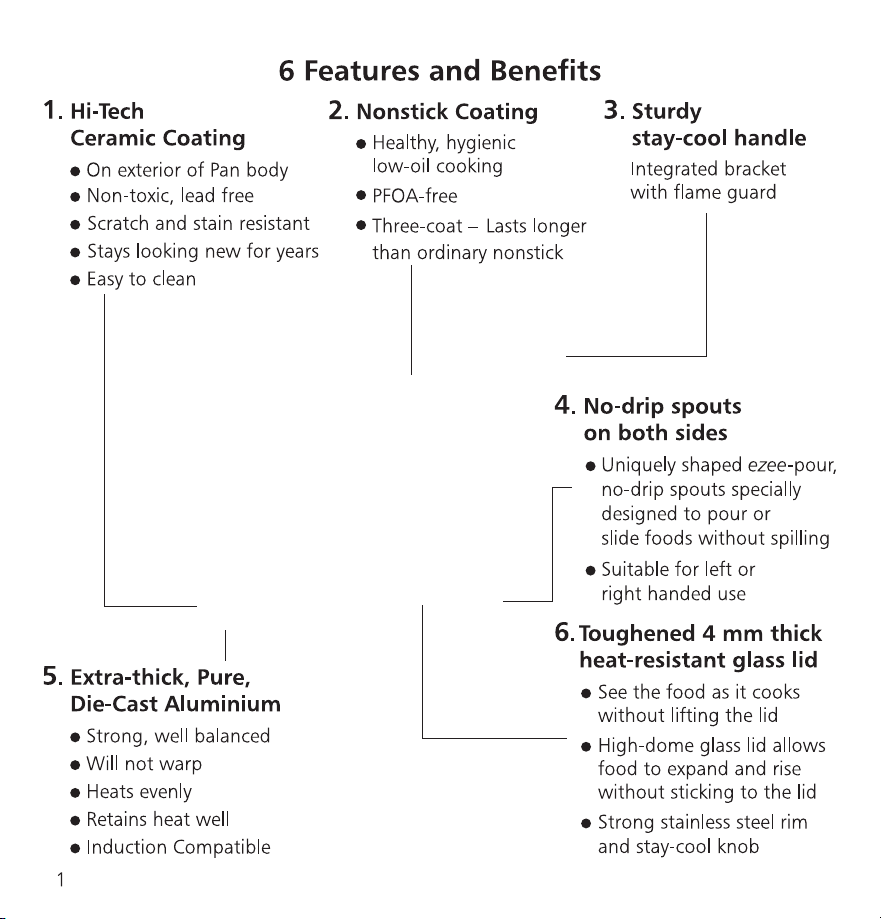
6 Features and Benefits 1
Important Safeguards 3
Hawkins Die-Cast Cookware 4
How to Use 5
How to Clean 8
General Cooking Tips 10
Recipes
Spanish Omelette 12
Macaroni and Cheese 14
Poha and Peas
(Flattened Rice with Peas
-
Maharashtra Style) 16
Vegetable Rava Upma (Semolina with Vegetables) 18
Spicy Fish Fry 20
Paneer Bhurji (Savoury Scrambled Cottage Cheese) 21
Sweet and Sour Vegetables 23
Sooji Halwa (Semolina Pudding) 25
2
© 2023 and All Rights Reserved. 'Hawkins' is the Registered Trademark of Hawkins Cookers Limited
in India and in various other countries throughout the world. CIN: L28997MH1959PLC011304.
Hawkins Cookers Limited
Udyog Mandir 2, Pitamber Lane Mahim,
MUMBAI 400 016, INDIA
TEL (91 22) 2444 0807 FAX (91 22) 2444 9152
EMAIL: [email protected]
WEBSITE: www.hawkinscookers.com
Any
Questions
or
Comments?
Contact:

3
Important Safeguards
1. Limit pre-heating the pan
without food (or with less than 1 tbsp/15 ml of oil/
butter/ghee)
, as follows:
2. After pre-heating, when the pan is hot, ensure that it is never without food.
Never "dry heat", that is, never heat the pan without food or water in it except
as stated in Point 1 above.
Dry heating may permanently damage the pan.
3. DO NOT USE HIGH HEAT. Use medium to low heat – the pan heats quickly
and retains heat well. Do not allow pan to boil dry.
4.
Do not use on chulha, industrial burners or any heat source which cannot be
regulated to low and medium heat or whose flame spreads beyond base of the pan.
If you see smoke coming from the handle, this is an indication that your pan is
getting overheated which will damage the nonstick coating and the handle.
5.
Do not leave frying unattended. In case oil or butter should ever catch fire,
have a metal lid handy to cover the pan.
6. Do not drop, hit, bang, rub, cut or chop on/in pan or scrape with metal or sharp
objects
-
do not use a metal spatula, use the Hawkins wooden spatula provided.
7. Do not put pan or glass lid in a heated oven or under a broiler/grill.
8. The handle of pan should be parallel to the kitchen counter – not sticking out.
9. When moving or placing pan on the burner, lift and place pan so that it is
seated securely with no possibility of the pan slipping or tipping, and then only
release handle.
10. Do not drop food from a height in the pan particularly when it has hot oil/
ghee/butter. Place food gently in the pan to avoid splashing.
11. Do not put hot pan or glass lid in water. Allow to cool first.
12. Do not wash pan or glass lid in a dishwasher. Hand wash.
13. Read and follow instructions in this Manual.
Size of Pan
Gas Stoves Induction Cooktops
Heat Setting Time Heat Setting Time
20 cm
Big Burner,
Medium
4 minutes
800 Watts
2 minutes
22 cm
6 minutes

Hawkins Die-Cast Cookware
What is Die Casting?
Die casting is a metal casting process, whereby metal is heated to a very high
temperature and poured under high pressure into a mould cavity. The molten
metal takes the shape of the mould and the result is a precisely designed pot or
pan which adds metal where it is needed, building strength and functionality.
Once the molten metal hardens, the mould is opened and the die cast
aluminium pan is removed. It is then finished by a three-coat, long-lasting nonstick
coating on the inside and ceramic on the outside.
The final result is a finely engineered piece of cookware with wonderful
properties for cooking.
The Benefits of Hawkins Die-Cast Cookware
•
Durable and strong, yet light: This pan has variable metal thickness across
different cross-sections. Extra-thick metal in the base and at the rim allow more
even, quick heating and also greater strength. Therefore it is a long-lasting
pan that will give you many years of faithful service, but yet feels amazingly light
in the hand!
•
Precisely Engineered: The Hawkins Nonstick Frying Pan is made to precise
engineering tolerances to generally retain heat well and give you uniform
and even browning on lower heat. The spouts are designed for left- or
right-handed pour without dripping down the sides.
•
Integrated bracket with flame guard: that is cast as an integral part of the
pan and is not made of separately-jointed components; hence the handle will
be more stable and firmly fixed.
4

How to Use
Before First Use
Remove sticker/label. If required, use a little vegetable oil to remove sticky
residue, if any. Hand wash in warm soapy water, rinse and wipe dry. DO NOT
WASH IN A DISHWASHER.
Seasoning
It is not necessary to season the pan. If, however, you plan to cook food which
tends to stick such as eggs without any oil or butter for the first use or before
you have cooked with oil in the pan, seasoning will assist release of the food. To
season: in an empty pan, rub 1 teaspoon (5 ml) vegetable oil over the nonstick
cooking surface using a paper napkin or clean cotton cloth. Wipe off oil with a
paper napkin or clean cotton cloth. Wash and dry pan.
Suitable Heat Sources
Do not use high heat. Use low to medium heat. Use high heat only to boil
liquids. High temperatures will shorten the life of the nonstick and may damage
the handle over time. Use pan only on domestic gas, electric, halogen, ceramic
and induction cooktops. Do not use on a coal fire or industrial burner or any heat
source that cannot be regulated to low and medium heat. Use a burner to suit
the size of your pan – gas flames should not lick the sides of the pan.
Comparing Heat Settings in Gas and Induction
1. The table given alongside is an approximate guide to the equivalent heat
settings of the Big burner in most gas stoves and induction cooktops. You may
have to adjust these settings to suit your stove/cooktop.
2. Induction cooktops initially heat up faster than gas and electric stoves and
the times normally required for initial heating of oil/butter/ghee may need
to be reduced.
5

6
3. Please be advised that many induction
cooktops at present may not indicate the
settings in Watts accurately. The heat
settings and quality of different induction
cooktops vary considerably. Refer to the
cooktop manufacturer’s instructions. Some
experimentation may be necessary to find the
correct heat settings. Try out the heat settings
given in the chart alongside and adjust them
as may be required for cooking on your cooktop
or gas stove.
Limit Pre-heating of Pan
The pan conducts heat evenly and retains heat well, so low to medium heat
is usually all that is required. Some foods require pre-heating and require the
pan to be at certain temperature before you cook in it. When pre-heating
the cold empty pan without food (with or without oil) before beginning
to cook, it is critical that the heat setting and maximum pre-heating
time are strictly limited to as follows:
The actual time required for pre-heating for best cooking results may be less,
depending on the food being cooked and your burner/cooktop. The pan can
overheat even on medium heat if the burner is providing excessive heat. If food
is smoking or burning, reduce heat. Using medium or lower heat and limiting
the time the empty pan is heating are the basic techniques to avoid overheating.
Gas Stoves
Big
Burner
Induction
Cooktops
in Watts
High 2000
Medium-high 1200
Medium 800
Medium-low 600
Low 400
Equivalent Heat Settings in
Gas and Induction Cooktops
Size of Pan
Gas Stoves Induction Cooktops
Heat Setting Time Heat Setting Time
20 cm
Big Burner,
Medium
4 minutes
800 Watts
2 minutes
22 cm
6 minutes

7
Overheating can occur quickly if the pan is left on the heat without food or water
so NEVER keep the pan empty on the heat once it is hot.
Saving Energy
The Hawkins Nonstick Frying Pan will save energy and produce tasty food while
optimising fuel consumption if you regulate the heat as given in the instructions.
Avoid Scratching, Damage, Breakage
Always use the wooden spatula provided with the pan or use any other
wooden, heat resistant nylon or silicone spatula (do not use metal). Metal
utensils will scratch and reduce the life of the nonstick coating. Do not cut or
chop on/in the pan or hit it with a knife, or other sharp instrument.
Do not drop pan or lid or bang it with hard or sharp objects. To protect the
exterior ceramic coating from chipping and scratching, do not bang pan down on
pan supports. Lift, do not drag it across the pan supports.
When storing the pan ensure that the ceramic/nonstick coating is not
knocked, gouged or rubbed against any hard or sharp surface. Do not stack
other utensils on the pan without protecting it. In the glass lid model, the glass
lid, plastic handle and knob are liable to break under a sharp or forceful blow.
Turning the knob clockwise will tighten it and turning it anti-clockwise will loosen
it. Do not over-tighten. Handle and store the glass lid with appropriate care
to avoid hard knocks that may break the glass.
During use, the ceramic coating may scratch or chip and faint scratches or
marks may appear on the nonstick coating
-
these are not defects. These are
marks of normal wear and tear and do not affect the functioning of the pan.
Even if some of the nonstick coating is scraped off, the pan is still safe to use.
The PFOA free coating is non-toxic and inert; if accidently and unknowingly
ingested, it passes through the body harmlessly.

How to Clean
1. Taking care to protect your hand from the hot pan with sufficient paper or
cloth, wipe off residual oil with a paper napkin or muslin cloth from hot pan
immediately after cooking. Doing so makes cleaning very much easier.
2. DO NOT WASH PAN/LID IN A DISHWASHER. We recommend hand
washing. Dishwashing detergents may contain harsh chemicals or abrasive
substances which may damage the ceramic and the nonstick coating and dull the
plastic handle, glass lid and knob.
3. Allow pan to cool before washing. Always wash all surfaces of the pan
thoroughly after every use in hot water with a mild, liquid utensil soap
or detergent such as 'Pril' or 'Vim' liquid and dishcloth or a non-abrasive
sponge. For stubborn spots, soak pan in hot water (cold water after cooking
eggs or milk) for about 10 minutes and rub with a non-abrasive plastic scrubber
– never use steel wool, coarse or metallic scouring pads or abrasive detergents.
When cleaning the pan ensure that the nonstick/ceramic coating is not gouged
or rubbed against any hard or sharp surface. While cleaning, keep a folded
kitchen cloth or a piece of any other soft material such as rubber or sponge
underneath the pan to avoid damaging the pan. Dry the pan and lid thoroughly
with a soft clean cloth.
4. Wash wooden spatula in hot water with a mild soap or detergent,
rinse and dry immediately – do not soak.
5. To avoid 'misting' caused by moisture, store the glass lid in a well-ventilated
place with good air circulation. Do not store the lid in its original packing.
8

9
How to Avoid "Baked-On" Food/Stains
and Deal with Them
1. If the pan is not cleaned thoroughly after each use, a thin layer of food or
grease may remain. When the pan is heated next, this food/grease becomes
"baked-on" and very difficult to remove. "Baked-on" food and the stains from
"baked-on" food may be impossible to remove without damaging the pan.
2. To avoid "baked-on" stains: wipe off any fat or grease while it is still fresh
and wash before you cook in the pan again. Also, ensure that the stove surface in
contact with the pan is free of fat drippings.
3. If you do get "baked-on" food/stains, you may try the following methods
(knowing that the pan surface may get damaged):
On the nonstick cooking surface: Make a thick paste of a cleaning
powder such as 'Vim' or 'Odopic' and apply it to the "baked-on" food/stain. Wait
5-10 minutes. Scour with a plastic scrubber using a circular motion. Wash and
wipe dry.
On the ceramic-coated exterior: Wash with a mild liquid utensil soap or
detergent and a non-abrasive plastic scrubber, removing all superficial food, and
dry. Make a paste with equal parts of baking soda and warm water and apply
it to the area of the ceramic coating with the stain. Wait 5-10 minutes. Rub
paste with a non-abrasive plastic scrubber using a circular motion until stains are
removed. Wash pan in hot soapy water and wipe dry.
To remove stains from the stainless steel plate attachment: The
stainless steel plate attached to the base may develop blue and/or golden/brown
stains which may be caused by overheating. To remove these stains clean the steel
plate with a stainless steel cleanser or with a non-abrasive cleaning powder, wash
and dry. These stains do not affect the performance of the pan.

10
General Cooking Tips
1. Read the entire recipe before beginning to work. Assemble and prepare all
ingredients. Follow recipe step-by-step.
2. Before putting the pan on the heat, prepare all ingredients and keep the
wooden spatula, utensils, serving plate etc., ready in the cooking area. If you are
looking for things once pan is on heat, it can overheat quickly and destroy the
nonstick coating.
3. Time and heat settings in the recipes refer to the big burner of a domestic gas
stove. You may have to adjust these times and settings to suit your stove/cooktop.
For best cooking results, adjust the heat so that cooking times are the same as
those given in the recipes. Avoid high temperatures for the best cooking results,
conserving fuel and preserving the life of the nonstick coating.
4. Induction cooktops generally heat up faster than gas or electric cooktops; hence
the heat settings required on induction cooktops for this pan are generally lower
than the recommended heat settings on gas. It may also be necessary to adjust
the heat more frequently to get the desired cooking results.
5. The pan conducts heat well and evenly. Do not heat oil till it is smoky. It
damages the oil and will burn the food. It is possible to cook with less oil and no
sticking if you cook on lower heat.
6. Adding a little oil or butter to the pan may enhance the colour, taste and
texture of the foods. Ghee, butter or oil can be spread in pan with a pastry brush.
7. Do not leave the ladle in the pan while cooking.
8. Eggs and batters should be at room temperature before beginning to cook.
9. The nonstick coating of the pan retards browning somewhat in certain
foods. If food is not browning or reaching the colour desired by you and a higher
heat setting causes burning, lower the heat setting and cook for a longer time. Do
not use high heat.

11
12. Abbreviations used:
13. Measurements: All measurements are level, not heaped.
Abbreviation Equivalent
tsp teaspoon
tbsp tablespoon
g gram
oz ounce
lb pound
Abbreviation Equivalent
ml millilitre
mm millimetre
cm centimetre
Volume
Measurement Equivalent
1 teaspoon 5 ml
1
/2 tablespoon 1
1
/2 teaspoons
/
7.5 ml
1 tablespoon 3 teaspoons
/
15 ml
1
/4 cup 4 tablespoons
/
60 ml
1
/3 cup 5 tablespoons +
1 teaspoon
/
80 ml
1
/2 cup 8 tablespoons
/
120 ml
3
/4 cup 12 tablespoons
/
180 ml
1 cup 16 tablespoons
/
240 ml
10. To ensure even cooking, shape foods (such as patties) evenly and slice foods
(such as potatoes) evenly.
11. Eggs require controlled heat or they may become tough. Eggs should be cooked
on low to medium-low temperatures.
Weight
Metric Equivalent
28 g 1 oz
(rounded off to 30 g)
450 g 16 oz / 1 lb
1 kg 2.2 lb
Length
Measurement Equivalent
1
/4 inch 6 mm
1
/2 inch 1.3 cm
3
/4 inch 1.9 cm
1 inch 2.5 cm

Spanish Omelette
Serves 4
6 eggs
2 tbsp
/
30 ml olive oil
2 medium (7 oz
/
200 g) potatoes peeled, quartered lengthwise
and widthwise thinly sliced
1
/2 tsp
/
2.5 ml pepper coarsely ground
1
1
/2 tsp
/
7.5 ml salt
1 medium (3
1
/2 oz
/
100 g) onion thinly sliced
1 green chilli finely chopped
1 medium (3
1
/2 oz
/
100 g) tomato halved lengthwise
and thinly sliced
1
/2 medium (1
3
/4 oz
/
50 g) capsicum thinly sliced
1
/3 cup
/
20 g coriander leaves finely chopped
12
Recipes
The recipe section features 8 recipes to give you an idea, that we have
actually tried and tested in our Test Kitchen. Using these as a base, you can easily
adapt your own favourite recipes.
The following recipes are written for the 20 cm Pan. To adapt the
recipes to the 22 cm Pan increase all ingredients by one-third. You may have
to increase heating/cooking time depending upon the type and quantity of
ingredients and your stove/cooktop.

13
1. In a bowl, beat eggs just till yolks and whites are mixed. Keep covered.
2. Heat oil in frying pan on medium heat of big burner of a gas stove about
3 minutes or on 800 Watts on an induction cooktop about 2 minutes. Add
potatoes, pepper and salt. Stir and fry about 5 minutes. Add onion and green
chilli. Stir and fry till onion is transparent. Add tomatoes. Mix. Reduce heat to
medium-low. Cover and cook till tomatoes are soft (about 3 minutes), stirring
occasionally. Uncover pan. Add capsicum and coriander leaves. Mix. Stir and
pour eggs into pan. Stir till eggs and vegetables are mixed (as sides start setting
immediately). Cover and cook till eggs are set (about 6 minutes). Uncover pan.
Loosen edges with a spatula so omelette slides in one piece.
3. Remove pan from heat. Slide omelette onto a large plate. Wearing oven mitts,
place pan upside down over omelette and invert plate on pan, dropping omelette
in pan. Remove plate. Return pan to medium-low heat and cook till eggs are set
(about 4 minutes). Remove pan from heat. Serve hot with toast.
•
Spanish Omelette
Continued

14
Macaroni and Cheese
Serves 4
3
1
/2 cups
/
840 ml water
1
1
/2 tsp
/
7.5 ml vegetable oil
1
1
/4 tsp
/
6.3 ml salt
1 cup
/
100 g elbow macaroni
1
1
/2 tbsp
/
22.5 ml butter
5 small cloves garlic finely crushed
1
/2 cup
/
75 g onion finely chopped
3 tbsp
/
45 ml maida (sifted refined flour)
1
3
/4 cups
/
420 ml milk
1
/2 tsp
/
2.5 ml pepper coarsely ground
1
/2 tsp
/
2.5 ml chilli flakes
1 tsp
/
5 ml dried mixed herbs
1
/2 tsp
/
2.5 ml sugar
1
/2 cup
/
60 g cheddar cheese grated
1
/2 cup
/
50 g broccoli cut into
3
/4 inch
/
2 cm
flowerettes including tender stalks
1
/2 medium (1
3
/4 oz
/
50 g) red bell pepper cut into
1
/2 inch
/
1.3 cm square pieces

15
1
/4 cup
/
30 g mozzarella cheese grated
1 tbsp
/
15 ml parsley chopped
1. Pour 3 cups
/
720 ml water in frying pan. Cover pan. Bring to boil on
medium-high heat of big burner of a gas stove or on 1200 Watts of an induction
cooktop. Uncover pan. Add oil, ½ tsp
/
2.5 ml salt and macaroni. Stir. Reduce
heat and cook till macaroni is just cooked (firm, not mushy), stirring occasionally
(about 10 minutes). Immediately transfer macaroni to a colander (chalanee).
Drain. Rinse macaroni with cold water till cool. Drain in colander. Keep aside.
Wash and wipe dry pan.
2. Melt butter in frying pan on medium heat of a big burner of a gas stove or on
800 Watts of an induction cooktop. Add garlic and stir and fry about 2 minutes.
Add onion, stir and fry till transparent. Reduce heat to low. Add flour and roast
till flour changes colour to light golden (about 3 minutes), stirring constantly.
Gradually add milk and remaining water (
1
/2 cup
/
120 ml), stirring constantly,
blending until smooth. Increase heat to medium and cook till sauce thickens
(about 3 minutes), stirring constantly. Add pepper, chilli flakes, mixed herbs,
remaining salt (
3
/4 tsp
/
3.8 ml), sugar, cheddar cheese and broccoli. Mix till cheese
melts and sauce becomes creamy (about 2 minutes).
3. Add the reserved macaroni. Mix till macaroni is evenly coated with sauce.
Add bell pepper and mozzarella cheese. Stir and cook about 2 minutes. Remove
pan from heat. Add parsley. Mix. Serve hot.
•
Macaroni and Cheese
Continued

16
Poha and Peas
(Flattened Rice with Peas
-
Maharashtra Style)
Serves 4
2 cups
/
185 g poha (thick variety)
2 tbsp
/
30 ml vegetable oil
3 tbsp
/
45 ml groundnuts
1
/2 tsp
/
2.5 ml mustard seeds
1
/2 tsp
/
2.5 ml cumin seeds
a pinch hing (asafoetida)
15 small curry leaves
1 medium (3
1
/2 oz
/
100 g) onion finely chopped
1 green chilli finely chopped
1
/4 tsp
/
1.3 ml turmeric
1
1
/2 tsp
/
7.5 ml salt
1
/2 cup
/
75 g peas shelled or frozen
2 tbsp
/
30 ml water
1
1
/2 tsp
/
7.5 ml sugar
1 tbsp
/
15 ml lemon juice
1
/4 cup
/
60 ml coconut scraped or finely grated
1
1
/2 tbsp
/
22.5 ml coriander leaves finely chopped

17
1. In a colander, wash and drain poha (do not soak). Keep aside.
2. Heat oil in frying pan on medium heat of big burner of a gas stove about
3 minutes or on 800 Watts on an induction cooktop about 2 minutes. Add
groundnuts. Stir and fry till light brown (about 3 minutes). Remove and drain
groundnuts, leaving oil in the pan. Keep aside.
3. To oil remaining in pan, add mustard seeds. When crackling add cumin seeds,
stir a few seconds. Add hing and curry leaves. Stir. Add onion and chilli. Stir and
fry till onion is transparent (about 2 minutes). Add turmeric, salt and peas. Stir
and fry about 2 minutes. Add water. Mix. Cover and cook on low heat till peas
are just tender and water has evaporated (about 5 minutes).
4. Uncover pan. Add lemon juice and sugar. Mix. Add poha and peanuts. Mix.
Cover and cook (about 2 minutes).
5. Remove pan from heat. Serve hot garnished with coconut and coriander
leaves.
•
Poha and Peas
Continued

18
Vegetable Rava Upma (Semolina with Vegetables)
Serves 4
1
1
/4 cup
/
200 g rava/sooji
2 tbsp
/
30 ml ghee
1
/2 tsp
/
2.5 ml mustard seeds
1 tsp
/
5 ml urad dal
10 small curry leaves
2 whole dry red chillies
1 x
1
/2 inch
/
1.3 cm piece fresh ginger finely chopped
(
1
/6 oz
/
5 g)
1 medium (3
1
/2 oz
/
100 g) onion finely chopped
1
/2 cup
/
60 g carrot peeled and cut into
1
/4 inch
/
6 mm cubes
1
/2 cup
/
50 g green beans cut into
1
/4 inch
/
6 mm pieces
1
1
/2 tsp
/
7.5 ml salt
2
3
/4 cups
/
660 ml hot water
1 tbsp
/
15 ml coriander leaves finely chopped
1. Roast rava in frying pan, on medium heat of big burner of a gas stove or
on 800 Watts on an induction cooktop till it turns one shade darker (about
5 minutes), stirring constantly. Remove and keep aside.

2. Heat ghee in frying pan on medium heat of big burner of a gas stove or on
800 Watts on an induction cooktop about 2 minutes. Add mustard seeds. When
crackling, add urad dal. Stir a few seconds. Add curry leaves and red chillies. Stir
a few seconds.
3. Add ginger and onion. Stir fry till onion is transparent (about 2 minutes). Add
carrots, beans and salt. Mix. Cover and cook about 4 minutes, stirring occasionally.
Add rava. Stir and fry about 2 minutes. Reduce heat to low. Carefully add water.
Stir. Cover and cook till water is absorbed (about 5 minutes), stirring occasionally.
4. Remove pan from heat. Serve hot garnished with coriander leaves.
•
Vegetable Rava Upma
Continued
19

Spicy Fish Fry
Serves 4
1 x 1 inch
/
2.5 cm piece fresh ginger
(
1
/3 oz
/
10 g)
10 small cloves garlic
2 green chillies
2 tsp
/
10 ml lemon juice
3 tbsp + 2 tsp
/
55 ml vegetable oil
2
1
/2 tsp
/
12.5 ml salt
1 tbsp
/
15 ml red chilli powder
1 tsp
/
5 ml cumin powder
1
/2 tsp
/
2.5 ml turmeric
8 (1 lb 12 oz
/
800 g) fish steaks (
1
/2 inch
/
1.3 cm thick)
1
/2 cup
/
45 g besan
1. Grind into a paste ginger, garlic and green chillies. Mix ginger-garlic paste,
lemon juice, 2 tsp
/
10 ml oil, salt, chilli and cumin powders and turmeric. Rub
on fish. Cover and keep aside about 30 minutes. Roll fish steaks in besan and
pat them.
2. Heat 1 tbsp
/
15 ml oil in frying pan on medium heat of big burner of a gas
stove about 3 minutes or on 800 Watts on an induction cooktop about 2 minutes.
Add 2 fish steaks. Fry on both sides till dark golden brown (about 5 minutes on
each side). Remove. Fry remaining steaks in the same way adding 1 tbsp
/
15 ml
oil for each batch, except do not add oil for the last batch. Serve hot.
•
20

21
Paneer Bhurji (Savoury Scrambled Cottage Cheese)
Serves 4
2 tbsp
/
30 ml vegetable oil
2 medium (7 oz
/
200 g) onions finely chopped
1 green chilli finely chopped
1
/4 tsp
/
1.3 ml turmeric
1
/2 tsp
/
2.5 ml red chilli powder
1
1
/2 tsp
/
7.5 ml coriander powder
1
/2 tsp
/
2.5 ml cumin powder
1
1
/4 tsp
/
6.3 ml salt
2 medium (7 oz
/
200 g) tomatoes finely chopped
14 oz
/
400 g paneer (see page 22), crumbled
1 medium (3
1
/2 oz
/
100 g) capsicum
de-seeded and finely chopped
2 tbsp
/
30 ml coriander leaves finely chopped
1. Heat oil in frying pan on medium heat of big burner of a gas stove or on
800 Watts on an induction cooktop about 2 minutes. Add onions. Stir and fry till
onions are soft. Add green chilli, turmeric, chilli, coriander, cumin powders and salt.
Stir and fry about 2 minutes. Add tomatoes. Mix. Cover and cook till tomatoes are
pulpy (about 3 minutes), stirring occasionally. Uncover pan. Stir and fry till liquid
dries up and oil shows separately. Add paneer. Stir and fry about 2 minutes. Add
capsicum and half the coriander leaves. Mix. Cover and cook about 2 minutes.

22
2. Remove pan from heat. Uncover pan. Garnish with remaining coriander leaves
(1 tbsp
/
15 ml). Serve hot with paratha.
To make soft paneer:
Yield: 14 oz
/
400 g
10 cups
/
2.4 litres whole milk
3 tbsp + 1 tsp
/
50 ml lemon juice
a. Place a strainer over a bowl large enough to hold the milk. Line strainer with
a muslin cloth large enough to hold the curds and then be tied by winding one
corner around the others and knotting. Keep aside.
b. Pour milk into a pan and bring to boil on high heat, stirring occasionally to
prevent skin from forming on top. Reduce heat to medium. Add lemon juice.
Stir till milk curdles (curds separate from whey). Cook till whey has a yellow
tint and has turned from cloudy to clear (about 2 minutes), stirring and
scraping the sides and base of pan. Remove pan from heat.
c. Stir curdled milk and pour into muslin-lined strainer over the bowl (kept aside
in step a). Allow to strain till whey is drained into bowl.
d. Gather up corners of muslin and tie a knot above curds to make a bag. Place
bag on plate or board with knot on top and press gently for a few seconds
on knot to level curds. Tilt plate slightly to drain and leave 20 minutes. Untie
bag and remove paneer.
•

23
Sweet and Sour Vegetables
Serves 4
1 tbsp
/
15 ml sesame oil
1 x 1
1
/2 inch
/
3.8 cm piece fresh ginger grated
(
1
/2 oz
/
15 g)
2 small (3 oz
/
85 g) carrots peeled and cut into
1
/4 inch
/
6 mm thick slices
1
/2 cup
/
60 g green beans cut into
3
/4 inch
/
2 cm long pieces
5 babycorns cut diagonally into
3
/4 inch
/
2 cm long pieces
4 oz
/
115 g mushrooms sliced
1 small head (9 oz
/
250 g)
cauliflower cut into
3
/4 inch
/
2 cm
flowerettes including tender stalks (115 g)
1 stalk celery chopped
2 tsp
/
10 ml salt
3
/4 tsp
/
3.8 ml red chilli powder
1
/2 tsp
/
2.5 ml chilli flakes
1 tbsp
/
15 ml vinegar
1
1
/2 tsp
/
7.5 ml light soy sauce
1
/2 cup
/
120 ml tomato ketchup

24
1 tbsp
/
15 ml sugar
2 small (2
1
/2 oz
/
75 g) spring onions, bulbs quartered;
tender green stalks cut into
3
/4 inch
/
2 cm long pieces
and kept separately
1
1
/2 cups
/
360 ml water
3 tbsp
/
45 ml cornflour
1
/2 medium (2
1
/2 oz
/
75 g) red bell pepper cut into
3
/4 inch
/
2 cm square pieces
1. Heat oil in frying pan on medium heat of big burner of a gas stove or on
800 Watts on an induction cooktop about 2 minutes. Add ginger. Stir fry about
1 minute. Add carrots, beans and babycorns. Mix. Reduce heat to low. Cover
and cook about 8 minutes. Uncover pan. Add mushrooms, cauliflower, celery
and salt. Mix. Cover and cook about 2 minutes. Uncover pan. Add all other
ingredients except tender green portion of spring onions, water, cornflour and
bell pepper. Increase heat to medium. Mix till vegetables are evenly coated with
the sauces (about 2 minutes).
2. Add 1
1
/4 cups
/
300 ml water. Mix. Increase heat to high. Bring to boil. Reduce
heat to low. Mix cornflour with remaining water (¼ cup
/
60 ml), blend until
smooth. Stirring constantly, gradually add cornflour mixture into pan and
continue cooking till sauce thickens (about 2 minutes). Add bell pepper and
tender green portion of spring onions. Mix. Cook about 2 minutes stirring
occasionally. Remove pan from heat. Serve hot with rice.
•

25
Sooji Halwa (Semolina Pudding)
Serves 6
1
/2 cup
/
120 ml ghee
1 cup (5
2
/3 oz
/
160 g) sooji (semolina)
2
1
/2 cups
/
600 ml hot water
1
1
/2 tbsp
/
22.5 ml raisins
10 almonds blanched,
skins removed and slivered
2 tsp
/
10 ml green cardamoms
husks removed, seeds powdered
a pinch saffron
1
1
/8 cups (8
1
/2 oz
/
240 g) sugar
1. Heat ghee in frying pan on medium heat of big burner of a gas stove or on
800 Watts on an induction cooktop about 3 minutes. Add sooji. Stir fry till light
brown (about 5 minutes).
2. Reduce heat to low. Carefully add water and mix. Add raisins and half each
of almonds and cardamom. Cook till water is absorbed, stirring constantly.
3. Add saffron and sugar. Increase heat to medium. Cook, stirring constantly, till
ghee just begins to show on sides (about 10 minutes).
4. Sprinkle remaining almonds and cardamom. Serve hot.
•