

Contents
Page
Important Safeguards 1
The Widest Range of High-Quality Cookware 3
Futura Hard Anodised Cookware 4
How to Use 5
How to Clean 7
General Cooking Tips 9
Deep-Frying Tips 11
Recipes 13
Batata Wada (Potato Balls in Thick Batter) 14
Kadhai Paneer (Stir-Fried Cottage Cheese) 16
Kadhai Masala Chicken (Spicy Stir-Fried Chicken) 18
Medu Wada (Savoury Doughnuts) 19
Vegetable Pakora (Vegetable Fritters) 20
Spicy Fried Chicken 22
Samosa (Savoury Stuffed Pastries) 24
Stir-Fried Bean Sprouts and Vegetables 26
Fish Fry
-
Bengali Style 27
Rabri (Scraped Cream Pudding) 28
2
© 2023 and All Rights Reserved. 'Futura' and 'Hawkins' are the Registered Trademarks of Hawkins Cookers
Limited in India and in various other countries throughout the world. CIN: L28997MH1959PLC011304.
Hawkins Cookers Limited
Udyog Mandir 2, Pitamber Lane Mahim,
MUMBAI 400 016, INDIA
TEL (91 22) 2444 0807 FAX (91 22) 2444 9152
EMAIL: [email protected]
WEBSITE: www.hawkinscookers.com
Any
Questions
or
Comments?
Contact:

3
The Widest Range of High-Quality Cookware
Hawkins and Futura Cookware offer over 270 models of pots and pans made from
carefully selected, high quality metals, designed with the best technology and craftsmanship,
to give you the best possible cooking results. Choose from a variety of different materials
and finishes selected for durability, utility and thermal efficiency, such as hard anodised,
nonstick, ceramic nonstick, stainless steel and cast iron. Refine your choice by adding lids
of glass or metal, and induction compatibility. Choose your ideal pot or pan based upon your
needs, your cooking style and the heat source in your kitchen. Hawkins and Futura Cookware
are generally made from the following metals unless otherwise specified:
Wrought Aluminium Cookware
•
Body (Ceramic-coated): Aluminium 40800 grade (EN Aluminium 8011 grade)
•
Body (others): Aluminium 31000 grade (EN Aluminium 3003 grade)
Die-Cast Aluminium Cookware
•
Body: Die-Cast Aluminium LM 6 grade (EN Aluminium 44100 grade), food-compatible
Stainless Steel Sandwich Bottom Cookware
•
Body: Stainless Steel AISI 304 grade (also known as 18/8 Stainless Steel)
•
Core: Heat-diffusing Aluminium as per IS:21 standard
•
Base: Stainless Steel AISI 430 grade (magnetic, induction compatible)
Stainless Steel Tri-Ply Cookware
•
Cooking (Inner) Surface: Stainless Steel AISI 304 grade (18/8 Stainless Steel)
•
Core: Heat-diffusing Aluminium as per IS:21 standard
•
Base: Stainless Steel AISI 430 grade (magnetic, induction compatible)
Metal Lids
•
Stainless Steel: AISI 304 grade (18/8 Stainless Steel)
•
Wrought Aluminium: Aluminium 31000 grade (EN Aluminium 3003 grade)
•
Die-cast Aluminium: Die-cast Aluminium LM 6 grade, food-compatible
Stainless Steel Induction Base Plate
•
Stainless Steel AISI 430 grade (magnetic, induction compatible).

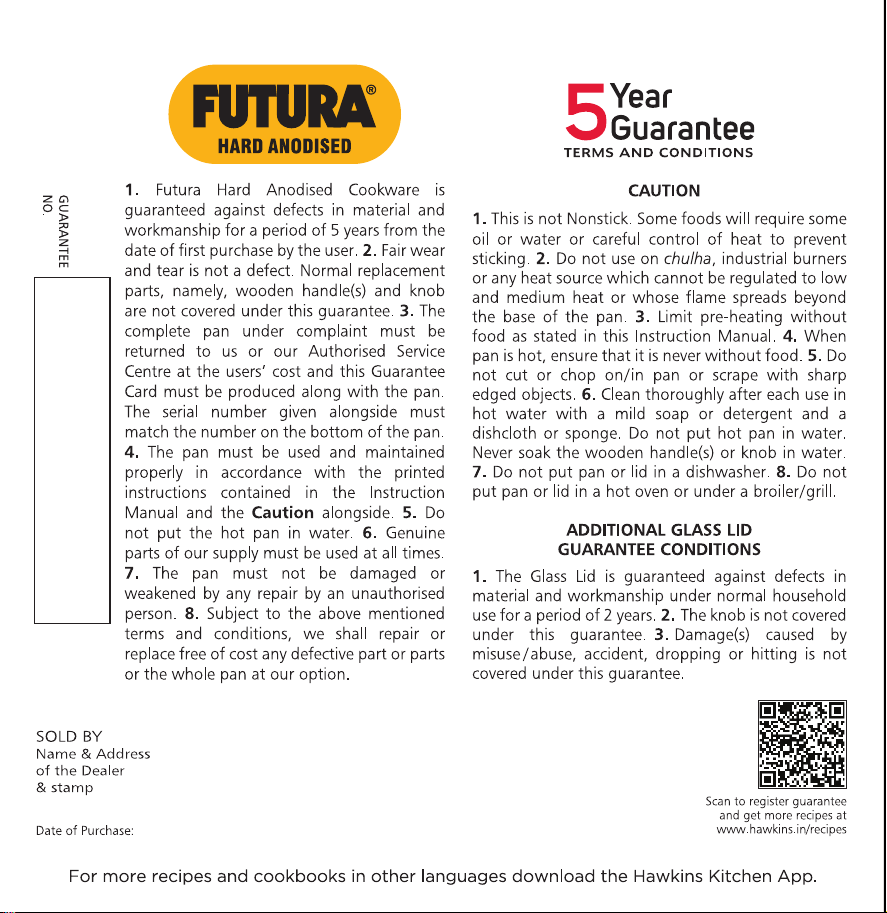
Futura Hard Anodised Cookware
The Futura Hard Anodised Cookware is made from heavy gauge, pure, virgin aluminium.
Hard anodised surface is an integral part of the metal, not sprayed on, but built up
molecule by molecule under very carefully controlled conditions, through electrolysis.
It forms a strong, abrasion-resistant, stable surface that is non-toxic, non-staining and
non-reactive with foods. It is thermal-efficient, heats fast and evenly and is not spoiled by
high heat. It is tough and durable, will not pit, tarnish or corrode, will stay looking new
for years and will give you years of easy, great-tasting, healthful, economical cooking and
easy clean-up if you carefully follow the instructions in this Manual. Metal ladles can be
used. All pans are well balanced with sturdy, stay-cool handles.
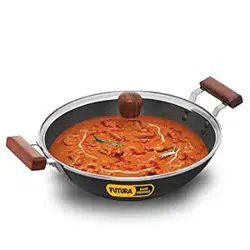
Futura Hard Anodised Deep-Fry Pan/Kadhai: Features and Benefits
•
Extra-thick 3.25 mm/4.06 mm Hard Anodised Heavy Gauge Body: Spreads heat
evenly and retains heat for a long time – food does not burn and stick and it is excellent
for both cooking and serving.
•
Induction Compatible: The AISI 430 grade magnetic stainless steel disc permanently
attached to its base (in some models) makes the pan work well on gas and induction.
•
Rosewood Handles and Knob: The stay-cool, natural, rivetted durable rosewood
handles/knob are elegant and attractive, and designed for handling comfort and safety
while cooking and serving.
•
Optionally available with stainless steel lid, glass lid or without lid:
Superior Quality Stainless Steel Lid: made of food-grade high quality stainless
steel
-
healthy, hygienic, does not react with food, pit or corrode.
Toughened 4.0 mm thick, heat-resistant Glass Lid with a strong stainless steel
rim: The glass lid locks in the steam, heat and flavours. Cooking and serving in a pan
with a glass lid has its own appeal: you can see the food as it is being cooked, and
what’s served on the table as well, without lifting the lid!
4

How to Use
Before First Use
Remove sticker/label. If required, use a little vegetable oil to remove sticky residue, if
any. Hand wash in warm soapy water, rinse and wipe dry.
Suitable Heat Sources
The pan can be used on all domestic gas, electric, halogen and ceramic cooktops/
stoves (and induction, for the induction compatible models). Do not use on a coal fire or
industrial burner or any heat source that cannot be regulated to low and medium heat.
Use a burner to suit the size of your pan – flames should not spread beyond the base of
the pan. We recommend the small burner for the 1.5 Litre Pan.
Using Your Pan on Induction
Induction models have permanently attached to the base a plate of AISI 430 grade
magnetic stainless steel. The Induction Compatible Deep-Fry Pan/Kadhai can be used
safely on all domestic gas, electric, halogen, ceramic and induction cooktops.
Comparing Heat Settings in Gas and Induction
1. The table given alongside is an approximate
guide to the equivalent heat settings of the Big burner
in most gas stoves and induction cooktops. You may
have to adjust these settings to suit your stove/cooktop.
2. Induction cooktops initially heat up faster than
gas and electric stoves and the times normally required
for initial heating of oil/butter/ghee may need to be
reduced. Some experimentation may be necessary to
find the correct heat setting. Try out the heat settings
given in the table alongside and adjust them as may be
required for cooking on your cooktop or gas stove.
Equivalent Heat Settings
Gas Stove
Big Burner
Settings
Induction
Cooktops
in Watts
High 2000
Medium-high 1200
Medium 800
Medium-low 600
Low 400
5

6
Prevent Sticking
Excessive heat may cause sticking and burning of food. In such cases, reduce heat –
especially when frying. Some foods will require some oil or water or careful control of heat
to prevent sticking.
Avoid Scratching and Damage
Do not cut or chop in the pan or hit it with any object. Do not drop or bang pan or lid.
The glass lid can break under a sharp or forceful blow – handle and store with appropriate
care. Turning the knob clockwise will tighten it and turning it anti-clockwise will loosen it
-
do not over-tighten. Do not bang pan down on pan supports. Lift, do not drag it across
the pan supports.
Natural salts and chemicals in water and decomposing foods can cause pitting of
the metal. Do not store raw, marinating or cooked foods in the pan. Do not leave salted
liquid, vinegar, lemon juice, mayonnaise or mustard in the pan. Do not leave the pan lying
with dirty dishes for long.
Size of Pan
Gas Stoves Induction Cooktops
Heat Setting Time Heat Setting Time
2 Litre
Big Burner,
Medium-high
2 minutes
1200 Watts
2 minutes2.5 & 3 Litre 3 minutes
3.75 & 5 Litre 4 minutes
CAUTION
1.
Never "dry heat", that is, never heat the Induction Compatible Futura
Deep-Fry Pan/Kadhai without food or water in it. Dry heating may permanently
damage the pan.
2.
Limit pre-heating of the Induction Compatible Deep-Fry Pan/Kadhai with a small
quantity of oil/butter/ghee (
1
/4 cup/60 ml or less) as follows:
3.
Do not put the hot pan in water as it may weaken the attachment of the base
over time. Allow to cool first.

How to Clean
1. DO NOT WASH PAN OR LID IN A DISHWASHER. We recommend hand washing.
Dishwashing detergents may contain harsh chemicals or abrasive substances which may
damage the hard anodised surface, the rosewood handles and knob and dull the lid.
2.
Allow pan to cool before washing. Always wash all surfaces of the pan thoroughly
after every use in hot water with a non-abrasive chlorine-free kitchen cleanser
-
such
as 'Vim'
-
and a dishcloth, sponge or plastic scrubber. Do not use any abrasive or caustic
cleaning powders or bars, steel wool, abrasive scrubbers or oven cleaners, bleach or floor
cleaners. Dry thoroughly with a soft clean cloth. Never soak the wooden handles and knob
in water. Dry wooden handles and knob immediately after washing. To avoid 'misting'
caused by moisture, store the glass lid in a well-ventilated place with good air circulation.
Do not store the lid in its original packing.
3.
While cleaning, keep a folded kitchen cloth or a piece of any other soft material such
as rubber or sponge underneath the pan to avoid damaging it.
4.
Metallic marks – most often from gas stove pan supports – may appear on the hard
anodised base. To remove metallic marks from base: apply a kitchen cleanser, such as 'Vim'
bar or 'Odopic' powder, to the marks and rub with an abrasive kitchen scrubber, such as
'Scotch-Brite' or fine steel wool. Wash and wipe dry.
5.
The external stainless steel bottom attachment of the pan may develop golden/brown
stains which may be caused by overheating. To remove these stains, clean the external base
with a stainless steel cleanser or with a non-abrasive cleansing powder and wash and dry.
6.
If food is badly stuck or burned in the pan the following procedure may help dislodge
food particles and make cleaning easier: pour into pan enough water (not above half
full) to cover the area of burned food. Bring to boil on high heat. Reduce heat and
cook 10 minutes. Allow to cool. Empty out water. Clean with a non-abrasive chlorine-
free kitchen cleanser – such as 'Vim' bar or 'Odopic' powder – and a plastic scrubber. Wash
and wipe dry.
7

8
How to Avoid "Baked-On" Food/Stains and Deal with Them
1. If the pan is not cleaned thoroughly after each use, a thin layer of food or grease
may remain. When the pan is heated next, this food/grease becomes "baked-on". These
"baked-on" stains may be impossible to remove without scratching/damaging the pan.
2.
To avoid "baked-on" stains: wipe off any fat or grease while it is still fresh and wash
before you cook in the pan again. Also, ensure that the stove surface in contact with the
pan is free of fat drippings.
3.
If you do get "baked-on" stains, you may try the following method (knowing that
the pan surface may get scratched): soak pan in hot water about 10 minutes. Make a thick
paste of a kitchen cleanser like 'Vim' and apply it to the surface. Wait 5 to 10 minutes, then
scour lightly with fine steel wool using a circular motion. Do not use regular steel wool or
harsh cleaning pads. Wash and wipe dry.
Saving Energy
Futura Hard Anodised Cookware conducts heat evenly and efficiently and will save energy
and produce tasty food while optimising fuel consumption if you regulate the heat as given
in the instructions.

General Cooking Tips
1. Read the entire recipe before beginning to work. Assemble and prepare all ingredients.
Follow recipe step-by-step.
2.
When cooking on induction, to adapt the recipes to the Induction Compatible Deep-Fry
Pan/Kadhai, refer to Comparing Heat Settings in Gas Stoves and Induction Cooktops
on page 5.
3.
Induction cooktops generally heat up faster than gas or electric cooktop; hence the heat
settings required on induction cooktops for this pan are generally lower than the recommended
heat settings on gas. It may also be necessary to adjust the heat more frequently to get the
desired cooking results. Excessive heat may cause sticking and burning of food and wastes
fuel.
4.
Time and heat settings in the recipes refer to the big burner of a domestic gas stove. You
may have to adjust these times and settings to suit your stove/cooktop.
5. For safety reasons and to minimise spattering of oil, maximum quantity of oil that
should be put in the pan is as follows:
6. If food is not browning or reaching the colour desired by you and a higher heat setting
causes burning, lower the heat setting and cook for a longer time.
7. Never heat oil till it is smoky except certain oils like mustard oil. It damages the oil and
will burn the food.
8. Foods removed from refrigerator should be at room temperature before beginning to cook.
9. The well fitting lid, even heat distribution and heat retention of the pan allows cooking
with less liquids. The method helps cook vegetables more flavourful and nutritious.
10. To ensure even cooking, shape foods (such as patties) evenly and slice foods (such as
Size of Pan Max. Qty. of oil
1.5 Litre 1
1
/2 cups/360 ml
2 Litre 2
1
/4 cups/540 ml
2.5 Litre 3 cups/720 ml
2.75 Litre 3
1
/4 cups/780 ml
3 Litre 4 cups/960 ml
Size of Pan Max. Qty. of oil
3.75 Litre 4
1
/2 cups/1.1 litres
4 Litre 5 cups/1.2 litres
5 Litre 6 cups/1.4 litres
7.5 Litre 11 cups/2.6 litres
9

10
Volume
All measurements are level, not heaped.
Measurement Equivalent
1 teaspoon 5 ml
1
/2 tablespoon 1
1
/2 teaspoons
/
7.5 ml
1 tablespoon 3 teaspoons
/
15 ml
1
/4 cup 4 tablespoons
/
60 ml
1
/3 cup 5 tablespoons +
1 teaspoon
/
80 ml
1
/2 cup 8 tablespoons
/
120 ml
3
/4 cup 12 tablespoons
/
180 ml
1 cup 16 tablespoons
/
240 ml
1 litre 1000 ml
Weight
Metric Equivalent
28 g (rounded off to 30 g) 1 oz
450 g 16 oz
/
1 lb
1 kg 2.2 lb
Abbreviations
tsp teaspoon
tbsp tablespoon
ml millilitre
l litre
oz ounce
lb pound
g gram
kg kilogram
mm millimetre
cm centimetre
15. Measurements
potatoes) evenly.
11. For crispy, light crusts on food such as alu tikki, fried fish and kheema kebab, adjust
heat so that food bubbles and sizzles gently as it cooks in the oil.
12. Brown pieces of food a few at a time. This allows the oil/fat to stay at a high temperature
so food browns quickly. This also makes turning easier for even browning. If too much food
is added at one time, the temperature reduces, steam forms, and food does not brown.
Heat may be adjusted if required to maintain constant temperature.
13. To adapt recipes to suit your pan, follow the tables and instructions given on page 13.
14. Never splash hot oil by dropping food from a height but do not put hands too close to
oil in case it spatters. Add food gently from the edges of the pan.

Deep-Frying Tips
1. Heat oil to the correct temperature. It is very important that the oil is the right
temperature for deep-frying. If oil is too cold, excess oil will be absorbed producing greasy,
soggy food. If oil is too hot, the food will brown too fast on the outside while the inside
remains uncooked. Be sure oil is at the correct temperature before adding each batch.
We have given the required temperature for each recipe. We recommend using a deep-
fry thermometer for checking oil temperatures. When no thermometer is available, a test
for temperature can be done with a day-old 1 inch x 1 inch x
3
/8 inch (2.5 cm x 2.5 cm x
1 cm) piece of bread. Heat oil (or other cooking medium) until you think it is the correct
temperature. Add bread. The time taken to brown the bread indicates the temperature
of the fat. For example, if bread browns in 1 minute the fat is 190°C which is satisfactory
for frying most foods. Use the following chart to test for correct temperature:
2.
Vegetable
Pakora
recipe in this Manual specifies that you fry the pakora to a certain
degree, remove it and then fry the same pakora again. In such case, the temperatures for
the first and second frying are different, as given in the following chart:
Food
Cooking
Medium
Temperature
Approximate time required to
brown bread in hot cooking
medium
Samosa Oil 160°C 4 minutes
Batata Wada Oil 190°C 1 minute
Medu Wada Oil 190°C 1 minute
Spicy Fried Chicken Oil 190°C 1 minute
Fish Fry
-
Bengali Style Oil 190°C 1 minute
Food:
Vegetable Pakora
Temperature
Approximate time required
to brown bread in hot oil
First Frying 170°C 2 minutes
Second Frying 190°C 1 minute
11

12
3.
Add only the recommended number of food items one after the other to hot oil by
carefully sliding in from the edges of the pan. Do not attempt to cook too much at one
time; the temperature of oil will decrease too fast for crisp results and the oil may splash
out of the pan.
4.
Food usually drops toward the base and then rises to the surface, bubbling gently.
Once food has surfaced, turn the food with a slotted, long-handled spoon to cook evenly.
5.
Heat may be adjusted if required to maintain constant temperature.
6. Fry until food reaches the desired colour. The recipes specify three different colour
categories, as follows:
The actual colour of the finished food may vary according to the colour of the food being
cooked. If a batter is made from Bengal gram flour, the colour will be yellowish; if a batter
is made from refined flour, the colour will be more reddish brown.
7.
Lift food with slotted, long-handled spoon a few at a time. Rest spoon on one side of
the pan for a few seconds to allow oil to drop into pan. Place food in a colander or paper
napkins to drain excess oil. This procedure is called 'Drain' in the recipes.
8.
Remove broken food particles, if any, from the oil with a slotted, long-handled spoon.
Heat or cool oil to the required temperature before adding more food. Fry other batches
as required.
9.
When finished frying, allow fat to cool. Strain it through a fine sieve/muslin cloth and
store it for future use if it is still useable.
Colour Specified in Recipe Description of Food
'Light Golden Brown' One shade darker than original
colour and batter (if any) is set
'Golden Brown' Four shades darker than
original colour
'Dark Golden Brown' Six shades darker than original
colour; very brown but not burned

Recipes
The recipe section features 10 recipes developed in our Test Kitchen. These are only
a small sample of the infinite number of dishes that cook perfectly in the Deep-Fry Pan/
Kadhai. Using these as a base, you can easily create or adapt your own favourite recipes.
The recipes in this Manual are written for the 2.5 Litre Pan. To adapt:
•
The recipes which are cooked in one batch such as Kadhai Paneer, Kadhai Masala
Chicken and Rabri, reduce/increase as stated in the table below. Adjust cooking time
suitably.
•
The recipes which involve deep-frying in batches such as Batata Wada and Vegetable
Pakora, reduce/increase the number of pieces fried at one time depending on the recipe,
your pan size, preference and expertise. Cooking times remain the same
-
if the size of the
individual food item is the same.
•
In general, the larger the number of items deep-fried at one time, the more the oil
required for frying. Increase the oil pre-heating time in proportion to the increase in oil
quantity. Adjust the Oil for Frying in deep-frying recipes as follows even if you do not
reduce/increase the quantity of the recipe.
To Adapt to... Reduce/Increase by
1.5 Litre Reduce by 40%
2 Litre Reduce by 20%
2.75 Litre No Change
3 Litre Increase by 20%
To Adapt to... Reduce/Increase by
3.75 Litre Increase by 50%
4 Litre Increase by 60%
5 Litre Increase by 100%
7.5 Litre Increase by 200%
To Adapt to... Oil for Frying
1.5 Litre 1
1
/4 cups/300 ml
2 Litre 2 cups/480 ml
2.75 Litre No Change
3 Litre 3
1
/2 cups/840 ml
To Adapt to... Oil for Frying
3.75 Litre
Increase atleast by 50%
4 Litre
5 Litre
7.5 Litre
13

14
Batata Wada (Potato Balls in Thick Batter)
Yield: 18 wada
Batter
1
2
/3 cups
/
150 g besan (Bengal gram flour)
1 tsp
/
5 ml rice flour
1
/4 tsp
/
1.3 ml turmeric
a pinch baking soda
1 tsp
/
5 ml salt
1
/2 tsp
/
2.5 ml red chilli powder
3
/4 cup + 2 tbsp
/
210 ml water
Stuffing
1 x
1
/2 inch
/
1.3 cm piece fresh ginger
(
1
/6 oz
/
5 g)
4 small cloves garlic
2 green chillies
5 medium (1 lb 1
3
/4 oz
/
500 g) potatoes boiled, peeled and while still hot,
slightly mashed so that some
small pieces remain
2 tbsp
/
30 ml coriander leaves finely chopped
1
1
/4 tsp
/
6.3 ml salt
1 tsp
/
5 ml sugar
1
1
/2 tsp
/
7.5 ml lemon juice
1
/2 tsp
/
2.5 ml turmeric
1
1
/2 tsp
/
7.5 ml vegetable oil
1
/2 tsp
/
2.5 ml mustard seeds
1
/2 tsp
/
2.5 ml urad dal (split skinned black gram)

1
/4 tsp
/
1.3 ml cumin seeds
10 curry leaves
a pinch hing (asafoetida)
Oil for Frying
2
1
/2 cups
/
600 ml
1.
To make batter: Sift together besan, rice flour, turmeric, soda and salt into a bowl.
Add chilli powder. Gradually add water, stirring constantly to make a smooth batter. Keep
aside 30 minutes.
2.
To make potato stuffing: Grind together ginger, garlic and green chillies into a paste.
3.
Mix ginger-garlic paste, potatoes, coriander leaves, salt, sugar, lemon juice and turmeric.
4. Heat oil in a small pan on medium heat about 1 minute. Add mustard seeds. When
crackling, add urad dal. Stir a few seconds. Add cumin seeds and curry leaves. Stir fry till
dal is light golden brown. Remove pan from heat. Add hing. Add to potatoes. Mix. Make
18 balls about 1
1
/2 inch
/
4 cm in diameter.
5.
To fry
wada
: Heat oil in Kadhai on high heat about 5 minutes (190°C). Roll 6 balls in
batter to coat. Add one after the other to hot oil. Reduce heat to medium. Fry till light
golden brown. Remove and drain. Fry remaining balls in the same way, increasing heat
after each batch. Serve hot, accompanied with chutney
.
●
15

16
Kadhai Paneer (Stir-Fried Cottage Cheese)
Serves 12
2 tbsp
/
30 ml coriander seeds
2 tbsp + 2 tsp
/
40 ml cumin seeds
1
1
/4 tsp
/
6.3 ml peppercorns
1
/4 cup
/
60 ml vegetable oil
3 medium (10
2
/3 oz
/
300 g) onions finely chopped
4 dry red Kashmiri chillies
de-seeded and finely chopped
4 medium (14 oz
/
400 g) tomatoes finely chopped
2 green chillies finely chopped
30 small cloves
/
30 g garlic finely chopped
1 tbsp
/
15 ml salt
1 lb + 12
1
/3 oz
/
800 g paneer (see page 17), cut into
1
/2 inch
/
1.3 cm cubes
1
/4 cup
/
60 ml coriander leaves finely chopped
1. In a pan, roast together coriander seeds, cumin seeds and peppercorns. Allow to cool.
Grind roasted spices into a powder.
2. Heat oil in Kadhai on medium-high heat about 2 minutes.
3. Add onions. Stir fry till onions are translucent (about 7 minutes). Add ground spices
and all other ingredients except paneer and coriander leaves. Stir fry about 2 minutes. Add
half the quantity of paneer. Mix gently. Add remaining paneer. Mix gently. Cover and
cook on medium heat (about 4 minutes), stirring gently every two minutes. Uncover pan
and cook till liquid has reduced (about 1 minute). Remove pan from heat. Add 2 tbsp
/
30 ml coriander leaves. Mix. Serve hot, garnished with remaining coriander leaves
(2 tbsp
/
30 ml).

To make soft paneer:
Yield: 1 lb + 12
1
/3 oz
/
800 g
21 cups
/
5 litres whole milk
1
/2 cup
/
120 ml lemon juice
a. Place a strainer over a bowl large enough to hold the milk. Line strainer with a
muslin cloth large enough to hold the curds and then be tied by winding one
corner around the others and knotting. Keep aside.
b. Pour milk into a pan and bring to boil on high heat, stirring occasionally to
prevent skin from forming on top. Reduce heat to medium. Add lemon juice.
Stir till milk curdles (curds separate from whey). Cook till whey has a yellow tint
and has turned from cloudy to clear (about 2 minutes), stirring and scraping the
sides and base of pan. Remove pan from heat.
c. Stir curdled milk and pour into muslin-lined strainer over the bowl (kept aside
in step a). Allow to strain till whey is drained into bowl.
d. Gather up corners of muslin and tie a knot above curds to make a bag. Place bag
on plate or board with knot on top and press gently for a few seconds on knot
to level curds. Tilt plate slightly to drain and leave 20 minutes. Untie bag and
remove paneer.
●
17

18
Kadhai Masala Chicken (Spicy Stir-Fried Chicken)
Serves 4
1 x 1
1
/2 inch
/
3.8 cm piece fresh ginger
(
1
/2 oz
/
15 g)
7 small cloves garlic
7 cashew nuts
3
/4 cup
/
180 ml water
2 tbsp
/
30 ml coriander powder
2
1
/2 tsp
/
12.5 ml red chilli powder
1
/2 tsp
/
2.5 ml pepper
1 tsp
/
5 ml cumin powder
1
/4 tsp
/
1.3 ml turmeric
1 tsp
/
5 ml garam masala powder
1 tbsp
/
15 ml lemon juice
3 tbsp
/
45 ml vegetable oil
1 medium (3
1
/2 oz
/
100 g) onion finely chopped
1
2
/3 lb
/
750 g chicken pieces, skinned
1 tsp
/
5 ml salt
1.
Grind together ginger and garlic into a paste.
2. Separately grind cashew nuts into a paste, adding water (2 tbsp
/
30 ml) a little at a time.
3.
Mix coriander, chilli, pepper, cumin, turmeric and garam masala powders, lemon juice
and 2 tbsp
/
30 ml water.
4.
Heat oil in Kadhai on medium heat about 2 minutes. Add onion and fry till golden
brown. Add ginger-garlic paste. Stir a few seconds. Add chicken and spice mixture. Stir fry
till chicken is lightly browned and oil shows separately (about 15 minutes).

5. Add cashew nut paste. Mix. Add remaining water (
1
/2 cup
/
120 ml) and salt. Stir. Cover
and cook on low heat till chicken is tender and water has evaporated, stirring occasionally
(about 20 minutes). Gravy should be thick but moist enough to spread over chicken. If
gravy is watery when chicken is tender, uncover pan, increase heat to medium and boil till
gravy is thick. Serve hot.
●
Medu Wada (Savoury Doughnuts)
Yield: 18 wada
1
1
/4 cups
/
250 g urad dal (split skinned black gram)
soaked 1 hour and drained
3
/4 cup
/
180 ml water
1
1
/4 tsp
/
6.3 ml salt
1 x
1
/2 inch
/
1.3 cm piece fresh ginger finely chopped
(
1
/6 oz
/
5 g)
6 curry leaves torn into pieces
2 green chillies finely chopped
2
1
/2 tbsp
/
20 g coconut cut into
1
/4 inch
/
6 mm long,
1
/8 inch
/
3 mm thick and
1
/8 inch
/
3 mm wide pieces
a pinch hing (asafoetida)
Oil for Frying
2 cups
/
480 ml
1. Grind urad dal into a fine paste, adding water a little at a time. In a bowl, beat paste
with fork about 5 minutes to fluff up thus: move fork up from bottom of bowl, breaking
paste’s surface and plunging fork down in a continuous circular motion rapidly.
19

20
2.
Add all other ingredients. Mix.
3. Heat oil in Kadhai on high heat about 5 minutes (190ºC). Reduce heat to medium-high.
Wet your left palm. Put about
1
/4 cup
/
60 ml paste on palm. Wet fingertips of right hand.
Pat paste into round shape and slightly flatten to about 1 inch
/
2
1
/2 cm thick. Make a hole
in the centre with a finger. Wet right hand fingers. Overturn wada and place on right hand
fingers. Put thumb in centre to enlarge hole. Slip wada into hot oil. Repeat this procedure
for 2 more wada. Fry till dark golden brown. Remove and drain. Fry remaining wada in
the same way except do not increase or reduce heat. Serve hot, accompanied with sambar
or chutney
.
●
Medu Wada (Continued)
Vegetable Pakora (Vegetable Fritters)
Serves: 6
1 small head (1 lb 1
3
/4 oz
/
500 g) cauliflower cut into 1
1
/4-1
1
/2 inch
/
3-4 cm flowerettes (250 g)
2 medium (9 oz
/
250 g) potatoes peeled and cut lengthwise
into
1
/4 inch
/
6 mm thick slices
2
1
/2 tsp
/
12.5 ml salt
2
1
/2 tsp
/
12.5 ml red chilli powder
8 small cloves garlic (optional)
1 tsp
/
5 ml ajwain (carrom seeds) optional
2
1
/4 cups
/
200 g besan (Bengal gram flour)
1
1
/4 cups
/
300 ml water
1
/3 cup
/
20 g coriander leaves finely chopped

Oil for Frying
2
1
/2 cups
/
600 ml
1. In a bowl, add cauliflower, potatoes,
1
/2 tsp
/
2.5 ml salt and
1
/2 tsp
/
2.5 ml chilli powder.
Mix. Keep aside 30 minutes. Drain.
2.
Grind together garlic and ajwain into a paste.
3.
Sift together besan and remaining salt (2 tsp
/
10 ml) into a bowl. Gradually add water,
stirring constantly to make a smooth batter. Add remaining chilli powder (2 tsp
/
10 ml),
garlic-ajwain paste and coriander leaves. Mix.
4.
Heat oil in Kadhai on high heat about 4 minutes (170ºC). Roll cauliflower and potato
pieces, 8 each in batter to coat. Add one after the other to hot oil. Reduce heat to medium
and fry till light golden brown. Remove and drain. Fry remaining vegetables in the same
way, increasing heat after each batch.
5.
Press cauliflower pakora between palms to flatten slightly.
6.
When ready to serve, reheat oil on high heat about 5 minutes (190ºC). Reduce heat to
medium-high. Fry pakora in batches till dark golden brown. Remove and drain. Serve hot,
accompanied with chutney.
7.
Note: Pakora can also be made using vegetables such as onion, spinach, brinjal, pumpkin,
green chilli etc.
●
21

22
Spicy-Fried Chicken
Serves: 4
1 small (3 oz
/
85 g) onion
6 small cloves garlic
1 x
3
/4 inch
/
2 cm piece fresh ginger
(
1
/4 oz
/
7 g)
2 tbsp
/
30 ml coriander leaves
1 tsp
/
5 ml cumin seeds
2 dry red Kashmiri chillies de-seeded and
soaked in
1
/2 cup
/
120 ml hot water for
5 minutes and drained
2 tbsp
/
30 ml lemon juice
1
/2 tsp
/
2.5 ml garam masala powder
1
1
/2 tsp
/
7.5 ml salt
1
/2 tsp
/
2.5 ml pepper
2 tsp
/
10 ml red chilli powder
3
/4 cup + 2 tbsp
/
210 ml curd beaten
2 lb 3
1
/2 oz
/
1 kg chicken pieces, skinned
Batter
2 tsp
/
10 ml besan (Bengal gram flour)
1
/4 tsp
/
1.3 ml salt
1
/4 tsp
/
1.3 ml red chilli powder
2 eggs beaten

Oil for Frying
2 cups
/
480 ml
1. Grind together onion, garlic, ginger, coriander leaves, cumin seeds and red chillies into
a paste adding lemon juice, a little at a time. In a bowl, mix ground paste, garam masala
powder, salt, pepper, chilli powder and curd. Add chicken. Mix. Cover and keep aside
4 hours or in refrigerator overnight.
2.
In a pan, add chicken with curd mixture. Bring to boil on medium-high heat. Reduce
heat to medium-low and cook till liquid dries up (about 30 minutes), stirring occasionally.
3.
To make batter: In a bowl, sift together besan and salt. Add chilli powder and eggs.
Mix.
4 Heat oil in Kadhai on high heat about 5 minutes (190ºC). Roll 2 chicken pieces in
batter to coat. Add one after the other to hot oil. Reduce heat to medium-high. Fry till
golden brown. Remove and drain. Fry remaining chicken in the same way, increasing
heat after each batch. Serve hot.
●
23

24
Samosa (Savoury Stuffed Pastries)
Yield: 24 samosa
Dough
1
1
/2 cups + 1 tbsp
/
180 g maida (refined flour)
1
/4 tsp
/
1.3 ml salt
3 tbsp
/
45 ml vegetable oil
1
/4 cup
/
60 ml water
Stuffing
4 medium (14 oz
/
400 g) potatoes boiled and peeled
1
/4 cup
/
60 ml vegetable oil
1 medium (3
1
/2 oz
/
100 g) onion finely chopped
1
1
/8 cups
/
170 g peas shelled or frozen
1 x
1
/2 inch
/
1.3 cm piece fresh ginger finely chopped
(
1
/6 oz
/
5 g)
2 green chillies finely chopped
3 tbsp
/
45 ml coriander leaves finely chopped
3 tbsp
/
45 ml water
2 tsp
/
10 ml salt
1 tsp
/
5 ml coriander powder
1
1
/2 tsp
/
7.5 ml garam masala powder
1
1
/2 tsp
/
7.5 ml cumin powder
1 tsp
/
5 ml red chilli powder
1 tbsp
/
15 ml amchur (mango powder)
1 tbsp
/
15 ml lemon juice

Oil for Frying
2
1
/2 cups
/
600 ml
1. To make dough: Sift together maida and salt into a bowl. Add oil and rub it in with
your fingers till mixture resembles fine bread crumbs. Gradually add water, mixing and
gathering maida to make a stiff ball. Knead till dough is smooth and elastic (about
3 minutes). Keep covered with a damp cloth about 30 minutes.
2.
To make stuffing: Cut 3 potatoes into
1
/4 inch
/
6 mm cubes. Mash 1 potato.
3.
Heat oil in a pan on medium heat about 2 minutes. Add onion. Fry till light brown.
Add peas, ginger, green chillies, coriander leaves and water. Stir. Cover and cook on low
heat till peas are tender and water has evaporated, stirring occasionally.
4.
Add cut potatoes, salt, coriander, garam masala, cumin, chilli powders and amchur. Stir
about 2 minutes. Add mashed potato and lemon juice. Stir about 1 minute. Allow mixture
to cool.
5.
To make samosa: Knead dough about 1 minute. Make 12 balls. On a floured board,
roll a ball of dough into a thin flat round 6 inch
/
15 cm in diameter.
6.
Cut round in half with a sharp knife. Dampen the cut edge of one half with water. Pick
up and form a cone, making a
1
/4 inch
/
6 mm overlapping seam. Press to seal. Fill cone
with 1
1
/2 tbsp
/
22.5 ml stuffing.
7.
Close top of cone by sticking the open edges together with a little water to form a
1
/4 inch
/
6 mm seam. Pinch top seam firmly to form a scalloped edge. Cover with damp
cloth. Assemble 23 more samosa in the same way.
8.
Heat oil in Kadhai on high heat about 4 minutes (160ºC). Reduce heat to medium.
Add 6 samosa one after the other. Fry till dark golden brown. Remove and drain.
Fry remaining samosa in the same way, increasing heat after each batch. Serve hot,
accompanied with chutney
or tomato ketchup.
●
25

26
Stir-Fried Bean Sprouts and Vegetables
Serves: 6
1
/4 tsp
/
1.3 ml salt
1
/4 tsp
/
1.3 ml sugar
1
/2 tsp
/
2.5 ml lemon juice
1 tbsp
/
15 ml vegetable oil
1 x
1
/4 inch
/
6 mm piece fresh ginger cut into long strips,
(
1
/15 oz
/
2 g)
1
/8 inch x
1
/8 inch
/
3 mm x 3 mm wide
2 small cloves garlic finely chopped
1 medium (3
1
/2 oz
/
100 g) carrot peeled and cut into
1
1
/2 inch
/
4 cm long matchstick-thin strips
2 spring onions including
tender green portion cut lengthwise into
strips up to 1
1
/2 inch
/
4 cm long,
1
/8 inch x
1
/8 inch
/
3 mm x 3 mm wide
4
1
/2 oz
/
125 g cabbage cut into
1
/8 inch
/
3 mm wide
long strips
2 cups
/
170 g whole green gram (sabat moong) sprouts*
1 green chilli finely chopped
1 tbsp
/
15 ml water
1.
In a bowl, mix salt, sugar and lemon juice. Stir till sugar is dissolved.
2. Heat oil in Kadhai on medium-high heat about 2 minutes. Add ginger and garlic. Stir a
few seconds. Add carrot. Stir about 1 minute. Add onions. Stir-fry till onions are transparent.
Add cabbage, sprouts and green chilli. Stir-fry about 2 minutes, pouring water around the
sides of the pan. Add lemon juice mixture. Stir a few seconds. Serve hot.

Fish Fry – Bengali Style
Serves 6
1
/2 tsp
/
2.5 ml salt
1
/4 +
1
/8 tsp
/
1.9 ml turmeric
6 (14 oz
/
400 g) Rohu/Indian Carp
fish steaks
(1 inch
/
2.5 cm thick)
1
/2 cup
/
120 ml mustard oil
1.
In a bowl, mix salt and turmeric. Add fish steaks. Rub mixture all over fish steaks. Cover
and keep aside about 30 minutes.
2.
Heat oil in Kadhai on high heat about 3 minutes (190ºC).
3. Add 3 fish steaks. Place the lid and fry till dark golden brown and crisp (about
4 minutes). Uncover. Turn over fish steaks. Cover. Reduce heat slightly. Fry till dark
golden brown and crisp (about 2 minutes). Uncover. Remove and drain fish steaks.
4.
Increase heat to high. Fry remaining fish steaks in the same way as in step 3.
Serve hot.
●
* To sprout whole green gram (sabat moong): Soak
1
/3 cup
/
65 g whole green gram in
1 cup
/
240 ml water overnight. Drain. Place a wet cloth on a flat plate. Spread gram. Fold
cloth over gram. Cover with another plate. Keep aside for 2 days, sprinkling water on cloth
to keep it damp (once or twice a day).
●
27

28
Rabri (Scraped Cream Pudding)
Serves: 6
4 cups
/
960 ml milk
1
/4 cup + 1 tbsp
/
65 g sugar
6 almonds thinly sliced
6 pistachio nuts thinly sliced
1.
Bring milk to boil in the Kadhai on high heat, stirring occasionally. Reduce heat to
low. As a layer of cream forms on top, move layer to the edges, slightly pushing it up the
sides of the Kadhai and leaving it to set. Continue this process till milk is reduced to about
1 cup
/
240 ml.
2.
Add sugar. Stir till sugar is dissolved. Remove Kadhai from heat. Scrape cream from
the sides into milk. Mix.
3.
Place rabri in serving bowl. Sprinkle almonds and pistachio nuts. Serve at room
temperature or cold.
●

Space for your Notes/Recipes