
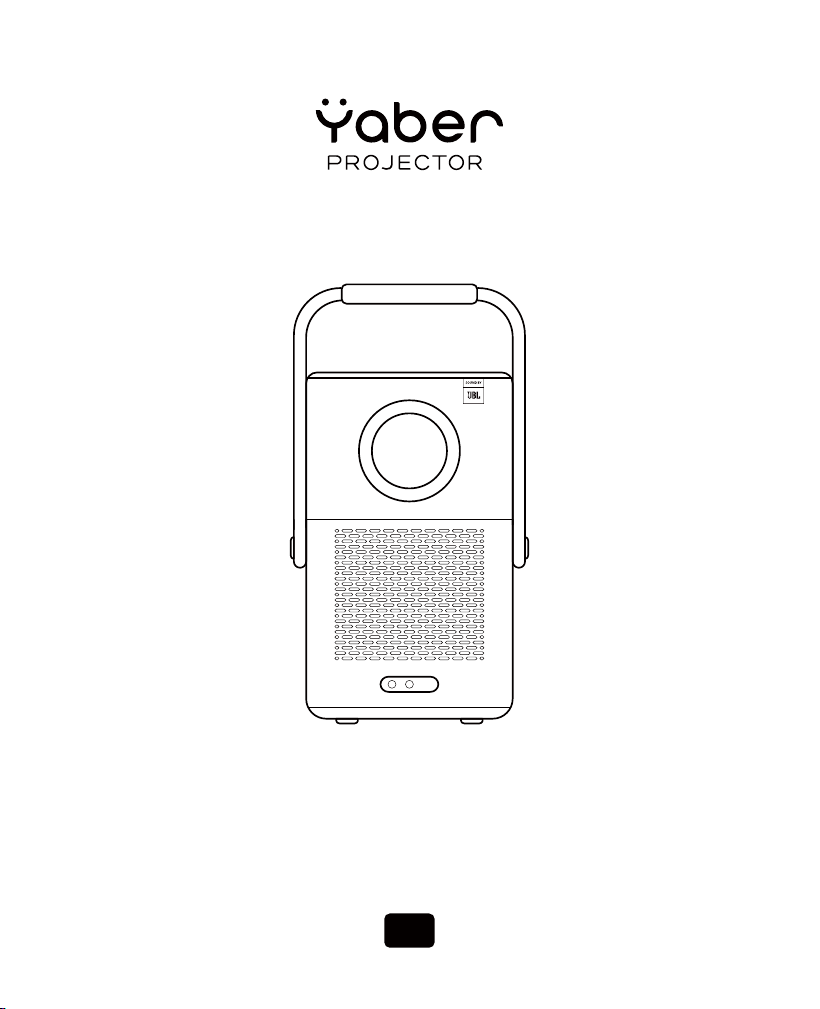
Smart Projector T2
EN
User Manual

Contents
1
20
41
62
83
104
English
Deutsch
Français
Italiano
español
日本語

Catalog
1. Yaber Lifetime Professional Support
2. Warranty
3. Important Precautions
4. What's included
5. Specification
6. About Battery
7. Installation
8. Projection Settings
9. Picture Settings
10. Connectivity
11. T2 Dongle
12. Bluetooth Settings
13. System Upgrade
14. Quiet Mode
1
2
2
3
5
6
7
8
12
13
16
18
19
19

1. Yaber Lifetime Professional Support
Dear Valued Customer,
Thank you for choosing Yaber T2 projector.
This manual will help you navigate through all the features.
We understand that there may be many questions and concerns that arise
during the use of the projector. We are also eager to hear your feedback.
However, leaving a review on the product page does not get the fastest solution.
Many common problems, such as inability to auto focus or keystone, sound
issues, WiFi or Bluetooth connection issues, can usually be resolved with appro-
priate settings adjustments.
If you encounter any issues, feel free to send your order number and the problems
to us at [email protected] (e.g. US+T2+000-0000000-0000000+Issues) Rest
assured, our service team will offer a solution to you within 24 hours.
Your satisfaction is our top priority. If you encounter any issues, we sincerely
hope you can give us an opportunity to make things right.
We wish you have an outstanding experience with the T2 projector.
Yaber Consumer Service Team
1

2. Warranty
Thank you so much for your purchase and support. We provide 3-year warranty
for Yaber T2 projector.
If you have any questions, please feel free to contact us.
For T2 Projector: [email protected]
3. Important Precautions
Please use the device correctly:
• Do not face the lens into eyes because the strong projector light may cause
injury to the eyes.
• Do not block the air inlet/outlet of the device in order to avoid damage to
internal electronic devices arising from normal heat dissipation failure.
• Do not wipe the lens directly with cleaning tools including paper and cloth to
avoid damage to the lens, Please clean up the dust on the lens through clean air
blowing.
• Do not wash the device with chemicals, detergents, or any liquid to prevent the
circuit board from being corroded by rainwater, or moisture mineral-containing
liquids.
• Keep the device and its components and accessories out of reach of children.
• Make sure that the device is used in a dry and ventilated environment.
• Do not store the device in excessively hot or cold places, because extreme
temperatures will shorten the life of electronic devices. Place and use the device
in an environment of 0°C-40°C
• Do not put the device into any heating equipment (such as a dryer and
microwave oven) for drying.
• Do not firmly extrude the device or place barriers on it or its back to avoid
damage to the device.
• Do not throw, strike, or sharply vibrate the device to avoid damage to the
internal circuit board
• Do not try to disassemble and assemble the device yourself. If any issue
occurs, please contact the after-sales service of Yaber.
2
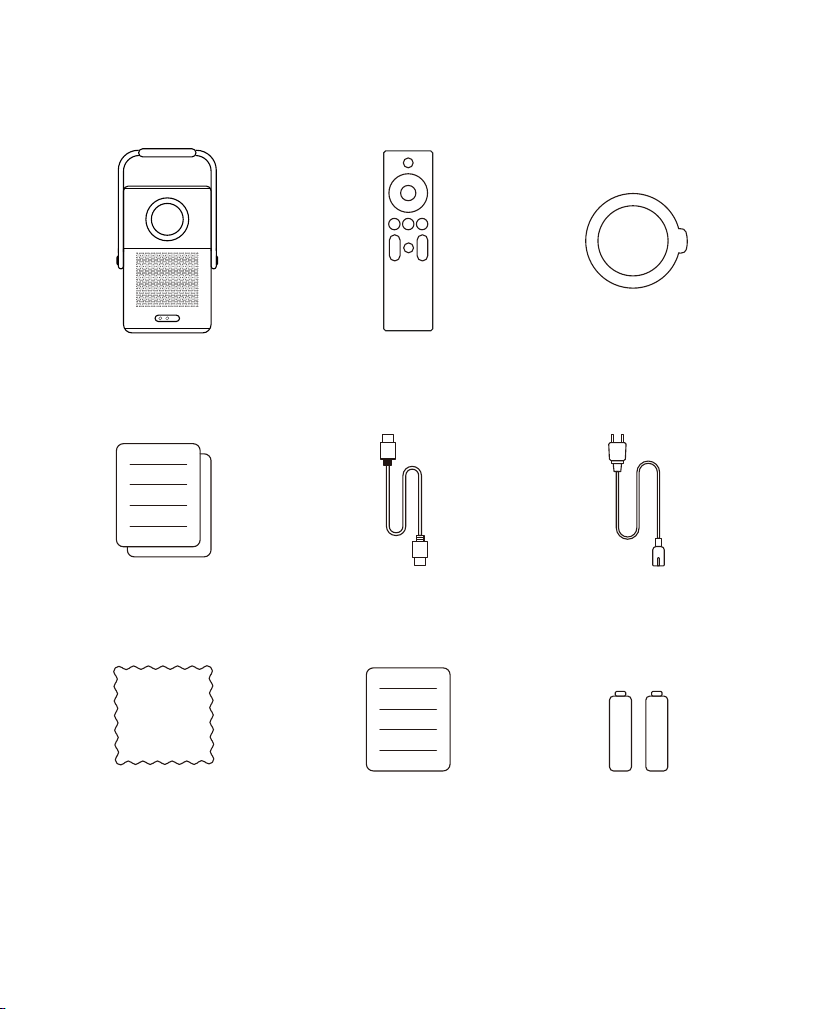
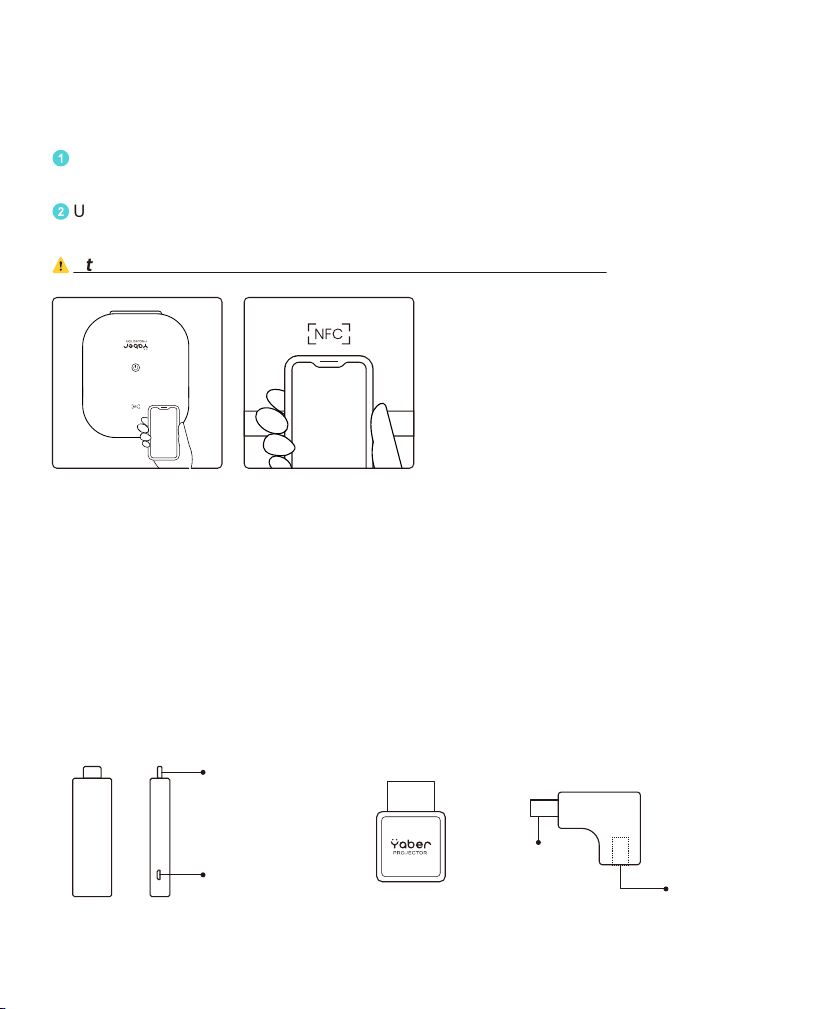
4. What's included
HDMI Cable Power Cord
QSG & FAQ
Cleaning Cloth
Projector
Lens CoverRemote Control
(For T2)
3
Brand Card AAA Batteries
If you don't have batteries for the remote control,
please contact [email protected].
4.1 Projector Interface
⚠
Notice: Press power button 2s-5s to boot the projector
⚠
Notice: Please ensure that the area in front of the [Focus receiver] is not
blocked, otherwise the focus function will be affected.
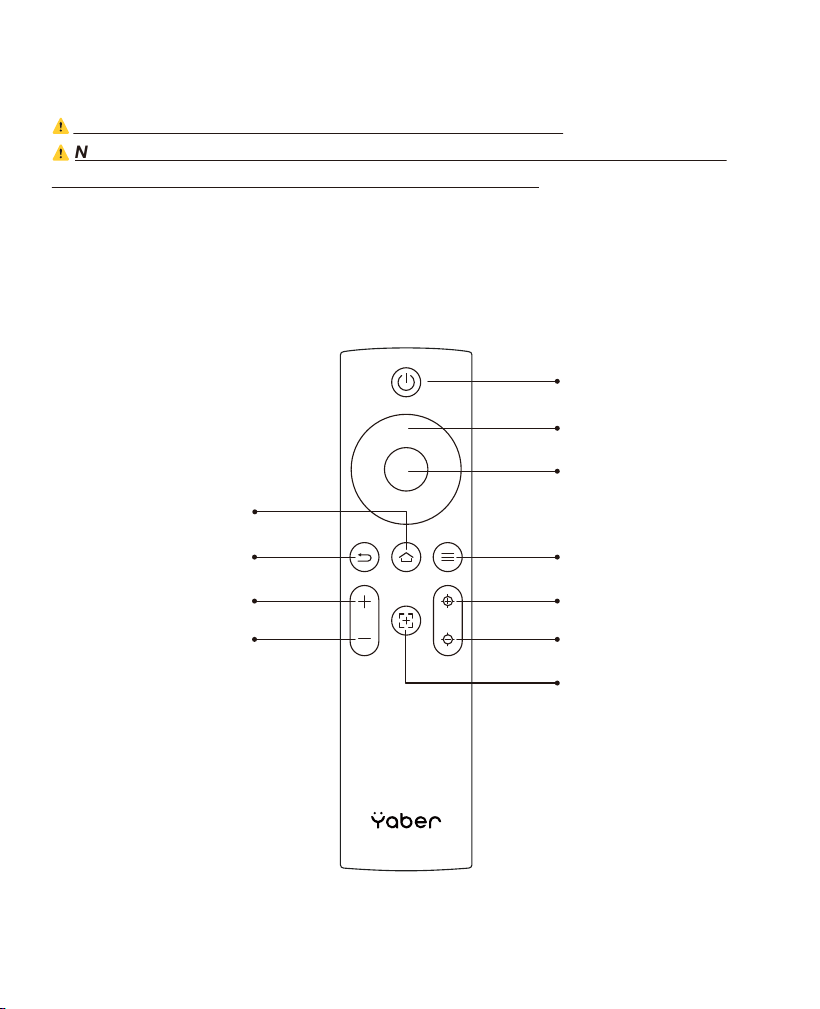
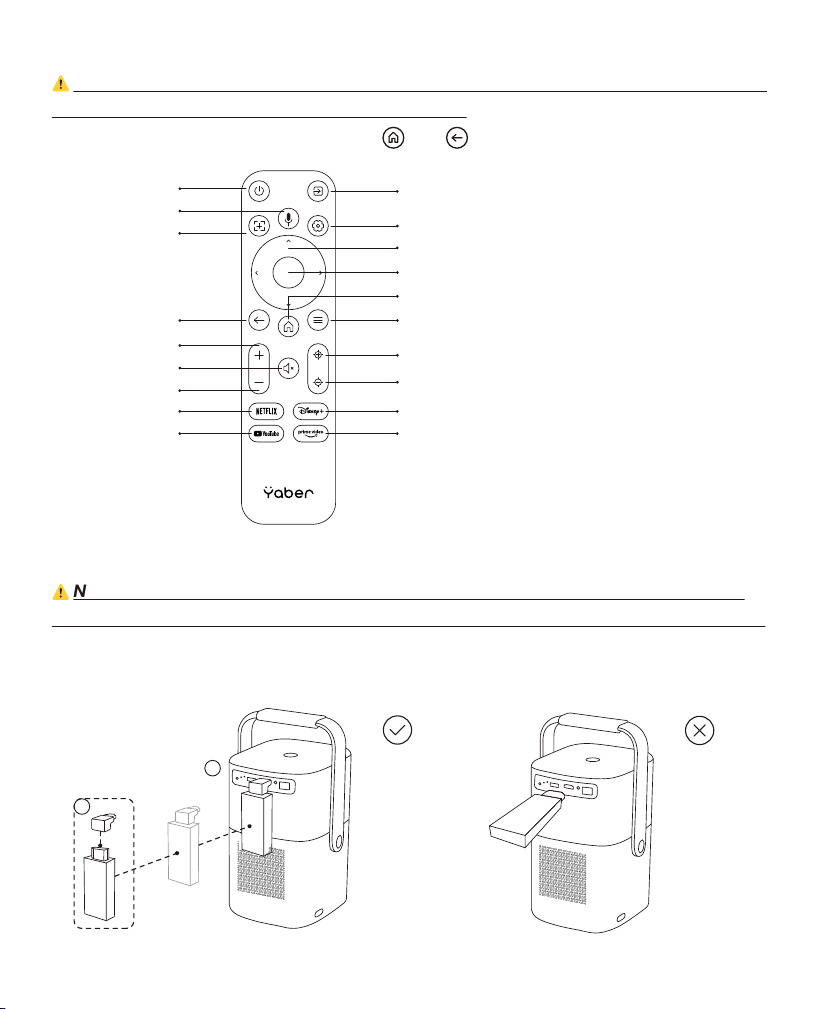
4.2 Remote Contol
Power
Confirm
Menu
Focus +
Focus -
Auto Focus
Home
Back
Volume UP
Volume Down
Arrow Key
4
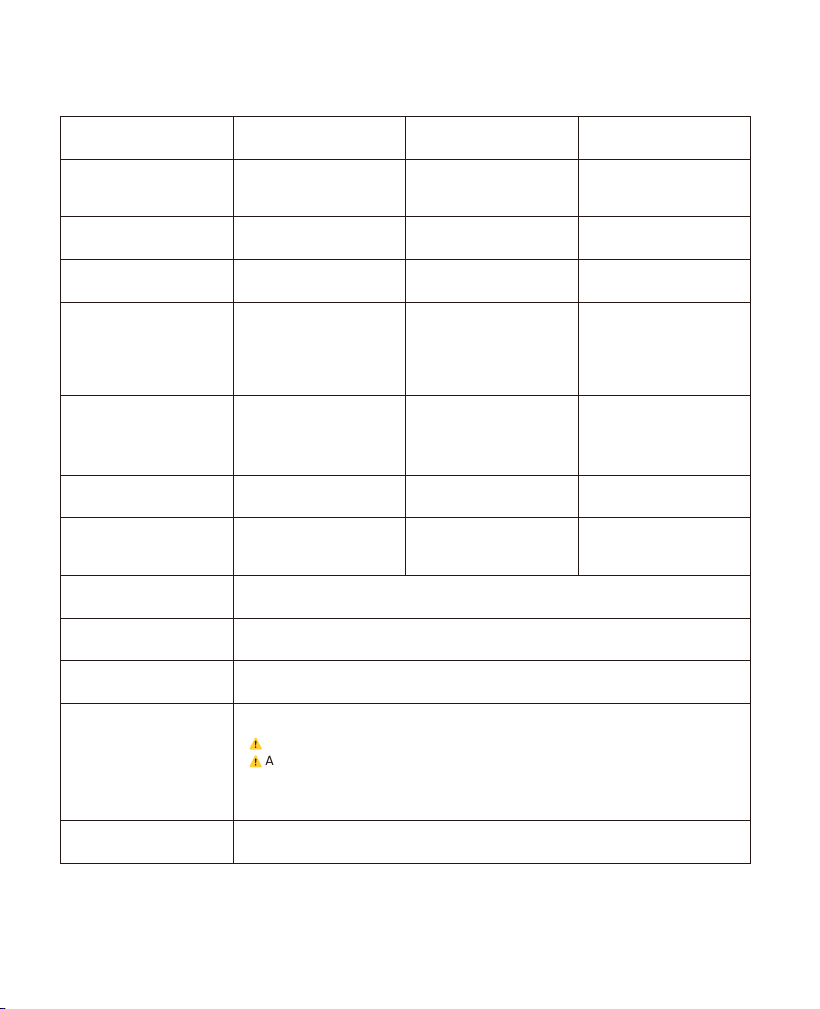
Native Resolution
1920*1080
Light Source
LED
Battery Lifespan
Video Playtime 2.5h
Music Playtime 18h
Aspect Ratio
16:9/4:3
Focus
Auto/Eletric
Keystone Correction
Auto/Eletric
Screen Alignment
Auto
Obstacle Avoidance
Auto
Interface
USB 2.0×1
HDMI 1.4×1
Audio Out×1
Lan×1
Unit Dimension
165×140×290 mm
6.4×5.5×11.4 inches
Projection Ratio
1.25:1
Projection Distance
Min1.1m~ Max3.3 m
Min43.3~Max129.9
inches
Power Voltage
100-240V~/50-60Hz
Power Consumption
110W
Projector Weight
2.5 kg
5.5 lbs
Projection Method
Front/Rear on Desk
Front/Rear on Celling
Picture Format
JPG、PNG、BMP、JPEG
Audio Format
MP3, AAC, LPCM, APE, FLAC, OGG, AMR
Video Format
MP4、MKV、WMV、3GP 、MPG、VOB、TP、TS、DAT、MOV、FLV
USB Format
FAT 32, NTFS
⚠
Unsupported format: Exfat
⚠
Attention:If the projector cannot recognize the contents of the USB
flash drive, please check whether your USB flash drive is formatted
correctly.
WPS Documents
txt, pdf, docx, xlsx. pptx
5. Specification
5

6. About Battery
The Yaber T2 is equipped with a battery that will give you 2.5 hours of use in
battery mode (Brightness in 60).
In battery mode, the brightness of the screen will be reduced, thus extending a
longer battery life.
You can also adjust the settings to increase the brightness of the screen, but the
duration will be shortened.
💡
Tips: (As the number of times the machine is used increases, the battery
life may be affected.)
6.1 About Battery
💡
Tips: For the health of the battery and your experience, we recommend that
you charge your machine while it is turned off.
💡
Tips: For first-time use, we recommend youfullychargeyourprojector
usingtheprovidedpower cord.
When the machine is turned off, the charging time from 0 to 100 is 3.5 hours.
When the machine is turned on, the charging time from 0 to 100 is 5.5 hours.
When the Power light is Blue, it means the battery is completely charged.
When the Power light is Red, the battery is charging.
Brightness Setting
Image q...
Projector turned off
Projector turned on
From 0% ~ 100%
3.5 Hours
5.5 Hours
Blue: Fully charged.
Red : Charging.
6
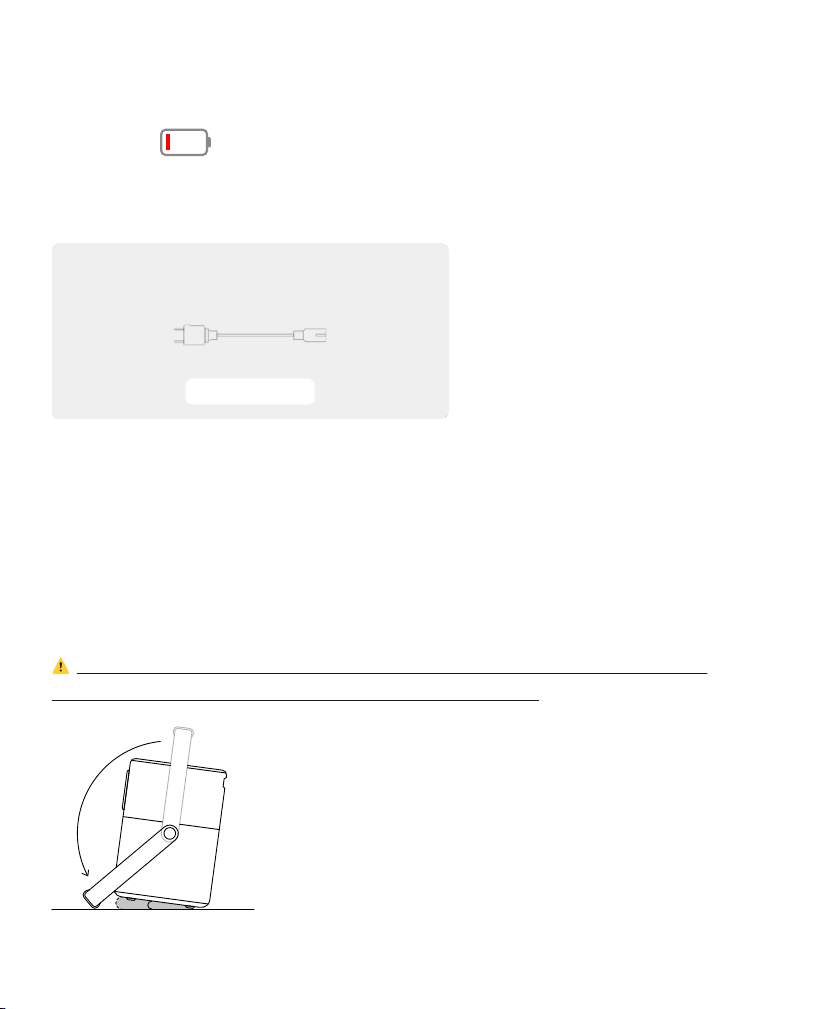
Low Power Notification
When the battery power is lower than 20%, the system will pop up a window to
prompt you to charge the Projector. The battery icon on the projector screen will
change to:
If the battery is about to run out, the system will push a shutdown countdown
pop-up.
7.1 Handle to Stand
7. Installation
For a better image, please try to place the projector on a stable, flat surface.
If you need to adjust the screen at a larger angle, you can rotate the carrying
handle to the bottom and it will provide you with support at certain angles (15%).
⚠
Notice: Please ensure that the area in front of the focus receiver is not
blocked, otherwise the focus function will be affected.
15°
7
The projector is running out of power
and will shut down in 60s
Please plug it in.
Dismiss
Settings
Projection Settings
Image Settings
7.2 Ceiling Mounting
⚠
Note: T2 does not support four-corner mount installation.
Step
1
: Make sure you have a universal mounting bracket that can fit the
projector.
Step
2
: Use the stand with M5*5mm screw to fix the projector on the bracket to
complete the installation.
8. Projection Settings
You can select [Settings]- [Image Settings] or [Projection Settings] in to adjust
the projector image.
8
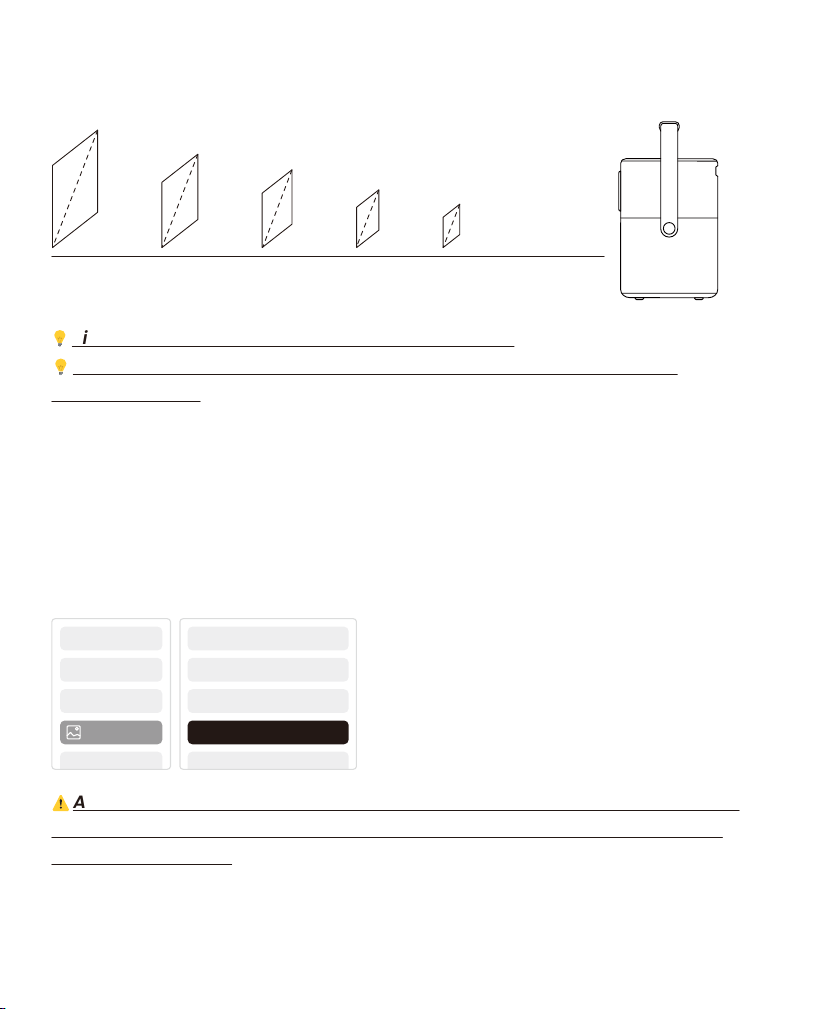
8.1 Projection Distance
Meters0.831.662.213.314.15
150"
120"
80"
30"
60"
2.725.457.2610.8913.62 feet
💡
Tips: Actual projection size and distance may deviate slightly from
laboratory data.
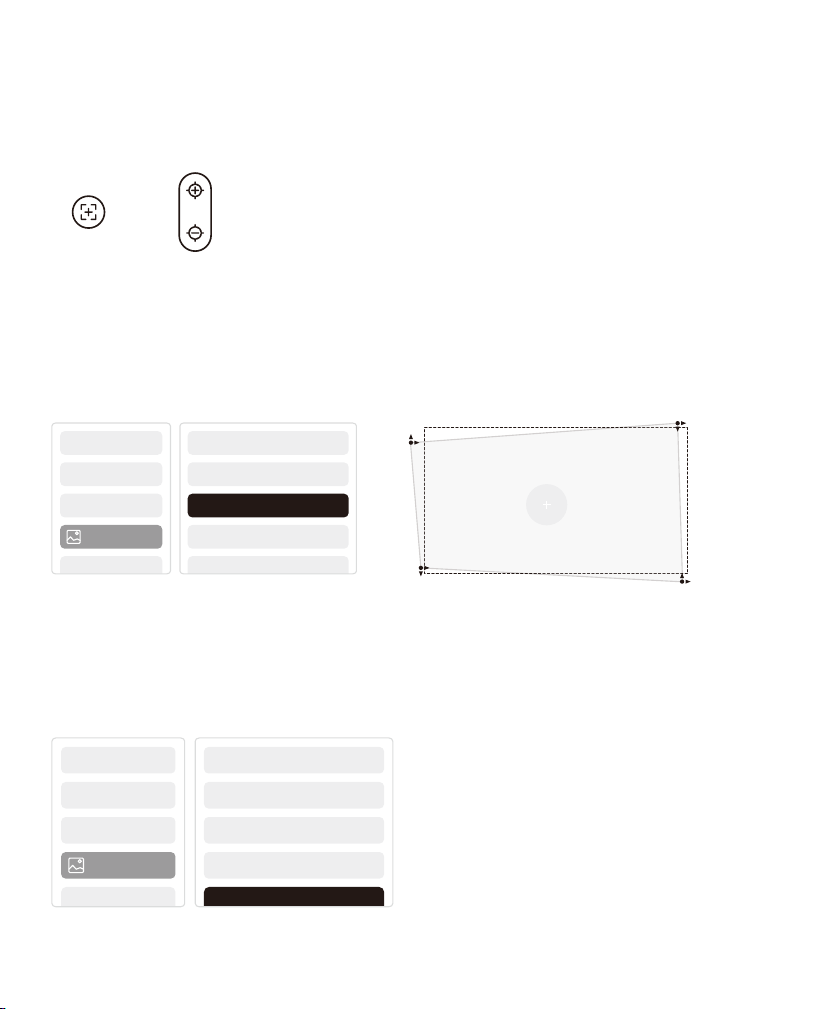
8.2 Auto Focus
Auto focus will be activated after each shift.
You can also turn off the auto focus function through [Settings]-[Projection
Settings]-[Auto Focus].
Projecti..
Projection Mode
Manual Keystone
Auto Focus
Auto Keystone
⚠
Attention:If you have already determined the location of the projector, it
is recommended that you turn off autofocus in the settings to get a better
viewing experience.
9
💡
Tips: The recommended Screen size is 80 inches.
8.3 Auto Keystone Correction
As you move the machine, the T2 automatically performs trapezoidal correction,
depending on the target wall.
⚠
Attention: The angle of the auto keystone cannot exceed 15 degrees up,
down, left, and right.
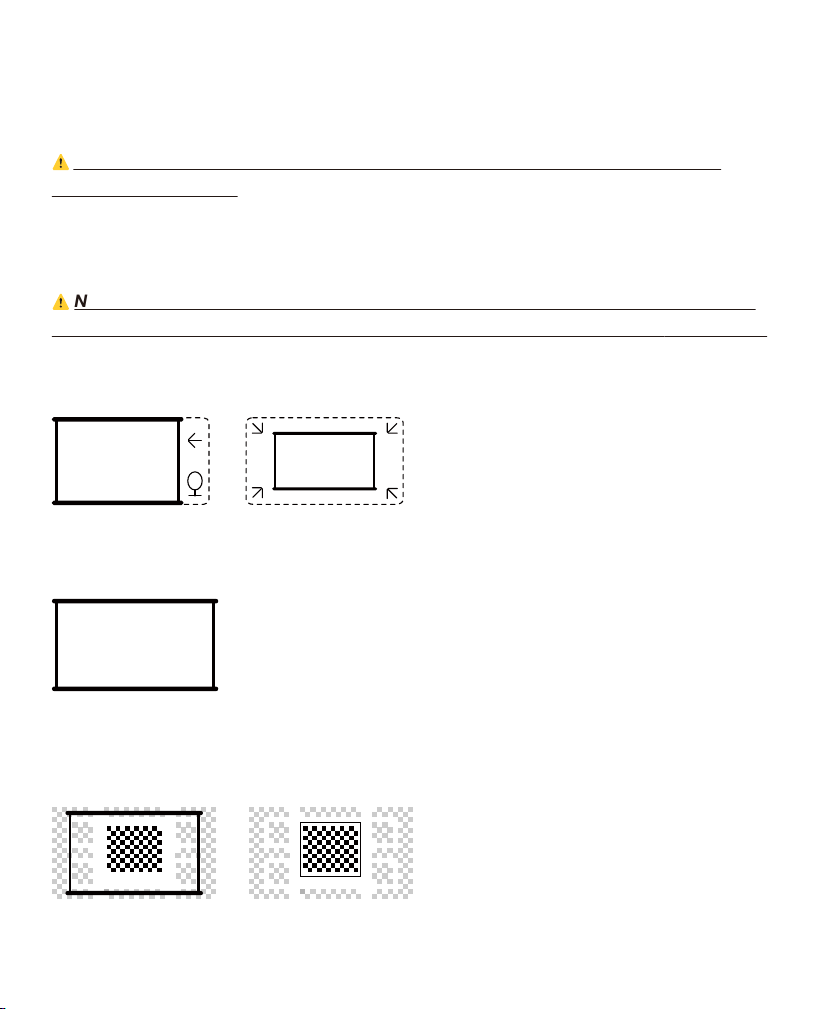
8.4 Auto Screen Alignment and Auto Obstacle Avoidance
⚠
Note: When using the Auto Screen Alignment and or Auto Obstacle Avoidance
functions, make sure the Auto Keystone and Auto Focus functions are turned on.
Please ensure the projection screen is larger than the screen area, and do not
block the area within the central square frame of the screen.
1. Obstacle avoidance may not work when there are white or other light-colored
objects in the target screen.
2. The backdrop should have a distinct black or other colored border, except
for anti-light screens which do not require a border.
3. Before using the auto screen alignment function:
10
Projecti..
Auto Keystone
Auto Focus
Manual Focus
Manual Keystone
Zoom Screen
8.5 Electric Focus
You can also adjust the focus by clicking on the buttons on the remote control to
get your desired picture.
8.6 Manual Keystone Correction
If you need to adjust the screen further, you can adjust the screen by dragging
the arrows by selecting "Manual Keystone"in the settings.
8.7 Projection Zoom
After auto-focusing, the zoom effect will be reset. If you want to save the zoom,
please try to turn off the auto focus when the picture is clear.
Auto Focus
Manual Focus
Projecti..
Projection Mode
Manual Keystone
Auto Focus
Auto Keystone
11
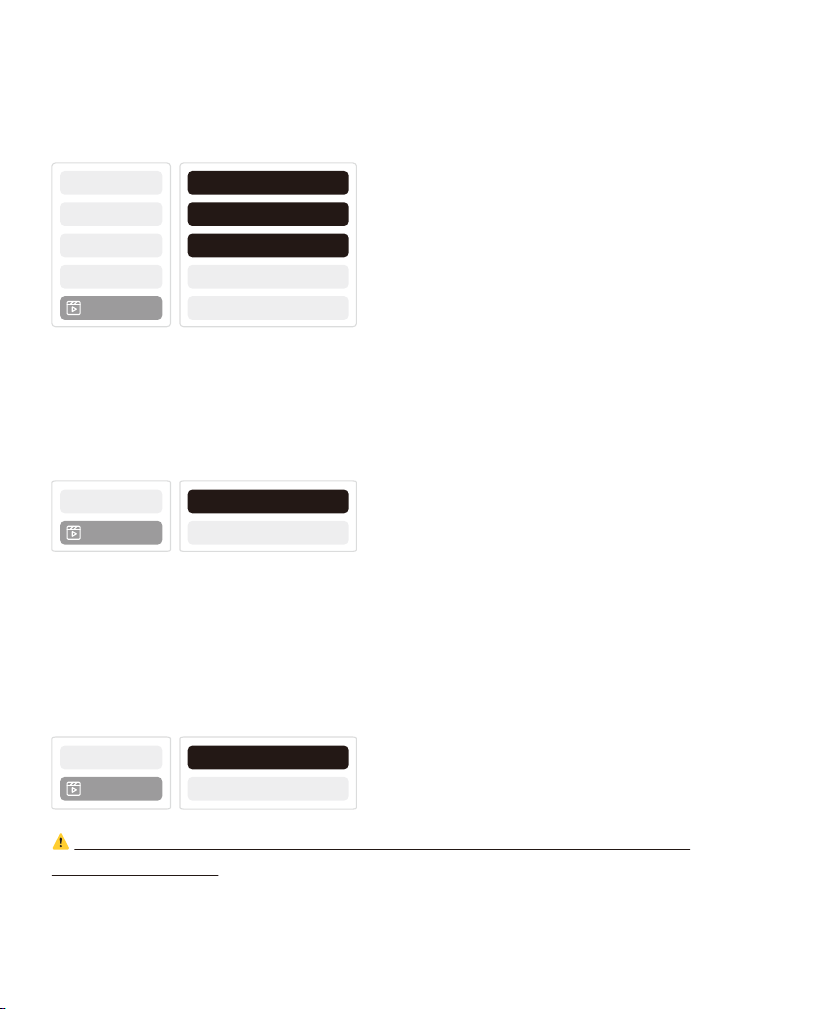
9. Picture Settings
You can select [Image Settings] or [Projection Settings] in [Settings] to adjust
the projector image.
9.1 Brightness Settings
You can also adjust the brightness by adjusting the settings; However, battery
life time will change as well.
9.2 Image Color Settings
Ajust the image color through [Home] - [Settings] - [Image Quality] -[Picture Mode].
You can set the [Brightness], [Contract], [Sharpness], [Color] of the screen in this
[User Mode].
⚠
Attention: The Image color setting will only take effect when playing
pictures or videos.
Brightness Setting
Image q...
Picture Mode
Image q...
Image q...
Color Temperature
Image Mode
Brightness Setting
12
10. Connectivity
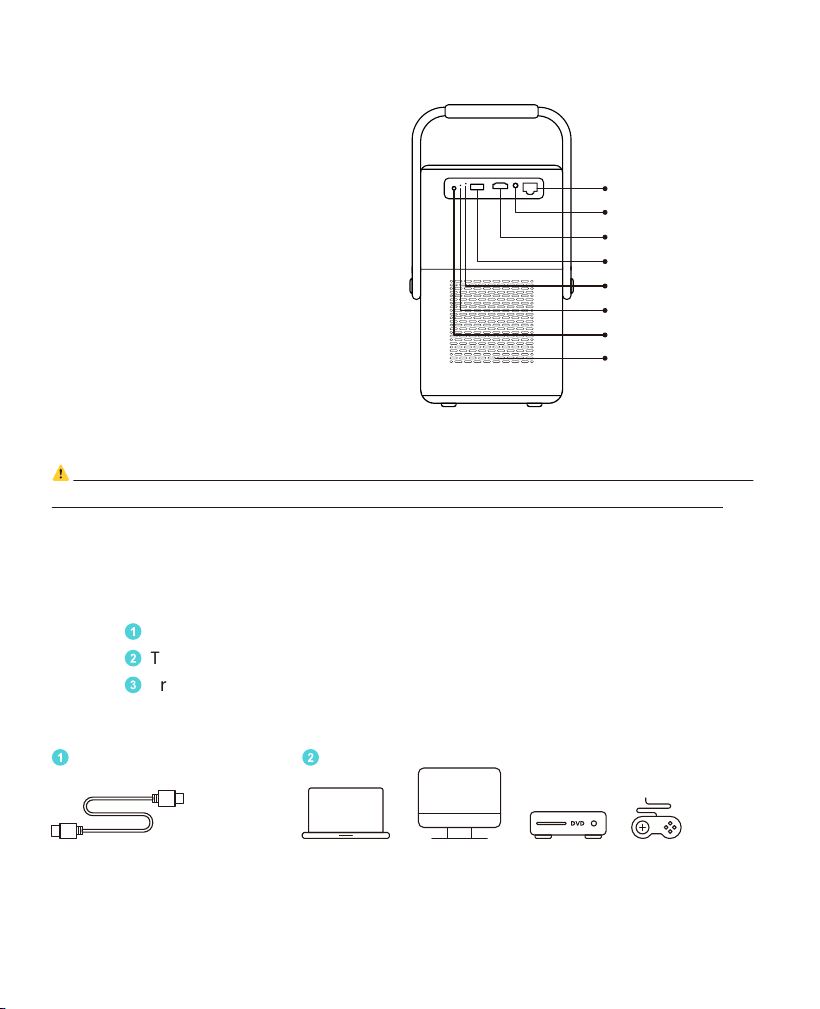
10.1 HDMI, USB, Lan Port
The T2 has an HDMI 1.4 port and a
USB 2.0 port. Before using these
ports, make sure your external
devices are compatible with this
format.
10.1.1 USB
⚠
Notice: T2 currently only supports reading FAT32 and NTFS USB flash drives,
and currently does not support reading exFAT formatted USB flash drives.
10.1.2 HDMI
If you're meet some troubles while using HDMI, please try these solutions below:
Method
1
. Switch HDMI EDID version to 1.4 in your external device settings.
Method
2
. Try changing the HDMI cable.
Method
3
. Try to replace other external devices with HDMI function and check
whether the HDMI interface of external device is working.
Audio Out
Lan Port (RJ45)
HDMI
IR
Power Light
Reset
USB
Air Outlet
13
10.1.3 Lan
The Lan interface of T2 is an RJ45 interface. If you encounter lag when using the
same screen with your phone, you can try to use this interface to connect to the
network and use the same screen.
10.3 Yaber App
You can download the Yaber App from the Google Play Store or Apple App store
for better screen casting!
⚠
Notice: Scan the QR code below to download the Yaber App.
10.2 Wireless Connections
Wi-Fi Screen Mirroring
⚠
Notice: If you need to mirror Netflix, Prime Video, etc. to the projector, please
connect a TV Dongle/Stick or other products with these streaming media via
HDMI.
14
10.3.1 Screen Share
Tip: To enhance your experience during screen sharing, download the [Yaber]
app from the Apple App Store or Google Play Store.
1
Ensure your phone and the projector are connected to the same Wi-Fi
network.
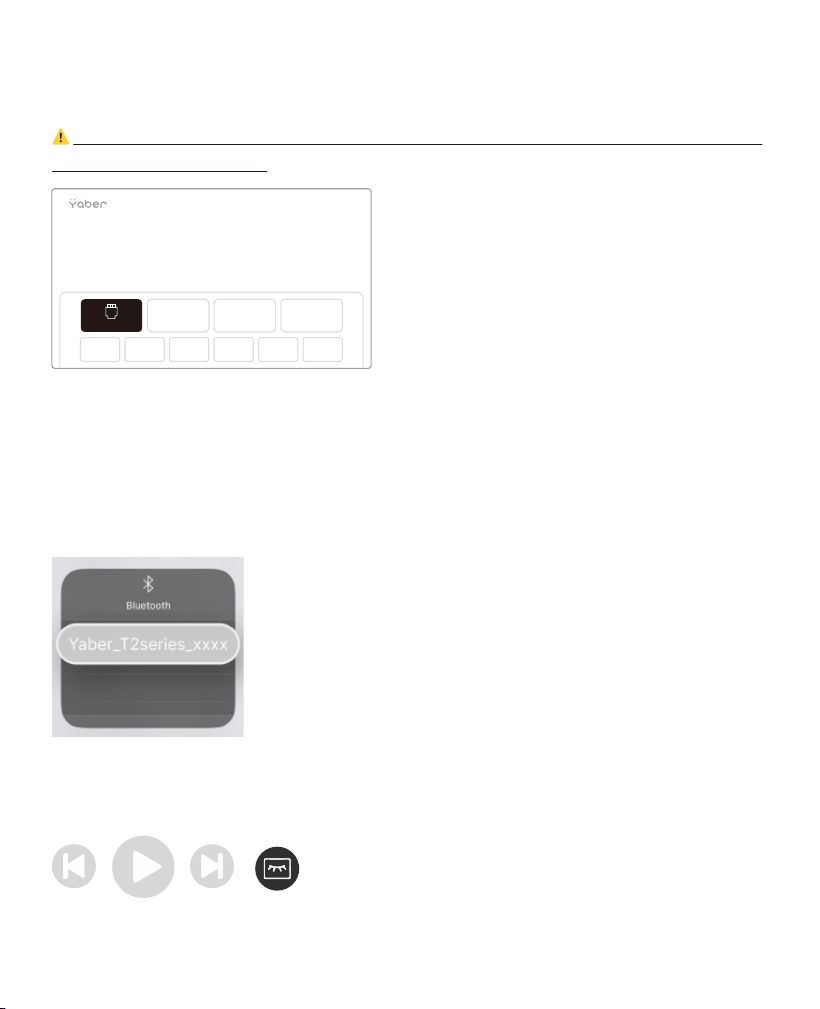
2
In the Yaber app, tap [Connect Device] and select the device named
[Yaber_T2_xxxx] to connect.
3
Once connected, select the screen mirroring option in the Yaber app to share
your phone screen with the projector.
4
To end the screen share, go to your phone's control center, select the device,
and stop sharing.
⚠
Attention: If you need to share the screen from streaming apps like Netflix,
Disney, or Prime Video, enter the Dongle system to share.
💡
Tips: If you prefer not to use the Yaber APP, please follow these steps: (Only
the step 2 is different)
1
Ensure your phone and the projector are connected to the same Wi-Fi
network.
2
In the screen mirroring settings on your smartphone, select the device named
[Yaber_T2_xxxx] to connect.
3
To end the screen share, go to your phone's control center, select the device,
and stop sharing.
10.4 Phone Control
⚠
Attention: Yaber App cannot control TV Dongle.
⚠
Attention: The phone and projector need to be connected in the same Wi-Fi
environment.
The [remote control] function of Yaber App can help you control the projector
without a physical remote control.
15
10.5 NFC Settings
Tip: If you need to use NFC for screen mirroring, download the [Yaber] app from
the Apple App Store or Google Play Store to synchronize your screen.
1
When using NFC, ensure your phone and the projector are connected to the
same Wi-Fi network.
2
Use an NFC-enabled phone and lightly tap the NFC area on top of the device
to use this feature.
⚠
Attention: Ensure NFC is turned on in your phone's settings.
11.1 Dongle Overview
11. T2 Dongle (Special for T2 Plus or Purchase separately Online)
If you want to use and browse streaming content such as Netflix, YouTube, Prime
Video, please contact the support team at [email protected] to purchase the
corresponding Dongle.
TV Dongle Adapter(Power in + Video Source)
HDMI Output
Power in
HDMI Output
HDMI Input
16
Remote Contol
⚠
Attention: When using Google TV for the first time, follow the screen prompts
for remote control pairing and other settings.
To pair, hold down the pairing button and .
Dongle Installation
⚠
Notice: When using Dongle on the T2/T2 Plus, it must be connected via the
Yaber Adapter. The Yaber adapter combines power and video source function.
Step1: Connect the dongle with the adapter
Step2: Connect the adapter with the HDMI port of the projector
Video Source
Arrow Key
Confirm
Home
Menu
Focus +
Focus -
Disney+
Prime Video
Power
Voice Search
Auto Focus
Back
Volume UP
Mute
Volume Down
Netflix
YouTube
Settings
1
2
17
How to Use TV Dongle
After connect TV Dongle to the HDMI Port on T2, Click [HDMI] on the Homepage to
Entry TV
⚠
Notice: When you turn on the device, it will take about 30s to wait before the
Dongle screen appears.
12. Bluetooth Settings
You can connect your phone to the projector via Bluetooth and enter Bluetooth
speaker mode anytime after confirmation. Please pair the device named
[Yaber_T2series_xxxx].
In Bluetooth Speaker mode, you can also turn off the screen and use the T2 as
an outdoor stereo.
18
HDMI
About
System Information
Upgrade
Factory Reset
13. System Upgrade
💡
Tips: You can check the system status of your device in
[Settings]-[About]-[Upgrade]
If you need to upgrade the software, please go to [Settings]-[About]-[System
information] and select the corresponding [MAC address] and send it to the
support team at [email protected].
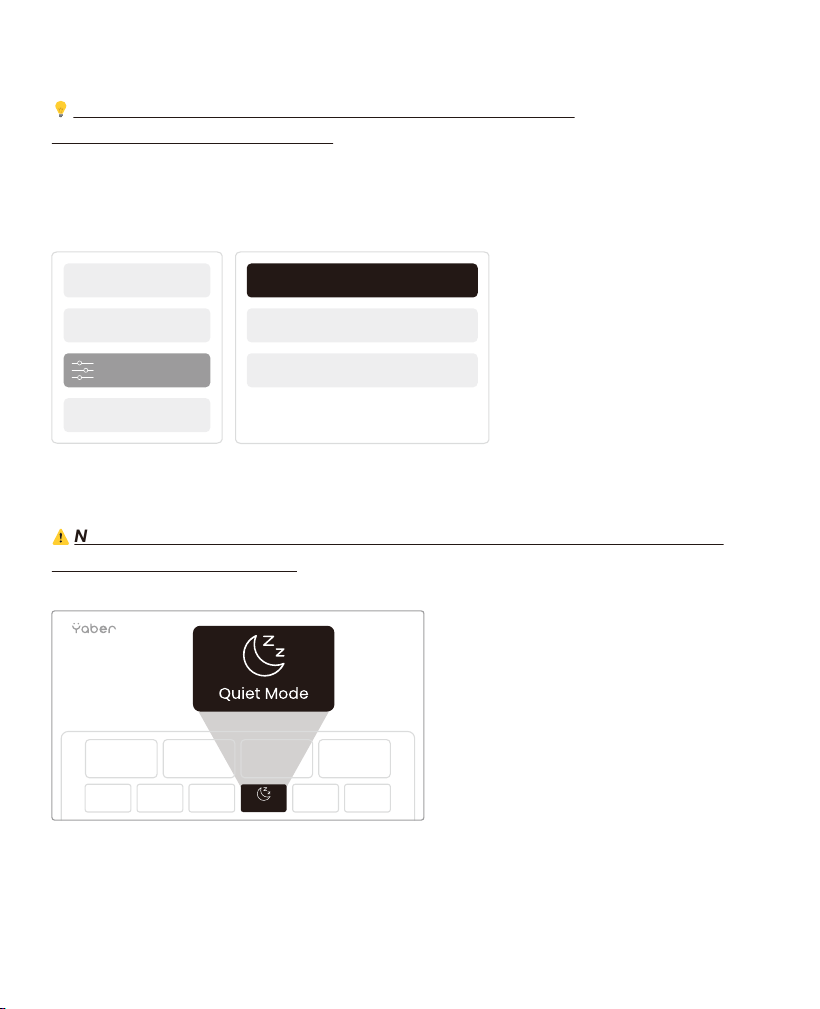
14. Quiet Mode
⚠
Notice: After turning on Quiet Mode, the noise of the machine will slowly
decrease within 5 minutes.
You can turn on Quiet Mode from the main page, which will provide you with a
quieter and more subdued picture by reducing brightness and fan speed.
Quiet Mode
19
