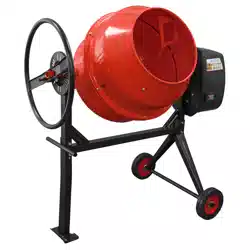
CEMENT MIXER WITH STAND
MODEL NO’S: CMX135 550W 135L/
CMX160 550W 160L
Thank you for purchasing a Sealey product. Manufactured to a high standard, this product will, if used according to these instructions,
and properly maintained, give you years of trouble free performance.
IMPORTANT: PLEASE READ THESE INSTRUCTIONS CAREFULLY. NOTE THE SAFE OPERATIONAL REQUIREMENTS, WARNINGS & CAUTIONS. USE
THE PRODUCT CORRECTLY AND WITH CARE FOR THE PURPOSE FOR WHICH IT IS INTENDED. FAILURE TO DO SO MAY CAUSE DAMAGE AND/OR
PERSONAL INJURY AND WILL INVALIDATE THE WARRANTY. KEEP THESE INSTRUCTIONS SAFE FOR FUTURE USE.
1. SAFETY
1.1. ELECTRICAL SAFETY
WARNING! It is the user’s responsibility to check the following:
Check all electrical equipment and appliances to ensure that they are safe before using.
Inspect power supply leads, plugs and all electrical connections for wear and damage.
Ensure that the insulation on all cables and on the appliance is safe before connecting it to the power supply.
8 DO NOT use worn or damaged cables, plugs or connectors.
9 Ensurethatanyfaultyitemisrepairedorisreplacedimmediatelybyaqualiedelectrician.
9 Ifthecableorplugisdamagedduringuse,switchotheelectricitysupplyandremovefromuse.
Ensurethatrepairsarecarriedoutbyaqualiedelectrician.
9 SealeyrecommendthatanRCD(ResidualCurrentDevice)isusedwithallelectricalproducts.
Important:Ensurethatthevoltageratingontheappliancesuitsthepowersupplytobeusedandthattheplugisttedwiththe
correct fuse.
8 DO NOT pull or carry the appliance by the power cable.
8 DO NOT pull the plug from the socket by the cable.
1.1.1. AvoidElectricShock:
9 Checkthattheelectriccircuitisadequatelyprotectedandthatitcorrespondswiththepower,voltageandfrequencyofthemotor.
8 DO NOT plug or unplug the motor while standing in or around damp or wet ground. DO NOT use the mixer in wet or damp areas or
expose it to rain.
9 Preventbodycontactwithgroundedsurfaces:pipes,radiators,ranges,andrefrigeratorenclosures.
9 Afterinstallation,thedegreeofprotectionoftheBSIapprovedplugandsocketcombinationshallbeIP44Datleast.
9 Extensioncordsmustbenolongerthan50metersinlength.Thewiresectionmustbe1.5mm²on230Vtoallowsucientcurrentow
tothemotor.Improperuseofextensioncordsmaycauseinecientoperationofthemixerwhichcanresultinoverheatingandmotor
damage.
1.2. GENERAL SAFETY
9 Trained users only to use this product.
1.2.1. UNDERSTAND THE PRODUCT:
9 Readandunderstandtheowner’smanualandlabelsaxedtothemixer.
9 Learnitsapplicationandlimitationsaswellasthespecicpotentialhazardspeculiartoit.
9 Become familiar with the controls before operating this mixer.
1.2.2. STAY ALERT:
8 DO NOToperatethemixerwhileundertheinuenceofdrugs,alcohol,oranymedicationthatcouldaectyourabilitytouseit
properly.
CMX135 CMX160 Issue:1 12/05/25
Original Language Version
© Jack Sealey Limited
Wear
protective
gloves
Useonlevel
ground
Keep area clear
for operation
and tipping
DO NOT plug
into mains with
coveroff
Keep guards in
place
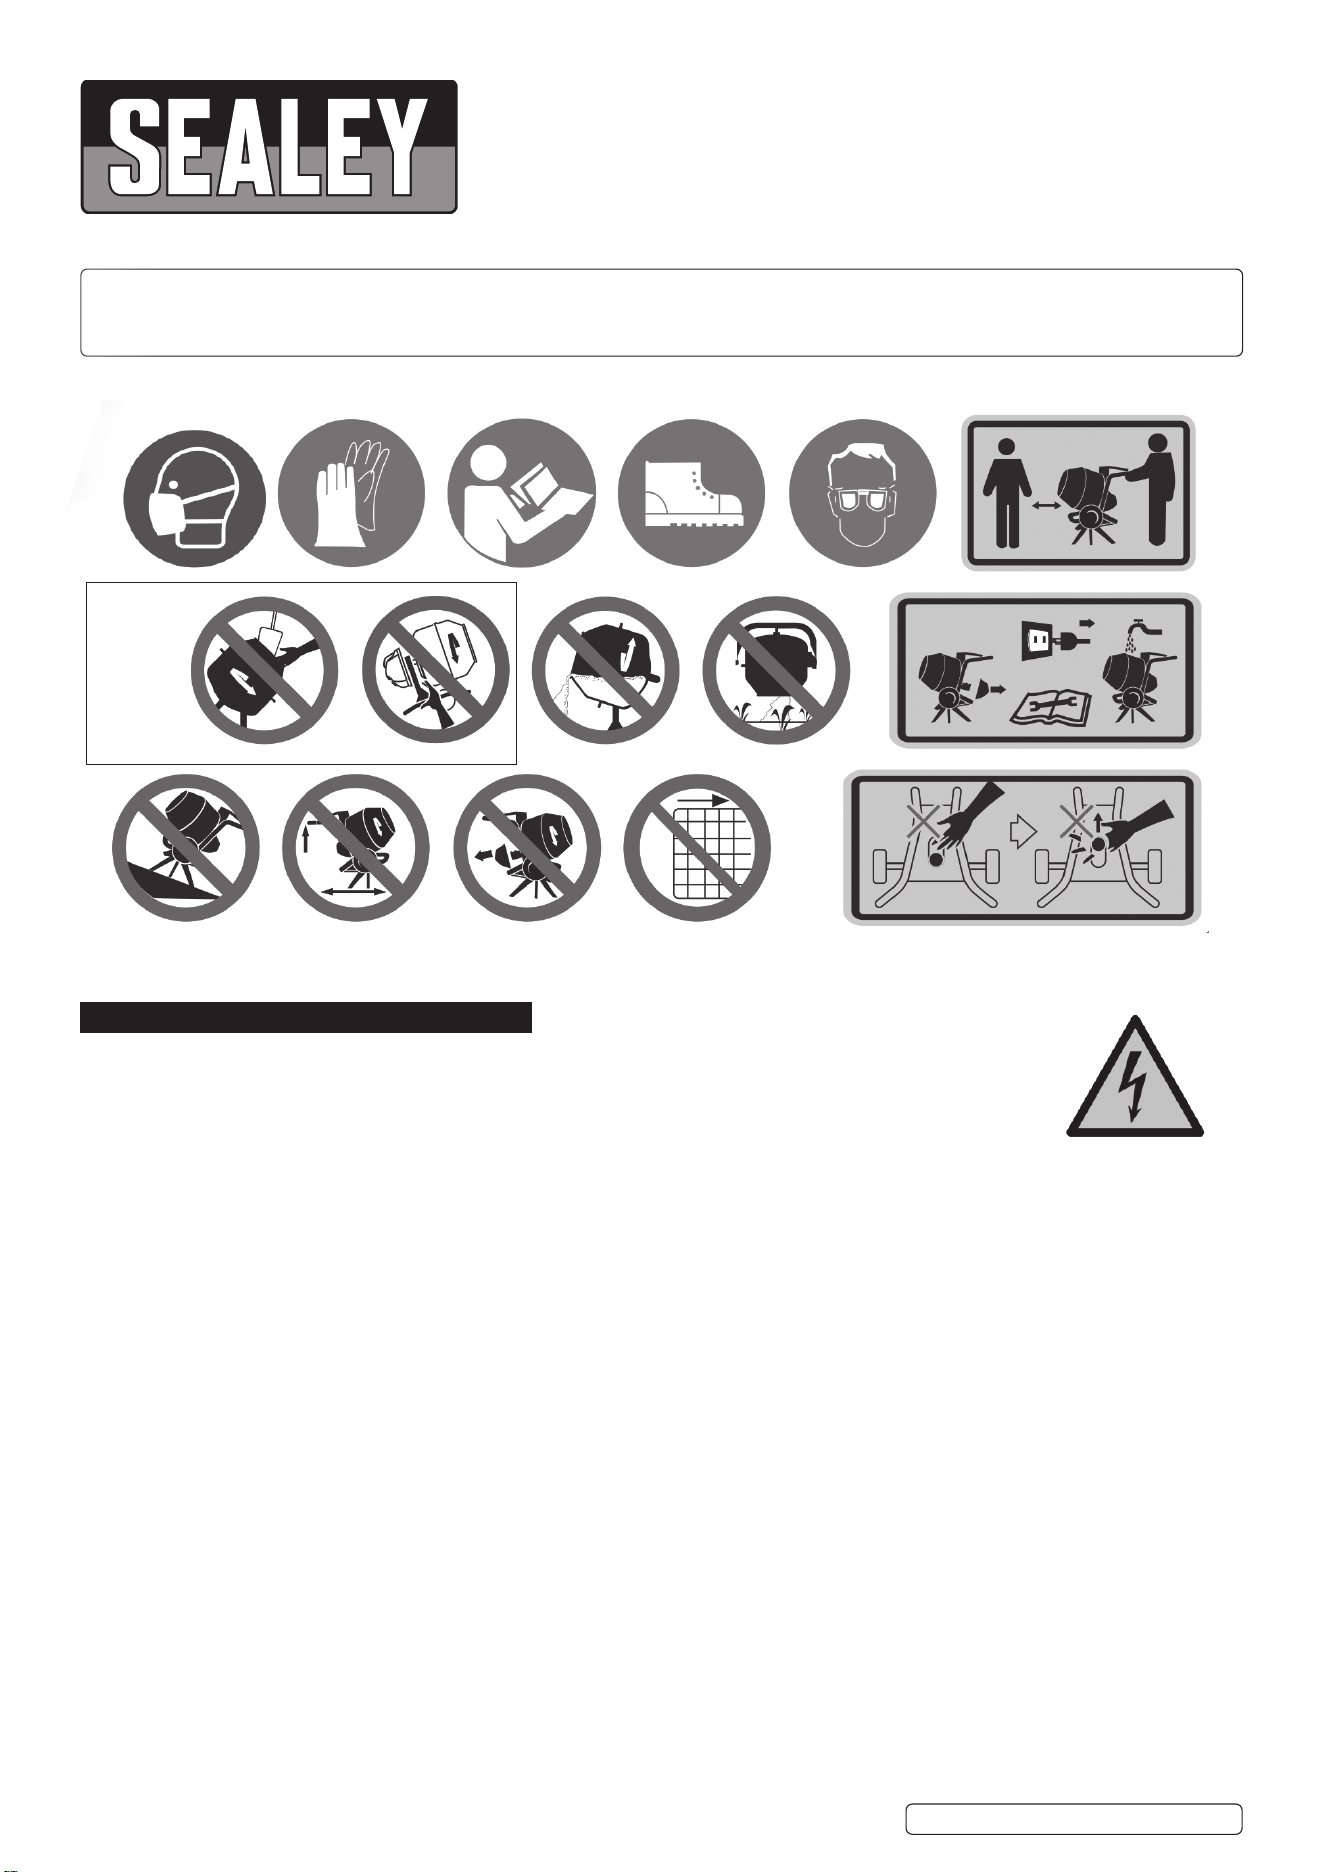
DO NOT pass hand through clearance
between frame and support leg or between
drum and support leg
Refer to
instruction
manual
Wear
safety
footwear
Wear safety
glasses
Keep people
away
Protectenvironment
Removefrommains:duringcleaning&maintenance
Keep hands
and tools
away
frommoving
parts
Wear a mask according
to the materials being
mixed
WARNING!
Electricity

8 DO NOT use this mixer when you are tired or distracted from the job at hand. Watch what you are doing at all times. Use common
sense.
1.2.3. AVOID DANGEROUS SITUATIONS:
9 Make sure there is adequate surrounding workspace.
9 Keepyourworkareacleanandwelllit.Clutteredareasinviteinjuries.Keepareaaroundthemixerclearofobstructions,grease,oil,
trashandotherdebriswhichcouldcausepersonstofallontomovingparts.
9 Onlyuseoroperatethemixeronsolid,at,levelgroundthatiscapabletosupporttheweightofthemixeranditsloadtopreventthe
mixerfromtippingover.
8 DO NOTattempttomovethemixerwhenitisloadedand/orinoperation.
9 Thismixerisintendedfortheproductionofconcrete,mortarandplaster.Itisnotsuitableforthemixingofammableorexplosive
substances.
8 DO NOTuseitinareaswherefumesfrompaint,solventsorammableliquidsposeapotentialhazard.
1.2.4. INSPECT YOUR MIXER:
8 Check your mixer before turning it on. Keep guards in place and in working order. DO NOTplugintomainssupplywithmotorcover
open.
9 Checkallbolts,nuts,andscrewsfortightnessbeforeeachuse,especiallythosesecuringguardsanddrivemechanisms.Vibration
during mixing may cause these to loosen.
9 Formahabitofcheckingtoseethatalltools,shovels,handtrowelsandothertools/equipmentsareremovedfrommixerareabefore
turning it on.
9 Replace damaged, missing or failed parts before using it.
9 Warning labels carry important information. Replace any missing or damaged warning labels.
1.2.5. DRESS PROPERLY:
8 DO NOTwearlooseclothing,gloves,necktiesorjewellery(rings,wristwatches).Theycanbecaughtinmovingparts.
9 Protectiveelectricallynon-conductiveglovesandnon-skidfootweararerecommendedwhenworking.Wearprotectivehaircovering
tocontainlonghair,preventingitfromgettingcaughtinmachinery.
9 Wearafaceordustmaskiftheoperationisdusty.Beawareofthesafetyadviceforworkingwithcement.Refertomanufacturer’s
adviceontheproduct,thatisbeingused.
9 Alwayswearsafetygogglesand/orfaceshields.Everydayeyeglasseshaveonlyimpactresistantlenses.Theyarenotsafetyglasses.
1.2.6. Keep people away:
9 Keepunauthorizedpersonsawayfromthemixer.
8 DO NOT allow children to handle or climb on or in the mixer.
1.2.7. DO NOT OVERREACH:
9 Keep proper footing and balance at all times when loading or unloading the mixer.
8 Neverstandonmixer.Seriousinjurycouldoccurifthemixeristippedorifthemovingpartsareunintentionallycontacted.
8 DO NOTstoreanythingaboveornearthemixerwhereanyonemightstandonthemixertoreachthem.
1.2.8. AVOID INJURY FROM UNEXPECTED ACCIDENTS:
9 Keephandsoutofthewayofallmovingparts.DO NOTplaceanypartofyourbodyoranytool,likeshovelinthedrumduring
operation. When operating, DO NOT pass hands through the clearance between frame and support leg or the one between the drum
and support leg.
1.2.9. DO NOT FORCE TOOL:
9 It will do a better and safer job at its designed rate. Always work within the rated capacity.
8 DO NOT start the motor if the drum is fully loaded. DO NOT turnmixerowhilefullofconcrete.
8 DO NOT use the mixer for a purpose for which it was not intended.
8 Themixerisnottobetowedbyanyvehicle.
1.2.10. NEVER LEAVE MIXER RUNNING UNATTENDED:
8 DO NOTleavemixeruntilithascometoacompletestop.
1.2.11. DISCONNECT POWER:
8 Neveropenthemotorcoverbeforeunpluggingthemixer.
9 Disconnectfrompowersupplywhennotinuse,beforemoving,makingadjustments,changingparts,cleaning,orworkingon
the mixer.
9 Consulttechnicalmanualbeforeservicing.
1.2.12. MAINTAIN YOUR MIXER WITH CARE:
9 Clean the mixer immediately after use. Keep the mixer clean for best and safest performance.
9 When maintaining this mixer, only the manufacturer’s original replacement parts may be used.
1.2.13. PROTECT THE ENVIRONMENT:
9 Takeleftovermaterialstoanauthorizedcollectionpointorfollowthestipulationsinthecountrywherethemixerisused.
8 DO NOT discharge into drains, soil or water.
1.2.14. STORE IDLE EQUIPMENT:
9 When not in use, the mixer should be stored in a dry location to inhibit rust.
Keepthemixerawayfromchildrenandothersnotqualiedtouseit.
1.2.15. FIRE FIGHTING: Refer to MSDS.
8 DO NOT to reach into the drum interior to the rotating blades.
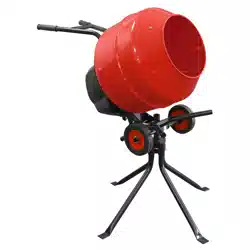
2. INTRODUCTION
Powerful 550W insulated motor for continuous mixing. 125/135L drum with 79/100L
mixingcapacity.Easilyattachorremovelegsforstorageortransportation.Large
Ø200mm wheels for easy portability.
3. FEATURES
See diagram on right.
Original Language Version
© Jack Sealey Limited
CMX135 CMX160 Issue:1 12/05/25

4. SPECIFICATION
Model No: ......................................................... CMX135/160
Drum Capacity: ..................................................... 135L/160L
IP Rating: .................................................................... IP44D/
Mixing Capacity: ..................................................... 100L/115L
Drum Speed: ...........................................................25/26rpm
Drum Opening: ...........................................................385mm
Motor Power:.................................................................550W
NoiseLevelEmpty: .......................................................93dB/
Weight: ...................................................................48kg/52kg
Plug Type: ......................................................................3-Pin
Power Supply: ...................................................... 230V50Hz
5. CONTENTS
Refer to Parts List for descriptions.
6. ASSEMBLY
NOTE: Two persons required to Assemble.
A: Insert the cross headed screws from the outside through
the holes in the drum.
Place a plastic washer inside between the drum and blade
andsecurethemixingbladefromtheinsideusingaat
washer, lock washer and nut.
B:(i)Rotatethechainendringintooneholeinthetriangle
support.
Then insert the pin rod into the two tubes in order from the
same side of the hole that connects chain to the opposite.
(ii)Slidethewheelsoverthestubaxles.Secureeachwheelwithaatwasherandhairpinretainer.
(iii)Lininguptheholesintheplasticbottomplatewiththeonesintheframe.SecuretheplateontheframewithtwoM6x20boltseach
withalockwasherandatwasher.
Original Language Version
© Jack Sealey Limited
PermissibleEnvironmentalConditions: ..............-40°to40°C
Short Circuit Rating for Incoming Power Supply: ............9.6A
Full-LoadCurrentRatingforIncomingPowerSupply: ....2.4A
Duty Cycle: ................................................................S6 30%
Electrical Class: .........................................................Class II
Fixings:LettersrefertospecicAssembly
Operations.
CMX135 CMX160 Issue:1 12/05/25
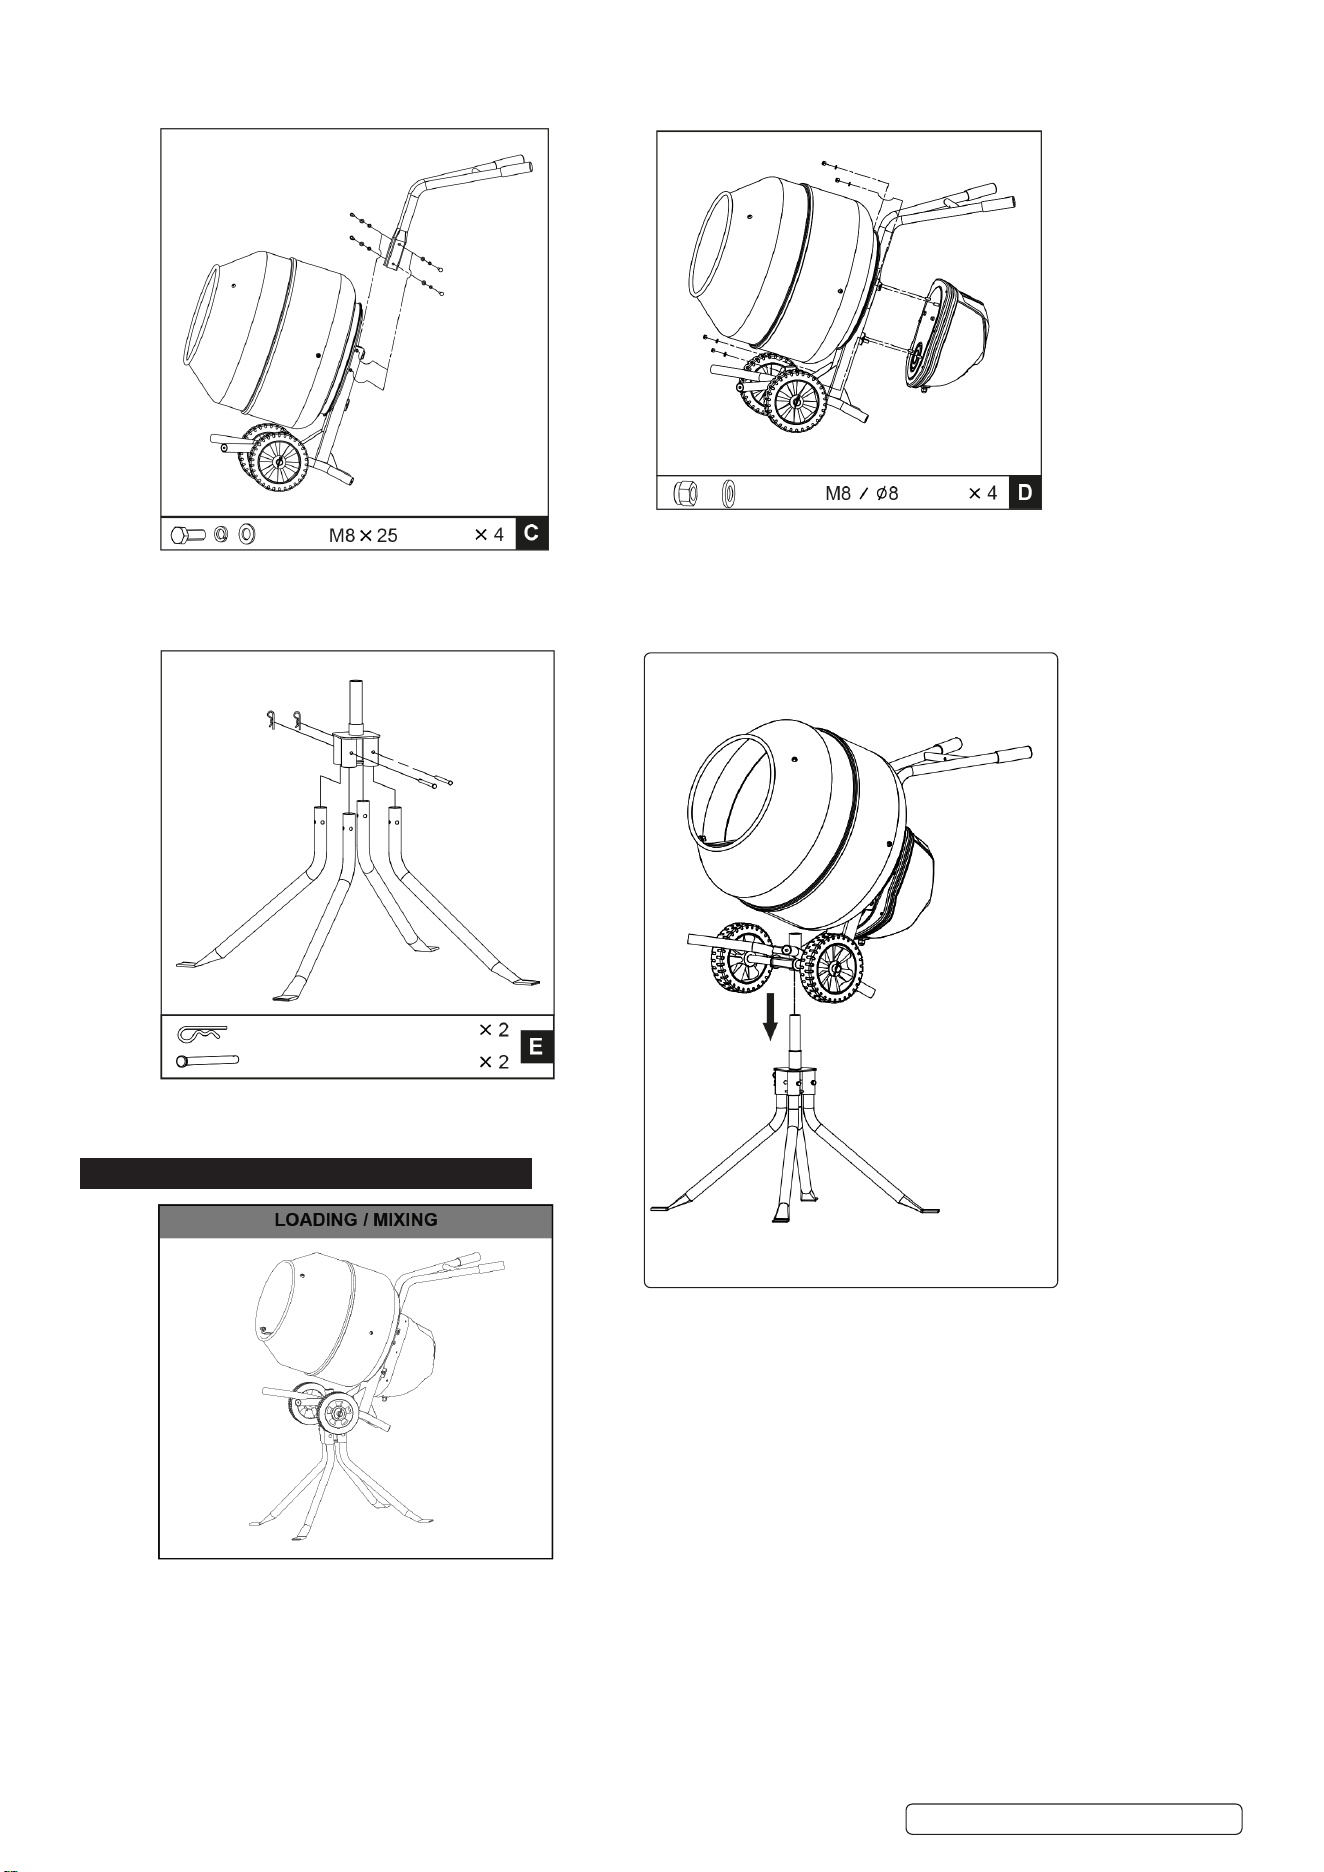
(iv)Positionthedrumontotheplasticbottomplateasshown.HolditinplaceandsecureitwithaM12x30boltwithlockwasherand
atwasher.
C: Lining up the holes in the handle bar with the ones
in the support frame. Secure them together with bolts,
lockwashersandatwashers.
E: Insert the support legs into the bracket and
secure them together with shaft and hairpin.
7. OPERATION
WARNING! DO NOToperatewiththemotorcoveropen.
7.1. Check that mixer is standing securely and that there is enough area around it to work safely.
7.2. Connect to mains supply.
7.3. Switchmixeron(switchislocatedonsideofmotorcover).
7.4. LOADING
Completelyunwindtheextensioncord.Connectittotheconcretemixerrstbeforepluggingintothemainspowersupply.
Always start the mixer before loading the drum. Loading the drum with drum rotating.
8 DO NOTthrowmaterialintothemixertoavoidstickingrmlytothebackofthedrum.Trickleitsteadilyovertherim.
D:Liningupthekeyways,slidethetransmissioncaseoverthepinion
shaft.Secureanutwithatwasheroneachofthefourstubbolts.
Place support stand into the whole in the axle bracket as shown.
Original Language Version
© Jack Sealey Limited
CMX135 CMX160 Issue:1 12/05/25
NOTE:Abuilt-inthermalprotectorisarrangedinthemotortopreventitfromoverheating.Thethermalprotectorrestoresautomatically
when the motor cools down.
For best results, proceed as follows:
A:Addtherequiredamountofgravelintothedrum.
B: Add the required amount of cement into the drum.
C: Add the required amount of sand into the drum.
D: Add the required amount of water into the drum.
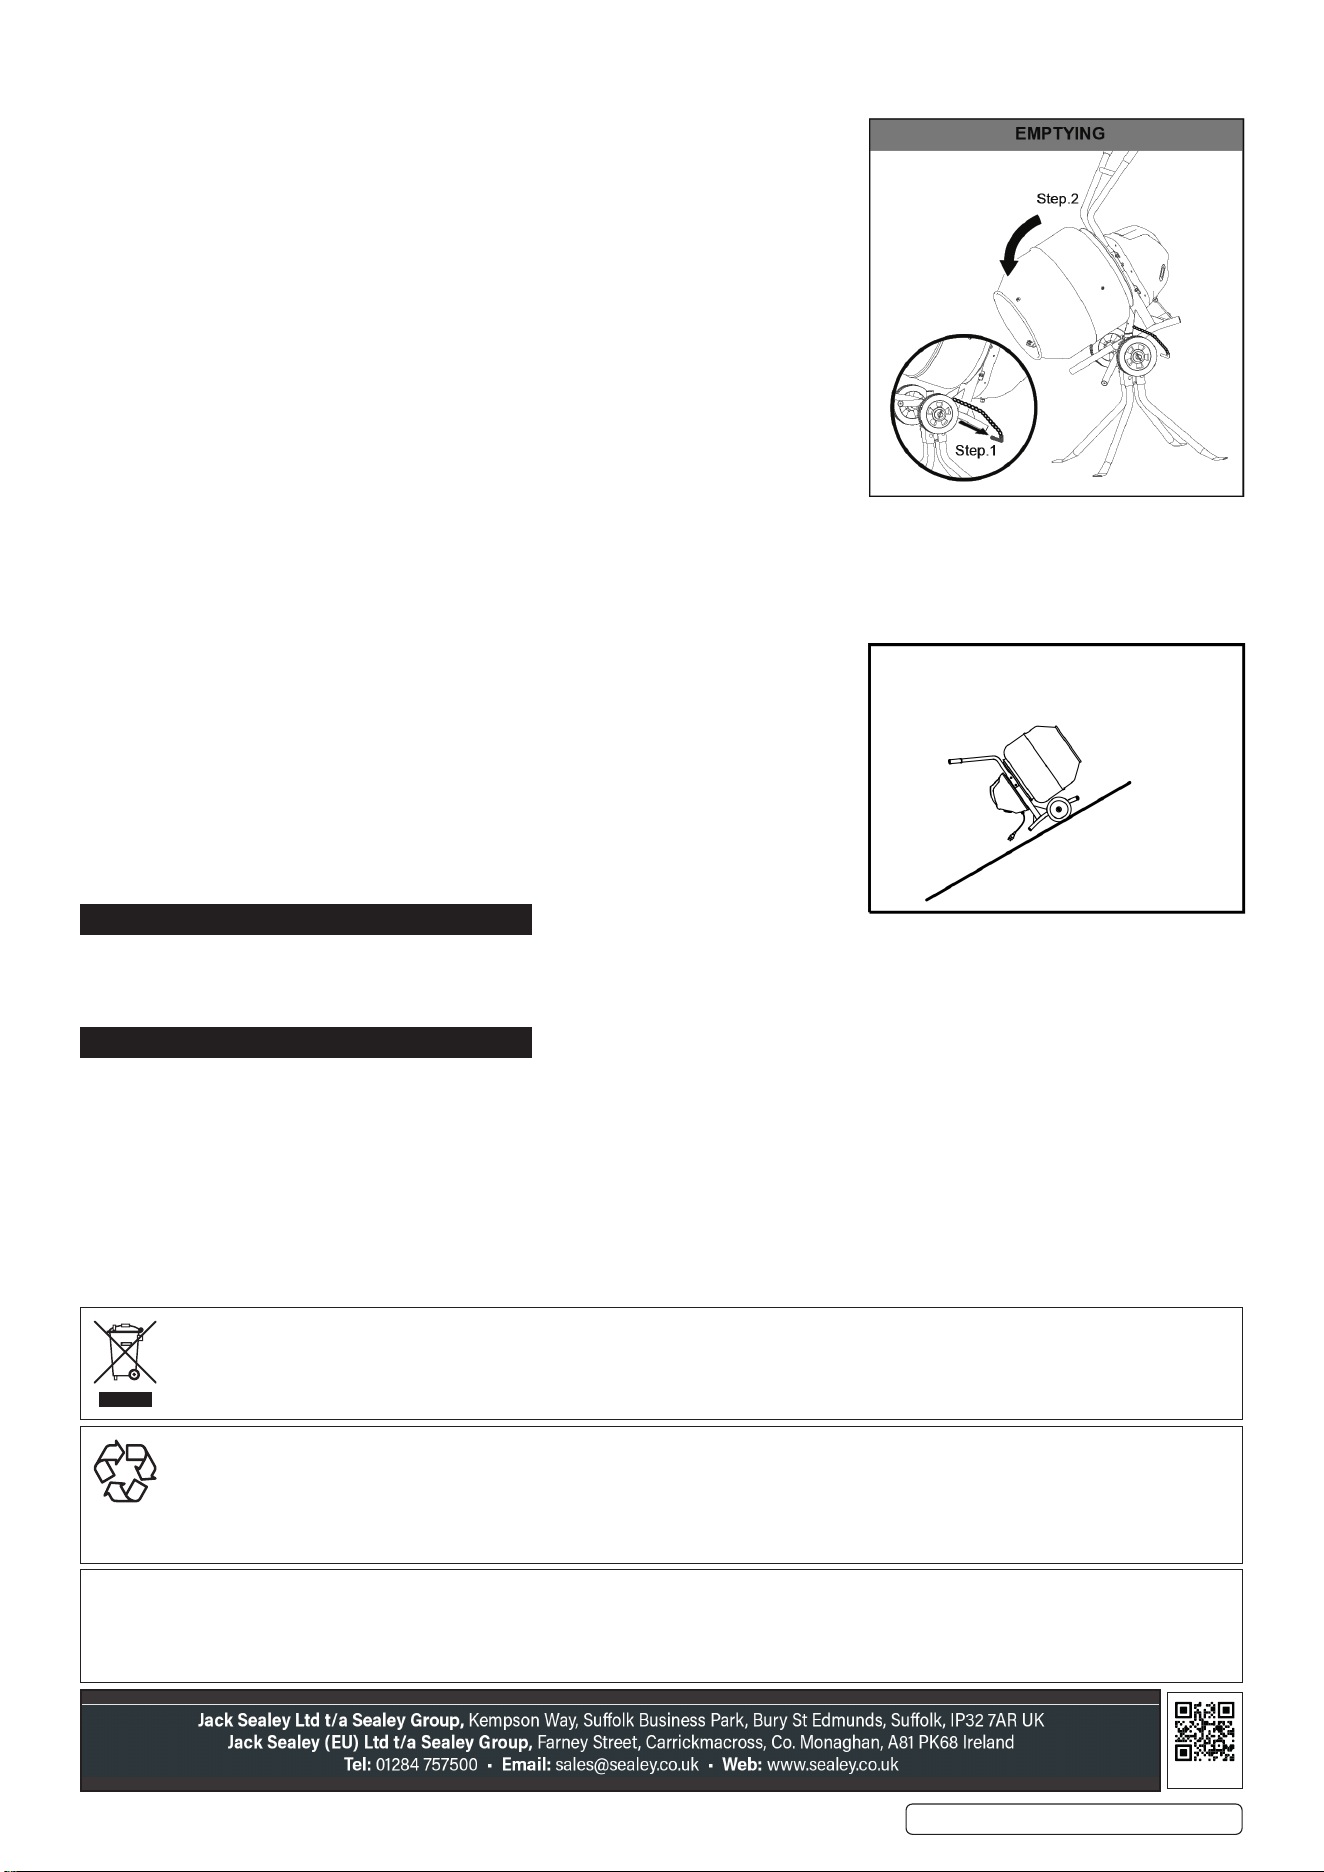
7.5. EMPTYING
DO NOTturnmixerowhilefullofload.Emptyingthedrumwithdrumrotating.
7.6. IN EVENT OF BREAKDOWN /EMERGENCY STOP:
Switchmixero(ifitissafetodoso)orifnotdisconnectfrommainssupply.
Investigatefault.
7.7. CLEANING
Thoroughly clean the mixer at the end of each day’s operation. Keep your mixer
clean. The slightest trace of material left in the drum will harden and attract more
each time you use it until the machine is useless. Dried cement should be scraped
out of the drum.
8 DO NOT throw bricks into mixer drum to clean it out.
8 DO NOT beatonthedrumwithashovel,ahammerorothertoolstobreakupaccumulationsofdriedcementmix,asdamagetothe
mixer may result.
8 DO NOTpourorspraywaterdirectlyoverthemotorcover,especiallytheopeningsinit.
7.8. Wipeoanyexternalmaterialonthemotor. DO NOTusepetrol,turpentine,lacquerorpaintthinner,drycleaninguidsoranysuch
solvents.
7.9. TRANSPORT
7.9.1. Securewhilsttransportingtopreventdamage.
7.9.2. Unload on wheels down a ramp DO NOTallowtofallfromavehicle.
8. MAINTENANCE
WARNING!Beforestartinganymaintenanceorrepairs,stopengineorswitchomotor,andisolatefromthemainssupply.
WARNING!Neverputhandsinsidethedrumwithdrumrotating.
Oncompletionofmaintenance,checkthatthemixerfunctionscorrectlyandthatallguardarecorrectlytted
9. END OF LIFE
9.1. Dismantlemixer(performreverseofassemblysection).Recycleaccordingtoregulationsinforce.
Original Language Version
© Jack Sealey Limited
REGISTER YOUR
PURCHASE HERE
Note:Itisourpolicytocontinuallyimproveproductsandassuchwereservetherighttoalterdata,specificationsandcomponentpartswithoutprior
notice.
Important: No Liability is accepted for incorrect use of this product. Warranty: Guarantee is 12 months from purchase date, proof of which is required
for any claim.
ENVIRONMENT PROTECTION
Recycle unwanted materials instead of disposing of them as waste. All tools, accessories and packaging should be sorted, taken to
arecyclingcentreanddisposedofinamannerwhichiscompatiblewiththeenvironment.Whentheproductbecomescompletely
unserviceableandrequiresdisposal,drainanyfluids(ifapplicable)intoapprovedcontainersanddisposeoftheproductandfluids
according to local regulations.
WEEE REGULATIONS
DisposeofthisproductattheendofitsworkinglifeincompliancewiththeEUDirectiveonWasteElectricalandElectronicEquipment
(WEEE).Whentheproductisnolongerrequired,itmustbedisposedofinanenvironmentallyprotectiveway.Contactyourlocalsolid
waste authority for recycling information.
CMX135 CMX160 Issue:1 12/05/25