Loading ...
Loading ...
Loading ...
19
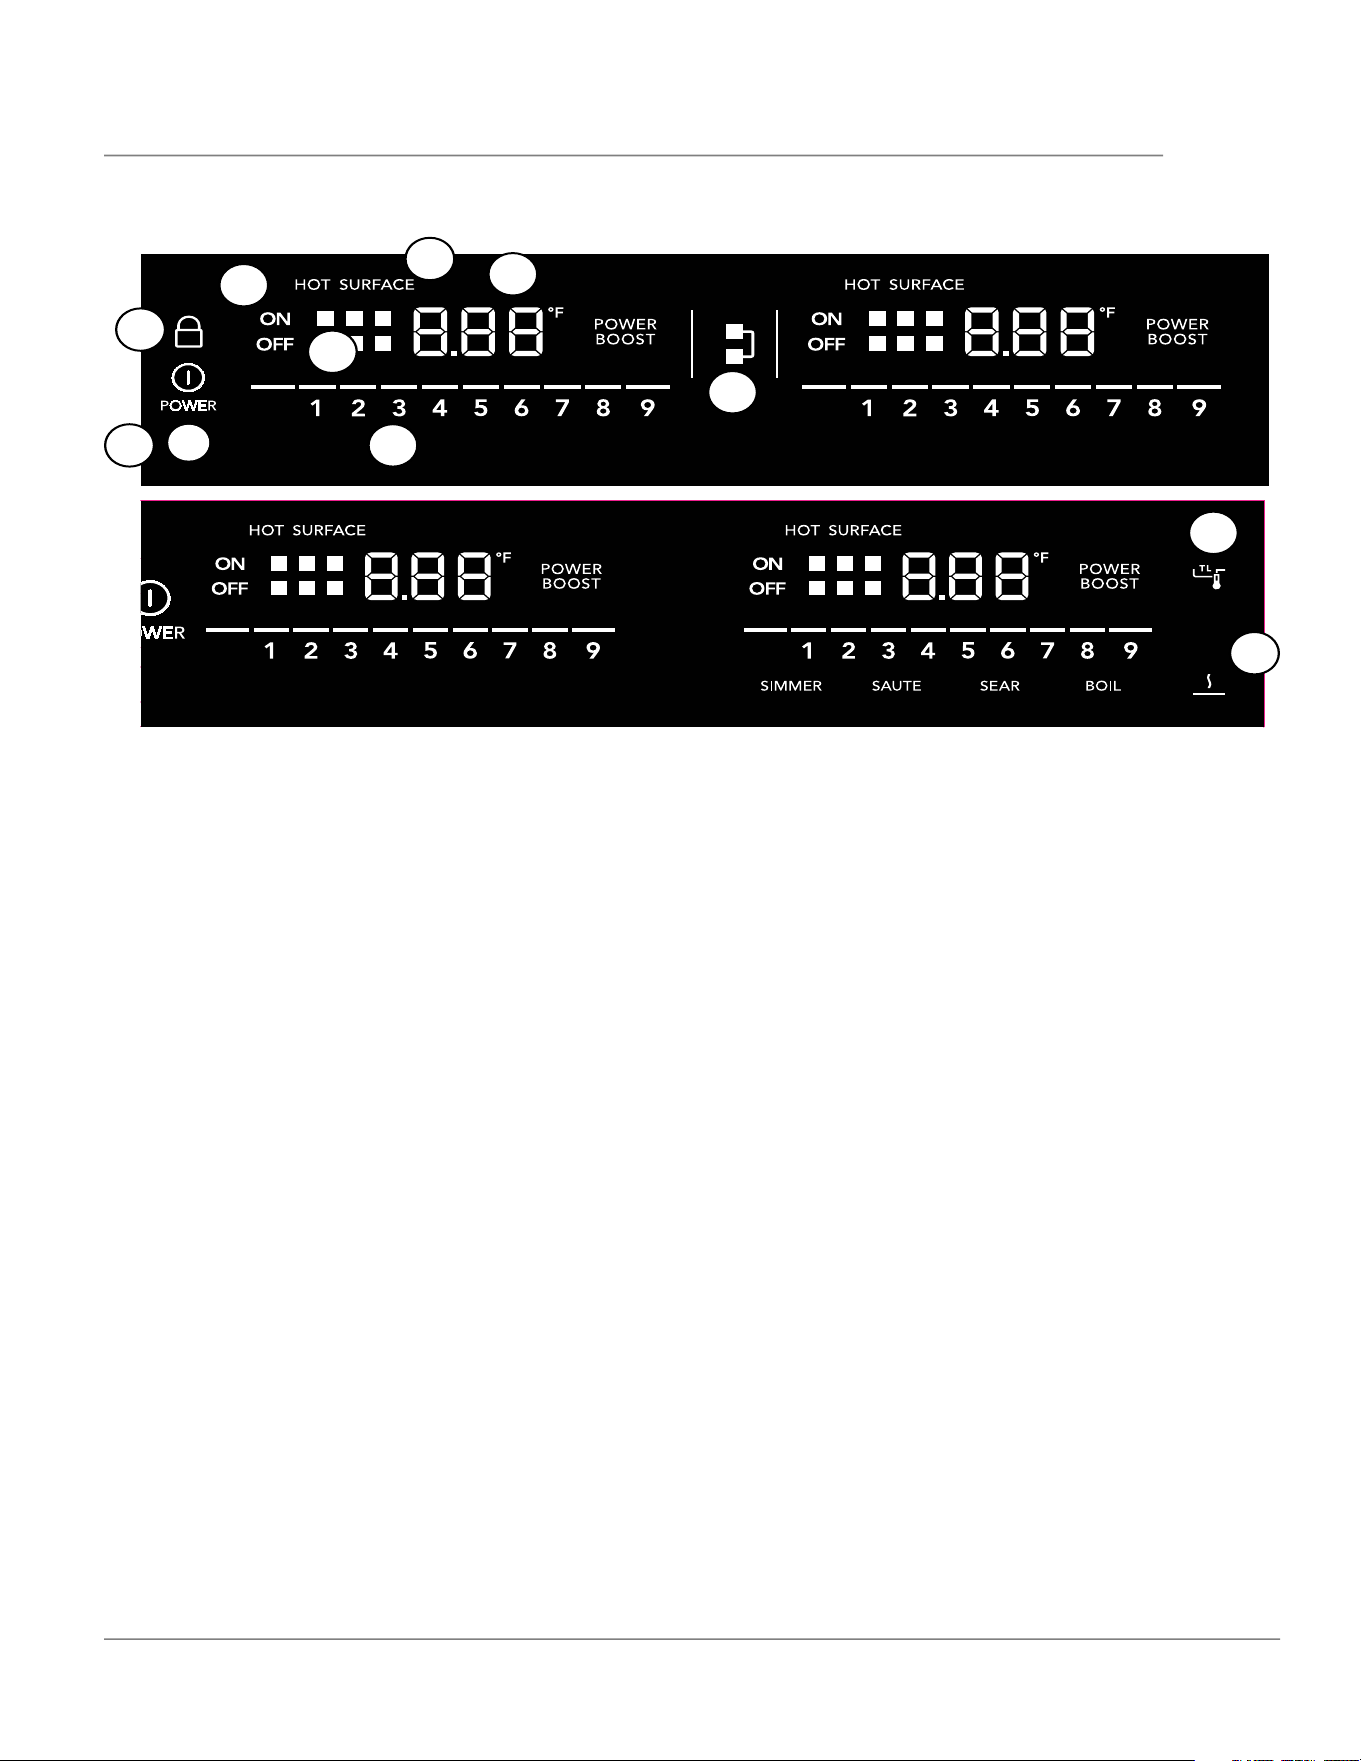
SETTING SURFACE CONTROLS
1. Power: Press to turn on or turn o the cooktop.
2. Lock: Lock the cooktop controls to prevent
accidental activation of cooking zones.
3. Cooking Zone Power Button: The rectangu-
lar controls (4 or 5 depending on the model)
indicate cook zones. The circle indicates which
cooking zone the control activates.
4. Zone Indicator: The box corresponding to the
cooking zone lights when the cooking zone is
on and cookware is present
5. Power Level Adjust/Indicator: Displays 1-9 to
show the selected power level of the cooking
zone.
6. Bridge: The two left cooking zones have the
Bridge feature. The Bridge indicator is available
on the front left cooking zone if both left cook-
ing zones detect cookware. The Bridge func-
tion makes the two left cooking zones work
together to heat a long piece of cookware, like
a griddle
7. Timer Indicator: Shows the time currently left
on the timer
8. Hot Surface Indicator: Displays when either of
the cooking zones on the same side is hot.
9. Temp Lock: The right front cooking zone has
the Temp Lock function. Temp Lock adjusts the
power to the cooking zone to maintain tem-
perature when cool food is added to the pan
10. Keep Warm: Sets all active cooking zones to
the lowest setting to keep food warm
Cooktop Controls
1
2
3
4
5
6
9
7
8
10
Loading ...
Loading ...
Loading ...