Loading ...
Loading ...
Loading ...
6
7
SINGLE TIME WITH DATE MODELS
SETTING THE TIME
1 Pull out the crown to position III.
(The watch stops.)
2 Turn the crown until you reach the
correct time.
3 Push the crown back into position I.
SETTING THE DATE
1 Pull out the crown to position II.
(The watch continues to run.)
2 Turn the crown until the correct date appears.
3 Push the crown back to position I.
4 If setting the date between 9:30 p.m. and 12:00 a.m., follow steps 1
through 3, but be sure to set the date to the following day.
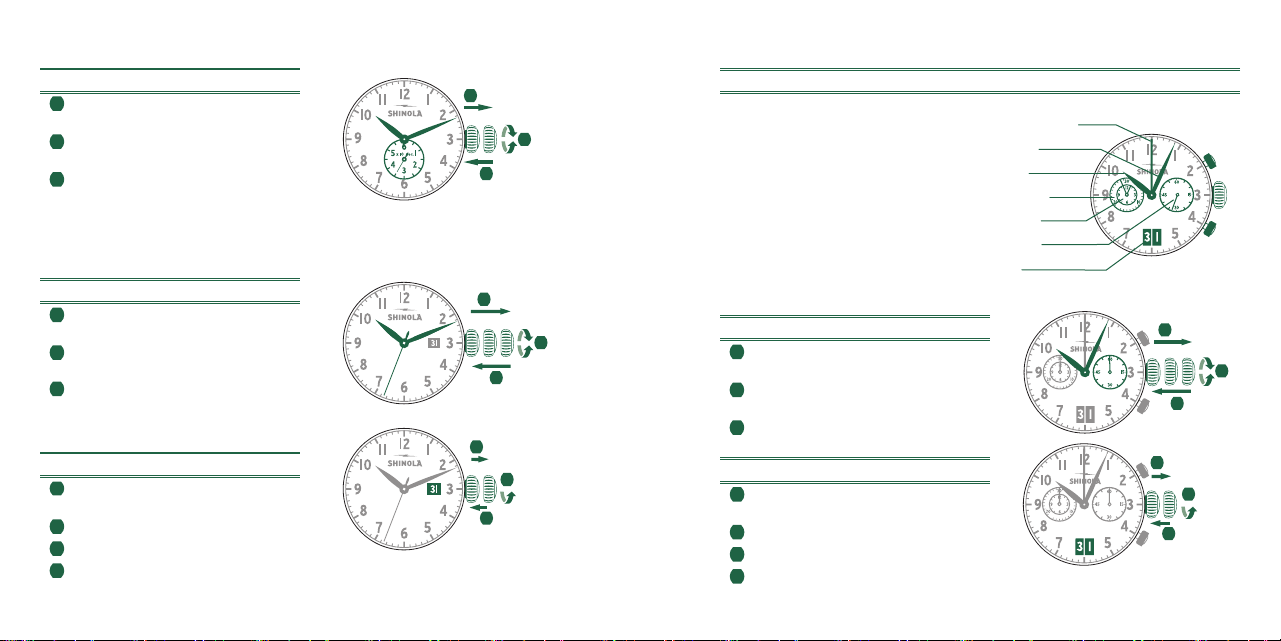
SINGLE TIME MODELS
SETTING THE TIME
1 Pull out the crown to position II.
(The watch stops.)
2 Turn the crown until you reach the
correct time.
3 Push the crown back to position I.
III
3
1
2
II IIII
3
1
2
III
1
2
3
SETTING THE TIME
1 Pull out the crown to position III.
(The watch stops.)
2 Turn the crown until you reach the
correct time.
3 Push the crown back to position I.
SETTING THE DATE
1 Pull out the crown to position II.
(The watch continues to run.)
2 Turn the crown until the correct date appears.
3 Push the crown back to position I.
4 If setting the date between 9:30 p.m. and 12:00 a.m., follow steps 1
through 3, but be sure to set the date to the following day.
CHRONOGRAPH MODEL 5020.B
DESCRIPTION OF THE DISPLAY AND CONTROL BUTTONS
Please note:
Before using the chronograph functions,
please ensure that:
- the crown is in position
I
(= normal position).
- the four chronograph hands are
precisely at zero position following
activation of push-button
B. If the
hands are not precisely at zero,
their positions must be adjusted.
(See the chapter
Adjusting the
Chronograph Hands to Zero
.)
A
B
I
Big date
Center stop-second
Minute hand
Hour hand
Minute counter
Hour counter
Second hand
II IIII
3
1
2
II
1
2
3
Loading ...
Loading ...
Loading ...