
Loading ...
Loading ...
Loading ...
Sarix® Multi Enhanced Installation Manual
C6730M | 03/30/23
25
Note: If the device cannot obtain an IP address from a DHCP server, it will use Zero Configuration
Networking (Zeroconf) to choose an IP address. When set using Zeroconf, the IP address is in the
169.254.0.0/16 subnet.
The IP address settings can be changed using one of the following methods:
l
Device's web browser interface: http://<camera IP address>/.
l
Network Video Management software application (for example, the Pelco VideoXpert software).
l
ARP/Ping method. For more information, see Setting the IP Address Using the ARP/Ping Method.
Accessing the Live VideoStream
Live video stream can be viewed using one of the following methods:
l
Web browser interface: http://< camera IP address>/.
l
Network Video Management software application (for example, the Pelco VideoXpert software).
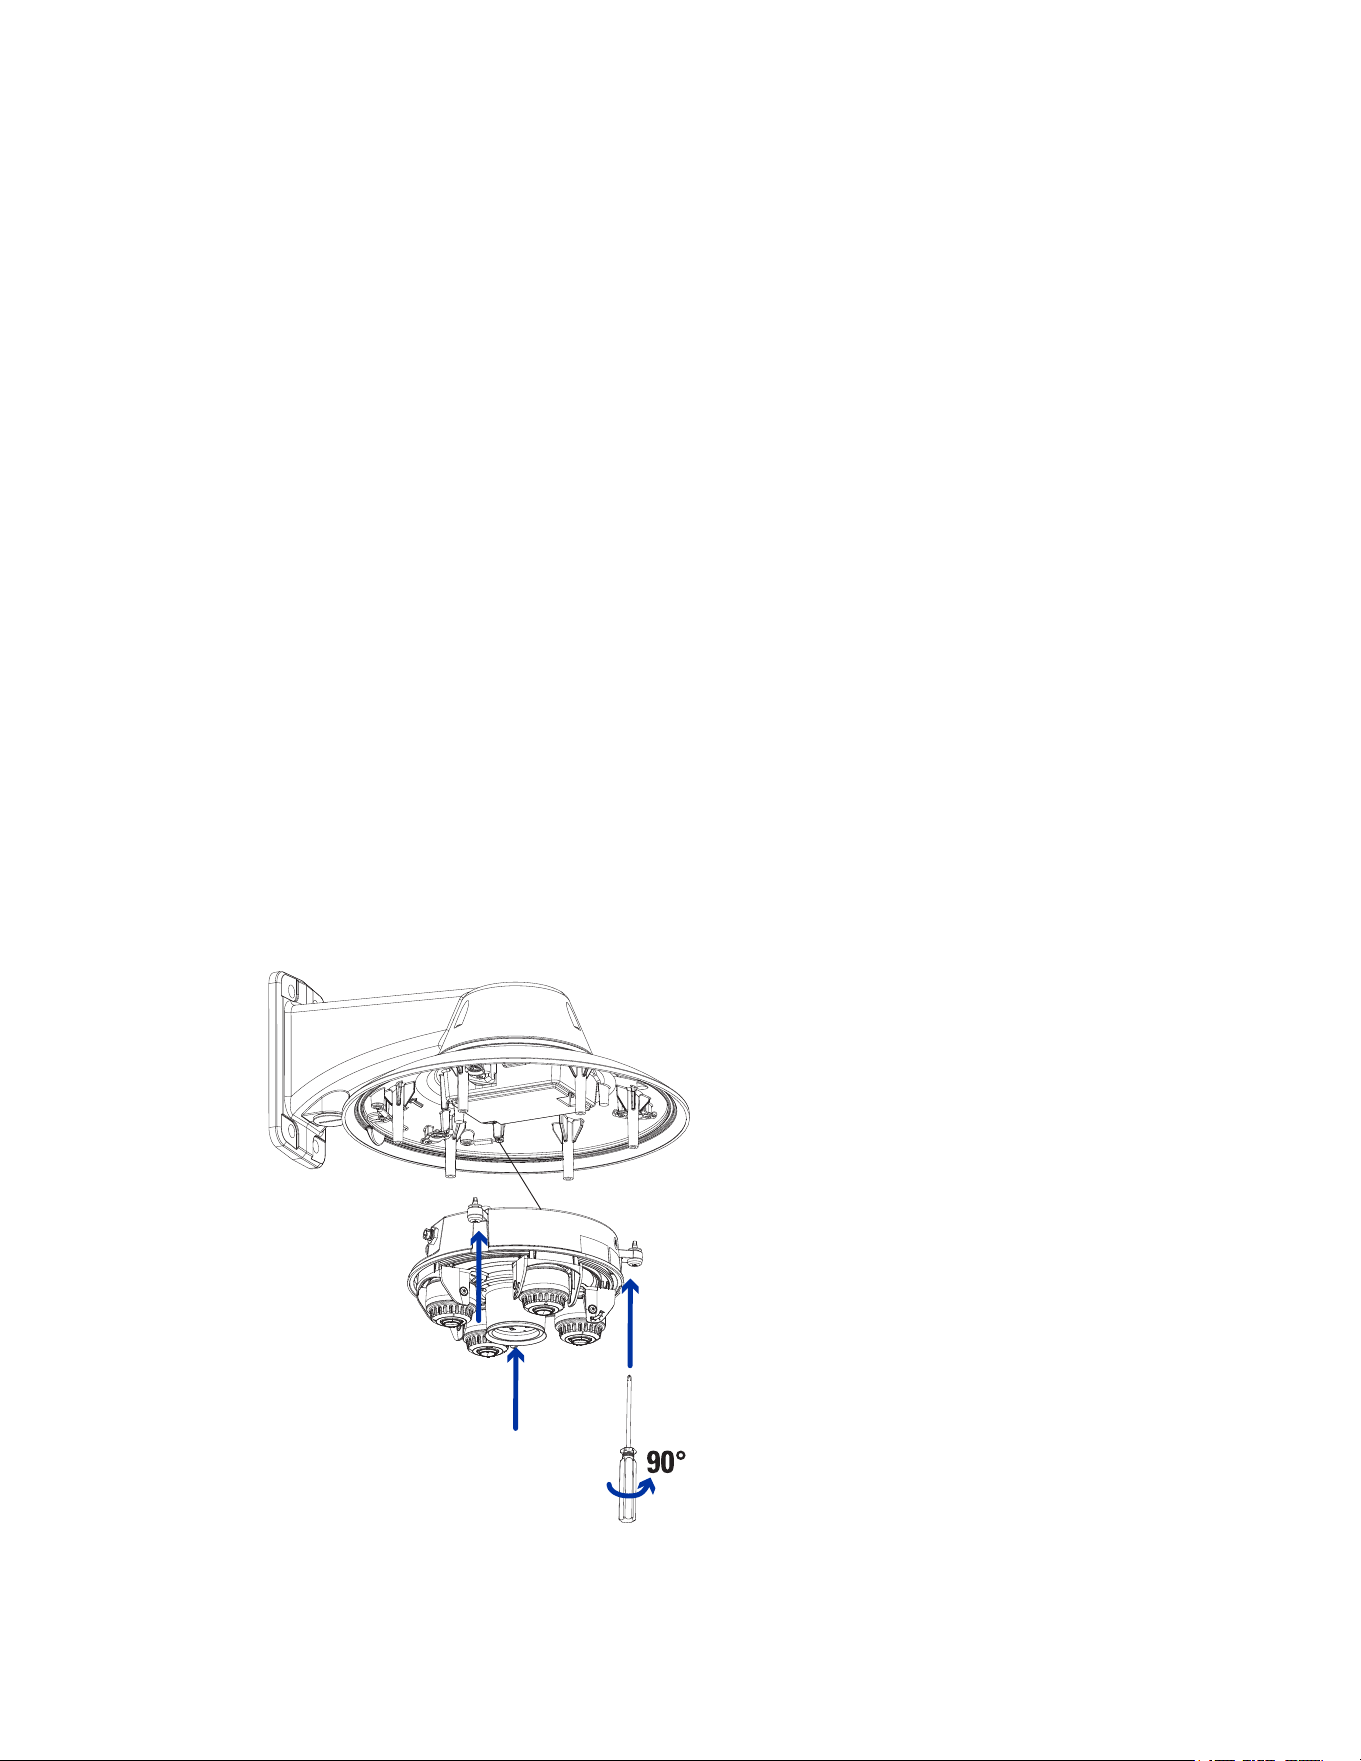
Installing the Camera Base to a Pendant Mount
After the cable connections have been made, mount the Sarix Multi Enhanced camera base into the
pendant mount adapter.
1. Inspect the PoE switch setting in the camera base to verify it is set correctly for your installation.
The "B" position is the default position that is compatible with the 802.3bt standard. The "A"
position should be used for legacy HPoE injectors PD-9501G, PD-9501GR, and PD-9601G. For
more information, see the Overview section.
2. (Recommended) Attach a safety lanyard from the pendant mount adapter to the lanyard anchor
on the camera base to prevent the camera from falling. See Connecting Cables.
3. Push the camera base into the pendant adapter so that the quick install fasteners in the camera
base align with the screw holes in the pendant adapter.
Loading ...
Loading ...
Loading ...