Loading ...
Loading ...
Loading ...
PREPARING TO CUT
RAISING AND LOWERING THE
BLADE
For most applications, it is recommended that you raise the blade
1/8 inch (3.2mm) to 1/4 inch (6.4mm) above the top surface of the
workpiece.
Raise or lower the blade with the hand wheel
A
located
on the front of the saw. See Figure 34.
1. Before raising or lowering the blade, be sure to loosen the
lock knob
B
by turning it counterclockwise.
2. To raise the saw blade, turn the hand wheel clockwise.
To lower the saw blade, turn the hand wheel counter-
clockwise.
3. Tighten lock knob to KEEP blade at the desired height.
ONLY a small amount of force is required to lock the blade
raising mechanism securely. Any added force merely puts
unnecessary strain on the locking device.
4. When done operating the saw, and when performing
maintenance, adjustments or repairs, lower blade below
surface of table (If applicable).
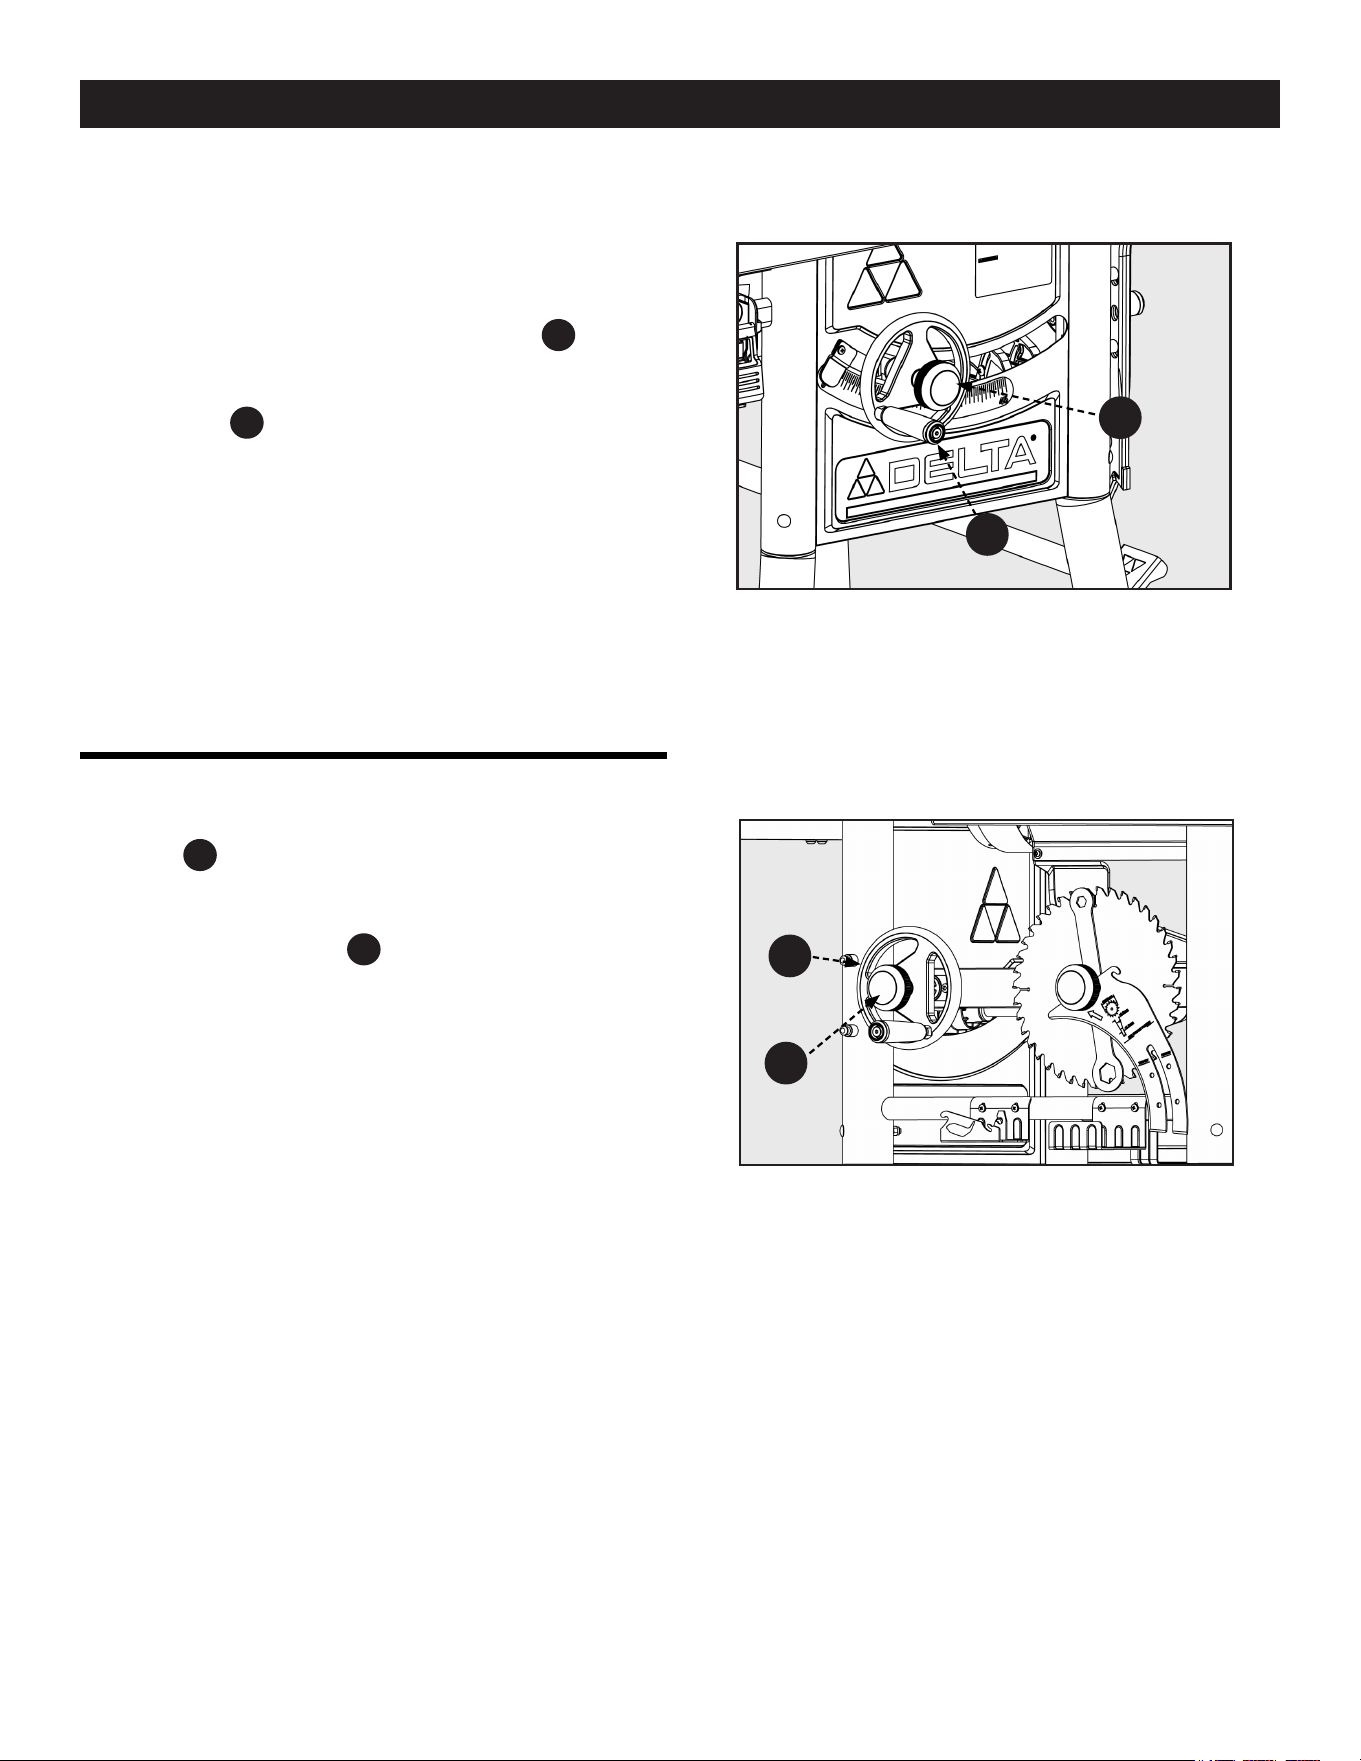
TILTING THE BLADE
The blade can be tilted up to 45° to the left using the Bevel
Handwheel
A
located on the right side of the saw. See Figure 35.
The angle of tilt is measured by the bevel gauge on the front of the
saw. To tilt the saw blade:
1. Loosen the lock knob
B
counterclockwise and turn the
hand wheel clockwise. A pointer on the front of the saw
indicates the angle of tilt in 1/2 degree increments.
2. To lock the saw blade at your desired angle, tighten the
lock knob by rotating it clockwise. ONLY a small amount
of force is required to lock the blade raising mechanism
securely. Any added force merely puts unnecessary strain
on the locking device.
Figure 34
Figure 35
A
B
A
B
30
Loading ...
Loading ...
Loading ...