Loading ...
Loading ...
Loading ...

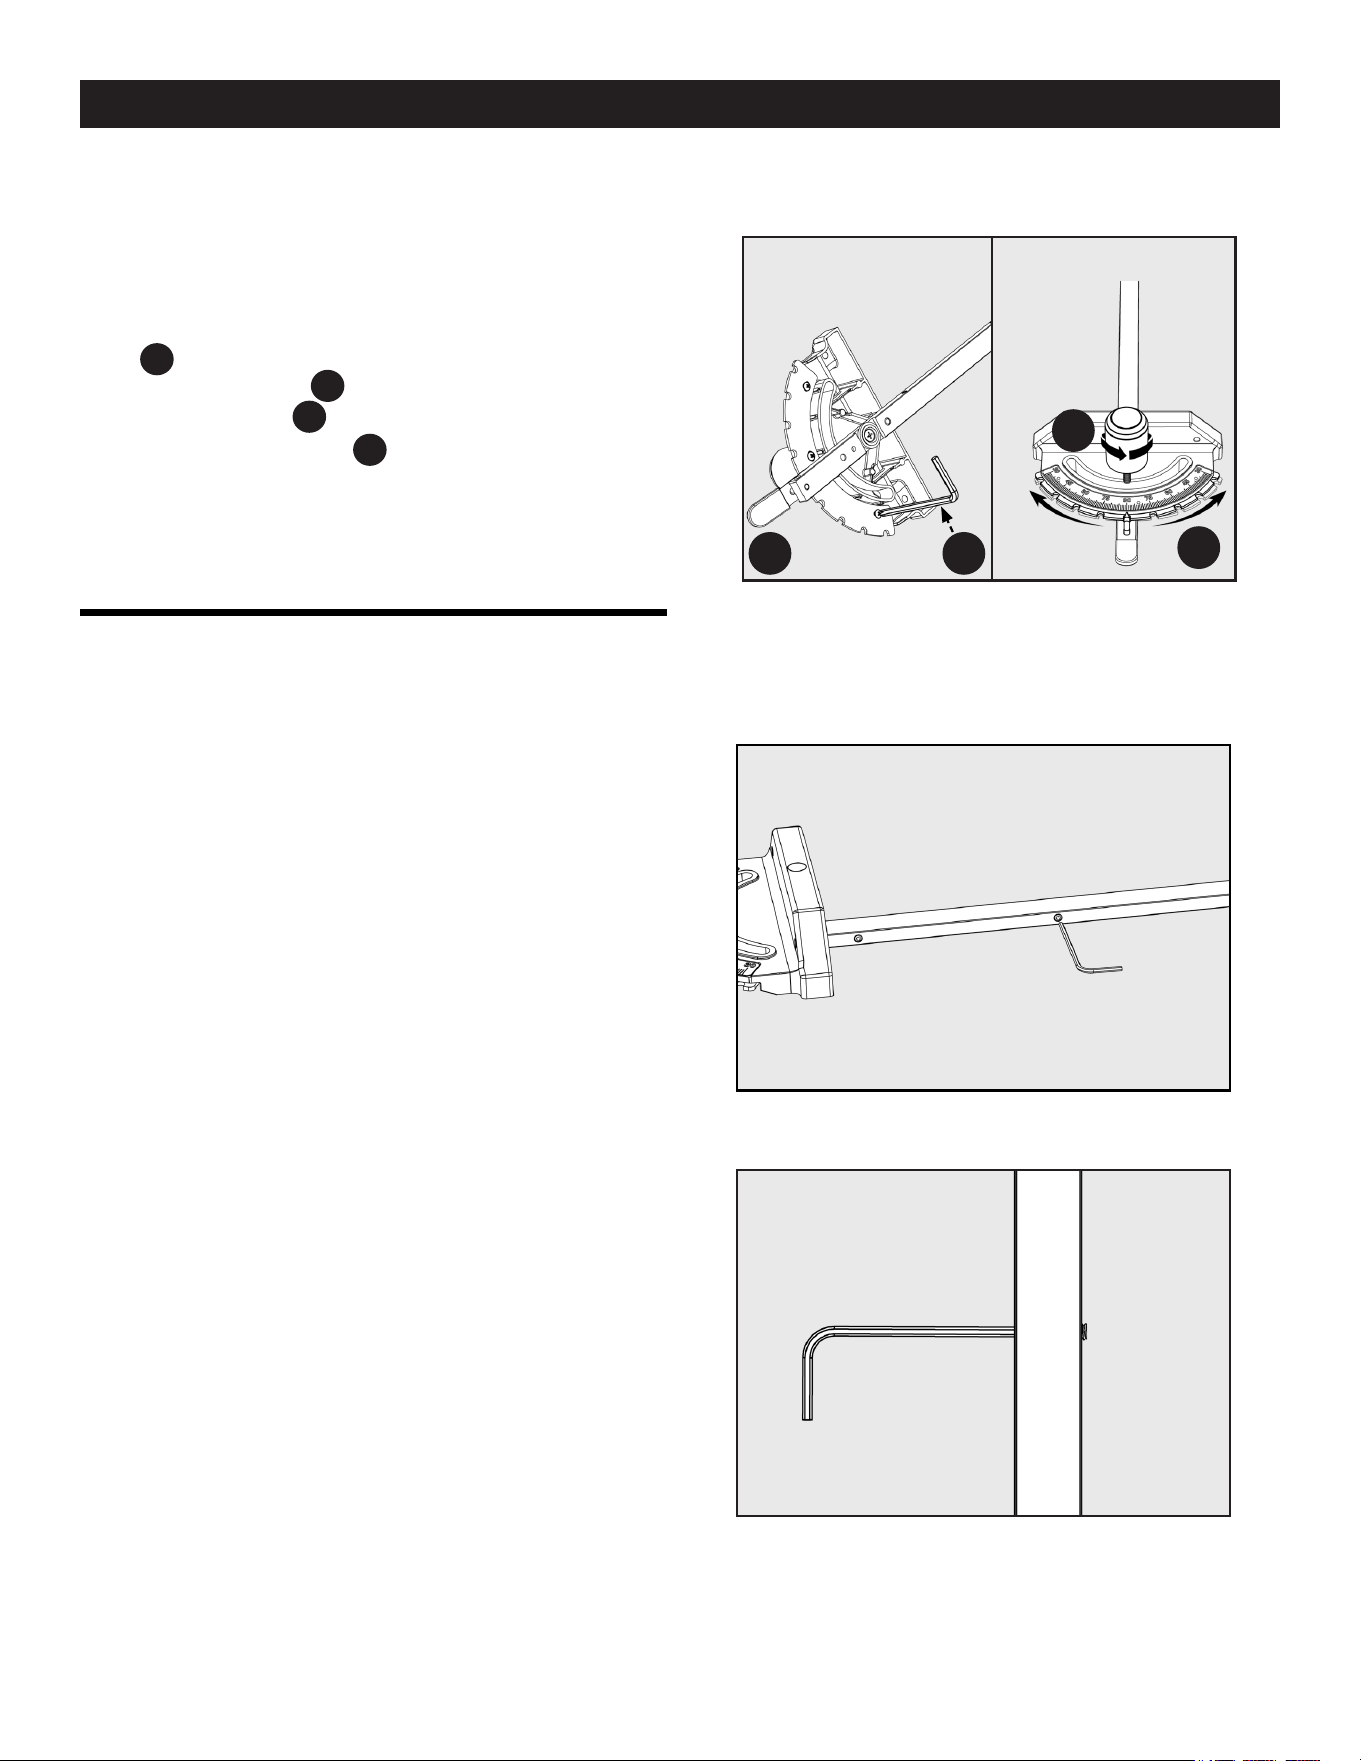
Figure 28
Figure 29
Figure 30
PC6 HP23
A
B
ADJUSTING THE MITER GAUGE
FITMENT
To adjust the tment between the miter gauge bar and the miter
slot:
1. Use a 3/32 inch Allen wrench on any of the three set
screws located on the side of the bar. See Figure 29 and
30.
2. To remove any side-to-side movement between the miter
gauge bar and miter gauge table slot adjust the three small
set screws found along the length of the miter gauge bar.
NOTE: The set screws should extend just beyond the side of the
bar.
ADJUSTING THE MITER GAUGE
SCALE
Use a combination square to check bar to head angle. If miter
gauge bar is not square to miter gauge head, then adjustment is
necessary. For adjustment, see below:
Use the supplied 3/16 inch two-way Allen wrench L Shape
HP23
to loosen the three Phillip screws located in the back
of the miter gauge
PC6
, seen in Figure 28 .
1. Loosen the knob
A
, seen in Figure 28.
2. Adjust the detent plate
B
so that the indicator measures
the correct angle, seen in Figure 28.
3. Once lined up, re-tighten the knob, and Phillip screws back
in place.
MAKING ADJUSTMENTS
28
Loading ...
Loading ...
Loading ...