Loading ...
Loading ...
Loading ...
MAKING ADJUSTMENTS
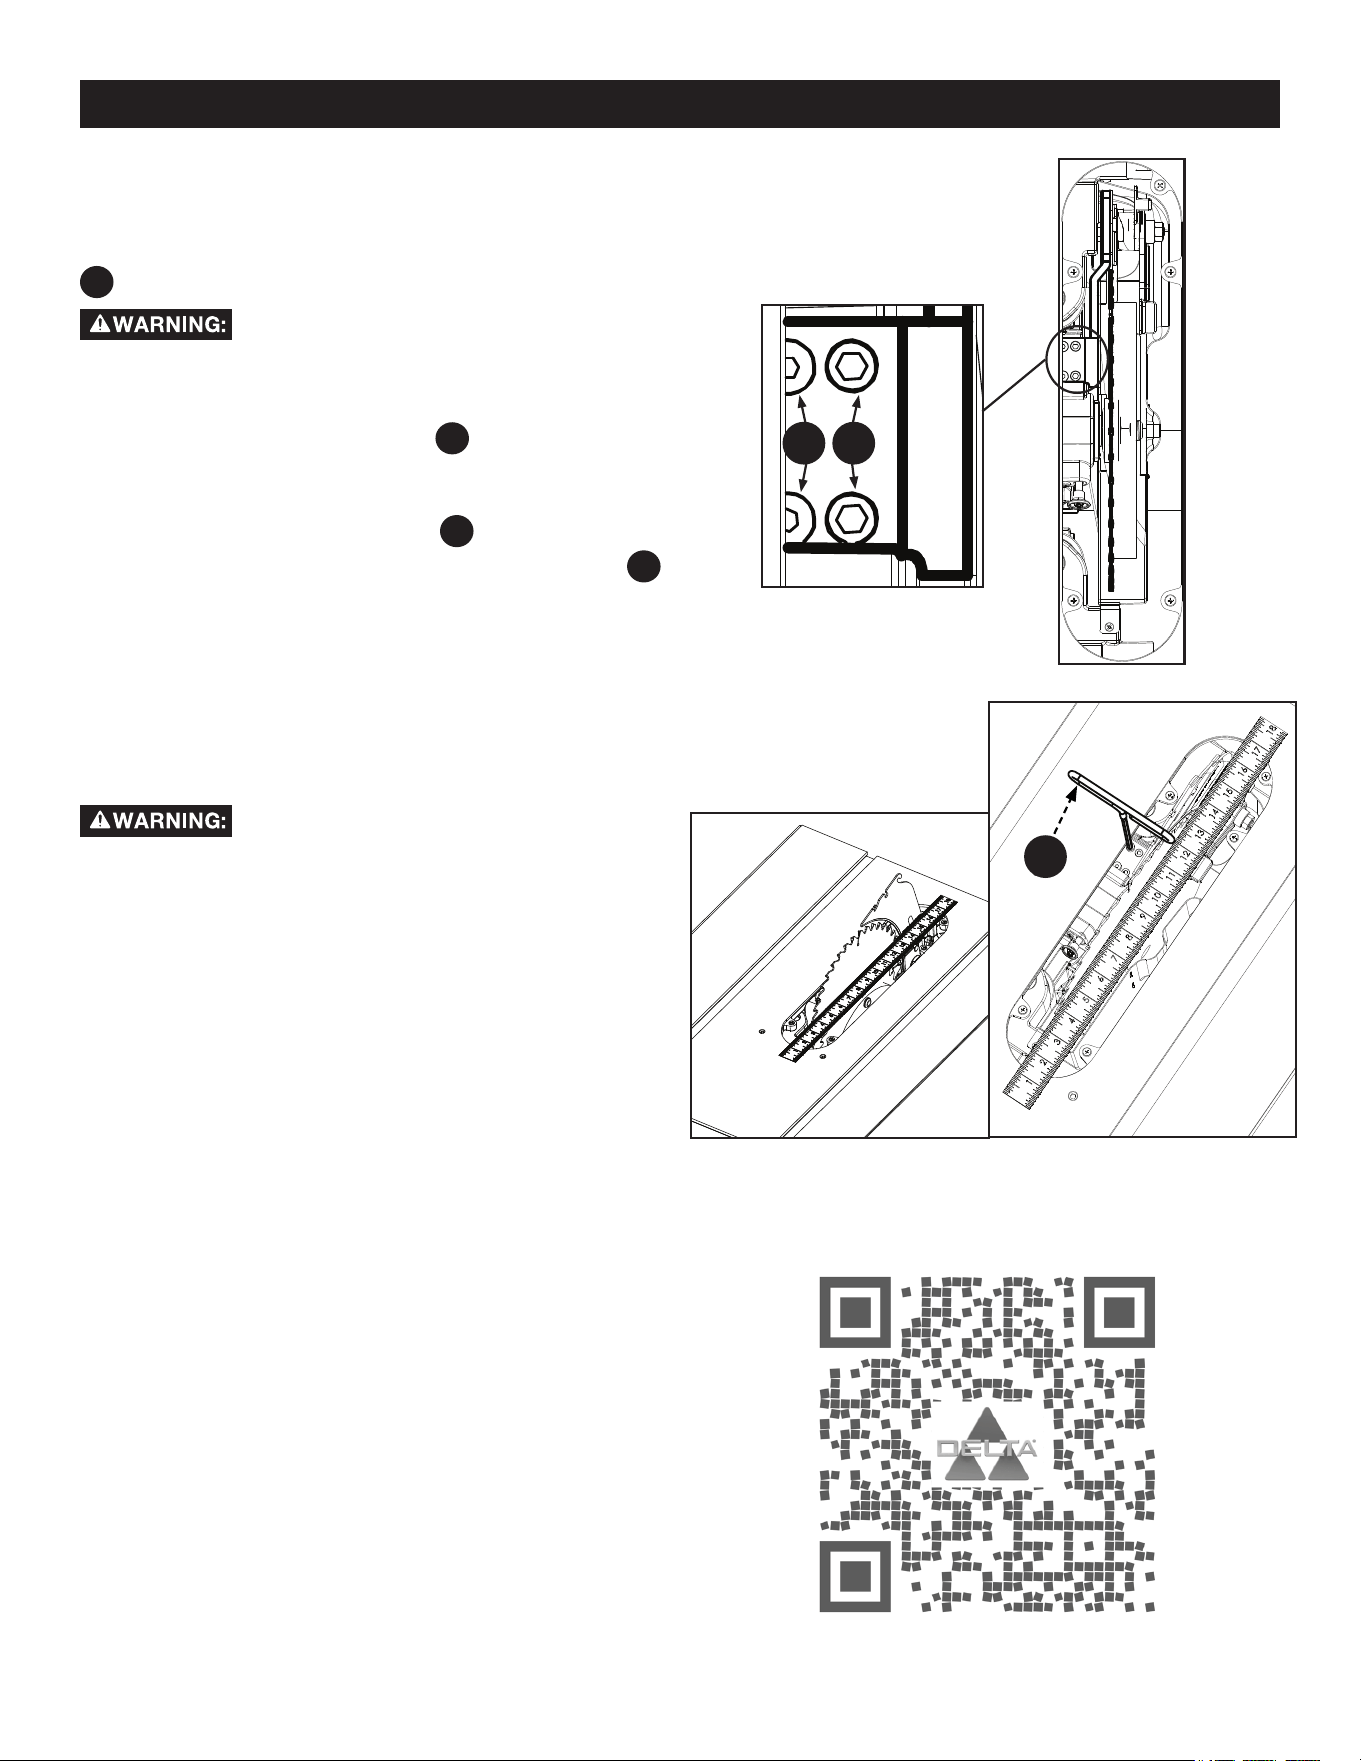
RIVING KNIFE ALIGNMENT
WITH THE BLADE
This procedure requires the supplied 4mm T-Handle Allen Wrench
HP21
and straight edge ruler. See Figure 27.
Completely disconnect saw from power source
before making any adjustments.
1. Carefully remove anti-kickback pawls, blade guard, and
throat plate.
2. Loosen the two hex-head screws
A
shown in Figure 25.
3. Using a straight edge ruler, align riving knife with blade
body, see Figure 26.
4. Tighten the two hex-head screws
A
, see Figure 25.
5. To adjust parallel alignment use the two set screws
B
,
see Figure 25. Clockwise: adjust riving knife to the right.
Counter-clockwise: adjust riving knife to the left. If needed,
use the set screws to align the riving knife with blade face
and the square.
6. Fully tighten the two hex-head cap screws.
7. Replace throat plate, blade guard and anti-kickback
assemblies before use.
If any dragging or binding of the workpiece
is encountered as it reaches the riving knife, turn unit o
and disconnect machine from power source and readjust
the riving knife/blade alignment or replace the blade.
NEVER attempt to back partially-cut workpiece out of
blade while blade is moving.
Figure 25
Figure 26 Figure 27
A B
HP21
NOTE: Scan QR code or visit us at https://youtu.be/FDQxRbmFxPs
to see Riving Knife Alignment with the Blade video instructions.
27
Loading ...
Loading ...
Loading ...