Loading ...
Loading ...
Loading ...
MAKING ADJUSTMENTS
Figure 23
Figure 24
ADJUSTING 90° AND 45°
POSITIVE BEVEL STOPS
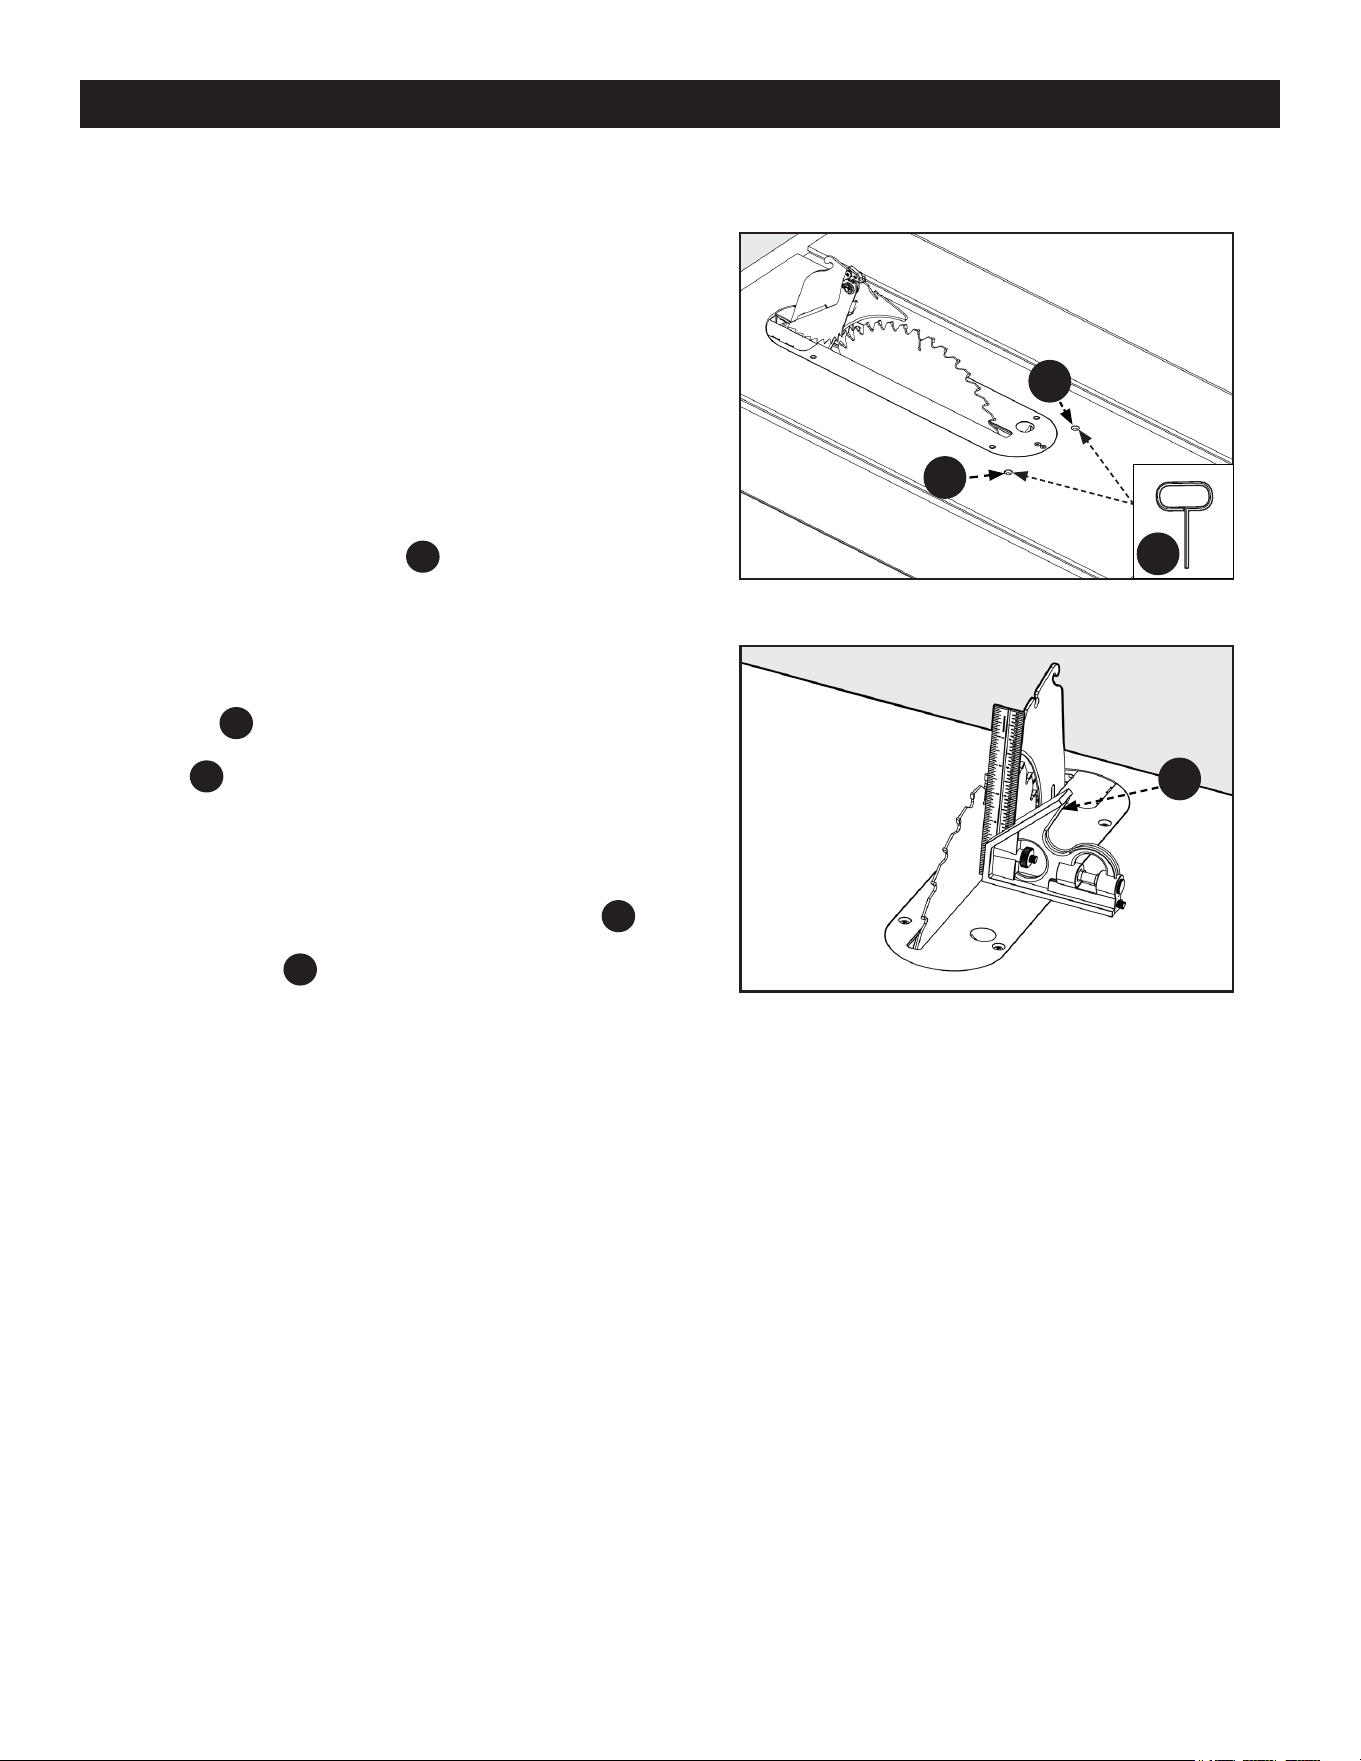
There are positive stops at each end of the bevel range. To ensure
accurate cuts, the Positive Stops MUST be positioned at exactly
90° and 45°. The Bevel Stops are properly adjusted as shipped.
However, for maximum accuracy, you should check the position of
the Stops upon assembly and from time to time to assure that the
settings remain satisfactory. To check the position of the Stops and
adjust if necessary, see Figure 23 and do the following:
1. Release the center knob on the bevel handwheel, located
on the right side of the Saw by rotating counter-clockwise.
2. Rotate the bevel handwheel counter clockwise and tilt the
blade to the 0° position until the Stop is reached.
3. Using a combination square
C
, check the angle of the
blade face to the table, as shown in Figure 24. Conrm the
blade is at 90° to the table.
4. If the blade is not perpendicular to the table, turn hand
wheel to slightly tilt the blade away from the stop position
then adjust the 90° Stop with the 3/16 inch T-Handle Allen
Wrench
HP21
by adjusting the Set Screw located in the
Table Top immediately in front of the left side of throat
plate
A
. Re-check angle using the carpenter’s square and
continue to adjust until the blade is at 90° when returned
to the stop position.
5. Rotate the bevel handwheel clockwise until it rests on the
45° Stop. Then repeat Steps 3 and 4, adjusting the 45°
Stop with the 3/16 inch T-Handle Allen Wrench
HP21
by
adjusting the set screw located in front of the right side of
the throat plate
B
.
B
A
HP21
C
26
Loading ...
Loading ...
Loading ...