
Loading ...
Loading ...
Loading ...
# Name Function
3 PTO switch Pull the PTO switch up to activate the
mower’
s cutting blades. Push the knob
down to stop the cutting blades.
NOTE
For cutting in reverse, the reverse
mode button must also be activated.
4 Direction
control but-
ton
The direction of movement of the mower
is controlled using the direction control
switch. Available settings are forward (F)
and reverse (R).
5 Cruise con-
trol button
The cruise control button allows you to
continue forward at a set speed without
needing to press the accelerator pedal.
6 Reverse
mode button
Press the reverse mode button to allow
the mower to cut when maneuvering in
the reverse direction. The blades will not
work if mower is operated in reverse
without pressing the reverse mode but-
ton.
NOTE
The PTO switch must also be pulled up
for mowing to occur when maneuver-
ing in reverse.
7 INSTALLATION
WARNING
Do not use accessories that are not recommended by the
manufacturer.
W
ARNING
Do not put in the safety key or the battery pack until you
finalised the assembly of all the parts.
7.1 UNPACK THE MACHINE
WARNING
Make sure that you correctly assemble the machine before
use.
WARNING
•
If parts of the machine are damaged, do not use the
machine.
•
If you do not have all the parts, do not operate the
machine.
•
If parts are damaged or missing, contact the service
center.
1. Open the package.
2. Read the documentation provided in the box.
3.
Remove all the unassembled parts from the box.
4.
Remove the machine from the box.
5.
Discard the box and packing material in compliance with
local regulations.
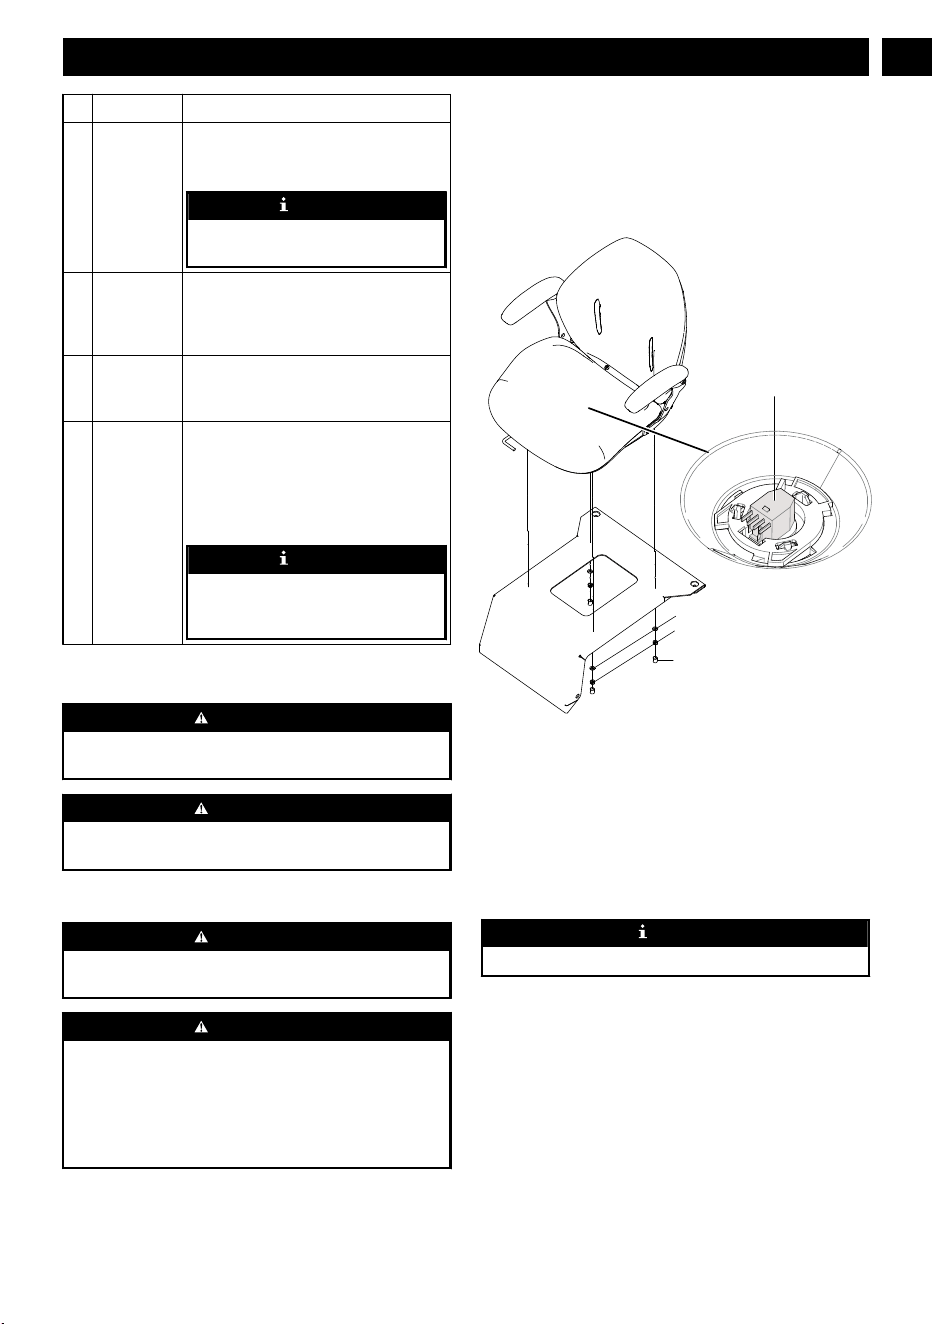
7.2 INSTALL THE SEAT
Sleeve
Nut
W
asher
Seat plug
1. Place the seat assembly over the mounting brackets and
align holes as shown.
2. Connect the seat plug to the machine.
3.
Install the washers and nuts and tighten securely.
4. Attach the sleeve to the nut.
5. Make sure it is securely seated.
7.3 INSTALL THE STEERING WHEEL
NOTE
Make sure the slot faces up to the seat.
9
English
EN
Loading ...
Loading ...
Loading ...