1
© 2018 Dorel Juvenile Group, Inc. Safety 1st™ and the Safety 1st logo and design are trademarks of Dorel Juvenile Group, Inc. Safety 1st™
y el logotipo de Safety 1st y su diseño son marcas comerciales de Dorel Juvenile Group, Inc. (800) 544-1108 www.safety1st.com Styles
and colors may vary. Los estilos y los colores pueden variar.
Made in CHINA. Hecho en CHINA. Distributed by (distribuido por) Dorel Juvenile Group, Inc., 2525 State St.,Columbus, IN 47201-7494.
Dorel Juvenile Canada, 2855 Argentia Road, Unit 4, Mississauga, ON, L5N 8G6 01/11/18 4358-7110A
Importado y Distribuido en Chile por: Comercial e Industrial Silfa S.A. - San Ignacio 0201 / Parque Industrial Portezuelo Quilicura, Santiago Chile. Fono (562) 2339 9000. En Perú por: Comexa S.A.
- Los Libertadores 455 – San Isidro, Lima – Perú. Fono (511) 4469014. En Centro América, Caribe y Ecuador por: Best Brands Group S.A. – Av. Balboa, Bay Mall Plaza, Planta Baja, local 9, Panamá. -
Fono: (507) 300 2884. En Colombia por: Baby Universe S.A.S. - Vía 40 No. 77-29, Barranquilla, Colombia - Fono: (575) 353 1110
Importador: DJGM, S.A. DE C.V. Gabriel Mancera No. 1041 Col. Del Valle Delegación Benito Juárez C.P. 03100 México, D.F. R.F.C. DJG140305GN9 Tel. (55) 67199202
ADVERTENCIA:
El no seguir estas advertencias y las instrucciones de ensamblado puede
resultar en lesiones personales o la muerte.
• NO use el andador si está dañada o rota.
• NO use el producto hasta que el bebé pueda sentarse solo.
• Limpielastirasdesujeciónconregularidadparamantenerenbuen
estado la capacidad de detenerse cuando sea necesario.
• NUNCA deje al niño sin supervisión. Siempre mantenga al niño a la
vista mientras está en el andador.
• Useelproductosóloensuperficiesplanasylibresdeobjetosque
puedan causar que se vuelque el andador.
• Paraevitarquemaduras,mantengaalniñolejosdelíquidoscalientes,
cocinas, radiadores, calentadores de espacio, chimeneas, etc.
• NO use este andador si el niño puede caminar sin ayuda.
• Deje de usar el andador cuando el niño pueda treparse.
ADVERTENCIA:
PELIGRO EN ESCALERAS
• EVITE lesiones graves o la muerte.
• Bloquelasescalerasylosescalonesdemaneraseguraantesdeusar
el andador.
WARNING:
Failure to follow these warnings and the assembly instructions
could result in injury or death.
• DO NOT use the walker if it is damaged or broken.
• DO NOT use until baby can sit up by itself.
• Cleangripstripsregularlytomaintainstoppingperformance.
• NEVER leave child unattended. Always keep child in view while
in walker.
• Useonlyonflatsurfacesfreeofobjectsthatcouldcausethe
walker to tip over.
• Toavoidburninjuries,keepchildawayfromhotliquids,
ranges, radiators, space heaters, fireplaces, etc.
• DONOT use this walker when your child can walk unassisted.
• Discontinue use of walker when child is able to climb out.
WARNING:
STAIR HAZARD
• AVOID serious injury or death.
• Blockstairs/stepssecurelybeforeusingwalker.
IMPORTANT:
• Baby must be able to sit up unassisted.
• Discontinue use when baby can walk unassisted.
• Allow only the child’s toes to touch the floor. DO NOT allow the child
to stand flat footed on the floor in any position.
• Discontinue use if baby can stand flat footed in the highest height
position or can climb out of the product.
•Recommendedforindooruse.
Read all instructions before assembly and use of walker.
•Adultassemblyrequired.
•CAUTION: Keep small parts away from children during assembly.
•Keepinstructionsforfutureuse.
•Tools needed: Phillips head screwdriver (not included).
•Requirestwo“AAA”alkalinebatteries(notincluded).
IMPORTANTE:
•Elbebédebepodersentarsesinayuda.
•Descontinúeelusocuandoelbebépuedacaminarsinasistencia.
•Permitaquesollolosdedosdelospiesdelniñotoquenelpiso.NOpermita
queelniñosepareplanoenelpisoencualquierposición.
•Descontinúeelusosielbebépuedepararseapoyandotodoelpieenla
posiciónmásaltaopuedesalirsesolodelproducto.
•Recomiendaparausoeninteriores.
Lea todas las instrucciones antes del ensamblado y uso del andador.
•Elarmadodebeserrealizadoporunadulto.
•PRECAUCIÓN:Duranteelarmado,mantengalaspiezaspequeñasfueradel
alcancedelosniños.
•Guardelasinstruccionesparausofuturo.
•Herramientanecesaria:DestornilladortipoPhillips(noincluidas).
•Requiere2bateríasalcalinas“AAA”(noincluidas).
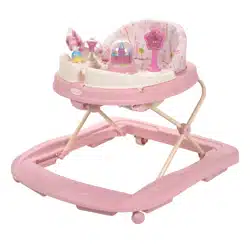
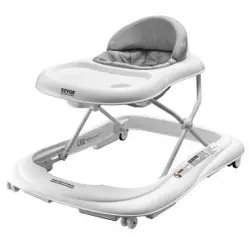
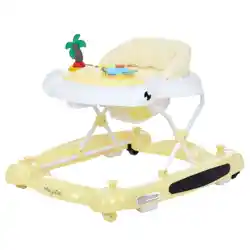
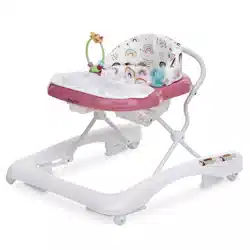
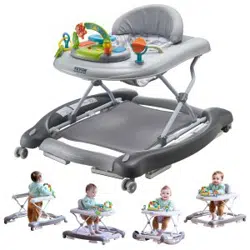
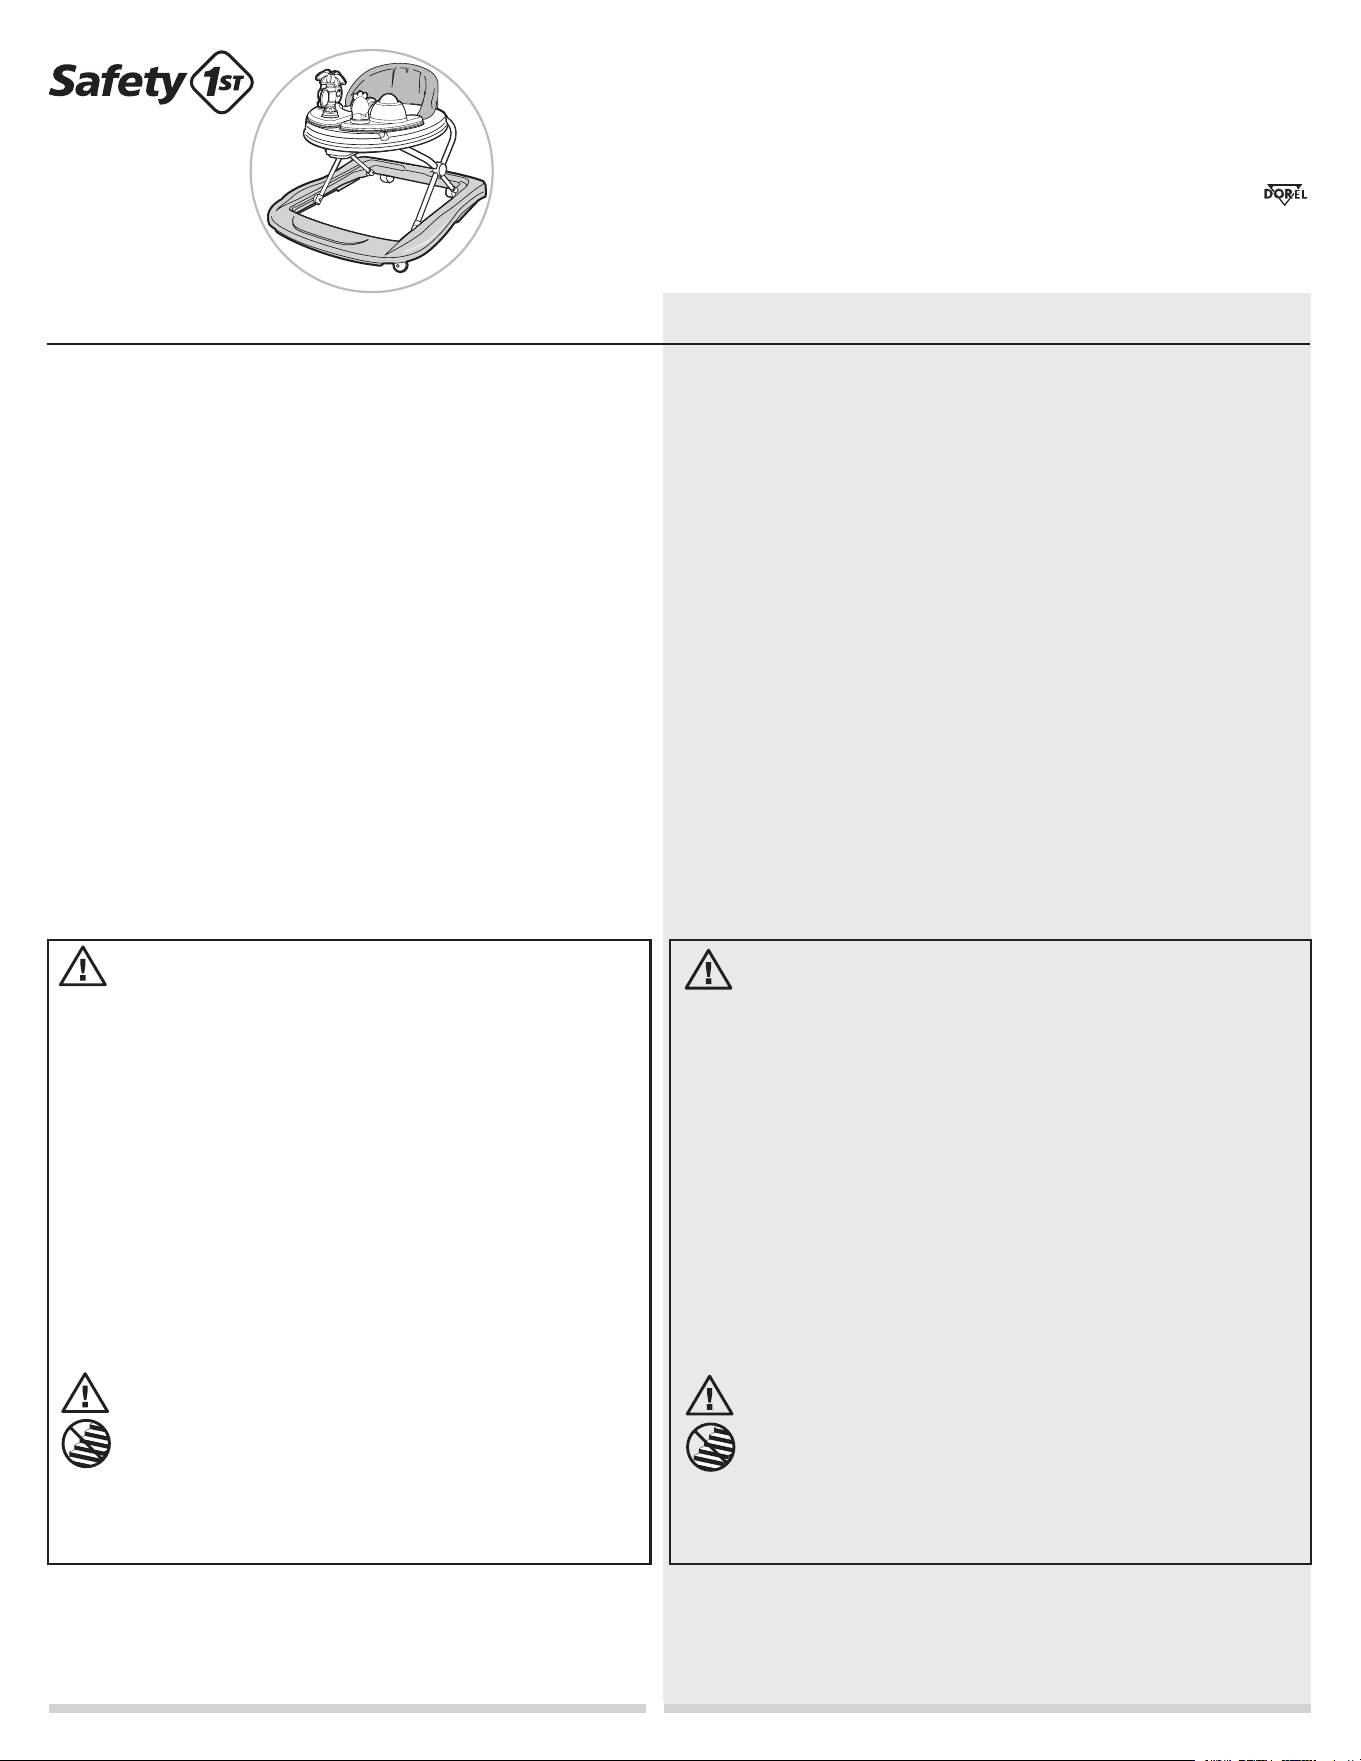
Sounds ‘n Lights Walker
WA063
IMPORTANT:
•Babymustbeabletositupunassisted,mustnot
weighmorethan30lbs.(13.6kg),orbetallerthan
32”(81.3cm).
•
Adultassemblyrequired.
Andador con sonidos y luces
WA063
IMPORTANTE:
•Elbebédebepodersentarsesinayuda,ynodebepesar
másde30lbs.(13.6kg),nitenerunaestaturademásde
32pulg.(81.3cm).
•
Serequiereelarmadoporpartedeunadulto.
2
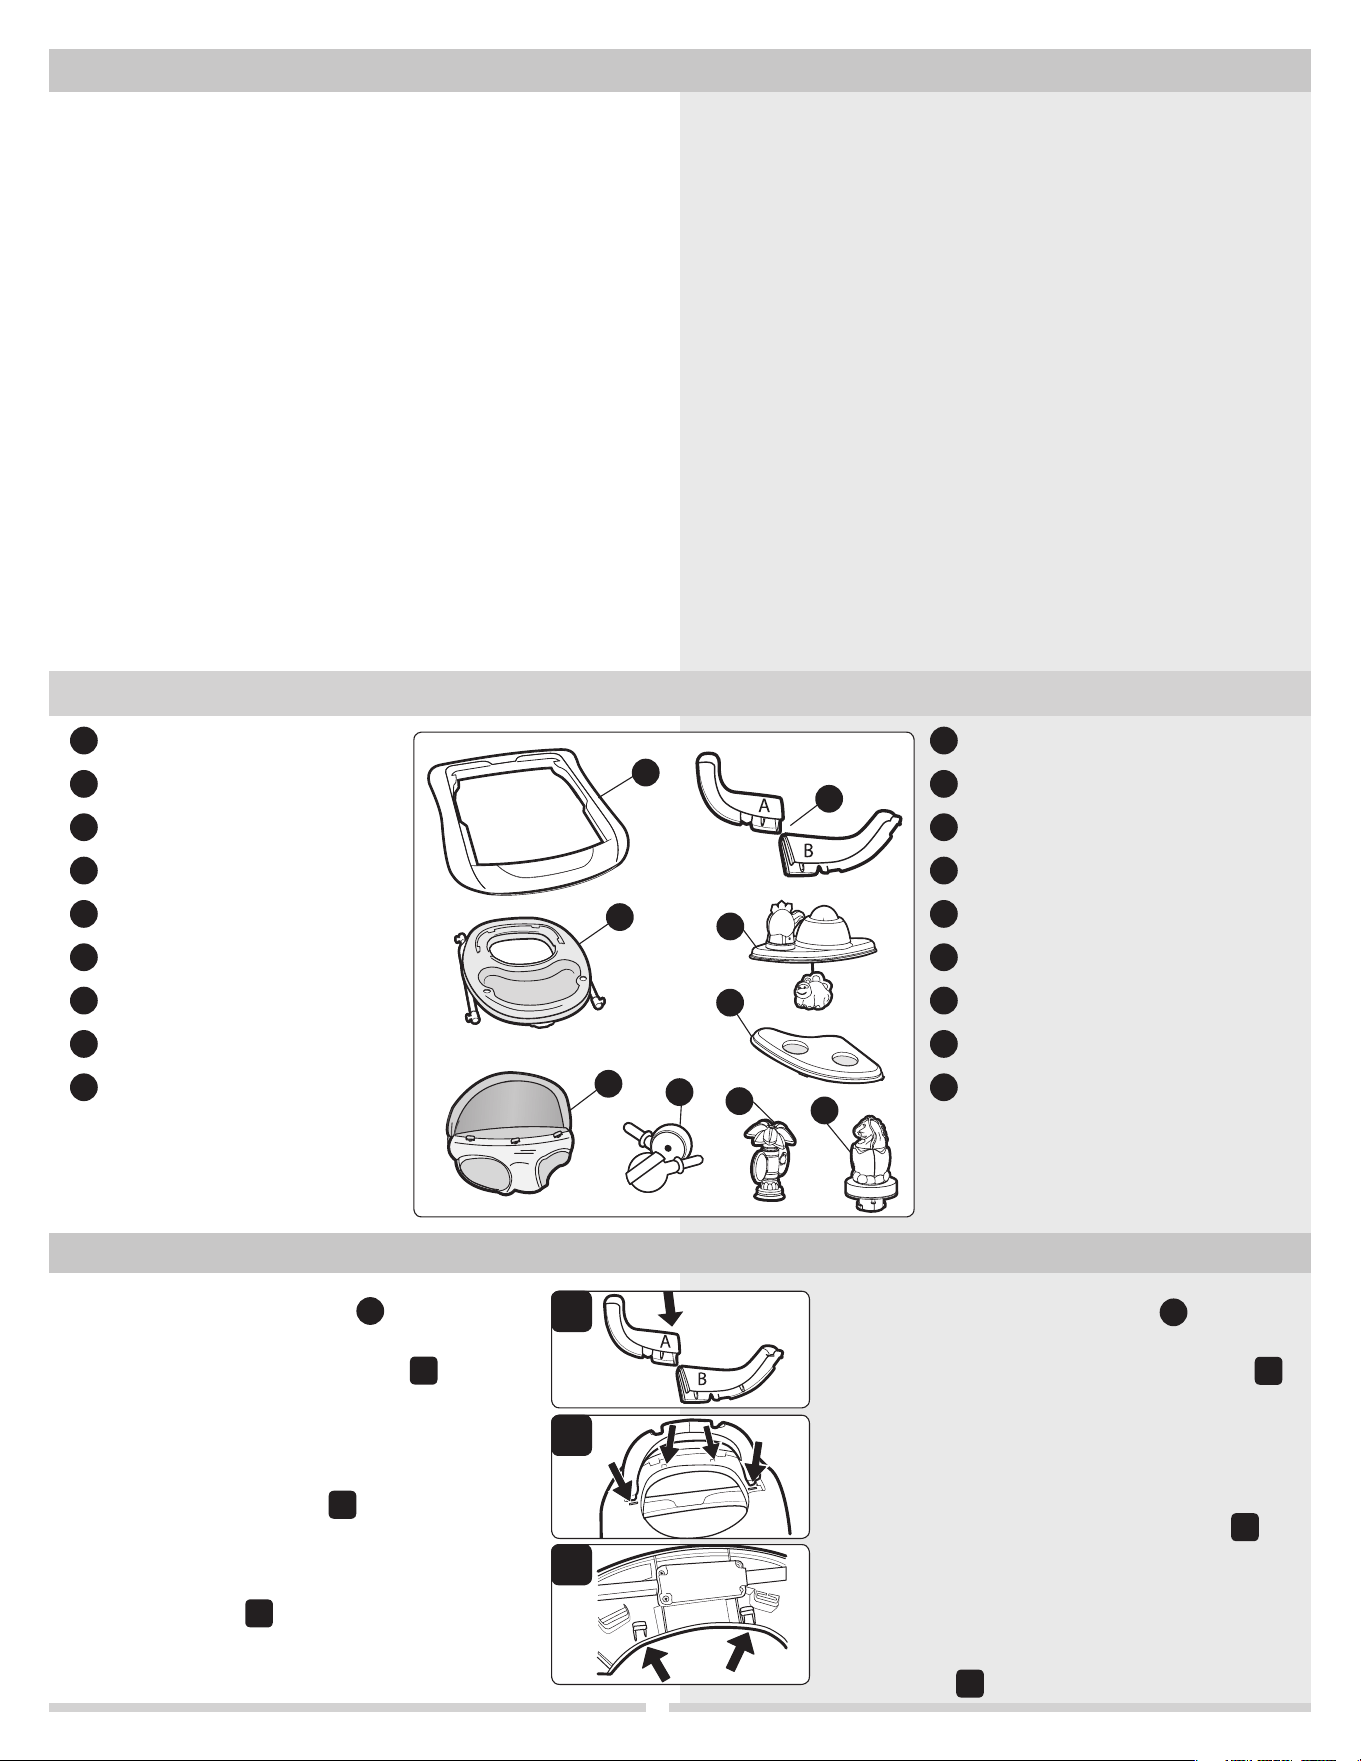
Base
Tray assembly
Fabric seat (partially assembled)
Front casters (2)
Seat supports
Left activity tray
Right activity tray
Spinner palm tree
Baby dinosaur
A
B
C
D
E
F
G
H
I
Base
Ensamble de la charola
Asiento de tela (parcialmente armado)
Ruedas delanteras (2)
Soportes del asiento (2)
Bandeja de actividades izquierda
Bandeja de actividades derecha
Palmera giratoria
Dinosaurio bebé
A
F
B
C
D
G
H
Parts List Lista de piezas
Keep These Instructions For Future Use Guarde estas instrucciones para su uso futuro
BEFORE ASSEMBLY:
• Carefully remove and discard the protective plastic covering
the walker parts.
• With a soft cloth and warm soapy water, wipe down the
walker parts.
•
Please hand wash and dry teether and all toys.
DO NOT submerge toys in water.
• Remove all contents from packaging and discard box and/or
poly bags.
• Lay out and identify all parts.
• Do not return this product to the place of purchase. If any
parts are missing, email support@djgusa.zendesk.com, or chat
with us at www.safety1st.com. You can also call Consumer Care
at (800) 544-1108. Have the model number (WA063) and date
code (manufacture date located on the bottom of the tray
assembly) ready.
ANTES DE ARMAR:
• Retire con cuidado el plástico protector que recubre las piezas
del andador y deséchelo.
• Limpie las piezas con un paño suave y agua jabonosa tibia.
• Por favor lave a mano y seque el juguete para morder y todos los
demás juguetes. NO sumerja los juguetes en agua.
• Retire todo el contenido del embalaje y deseche la caja y/o las
bolsas de polietileno.
• Despliegue e identifique todas las piezas.
• No devuelva este producto al lugar donde lo compró. Si falta
alguna pieza, mande un correo electrónico a support@djgusa.
zendesk.com o chatee con nosotros en www.safety1st.com.
Además, puede llamar a Atención al cliente al (800) 544-1108.
Tenga a mano el número de modelo (WA063) y el código
de fecha (fecha de fabricación que se encuentran en la parte
inferior del ensamble de la charola).
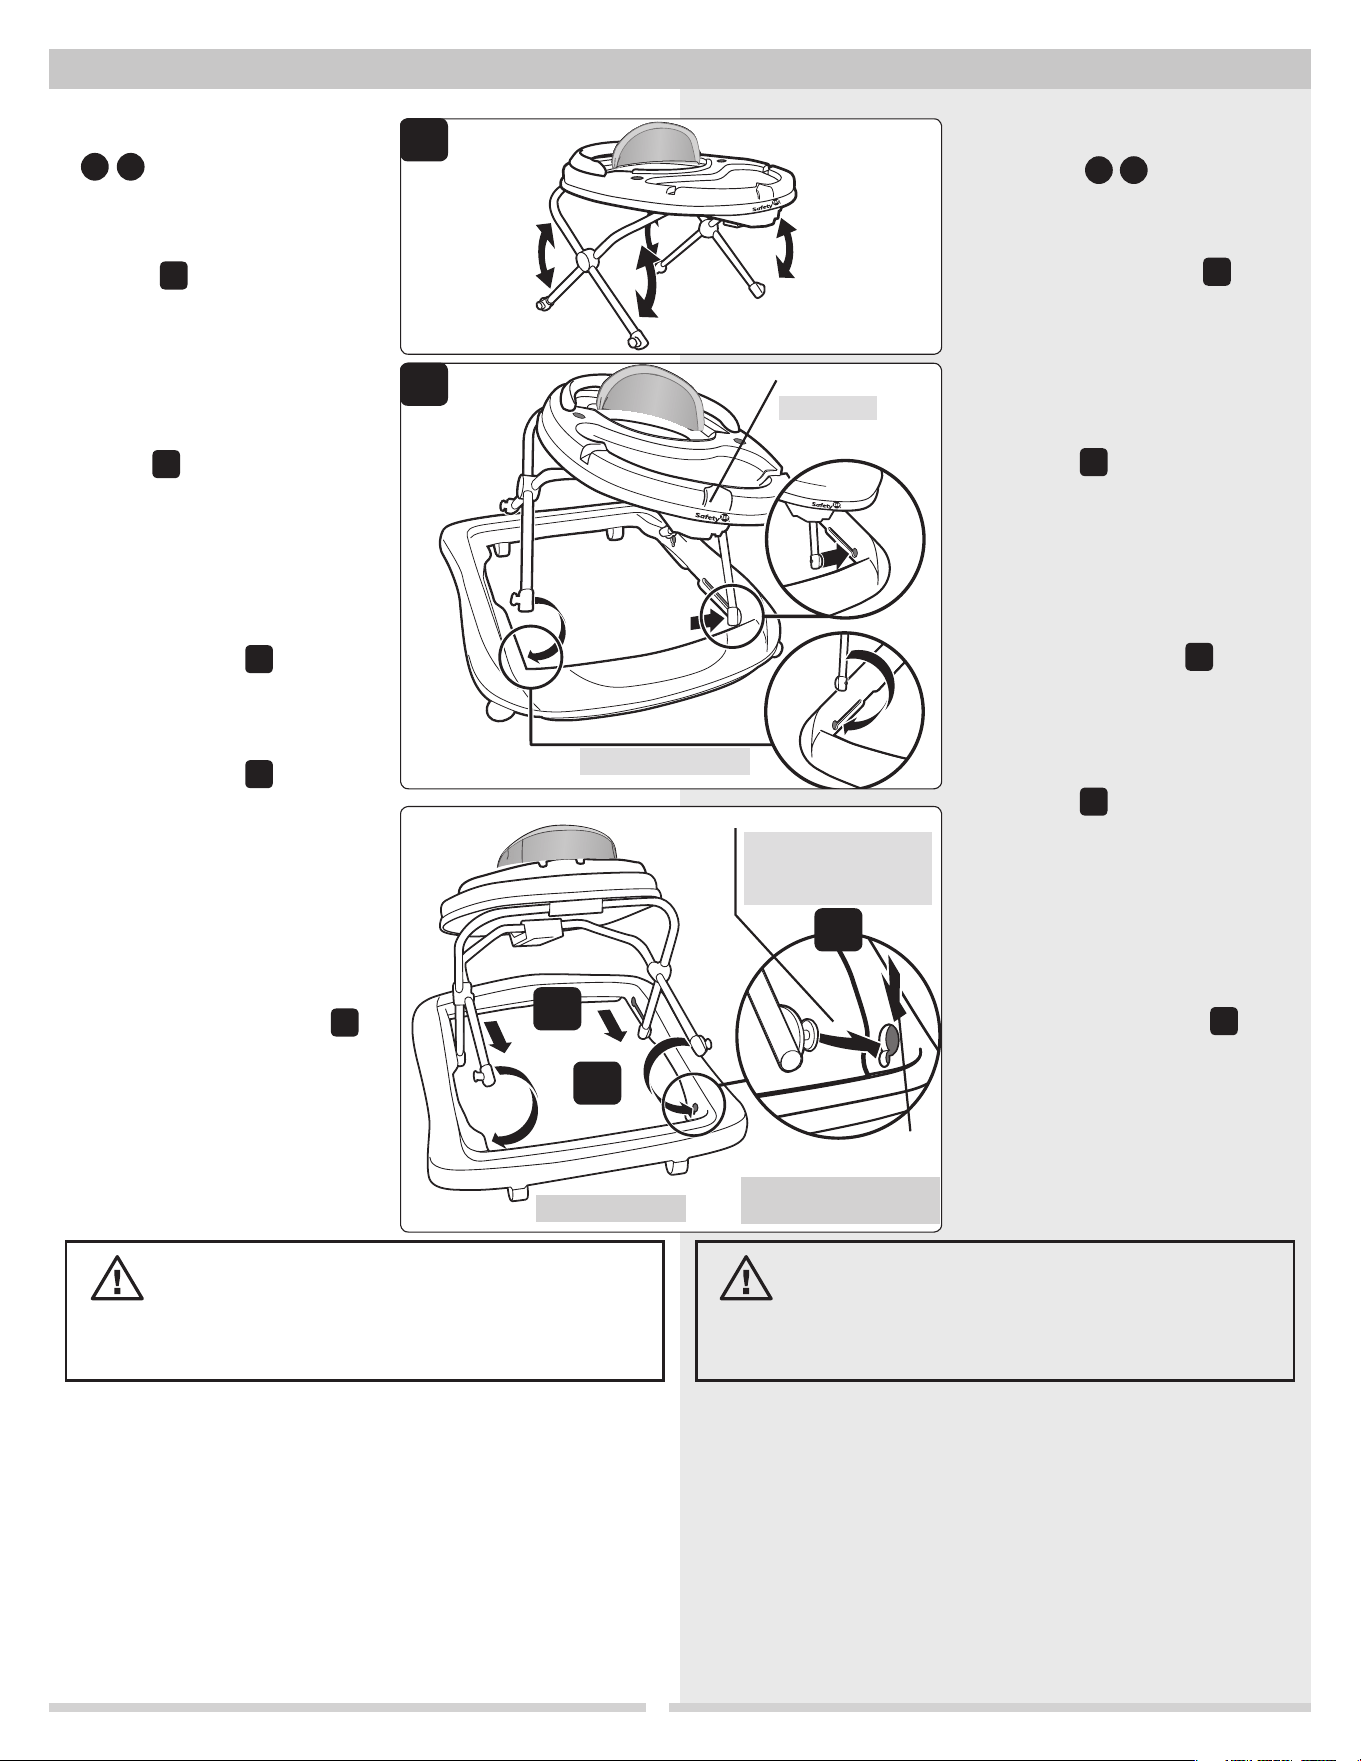
1 Attach Seat Supports
E
:
Join the two seat supports by sliding part
A into part B, as shown in (Figure
1
).
NOTE: The pieces do not “snap” together.
Attach seat support assembly to walker by
inserting the tabs on the seat support arms
and rear snaps into the corresponding slots
in the walker tray (Figure
2
). Push seat
down and snap into place.
Turn the walker over and ensure that the
seat support tabs and snaps are securely
attached (Figure
3
).
1 Para colocar el asiento
E
:
Una los dos soportes del asiento deslizando
la pieza A dentro de la pieza B (Figure
1
).
NOTA: Las piezas no “encajan” juntas.
Instale el ensamble de soporte del asiento en
la andadera insertando las lengüetas de los
brazos de soporte del asiento y los broches
traseros en las ranuras correspondientes
en la bandeja de la andadera (Figure
2
).
Presione el asiento hacia abajo y encájelo en
su lugar.
Voltee la andadera y asegúrese de que
las lengüetas de soporte del asiento y los
broches están firmemente enganchados
(Figure
3
).
To Assemble Armado
A
B
C
D
E
F
G
H
I
1
2
3
I
E

To Assemble
(continued)
Armado
(continuación)
3
3
WARNING:
Check seat pegs and straps for security
before each use.
ADVERTENCIA:
Antesdecadauso,compruebequelasclavijas
ylascorreasdelasientoesténfirmemente
colocadas.
6
7
5
1
2
4
View from
underside of
tray
Vista desde la
parte inferior
de la charola
Top View
Vista superior
Top View
Vista superior
Rear View
Vista posterior
2 Attach Seat
C
:
To secure front of fabric
seat (may already be
assembled), locate the three
rectangular plastic pegs
on outer rim of fabric seat:
these pegs fit into inside
openings in seat of walker
(Figures
1
and
2
). First,
insert left peg into opening
and rotate until secure,
then insert right peg until
secure, and lastly, insert
middle peg until secure.
To secure back of fabric seat,
locate 4 straps with plastic
buckles (Figure
3
), which
now align with openings
on inside back of walker
(Figure
4
). One at a time,
insert strap and buckle into
opening (front of buckle
should face you) (Figure
5
). Looking underneath
walker, pull strap and
buckle firmly through
opening until entire buckle
appears (Figure
6
). Tip
buckle upwards to lie flat
against underside opening
as shown (Figure
7
).
Repeat for each strap and
buckle.
IMPORTANT: Fabric seat
must be secure before
use. To make certain,
push down firmly on
inside bottom of seat pad.
If peg(s) is not secure,
repeat steps in Figure
2
;
and/or if a buckle appears
on upper back side of
seat pad, repeat steps in
Figures
5
,
6
and
7
.
2 Para colocar el asiento
C
:
Para asegurar el frente del
asiento de tela (puede ya estar
armado), localice las tres clavijas
rectangulares de plástico en el
borde exterior del asiento de tela:
estas clavijas encajan en aberturas
del asiento del andador (Figuras
1
y
2
). Primero, inserte la
clavija izquierda en la abertura
y gírela hasta fijarla firmemente;
luego, inserte la clavija derecha
y fíjela firmemente; por último,
inserte la clavija central y fíjela
firmemente.
Para asegurar la parte posterior
del asiento de tela, localice las
4 tiras con hebillas de plástico
(Figura
3
), que ahora se
alinean con las aberturas en
la parte posterior del andador
(Figura
4
). Inserte una correa
y una hebilla por vez en cada
apertura (la hebilla frontal
debe estar frente a usted)
(Figura
5
). Mire debajo del
andador y tire firmemente de la
correa y la hebilla a través de
la apertura hasta pasar toda la
hebilla (Figura
6
). Incline la
hebilla hacia arriba para ponerla
plana contra la parte inferior de
la apertura, como se muestra
(Figura
7
). Repita para cada
correa y cada hebilla.
IMPORTANTE: El asiento de
tela debe estar asegurado antes
de usarse. Para comprobarlo,
empuje firmemente hacia
abajo en la parte inferior
interna de la almohadilla del
asiento. Si alguna clavija no
está firmemente colocada,
repita el paso en Figura
2
; si
puede verse alguna hebilla en
la parte superior trasera de la
almohadilla, repita los pasos en
Figuras
5
,
6
y
7
.
To Assemble
(continued)
Armado
(continuación)
4
4
5
6
WARNING:
Make certain all four leg posts are fully secured
before proceeding.
ADVERTENCIA:
Antesdeprocederasegúresedequeloscuatropostes de
laspatasesténcompletamenteseguros.
Front
Parte delantera
Rear
Parte trasera
Primero, inserte el
poste en el orificio
de fijación
First, insert post into keyhole
Luego encaje el poste
insertadohacia abajo
Then, snap inserted
post downward
Logo
Logotipo
1
3 Attach Tray Assembly
A
B
:
Completely extend legs of
X-frame tray assembly to their
highest position as shown in
(Figure
1
).
Orient the front of the tray
with the logo to the front of
the base as shown. Insert the
post of one front leg into the
track at the front of the base in
(Figure
2
). Repeat with other
front leg post, using gentle
pressure to guide it into the
track if necessary.
Slide the leg posts fully to
the back of the basetracks as
shown in (Figure
3
).
Align rear leg posts over the
keyholes in rear of base as
shown in (Figure
4
). Using
gentle pressure, squeeze the
legs together to allow the posts
to position into top of the
keyholes.
Firmly press down on each leg,
snapping post into bottom of
each keyhole to securely lock in
place as shown in (Figure
5
).
Visually check to ensure ALL
parts are securely in place.
3 Coloque el conjunto de
charola
A
B
:
Extienda completamente las patas
del ensamble de marco en X de la
charola a su posición más alta, como
se muestra en la (Figura
1
).
Oriente la parte delantera de la
charola con el logotipo en la parte
delantera de la base, como se
muestra. Inserte el poste de una
pata delantera en la pista situada
en la parte delantera de la base en
la (Figura
2
). Haga lo mismo con
el otro poste de la pata delantera,
aplicando presión suave para guiarla
dentro de la pista si es necesario.
Deslice los postes de las patas
totalmente hacia la parte posterior
de las pistas de la base, como se
muestra en la (Figura
3
).
Alinee los postes de las patas
traseras sobre los orificios de
fijación situados en la parte trasera
de la base, como se muestra en
la (Figura
4
). Aplicando presión
suave, apriete las patas juntas para
posicionar los postes en la parte
superior de los orificios de fijación.
Presione hacia abajo firmemente
cada pata encajando el poste en el
fondo de cada orificio de fijación
para bloquearlo en su lugar, como
se muestra en la (Figura
5
).
Verifique visualmente que TODAS
las piezas están en su lugar de
manera segura.
2
3
4
5
5
7 Attach Toys to Right
Activity Tray
G
H
I
:
Push the baby dinosaur toy into the
tray hole (A) that has slots, lining
up the small and large slots. Rotate
baby dinosaur clockwise until it stops
turning (B) (Figure
1
).
Push the palm tree toy into the hole
(A) while rotating it (B) to properly
engage the base of the toy in the tray.
You will hear a “snap.”
Turn over the tray and visually check
that the toys are completely through
their holes and locked into position.
Pull up on both toys to be sure they
are secure (Figure
1
).
7 Instalación de los juguetes en las
bandeja de actividades derecha
G
H
I
:
Introduzca el juguete de dinosaurio bebé en
el orificio (A) el orificio de la bandeja que
tiene ranuras, alineando las ranuras pequeñas
y grandes. Gire el dinosaurio bebé hacia la
derecha hasta que deje de girar (B)
(Figura
1
).
Introduzca el juguete de palmera en el orificio
(A) mientras lo gira (B) para enganchar
correctamente la base del juguete en la bandeja.
Escuchará un chasquido.
Voltee la bandeja y verifique visualmente que
los juguetes estén completamente introducidos
To Assemble
(continued)
Armado
(continuación)
1
a través de los orificios y bloqueados en posición. Jale hacia arriba
los juguetes para cerciorarse de que están firmemente instalados.
6 Replace Batteries
Using Phillips head screwdriver,
remove battery compartment
door on the baby dinosaur toy.
Insert two “AAA” batteries (not
included) into the compartment
as indicated (Figure 1).
Replace and secure battery door. Note: Reference battery
compartment for proper battery orientation.
NOTE: Install new batteries and re-try function before
calling Consumer Care on electronics. We recommend
alkaline batteries for longer battery life.
6 Reemplace las baterías
Utilizando un destornillador tipo Phillips, abra la
tapa del compartimento para pilas en el juguete de
dinosaurio bebé. Introduzca dos pilas alcalinas tipo
“AAA” (no incluidas), tal como se muestra (Figura
1). Coloque y cierre la tapa del compartimento para
pilas. Note: Vea las marcas en el compartimento
para pilas para colocarlas adecuadamente según su polaridad.
NOTA: Antes de llamar al Atención al cliente para consultas sobre
artefactos de electrónicos, coloque baterías nuevas y trate de
hacerlo funcionar otra vez. Recomendamos usar baterías alcalinas
para prolongar la vida útil de la batería.
1
BATTERY CAUTION
•Keeptheseinstructionsastheycontainimportantinformation.
•Werecommendalkalinebatteriesforlongerbatterylife.
•DO NOTmixoldandnewbatteries.•DO NOT mix alkaline,
standard (carbon zinc), or rechargeable (nickel cadmium)
batteries.•Non-rechargeablebatteriesarenottoberecharged.
•Rechargeablebatteriesaretoberemovedfromtheunitbefore
beingcharged.•Rechargeablebatteriesareonlytobecharged
underadultsupervision.•Onlybatteriesofthesameor
equivalenttypeasrecommendedaretobeused.•Batteriesare
tobeinsertedwiththecorrectpolarity.•Exhaustedbatteries
aretoberemovedfromtheunit.•Thesupplyterminalsarenot
tobeshort-circuited.•Checkthatallcontactsurfacesareclean
andbrightbeforeinstallingbatteries.•DO NOT submerge any
partoftheproductinwater.•Disposeofbatteriessafely.
•Removebatterieswhenstoredforlongperiodsofnon-use.
PRECAUCIÓNPARALASBATERÍAS
•Guardeestasinstrucciones,yaquecontieneninformaciónimportante.
•Recomendamosusarbateríasalcalinasparaprolongarlavidaútilde
labatería.•NOmezclebateríasviejasynuevas.•NO mezcle baterías
alcalinas, estándar (carbón-zinc) o recargables (níquel-cadmio).
•Lasbateríasnorecargablesnodebenserrecargadas.•Lasbaterías
recargables deben retirarse de la unidad antes de proceder a su carga.
•Lasbateríasrecargablessólodebenrecargarsebajolasupervisióndeun
adulto.•Sólosedebenutilizarbateríasdelmismotipoodetiposimilar,
talcomoserecomienda.•Lasbateríasdebencolocarsedemodoquelas
respectivaspolaridadescoincidan.•Lasbateríasagotadasdebenretirarse
delaunidad.•Losterminaleseléctricosnodebencortocircuitarse.•Antes
de instalar las baterías, verifique que todas las superficies de contacto
esténlimpiasybrillantes.•NO sumerja ninguna parte del producto en
agua.•Desechelasbateríasenformasegura.•Sielproductopermanece
almacenado durante largos períodos sin ser usado, retire las baterías.
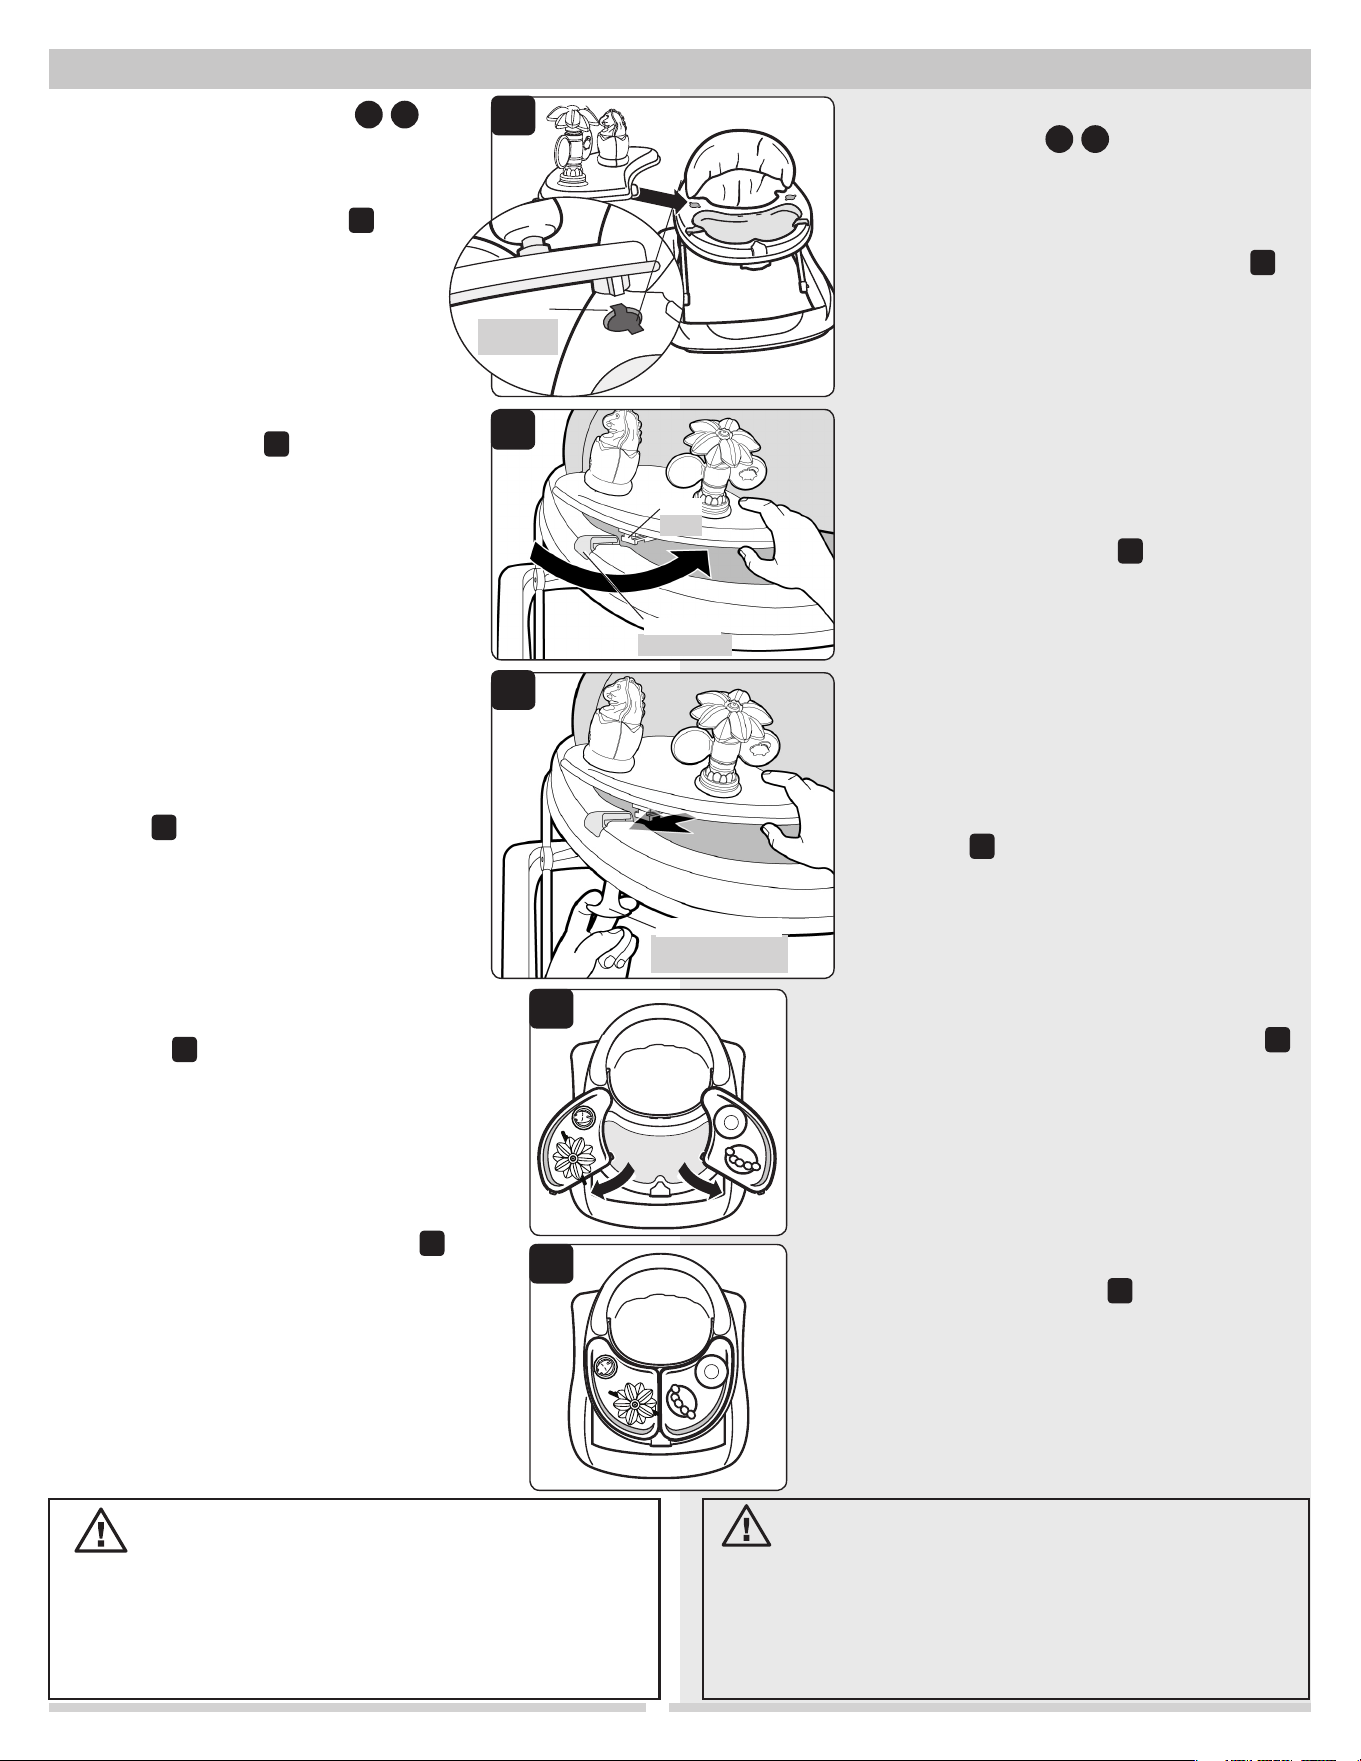
8 Attach Activity Trays
F
G
:
Align one activity tray with the proper
keyhole in the main tray as shown. Push
down to insert the activity tray into the
main tray as shown in (Figure
1
).
As shown in (Figure
2
), gently lift the
front edge of the activity tray and rotate
inward over the main tray until the guide
(underneath the activity tray) is past the
guide slot (on the main tray). Do not
attempt to insert the guide into the
guide slot at this time.
Pull down tray lock handle (on the
underside of the main tray) and hold.
Insert the guide of the activity tray into
the guide slot on the main tray as shown in
(Figure
3
).
8 Coloque el las charolas de
actividades
F
G
:
Alinee una charola de actividades con la
ranura correspondiente en la charola principal,
como se muestra. Presione hacia abajo para
insertar la charola de actividades en la charola
principal, como se muestra en la (Figura
1
).
Levante suavemente el borde delantero de la
charola de actividades y gírela hacia dentro
sobre la charola principal, hasta que la guía
(debajo de la charola de actividades) pase la
ranura de guía (en la charola principal), como
se muestra en la (Figura
2
). No intente
insertar la guía en la ranura de guía en este
momento.
Tire hacia abajo de la manija de traba de la
charola (en la parte inferior de la charola
principal) y sosténgala. Inserte la guía de la
charola de actividades en la ranura de guía
de la charola principal, como se muestra en la
(Figura
3
).
1
2
Guía
Guide
Ranura guía
Guide Slot
Manija de bloqueo
de la charola
Tray Lock Handle
3
Orificio de
fijación
Keyhole
1
2
3
6
WARNING: TRAY SHOULD ONLY BE
USED LOCKED IN EITHER THE FULLY OPEN OR FULLY
CLOSED POSITION WITH GUIDE ENGAGED. NEVER
USE WITH THE TRAYS PARTIALLY OPEN OR WITH
TRACK NOT ENGAGED IN THE GUIDE SLOT.
ADVERTENCIA
:LABANDEJASÓLO
DEBEUSARSEBLOQUEADAYASEAENLAPOSICIÓN
TOTALMENTE ABIERTA O TOTALMENTE CERRADA CON
LAGUÍAENGANCHADA.NUNCAUSEELPRODUCTO
CON LAS BANDEJAS PARCIALMENTE ABIERTAS O CON
LAPISTANOENGANCHADAENLARANURAGUÍA.
To Assemble
(continued)
Armado
(continuación)
Using Activity Tray: Pull down on the tray lock
handle, then open or close the activity trays and
release the handle to lock in place.
Para usar la charola de actividades: Para abrir o
cerrar la charola de actividades, tire hacia abajo de
la manija de traba y suéltela para trabar en posición.
5
While pulling down the tray lock handle, rotate
activity tray to its fully open position as shown
in (Figure
4
). Visually check and pull up on the
activity tray to make sure the guide is securely
in the guide slot.
Lastly, swing the activity tray back to the closed
position ensuring that the tray rotates correctly.
Make sure that the locking tabs on the front and
rear of the activity tray engage the locking tab
slots when closed as shown in (Figure
5
).
Swing the activity tray back to its open position
and repeat steps 1 through 5 with the remaining
activity tray.
Mientras que tira hacia abajo la manija de bloqueo de
la charola, gire la charola de actividades a su posición
totalmente abierta, como se muestra en la (Figura
4
). Verifique visualmente la charola de actividades y tire
de ella hacia arriba de para asegurarse de que la guía
esté firmemente colocada en su ranura.
Por último, gire la charola de actividades hacia
su posición cerrada y compruebe que gire
correctamente. Cuando esté cerrada, asegúrese
de que las lengüetas de seguridad en las partes
delantera y trasera de la charola de actividades
encajen en las ranuras de las lengüetas de seguridad,
como se muestra en la (Figura
5
).
Gire la charola de actividades hasta su posición
abierta y repita los pasos 1 a 5 con la charola de
actividades restante.
4

7
Care and Maintenance
Cuidado y mantenimiento
Vista del lado inferior de la base
Underside view of base
Tiras de sujeción
Grip Strips
Grip strips: ALWAYS MAKE SURE
GRIP STRIPS ARE KEPT CLEAN.
CLEAN GRIP STRIPS WITH WATER
ONLY.
Toys: DO NOT SUBMERGE TOYS IN
WATER. Wring out cloth thoroughly
and avoid wiping electronic areas.
Plastic and metal parts: Wipe with
damp cloth and allow to dry.
NOTE: Keep product away from
direct sunlight or heat.
Bandas de agarre: SIEMPRE
ASEGÚRESE DE QUE LAS TIRAS DE
SUJECIÓN ESTÉN LIMPIAS. LIMPIE
LAS TIRAS DE SUJECIÓN CON AGUA
SOLAMENTE.
Juguetes: NO sumerja los juguetes en
agua. Escurra el paño por completo para
limpiar, pero evite pasarlo por las áreas
con sistemas electrónicos.
Piezas de plástico y de metal: Límpielas
con un paño húmedo y permita que se
sequen.
NOTA: No exponga el producto al calor
ni a la luz del sol directa.
WARNING:
ALWAYS use caution when collapsing walker.
ADVERTENCIA:
SIEMPRE tenga cuidado al plegar el andador.
WARNING:
NEVER adjust walker
height with child in
walker.
ADVERTENCIA:
NUNCA ajuste la altura
delandadorconelniño
en el andador.
4
2
3
To Operate Para operar
2 Adjusting Height:
Height adjustment latch is
located under the toy tray.
To adjust height, hold side
buttons
2
and press height
adjustment latch up
3
.
While pressing, raise/lower
tray assembly to desired
position with other hand
4
.
Adjust height so your baby
can stand comfortably with
both feet on the floor.
NOTE: Always verify the
height adjustment latch
automatically locks into
place before using walker.
Collapsing for Storage and Travel:
Hold side buttons
2
and press height adjustment latch
up
3
with one hand and guide tray to lowest (closed)
position with other hand.
Cómo colapsar para viajes y almacenamiento:
Sujete los botones laterales
2
y presione el seguro de ajuste
de altura hacia arriba
3
con una mano mientras guía la
bandeja a la posición más baja (cerrada) con la otra mano.
2 Ajuste de la altura:
El seguro de ajuste de altura
está ubicado debajo de la
bandeja para juguetes.
Para ajustar la altura, sujete
los botones laterales
2
y
presione el seguro de ajuste
de altura hacia arriba
3
.
Sin dejar de presionar, suba/
baje la bandeja a la posición
deseada con la otra mano
4
.
Ajuste la altura de manera
que su bebé pueda pararse
cómodamente apoyando los
dos pies sobre el piso.
NOTA: Siembre verifique
que el seguro de ajuste de
altura se haya bloqueado
automáticamente en el lugar
antes de usar.
1 Proper Height
Adjustment:
Height can be adjusted to
three different positions. Only
the ball of each foot should
touch the floor
1
.
1 Ajuste apropiado de
la altura: La altura puede
ajustarse a tres posiciones
diferentes. El bebé sólo debe
tocar el piso con la parte
anterior de la planta del pie
1
.
1
8
Dorel Juvenile Group, Inc. garantiza al comprador original que este producto
(Andador con sonidos y luces) estará libre de defectos de material y mano de obra
cuando se utilice bajo condiciones normales durante un periodo de un (1) año a partir
de la fecha de compra. Si el producto tuviese defectos de material o mano de obra,
Dorel Juvenile Group, Inc. reparará o reemplazará el producto, a nuestra opción, sin
cargo. El comprador será responsable de todos los costos asociados con embalar
y enviar el producto al Departamento de Relaciones con el Consumidor de Dorel
Juvenile Group a la dirección indicada en la primera página y de todos los otros
costos de envío o seguro asociados con la devolución. Dorel Juvenile Group correrá
con los gastos de enviar el producto reparado o reemplazado al comprador. El
producto se debe devolver en su embalaje original acompañado de la constancia de
compra, ya sea un recibo de compra u otra prueba que demuestre que el producto
está dentro del periodo de garantía. Esta garantía es nula si el propietario repara o
modifica el producto o si éste sufrió daño como resultado de uso incorrecto.
Esta garantía excluye cualquier responsabilidad que no sea la expresamente indicada
anteriormente, incluyendo pero sin limitarse a daños incidentales o consecuentes.
ALGUNOS ESTADOS NO PERMITEN LA EXCLUSIÓN O LIMITACIÓN DE DAÑOS
INCIDENTALES O CONSECUENTES, POR LO TANTO LA LIMITACIÓN O
EXCLUSIÓN ANTERIOR PODRÍA NO APLICARSE EN SU CASO.
ESTA GARANTÍA LE OTORGA DERECHOS LEGALES ESPECÍFICOS Y USTED PODRÍA
TENER TAMBIÉN OTROS DERECHOS QUE PUEDEN VARIAR DE UN ESTADO A OTRO.
One (1) Year Limited Warranty Garantía limitada de un año (1)
Care and Maintenance
Cuidado y mantenimiento
Dorel Juvenile Group, Inc. warrants to the original purchaser that this product
(Sounds ‘n Lights Walker), is free from material and workmanship defects when
used under normal conditions for a period of one (1) year from the date of
purchase. Should the product contain defects in material or workmanship Dorel
Juvenile Group, Inc., will repair or replace the product, at our option, free of charge.
Purchaser will be responsible for all costs associated with packaging and shipping
the product to Dorel Juvenile Group Consumer Relations Department at the address
noted on front page and all other freight or insurance costs associated with the
return. Dorel Juvenile Group will bear the cost of shipping the repaired or replaced
product to the purchaser. Product should be returned in its original package
accompanied by a proof of purchase, either a sales receipt or other proof that the
product is within the warranty period. This warranty is void if the owner repairs or
modifies the product or the product has been damaged as a result of misuse.
This warranty excludes any liability other than that expressly stated previously,
including but not limited to, any incidental or inconsequential damages.
SOME STATES DO NOT ALLOW THE EXCLUSION OR LIMITATION OF
INCIDENTAL OR CONSEQUENTIAL DAMAGES, SO THE ABOVE LIMITATION
OR EXCLUSION MAY NOT APPLY TO YOU.
THIS WARRANTY GIVES YOU SPECIFIC LEGAL RIGHTS, AND YOU MAY ALSO
HAVE OTHER RIGHTS THAT MAY VARY FROM STATE TO STATE.
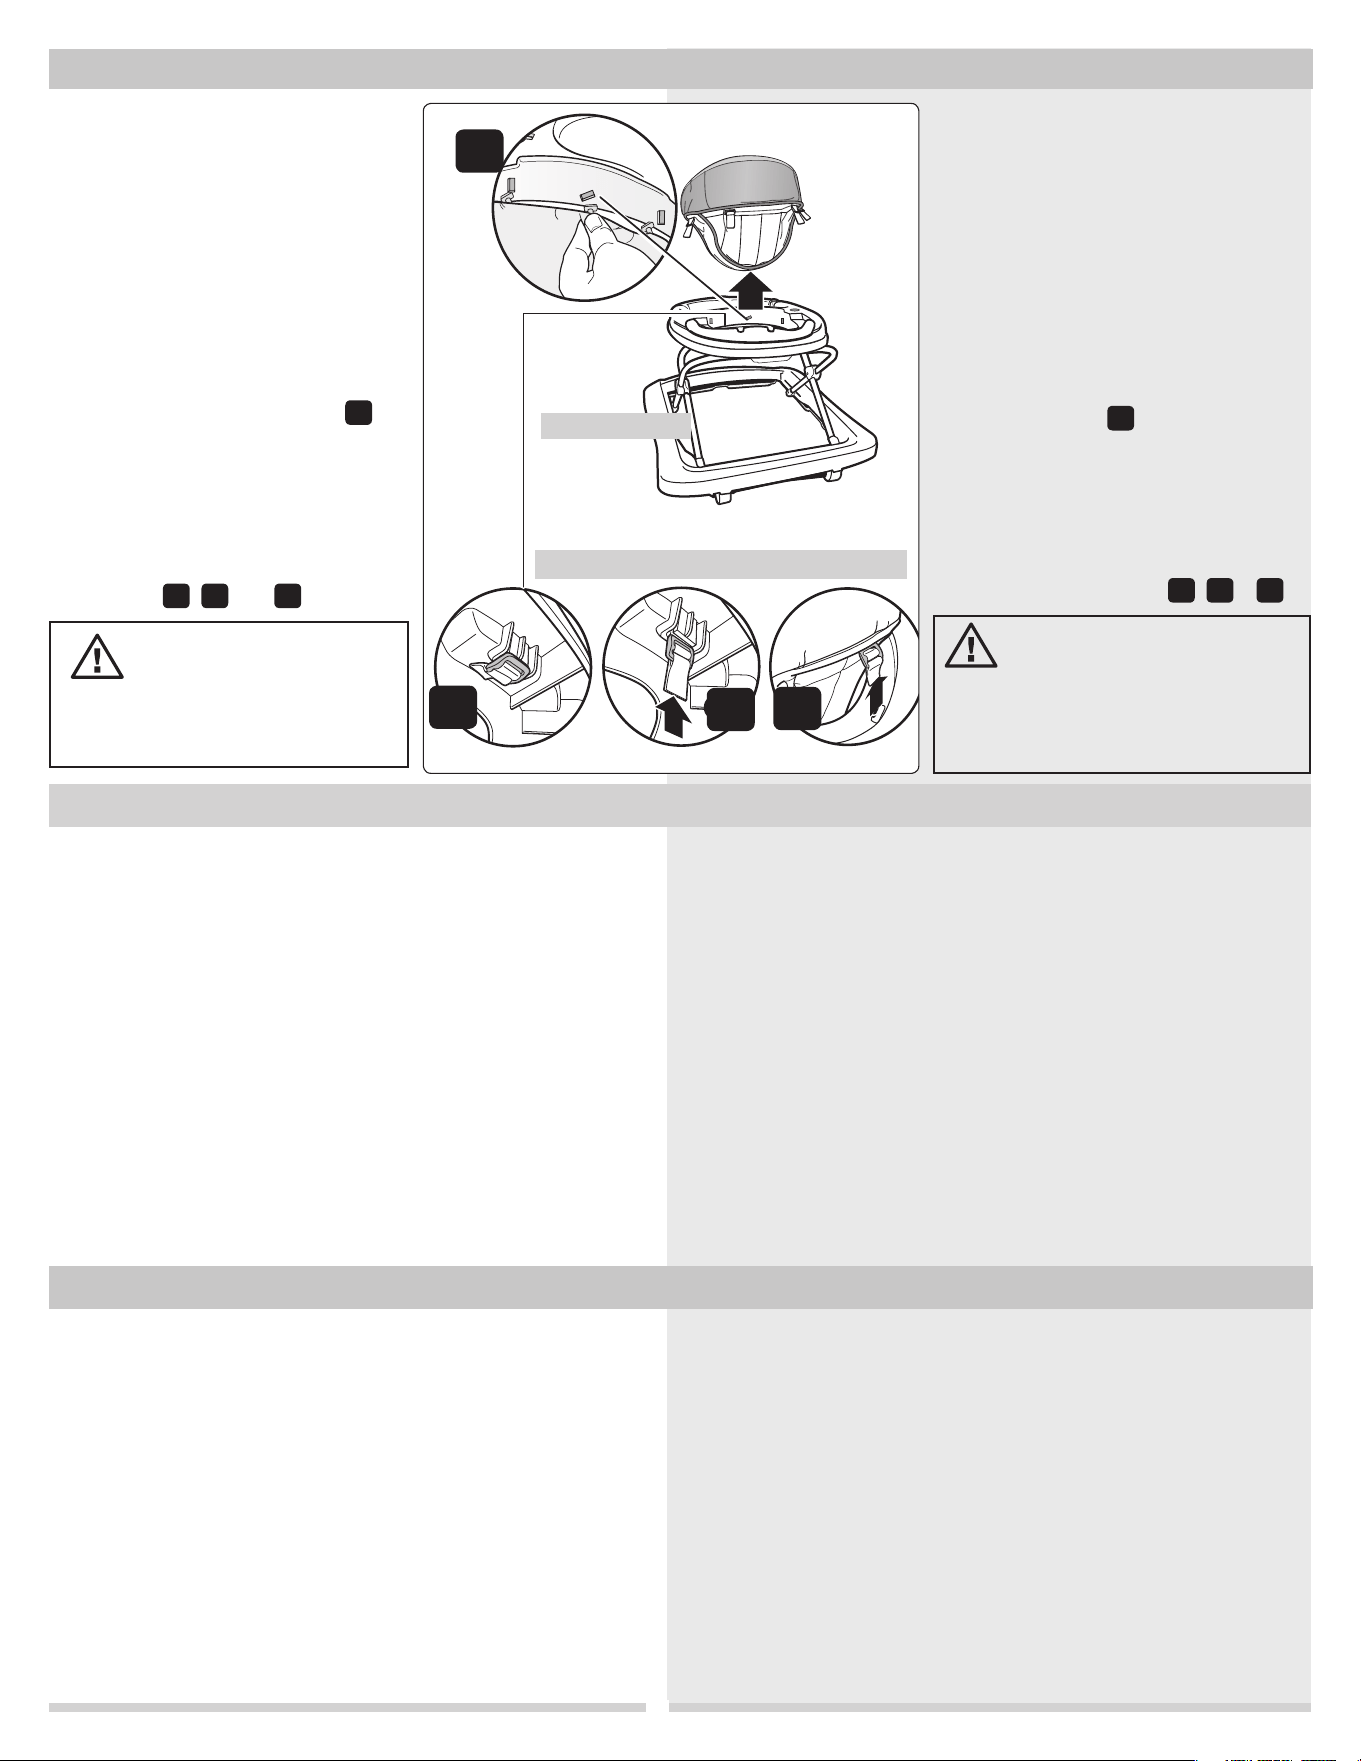
Fabric seat:
Remove from tray assembly by
following the steps below.
Machine-wash in cold water on
delicate cycle and drip-dry. DO
NOT BLEACH.
Remove Seat:
Pulling front of fabric seat away
from tray, locate three rectangular
plastic pegs on seat pad. Starting
with the center peg, rotate peg
and pull through slot (Figure
1
).
Repeat for the right and left pegs.
From underside of tray, locate 4
straps with buckles. To release each
strap and buckle, pull firmly on
strap and place buckle in upright
position, then fit through opening
(Figures
2
,
3
and
4
).
Asiento de tela:
Retírelo del conjunto de la charola
siguiendo los pasos a continuación. Lave
en lavadora con agua fría en ciclo para
ropa delicada y deje secar al aire. NO
UTILICE BLANQUEADORES.
Para retirar el asiento:
Tire del frente del asiento de tela para
alejarlo de la charola, y localice tres
clavijas rectangulares de plástico en la
almohadilla del asiento. Comenzando
con la clavija central, gírela y pásela por
la ranura (Figura
1
). Repita para las
clavijas derecha e izquierda.
Desde la parte inferior de la charola,
localice las 4 correas con hebillas.
Para soltar cada correa y hebilla, tire
firmemente de la correa y ponga la
hebilla en posición vertical; luego, pásela
por la abertura (Figuras
2
,
3
y
4
).
WARNING:
Check seat pegs and straps
for security before each use.
4
5
Vista desde la parte inferior de la charola
Viewed from underside of tray
Rear
Parte trasera
2
3
4
1
ADVERTENCIA:
Antesdecadauso,compruebeque
las clavijas y las correas del asiento
esténfirmementecolocadas.
FCC Information Información de FCC
This device complies with part 15 of the FCC Rules. Operation is subject to the
following two conditions (1) this device may not cause harmful interference, and
(2) this device must accept any interference received, including interference that
may cause undesired operation.
RADIO AND TELEVISION INTERFERENCE
This equipment has been tested and found to comply with the limits for a Class
B digital device, pursuant to Part 15 of the FCC rules. These limits are designed
to provide reasonable protection against harmful interference in a residential
installation. This equipment generates, uses and can radiate radio frequency energy
and, if not installed and used in accordance with the instructions, may cause
harmful interference to radio communications. However, there is no guarantee that
interference will not occur in a particular installation. If this equipment does cause
harmful interference to radio or television reception, which can be determined
by turning the equipment off and on, the user is encouraged to try to correct the
interference by one or more of the following measures:
• Reorient or relocate the receiving antenna.
• Increase the separation between the equipment and the receiver.
• Connect the equipment into an outliet on a circuit different from that to which
the receiver is connected.
• Consult the dealer or an experienced radio/TV technician for help.
Changes and Modifications not expressly approved by the manufacturer or
registrant of this equipment can void your authority to operate this equipment
under Federal Communications Commissions rules.
Este dispositivo cumple con lo establecido en la Parte 15 de las Reglamentaciones de la
Comisión Federal de Comunicaciones (FCC). La operación está sujeta a las siguientes
dos condiciones: (1) este dispositivo no puede causar interferencias perjudiciales, y (2)
este dispositivo debe aceptar toda interferencia recibida, incluso aquéllas que puedan
provocar un funcionamiento inadecuado.
INTERFERENCIAS DE RADIO Y TELEVISIÓN
Este equipo ha sido probado y se ha determinado que cumple con los límites para
dispositivos digitales de Clase B, de acuerdo con la Parte 15 de las Reglamentaciones
de la FCC. Estos límites han sido diseñados para proporcionar una protección razonable
contra interferencias perjudiciales en una instalación residencial. Este equipo genera,
utiliza y puede irradiar energía de radiofrecuencia y, si no se ha instalado y utilizado
conforme a las instrucciones, puede causar interferencias perjudiciales en la recepción
de señales de radio y televisión. Sin embargo, no existe garantía alguna de que no se
producirán interferencias en una instalación particular. Si este equipo causa alguna
interferencia en la recepción de las señales de radio y televisión, se ruega al usuario que
trate de corregirla tomando una o más de las siguientes medidas:
• Reoriente o traslade la antena de recepción.
• Aumente la separación entre el equipo y el receptor.
• Conecte el equipo a la salida de un circuito diferente de aquél al que esté
conectado el circuito.
• Consulte al distribuidor o a un técnico de radio y televisión con experiencia.
Los cambios y modificaciones no expresamente aprobados por el fabricante o
registrante de este equipo pueden invalidar su autoridad para operar el mismo, conforme
a las reglamentaciones de la Comisión Federal de Comunicaciones (FCC).