Loading ...
Loading ...
Loading ...

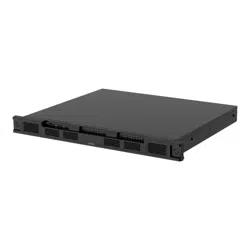
AXISS3016Recorder
Configureyourdevice
ChangetheRAIDlevel
CAUTION
ChangingtheRAIDlevelreformatsthelesystemanddeletesalldatafromyourdisks.
1.Inthedevicewebinterface,gotoSystem>Storage.
2.UnderTools,selectChangeRAIDlevelandclickUsetool.
3.SelectaRAIDlevelandclickNext.
4.SelectEncryptthediskandtypeyourpassword.ClickNext.
5.ClickYes.
6.Thestatusmessageappearsintheupper-rightcorner.WaituntiltheoperationisdoneandRAIDconfigured
isshownbeforeclosingthepage.
Replaceaharddrive
Note
Toavoidelectrostaticdischarge,werecommendthatyoualwaysuseastaticmatandstaticstrapwhileworkingon
componentsintheinteriorofthesystem.
1.Loosenthescrewsattheleftandrightofthebezelandremovethebezel.
2.LocatethebrokenharddriveindicatedbyaredLED.
AllLEDsareredincaseofaRAIDfailure.Toidentifythebrokenharddrive,gotothedevicewebinterfaceandgo
toSystem>Storage>Harddrivestatus.
3.Loosenthescrewfortheharddrivesled(T10).
4.Pulltheharddrivesledoutoftheharddrivebay.
5.Loosenthefourscrewsfortheharddrive(T8).
6.Taketheharddriveoutoftheharddrivesled.
7.Insertanewharddriveintotheharddrivesled.
8.Fastenthefourscrewsfortheharddrive.
9.Insertandpushtheharddrivesledallthewayintotheharddrivebay.
10.Fastenthescrewfortheharddrivesled.WaituntiltheLEDturnsgreen.
11.Attachthebezelandfastenthescrewsattheleftandrightofthebezel.
CreateanewRAID
CAUTION
YouonlycreateanewRAIDincaseofaRAIDfailure.CreatinganewRAIDdeletesalldatafromyourharddrives.
1.Replacethebrokenharddrives.SeeReplaceaharddriveonpage10.
2.ConguretheRAID.SeeChangetheRAIDlevelonpage9.
3.Congurerecordingsinyourvideomanagementsystem.SeeGetstartedwithAXISCompaniononpage4andGet
startedwithAXISCameraStationonpage7.
10
Loading ...
Loading ...
Loading ...