
Thank you for purchasing a Sealey product. Manufactured to a high standard, this product will, if used according to these instructions,
and properly maintained, give you years of trouble free performance.
IMPORTANT: PLEASE READ THESE INSTRUCTIONS CAREFULLY. NOTE THE SAFE OPERATIONAL REQUIREMENTS, WARNINGS & CAUTIONS. USE
THE PRODUCT CORRECTLY AND WITH CARE FOR THE PURPOSE FOR WHICH IT IS INTENDED. FAILURE TO DO SO MAY CAUSE DAMAGE AND/OR
PERSONAL INJURY AND WILL INVALIDATE THE WARRANTY. KEEP THESE INSTRUCTIONS SAFE FOR FUTURE USE.
SCS901 Issue:3 (1) 27/02/24Original Language Version
© Jack Sealey Limited
Refer to
instruction
manual
Wear
eye
protection
Wear
protective
gloves
WINDSCREEN REPAIR KIT
MODEL NO: SCS901
1. SAFETY
WARNING! Ensure Health & Safety, local authority, and general workshop practice regulations are adhered to when using this tool.
WARNING! This kit contains glue. If you require a safety data sheet, contact your Sealey stockist.
WARNING! Familiarise yourself with the specific applications and limitations of the kit, as well as any potential hazards.
WARNING! Avoid contact with eyes, skin and vehicle bodywork.
WARNING! Causes skin irritation.
WARNING! Causes serious eye irritation.
WARNING! May cause an allergic skin reaction.
WARNING! May cause respiratory irritation.
9 This kit should be used in conjunction with inspection maintenance procedures recommended in the vehicle manufacturer’s manual.
9 Ensure that the kit is correct for the task.
9 Use only outdoors or in a well-ventilated area.
9 If on skin: Wash with plenty of soap and water.
9 If in eyes: Rinse cautiously with water for several minutes: Remove contact lenses if present and easy to do. Continue rinsing.
9 Dispose of contents/ container to an approved waste disposal plant.
9 Wear the appropriate personal protective equipment for the task. A full range is available from your Sealey stockist.
8 DO NOT use the kit for any purpose other than that for which it is designed.
9 Ensure there is adequate lighting prior to using the kit. A range of inspection lamps are available from your Sealey stockist.
9 Keep children, animals and unauthorised persons away from the working area.
8 DO NOT use the kit if any parts are damaged or missing, as this may cause failure and/or personal injury.
8 DO NOT use the kit when you are tired, or under the influence of alcohol, drugs or intoxicating medication.
9 After use, store in a safe, dry childproof area.
NOTE: If the damage is right in front of the driver - in the area known as ‘Zone A’ for MOT testing - damage up to 10mm diameter will
normally result in an MOT failure. Also damage greater than 40mm in the remaining swept area will normally result in a failure. Always refer
to the latest MOT information to make sure the repair is legal. Referring to the figure below, Zone ‘A’ is:
1. In the swept area of the windscreen.
2. 290mm wide.
3. Centred on the centre of the steering wheel.
2. INTRODUCTION
Simple step-by-step process and a 30 minute curing time. Pressurising applicator penetrates deep inside chips and cracks to give an
almost invisible repair. Tough resin formula lls damaged area to prevent from spreading, avoiding costly windscreen replacement.
Suitable for screen chips up to Ø25mm diameter and cracks up to 300mm long. Curing process can be sped up by using a UV lamp
(not included). Improves visibility and safety.
Warning
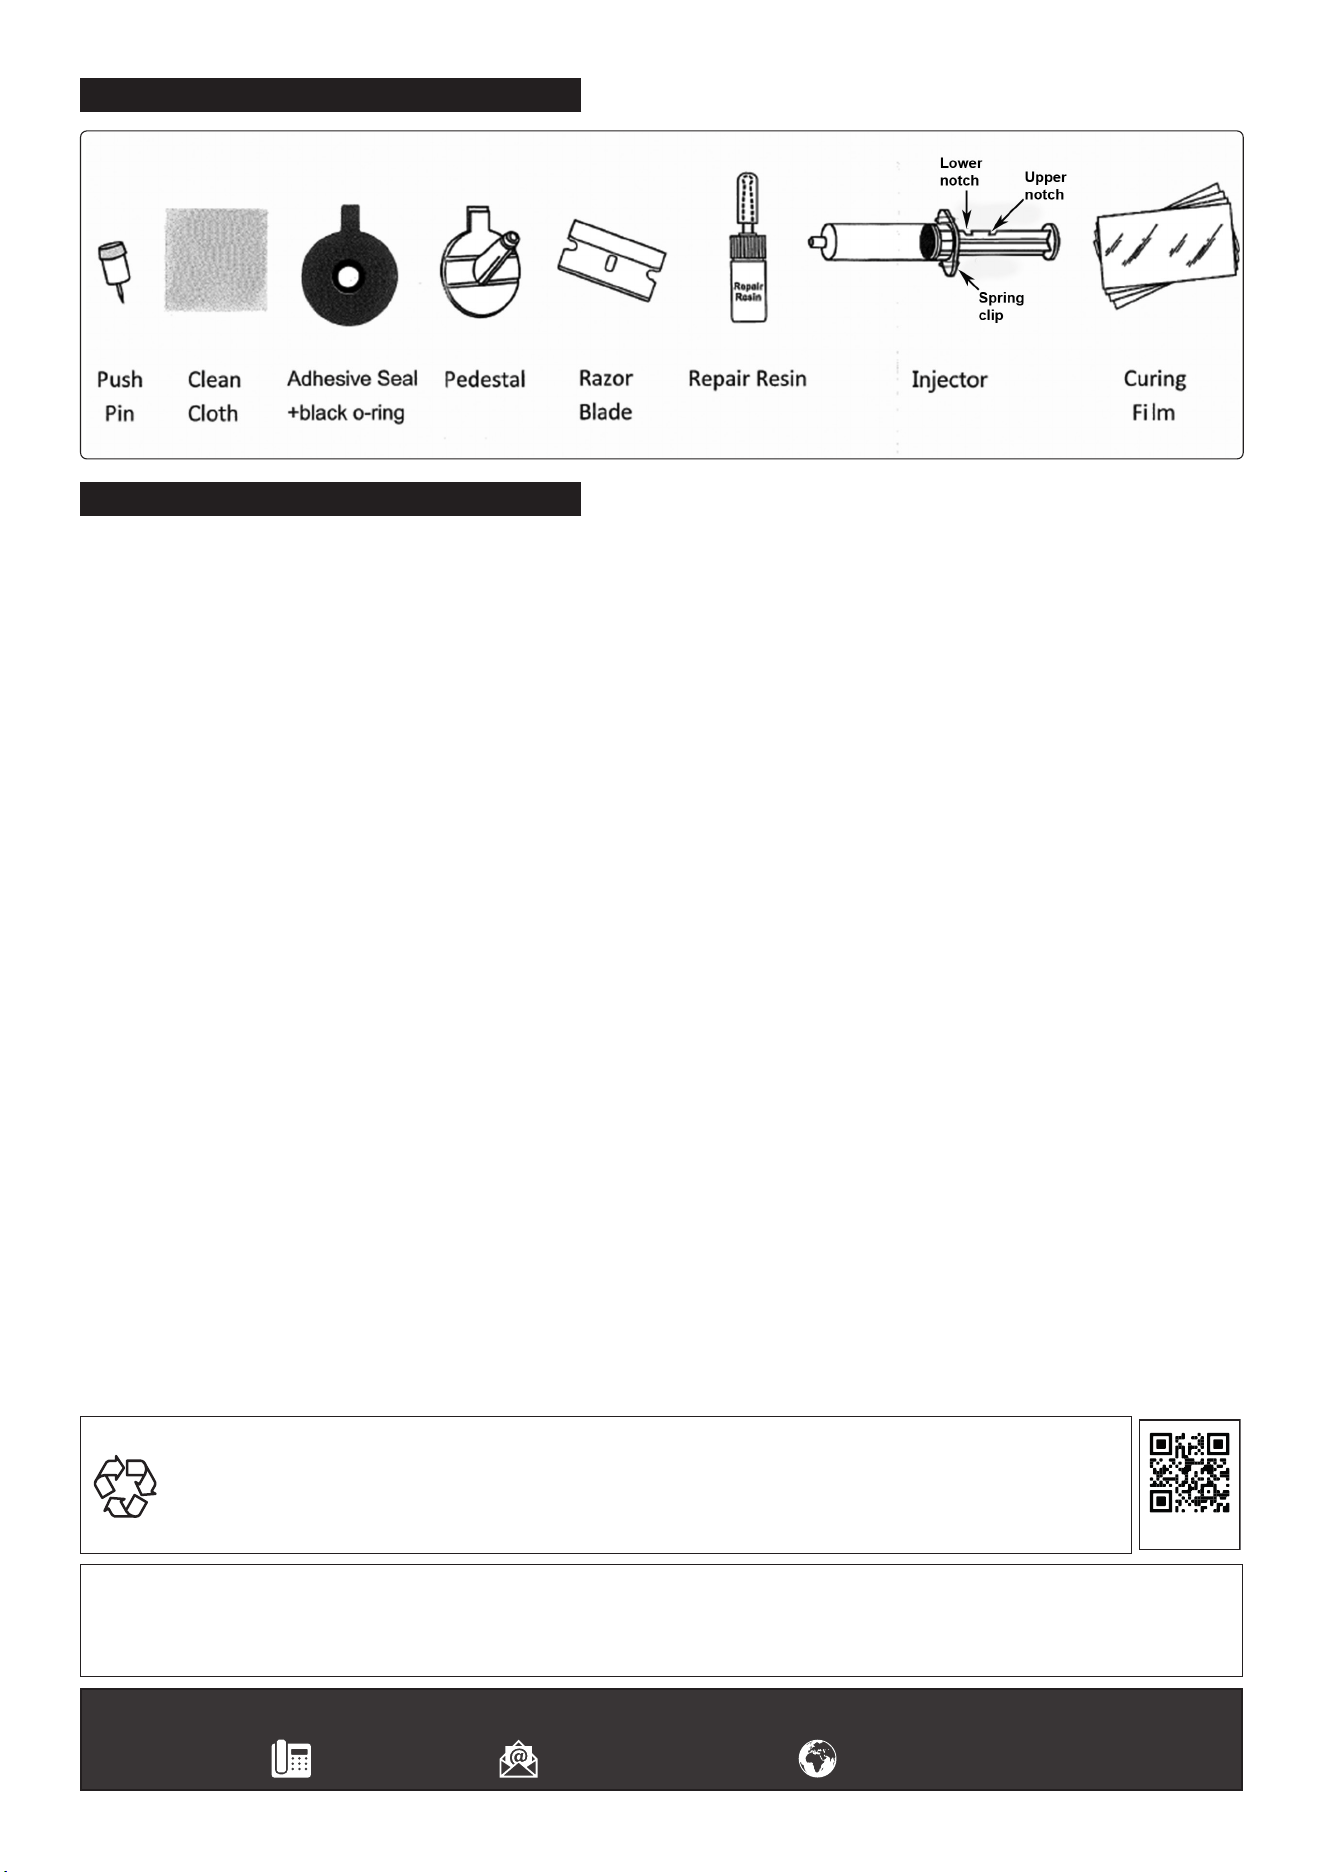
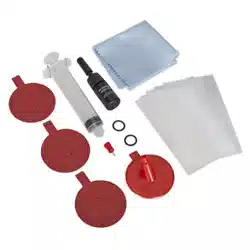
3. CONTENTS
4. OPERATION
8 DO NOT use in direct sunlight; work in a shaded area.
8 DO NOT work on a hot windscreen; park the vehicle in the shade and open windows to cool the glass.
4.1. REPAIR PROCEDURE
4.1.1. Clean out any loose glass particles using the push pin. Clean the area surrounding the damage using a dry cloth.
4.1.2. Peel the backing o one side of an adhesive seal, lining up the hole in the centre of the seal with the centre of the break. Press the
adhesive seal rmly onto the glass, making sure that the tab faces towards the top of the screen.
4.1.3. Peel the backing from the top side of the adhesive seal and place an o-ring in the middle.
4.1.4. Line up the pedestal with the adhesive seal, ensuring that tabs line up.
4.1.5. Press pedestal to adhesive seal, running a nger round base of pedestal to ensure a tight bond.
4.1.6. Cut the tip o the resin bottle and empty about 3/4 of the resin into the pedestal. Squeeze slowly to better control the amount of resin
being poured. Wipe o any excess resin from the tip with cloth and save the container for section 4.2.3.
4.1.7. Ensure that the plunger is positioned in the injector barrel just above the nozzle.
4.1.8. Press the injector assembly into the pedestal, ensuring a tight t. Line the spring clip up with the tab on the pedestal.
4.1.9. Pull the plunger upwards and rotate until the spring clip engages in the lower notch, maintaining the vacuum. Leave for 15 minutes.
4.1.10. Release the injector from the pedestal briey to allow air back in.
4.1.11. Replace the injector into the pedestal and, holding the injector with one hand, rotate the plunger, releasing it from the lower notch.
4.1.12. Using a steady pressure, press the plunger down until it is locked by the upper notch. Leave for 10-15 minutes.
8 DO NOT apply any further pressure, as this may cause resin leakage.
4.2. COMPLETING
4.2.1. Remove the injector and loosen the edges of the pedestal with the razor blade. Once loosened, grip the tab and pull away.
4.2.2. Wipe o any surplus resin.
4.2.3. Apply a few drops of resin to the centre of the damaged area by squeezing the resin bottle gently.
4.2.4. Place a curing lm over the area quickly, using light pressure on the razor blade to exclude any air bubbles.
4.2.5. Move the vehicle into the sunshine. The ultra violet rays will cure the resin in 15-20 minutes. Alternatively, the use of a UV light source
(not included) will speed the process up.
4.2.6. When the resin is cured, remove the curing lm and scrape the area with the razor blade to leave ush with the surrounding glass.
Sealey Group, Kempson Way, Suffolk Business Park, Bury St Edmunds, Suffolk. IP32 7AR
01284 757500 sales@sealey.co.uk www.sealey.co.uk
Note: It is our policy to continually improve products and as such we reserve the right to alter data, specifications and component parts without prior
notice.
Important: No Liability is accepted for incorrect use of this product.
Warranty: Guarantee is 12 months from purchase date, proof of which is required for any claim.
ENVIRONMENT PROTECTION
Recycle unwanted materials instead of disposing of them as waste. All tools, accessories and packaging should be sorted,
taken to a recycling centre and disposed of in a manner which is compatible with the environment. When the product
becomes completely unserviceable and requires disposal, drain any fluids (if applicable) into approved containers and
dispose of the product and fluids according to local regulations.
Original Language Version
© Jack Sealey Limited
SCS901 Issue:3 (1) 27/02/24
REGISTER YOUR
PURCHASE HERE
