Loading ...
Loading ...
Loading ...
44 49-2000877 Rev. 1
CARE AND CLEANING
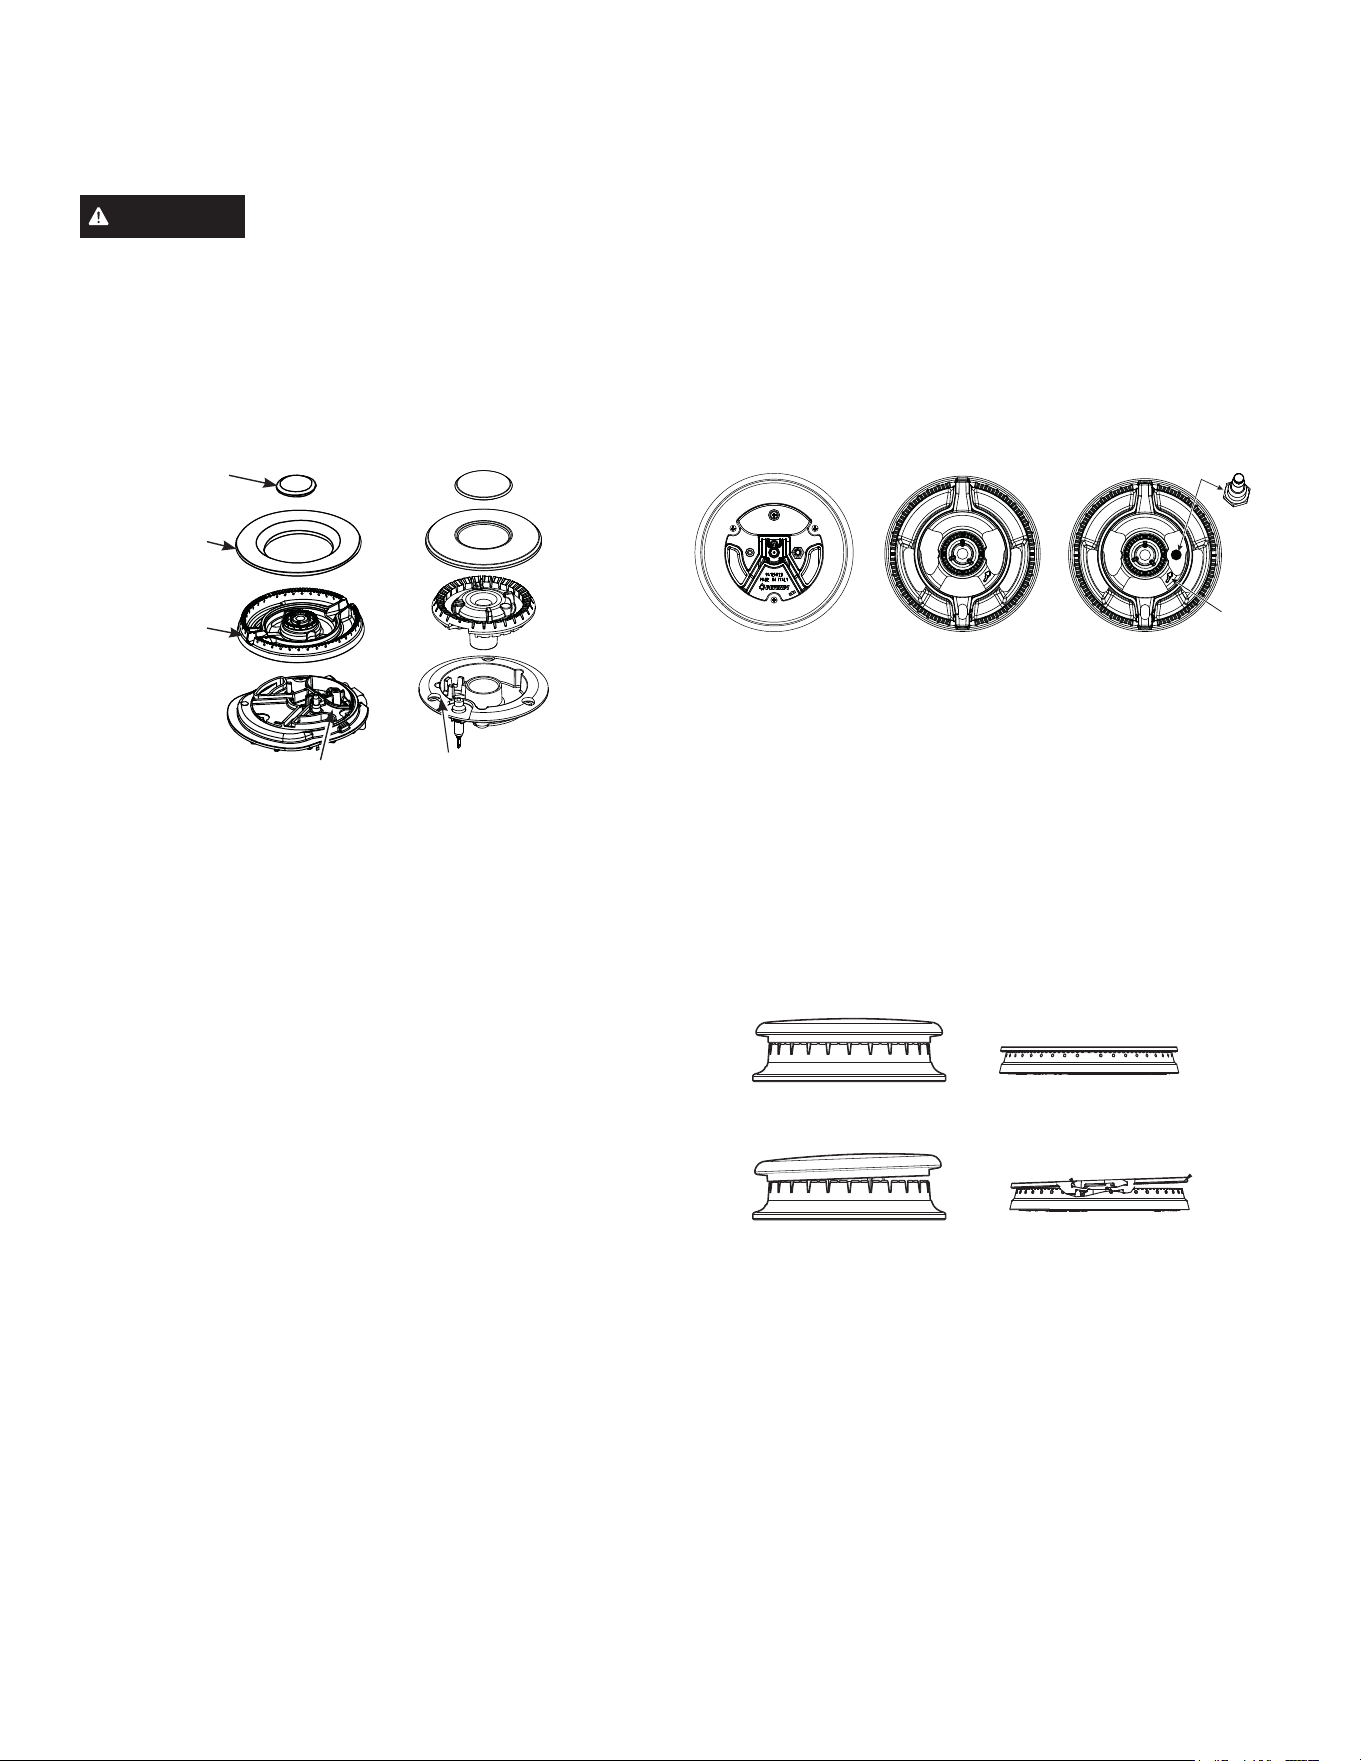
DUAL-FLAME STACKED AND MULTI-RING BURNERS
CAUTION
DO NOT OPERATE THE BURNER
WITHOUT ALL BURNER PARTS IN PLACE.
Surface burners should be cleaned routinely, especially
after bad spillovers, which could clog the slots and holes in
the burner heads.
The electrode is located at the rear of each burner. Do not
attempt to disassemble or clean around any burner while
another burner is on. An electric shock may result.
To remove the burner parts:
1. Turn all controls OFF before removing any burner parts.
2. When cool, you may lift off the burner grates, burner
caps and burner heads for easier cleaning. Do not
remove the burner bases.
NOTE: Be sure to replace the burners in the same location
and orientation.
Cleaning
Lift off burner parts only when cool. Wash in hot, soapy
water.
To remove burned-on food, soak the burner heads in a
solution of mild liquid detergent and hot water for 20–30
minutes. For more stubborn stains, use a plastic scouring
pad or toothbrush.
If the spill goes inside the burner head assembly, wash it
under running water and shake to remove excess water.
After Cleaning
Before replacing the burner parts, shake out excess water
and then dry them thoroughly.
To replace the burner parts for Multi Ring:
Align the burner head as shown. Pass the igniter through
the opening in the burner head while ensuring the ignitor
arrow is pointing toward the ignitor. Make sure the burner
lies flat. Install the burner caps taking care to check that
they lie flat on the burner head. Check burner operation to
ensure uniform, blue flame around the burner. If there are
yellow or uneven flames, immediately turn the burner off,
let it cool, and readjust the burner and burner caps.
To replace the burner parts for Dual Flame:
Make sure that the burner parts are replaced in the correct
location and orientation.
1. Replace the burner head on top of the burner base,
making sure that the hole in the burner head is properly
aligned with the electrode in the burner base. A small
gap between the base and head is normal.
2. Place the burner cap on top of the burner head. Make
sure that the burner cap is properly seated on the burner
head.
Burner
Head
Burner
Base
Electrode
Electrode
Burner
Cap
Multi-Ring Burner Dual-Flame Stacked
Burner
Inner Burner
Cap
(Removable)
Outer
Burner Cap
(Removable)
Burner
Head
Burner cap not properly seated
Burner cap properly seated
Ignitor
Arrow
Ignitor
Cooktop without
burner installed
Front
Burner in correct
orientation
Front
Burner correctly
installed
Front
Loading ...
Loading ...
Loading ...