Loading ...
Loading ...
Loading ...
49-2000877 Rev. 1 43
CARE AND CLEANING
OVEN LIGHTS
WARNING
SHOCK OR BURN HAZARD: Before
replacing oven light bulb, disconnect the electrical power to
the range at the main fuse or circuit breaker panel. Failure
to do so may result in electric shock or burn.
CAUTION
BURN HAZARD: The glass cover and
bulb should be removed when cool. Touching hot glass
with bare hands or a damp cloth can cause burns.
Each oven is equipped with halogen light columns located
on the side walls of the oven. The lights come on when the
door is opened or when the oven is in a cooking cycle.
Each light assembly consists of a removable light cover
with two locking clips and a light compartment with three
halogen bulbs.
Be sure to let the light cover and bulb cool completely. For
your safety, do not touch a hot bulb with bare hands or a
damp cloth.
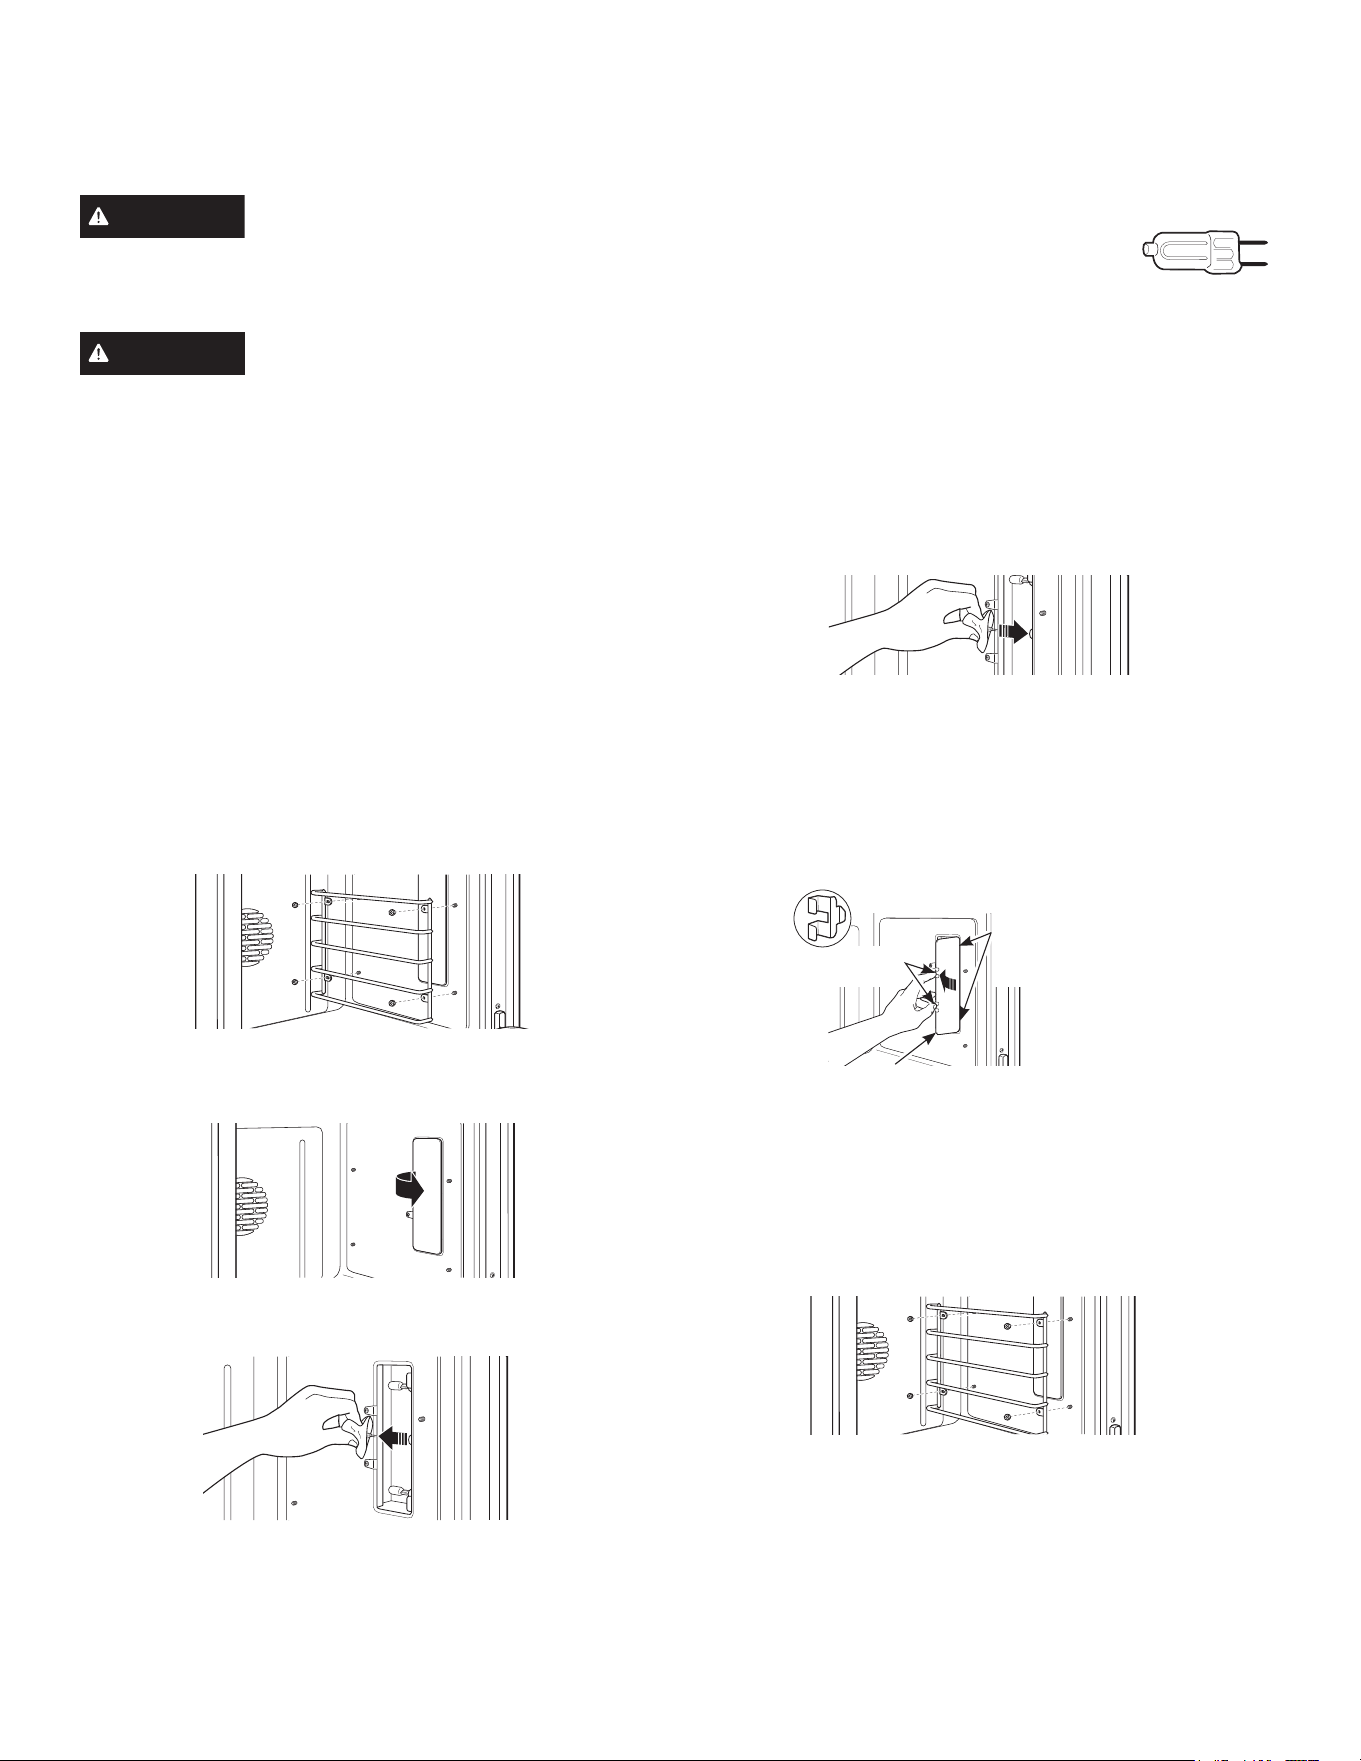
To remove:
1. Remove the racks from the oven. See the Full
extension oven racks section.
8VLQJDƎQXWGULYHUUHPRYHWKHIRXUQXWVKROGLQJ
the rack supports to the oven wall.
3. Remove the glass light cover by pulling its back edge
out and rolling it toward you. Do not remove any
screws.
4. Using gloves or a dry cloth, remove the burned-out light
bulb by pulling it straight out.
To replace:
Use a new 120-volt Halogen bulb, with G8
pins, not to exceed 40 watts.
Replacement bulbs may be purchased by calling
800.626.2002. Order Part Number WB25X39610.
NOTE: Higher wattage bulbs will damage your oven.
Using gloves or a dry cloth, remove the bulb from its
packaging. Do not touch the bulb with bare fingers. Oil
from bare fingers may cause hot spots on the glass
surface and lead to premature failure of the bulb. If you do
touch the glass, clean it with alcohol prior to installation.
1. Push the bulb straight into the receptacle all the way.
2. Replace the light cover, by placing its front edge under
the front two tabs in the light compartment. Roll the
back edge into place, making sure that it is firmly
seated.
NOTE: If the locking clips fell from the glass lens cover,
hold them on the cover, in the correct position, while
replacing the cover on the light compartment.
The light cover must be in place when using the
oven.
3. Reinstall the rack support. Be sure to orient the support
so that the top tabs for the nuts are closest to the top
of the oven. Lightly secure with the four nuts removed
earlier, but do not over-tighten or the enamel could be
chipped.
4. Replace the racks. See the Full extension oven racks
section.
5. Reconnect electrical power to the oven.
Press the light cover into place
Place front
edge of lens
cover under
front two tabs
Locking
clips
Loading ...
Loading ...
Loading ...