Loading ...
Loading ...
Loading ...

12 English
Symbols on the device
(according to type of appliance)
Safety valve
In the case of excessively high pressure in the event of
a fault, a safety valve relieves the pressure into the at-
mosphere.
Fuse
The fuse prevents the device from overheating. If the
device overheats, the fuse disconnects the device from
the power supply.
Before re-commissioning the device, contact the re-
sponsible KÄRCHER Customer Service.
Device description
The maximum amount of equipment is described in
these operating instructions. Depending on the model
used, there are differences in the scope of delivery (see
packaging).
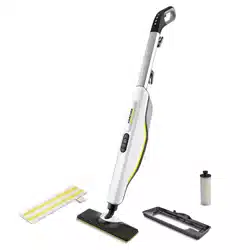
For the illustrations, refer to the graphics page.
Illustration A
1 Button/switch area
2 Switch - Off
3 Switch - On
4 Indicator light (red)
- replace decalcification cartridge.
5 RESET button
- set water hardness
- confirmation after cartridge replacement
6 LED operating indicator
Flashing red - mains voltage present and device is
heating up
Green - device is ready for operation
7 Display for steam stage setting
8 Button for steam stage setting
9 Steam stage 1 - Wood
10 Steam stage 2 - Carpet
11 Steam stage 3 - Tiles/Stone
12 Handle
13 Wall anti-slip handle
14 Steam lever
15 Cable hook with cable fastener
16 Decalcification cartridge
17 Filling hole for water
18 Water reservoir with reservoir cover and carrying
handle
19 Mains connection cable with mains plug
20 Unlocking button for floor nozzle
21 Floor nozzle
22 Hook and loop fastener
23 Microfibre floor cloth (1 x)
24 ** Microfibre floor cloth (2 x)
25 ** Abrasive floor cloth (1 x)
26 Carpet glider
** optional
Initial Start-Up
ATTENTION
Device damage due to calcification
The decalcification cartridge only works properly if you
adjust the device to the local water hardness before op-
erating it for the first time.
Set the device to the local water hardness.
Set the device to the current water hardness before us-
ing it in an area with a different water hardness (e.g. af-
ter a move)
1. Insert the decalcification cartridge into the water res-
ervoir and press it firmly into place.
Illustration F
2. Set the water hardness, see chapter Setting the wa-
ter hardness.
Note
When steaming for the first time after removing and re-
inserting the decalcification cartridge, the steam jet may
be weak or irregular, and individual drops of water may
be expelled. The device requires a short running-in pe-
riod in which the decalcification cartridge fills with water.
The steam volume that is expelled increases constantly
until the maximum steam volume has been reached af-
ter approx. 30 seconds.
Note
Please note that here it is set to steam stage 3 (tiles/
stone), since the running-in period will otherwise be ex-
tended.
Installation
Installing the handle bar
1. Hold the basic device.
2. Fit the handle bar all the way to the end stop into the
basic device until it audibly latches into place. The
handle bar must sit tightly in the device.
Illustration B
Installing the floor nozzle
1. Hold the device by the handle.
2. Connect the lower section of the basic unit to the
floor nozzle until it audibly latches into place.
Illustration C
Operation
Unwinding the power cord
몇 WARNING
Risk of electric shock
If the power cable is not completely unwound, the dan-
ger exists of you straining and damaging the mains ca-
ble by overestimating the range of the cable.
Always completely unwind the power cable.
Risk of burns, surface of appliance be-
comes hot during operation
Risk of scalding from steam
Read operating instructions
Loading ...
Loading ...
Loading ...
