
EN
www.mobotix.com
Innovations–Made in Germany
The German company MOBOTIX AG is known as the leading pioneer in network camera technology and its decentralized concept has made high-resolution video
systems cost-ecient.
MOBOTIX AG • Security-Vision-Systems • D-67722 Langmeil • Phone: +49 6302 9816-103 • Fax: +49 6302 9816-190 • [email protected]
Security-Vision-Systems
32.480-001_EN_10/2015
Quick Install Corner Mounting Set
MX-MT-CM-1
Preparing the Camera
1. Remove three spring clips
Put on safety glasses for this step.
Using a small flat-head screwdriver,
push against the clip as indicated by the red arrow. Then lift the spring
clip from its seating on one side. The clips can now be removed easily.
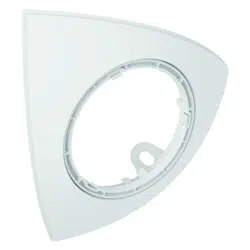
2. Attach mounting ring
Position the mounting ring (
item 1.2
) on the camera from below as shown.
Make sure that the triangular mark of the mounting ring (colored red in the
image) points towards the red dot on the camera. When installing, the
marking is pointing downward.
3. Complete optional tasks
You can now complete the following tasks as shown in the camera docu-
mentation:
• Exchange the supplied microSD by a card with more storage capacity.
• Attach MX-Bus-IO-Module to camera (e.g., for interface boxes with
MxBus connection).
• Connect MxBus wires and USB cables.
Wear safety glasses!
• Corner Mounting Set for MOBOTIX cameras c25 (not included)
• Perfect surveillance of an entire room with only one c25 and lens B036 –
103°
• Concealed cabling from the back
Installing the Corner Mounting Set
Install the Casing
•
Hold the casing (
item 1.1
) to the mount-
ing position so that the embossed mark
(blue arrow) is pointing downward.
• Mark the three holes for drilling (red
arrows in figure) with a pencil.
• Take o the casing and drill the holes
at the marked positions. Insert the sup
-
plied screw anchors into the holes,
if required.
• If you want to install a concealed Interface Box behind the casing, drill
the holes as proposed on the back of this document.
•
Hold the casing over the holes you drilled and attach it using the supplied
screws (
item 1.5
) with washers dia. 5.3x20mm (
item 1.7
, torque 0.4Nm).
Connect the camera
•
If you are using Interface Boxes, connect
the corresponding wires to the camera.
Note:
Please follow the notes on
installing in the documentation of
the individual Interface Box.
• Connect the network cabling of the
camera.
Insert the camera
•
Position the camera with attached mount-
ing ring onto the casing. Make sure that
the triangular mark at the mounting ring
and the red dot on the camera are pointing
downward (you can still rotate the camera
for fine-tuning the image later on). Take
care that no cables or wires are crushed
between the mounting ring and the rim
of the casing.
• Position your fingers on the four spots
indicated by the red circles in the figure and firmly press the camera
into the casing. A loud click indicates that the camera is fully inserted.
• Turn the camera so that it points into the proper direction.
Finish the Installation
• Establish the power supply to the cam-
era and bring the camera into service as
described in the corresponding camera
manual.
• In the browser, open the Setup Menu>
vPTZ Settings dialog and set the Tilt
Angle Correction parameter to
35°
(Corner Mounting Set)
.
• Check the live image and adjust the camera, if required.
Corner Mounting Set for
MOBOTIX c25
Set for corner installation of
MOBOTIX cameras c25 (not included),
allows elegant installation of the cameras in corners
Corner Mounting Set with
installed c25 (not included)
MOBOTIX Corner Mounting Set
MX-MT-CM-1
with mounting supplies
Standard Delivery
Item Count Part Name
1.1 1 Casing
1.2 1 Mounting ring
1.3 2 Cable ties (not used here)
1.4 4 Washer dia. 4.3mm, stainless steel (not used here)
1.5 4 Wood screw 4x40mm, stainless steel
1.6 4 Screw anchor S6
1.7 3 Washer dia. 5.3x20mm, stainless steel
1.8 1 Torx wrench TX6 (not used here)
1.1
1.8
1.2
1.3
1.6
1.5
1.4
1.7
Main direction of view titled down
-
ward by 35°
35°

EN
www.mobotix.com
Innovations–Made in Germany
The German company MOBOTIX AG is known as the leading pioneer in network camera technology and its decentralized concept has made high-resolution video
systems cost-ecient.
MOBOTIX AG • Security-Vision-Systems • D-67722 Langmeil • Phone: +49 6302 9816-103 • Fax: +49 6302 9816-190 • [email protected]
Security-Vision-Systems
Quick Install Corner Mounting Set
2015 • Declaration of Conformity: www.mobotix.com> Support> Media Library> Certificates
Copyright © MOBOTIX AG 2015 • Made in Germany • Technical information subject to change without notice.
Removing the Camera
1. Correct the camera orientation
Turn the camera until the two LEDs of the c25 are perpendicular to the
corner that is pointing downward (embossed mark, highlighted red in the
upper figure).
2. Firmly press at the bottom
Place two thumbs at the positions indicated by the red circles in the figure,
then firmly press the camera into the casing. The camera tilts inwards and
the opposite side comes up.
3. Pull out the camera
You can now grab the camera at the top and remove it from the
Corner Mounting Set. Remove the network cable and any other cables or
wires attached to the camera.
Embossed
mark
LEDs
Dimensions/Drilling
80mm/3.15in
80mm/3.15in
143mm/5.63in
211mm/8.31in
Drill hole
63mm/2.48in
80mm/3.15in
75mm/2.95in
80mm/3.15in
63mm/2.48in
150mm/5.91in
150mm/5.91in
Cable guided from the
rear
Interface Box installed
behind set
Drill hole
10mm/
0.39in
10mm/
0.39in
Safety Warnings
• This product must not be used in locations exposed to the dangers
of explosion.
•
The Corner Mounting Set is only to be used in combination with MOBOTIX
cameras of the c2x series.
• Make sure that you install this product as outlined in the installation
instructions above.
• Electrical systems and equipment may only be installed, modified and
maintained by a qualified electrician or under the direction and supervi-
sion of a qualified electrician in accordance with the applicable electri-
cal guidelines. Make sure to properly set up all electrical connections.
• Only install this product in or on suitable, solid materials that provide
for a sturdy installation of the fixing elements used.
•
When using an MOBOTIX interface box (e.g., MX-Input-Box, MX-Output-Box),
the installation instructions of these boxes are also to be followed.
• For the Corner Mounting Set, the same operating conditions apply as
for the installed MOBOTIX camera.
Technical Specifications
Corner Mounting Set
Dimensions
Total width: 211mm/8.31in,
Total height: 150mm/5.91in
Operating
Conditions
Same as MOBOTIX camera
Materials Housing: PBT GF30
Weight 130g
The MOBOTIX YouTube Channel
www.youtube.com/user/MobotixAG
