Loading ...
Loading ...
Loading ...
21
3. Remove pilot and main injectors and replace with correct size injectors as shown in ‘Gas
Specifications Tables’ at rear of this section.
4. Refit the following:-
Re-connect pilot supply tube to pilot burner.
Refit main burner and sole plate(s).
Refit lower lintel.
5. To replace the low fire screw in the static oven gas valve:-
Remove the oven control panel.
Remove low fire screw from gas valve and replace with correct
size low fire screw as shown in ‘Gas Specifications Tables’ at end
of this section.
NOTE: The 'Low Fire Screw' should be sealed with coloured
paint on completion of low fire adjustment.
Refit the oven control panel.
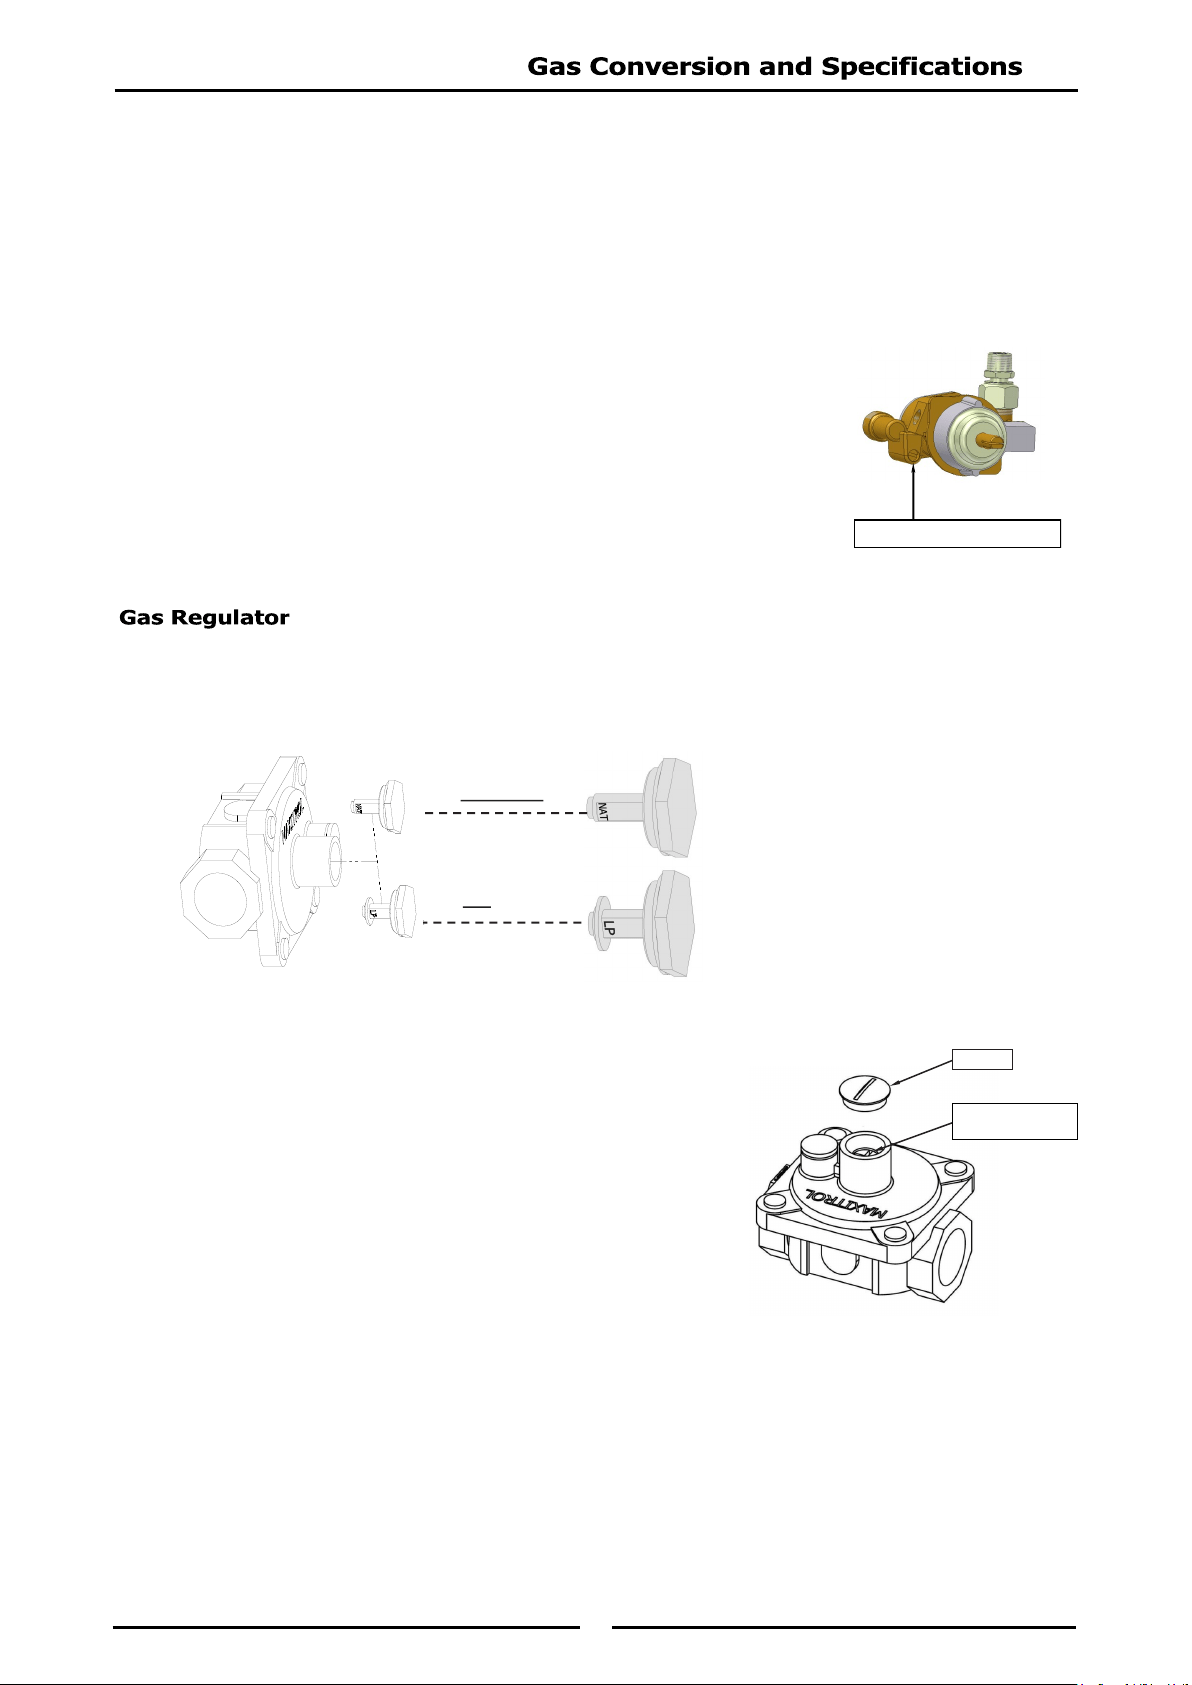
NAT Gas / LPG / Butane Only.
NOTE: The gas regulator supplied is convertible between Natural Gas and LP Gas, but it’s outlet
pressure is fixed ex-factory and is NOT to be adjusted.
- Town Gas Only.
1. Remove slotted cap from regulator.
2. Turn ‘On’ gas supply and appliance.
3. Adjust pressure adjusting screw to achieve correct burner
operating pressure.
NOTE: Operating pressure to be measured at manifold test
point with two burners operating at 'High Flame' setting.
4. Verify operating pressure remains correct (Re-adjust regulator
if required).
5. Screw cap nut back onto regulator.
Low Fire Adjustment Screw
NOTE, Pin rotated
for Natural Gas
NOTE, Pin rotated
for LPG
Pressure Adjusting
Screw
Cap Nut
Loading ...
Loading ...
Loading ...