Loading ...
Loading ...
Loading ...
11
English
Range Installation
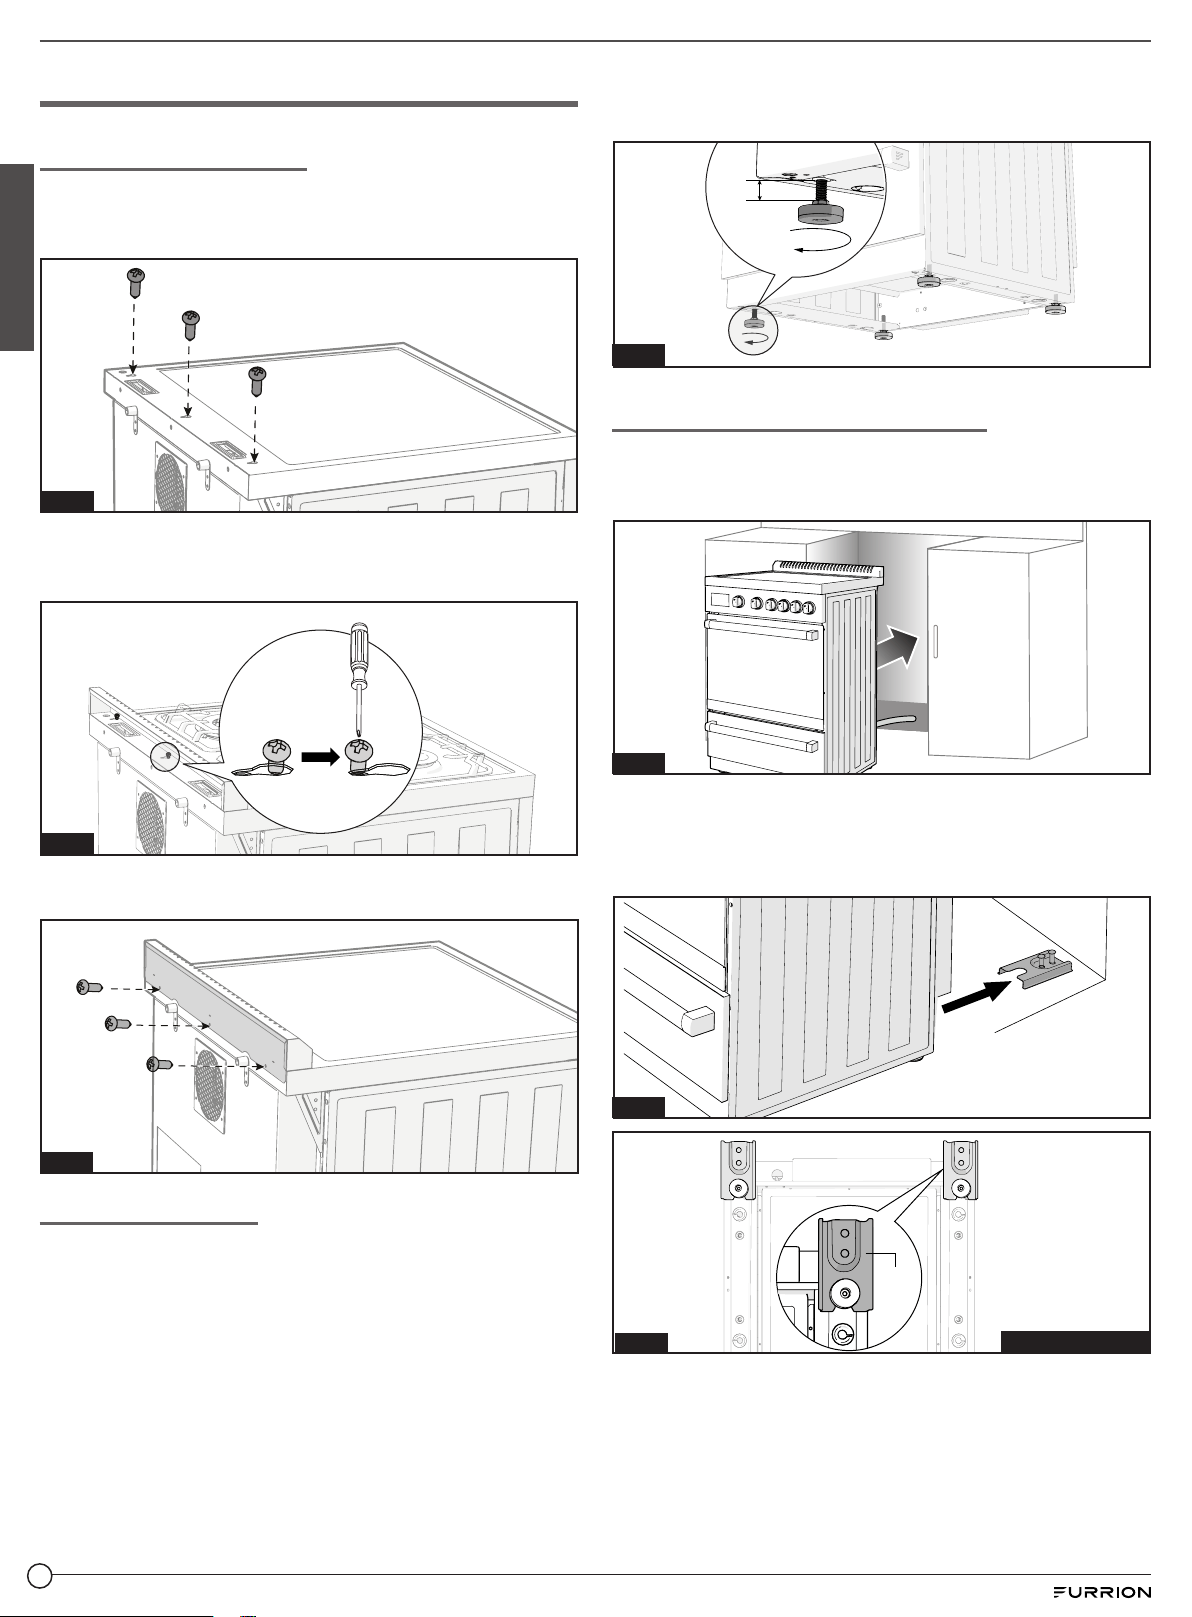
Backsplash Installation
1. Have three screws (M4
*
12mm, included) pre-installed at
the rear side of the range and leave 3mm untightened.
(Fig. 8)
Fig. 8
2. Attach the backsplash into the pre-installed screws at the
bottom and pull inward until stopped. Turn the backsplash
to the front then tighten these three screws. (Fig. 9)
Fig. 9
3. Reinforce the backsplash at the back with extra three
screws (M4
*
12mm, included). (Fig. 10)
Fig. 10
Leveling the Range
The range must be level for satisfactory baking performance.
Your Furrion range is designed with four adjustable leveling
legs at the bottom of the range, user can reach to any leg to
adjust to make it level.
NOTE: A level maybe required to assist you to check the
range levelness.
Check the levelness by placing a level on a flat surface of the
range, such as the oven rack or the top of cooktop. Adjust the
leveling legs until the range is level by hand. (Fig. 11)
Max. ¾”
(20mm)
Fig. 11
Slide the Range into the Cabinet
1. Move the range close enough to the cutout to
allow proper electrical connections. See “Electrical
Connections” section for detail. (Fig. 12)
Fig. 12
2. Slide the range into the cutout until the rear leg engaged
into the pre-installed anti-tip bracket. Care should be
taken to avoid rubbing and damaging the wire during
moving. (Fig. 13 & Fig. 14)
Fig. 13
Anti-tip
Bracket
Fig. 14
Bottom of the Range
NOTE: If range is relocated, the bracket must be removed
and installed in the new location.
Loading ...
Loading ...
Loading ...