Loading ...
Loading ...
Loading ...

6 7
BEFORE FIRST USE
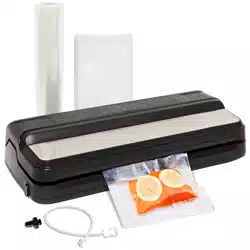
1. Carefully unpack your Kenmore Food Sealer and check that all parts and accessories are
present. Open the food sealer, remove the accessories and folded support card stored inside, and
set them aside. Safely dispose of plastic bags or small pieces that could present a suocation or
choking hazard. DO NOT DISCARD THE SUPPORT CARD.
2. Wipe the interior and exterior surfaces and accessories with a soft damp cloth to remove any
dust or debris from the factory or packaging. Do not use abrasive cleansers or scouring pads that
could scratch the appliance’s surface.
OPERATING YOUR FOOD SEALER
Always place the food sealer on a stable, level surface and remove the support card and any
accessories stored inside (other than the bag roll) before operating it.
USING THE SINGLE SEAL FUNCTION
Use the single seal function to create custom-sized bags from a bag roll, to seal liquids for storage,
or when using the Pulse function to vacuum seal delicate items.
NOTE - Only embossed (textured) bags should be used for vacuuming. Smooth (untextured) bags
should be used for sealing only.
1. Position the open end of the bag in the bag clips and smooth out any wrinkles or creases.
2. Close the food sealer, pressing down rmly on both sides of the cover until you hear both
fasteners lock.
3. Touch the SEAL button. A few seconds after the indicator light turns on, you will hear the sound
of the sealing operation start and stop. Wait for the indicator light to go out before pressing the
fastener release buttons to open the food sealer.
MAKING BAGS FROM A BAG ROLL
1. Lift the cutter bar, draw out your desired length of bag plus an additional 3 inches (8 cm), and
lower the cutter bar over the bag.
2. Holding the cutter bar rmly with one hand, slide the bag cutter smoothly across to the other
side and remove the cut section.
3. Use the single seal function to seal one end of the bag. You can now ll your custom bag and
either vacuum or single-seal the open end.
3. Dry all parts thoroughly and then place the food sealer on a stable, level surface before
plugging it in and powering it on.
USING THE VACUUM SEAL FUNCTION
1. Place the food or items to be sealed in the embossed (textured) vacuum bag, leaving at least 3
inches between contents and the top of the bag.
2. Position the open end of the bag in the bag
clips and smooth out any creases.
Figure 1
3. Close the food sealer, pressing down rmly on
both sides of the cover until you hear both
fasteners lock.
Figure 2
4. Touch the MODE and FOOD buttons to
change the settings as needed. Use the normal
and dry settings for most items. Select gentle
mode for delicate foods like cakes or soft chees-
es and select moist for wet or greasy foods like
raw or cooked meat.
Figure 3
5. Touch the VAC SEAL button. The indicator light
will turn on and you will hear the vacuum
working and see the bag contracting around the
contents.
Figure 4
6. The pump will stop automatically when all the air has been removed. The SEAL indicator light
will come on and you will hear the sealing operation start and stop.
7. Wait for the VAC SEAL and SEAL indicator lights to go out before pressing the fastener release
buttons to open the food sealer.
OPERATING YOUR FOOD SEALER
WARNING - To protect against electrical shock, always unplug the food
sealer from the power source before cleaning. Do not immerse the food
sealer body, power cord, or electrical plug in any liquid.
Figure 1
Figure 2
Figure 3
Figure 4
Loading ...
Loading ...
Loading ...
