Loading ...
Loading ...
Loading ...
13
B. Checks Before Installation
• Visually inspect the exterior of the shipping container and immediately report any
damage to the carrier. Upon opening the container, any concealed damage should also
be immediately reported to the carrier.
• Remove the shipping carton, tape, and packing material. If any are left in the icemaker,
it will not work properly.
• See the nameplate on the rear panel, and check that your voltage supplied corresponds
with the voltage specied on the nameplate.
• Remove the panels to prevent damage when installing the icemaker. See "II.C. How to
Remove Panels."
• Remove the package containing the accessories.
• Remove the protective plastic lm from the panels. If the icemaker is exposed to the sun
or to heat, remove the lm after the icemaker cools.
• Check that the refrigerant lines do not rub or touch lines or other surfaces, and that the
fan blade (if applicable) turns freely.
• Check that the compressor is snug on all mounting pads.
• The icemaker can be installed on a dispenser unit or ice storage bin. The ice storage
bins listed below are recommended.
Model Number Bin Width Recommended Hoshizaki Ice Storage Bin
KM-350M_J
KM-520M_J
KM-660M_J
22" or Wider B-300 Series
For further options, contact your local Hoshizaki distributor.
• NOTICE! Remote models must be connected to an appropriate remote condenser
unit. The remote condenser units listed below are recommended. Connection to a
different remote condenser unit will void the warranty unless Hoshizaki approves
a different remote condenser unit for your specic application. For further
details, contact your local Hoshizaki distributor.
Model Number Recommended Hoshizaki Remote Condenser Unit
KM-520MRJ
KM-660MRJ
URC-5F
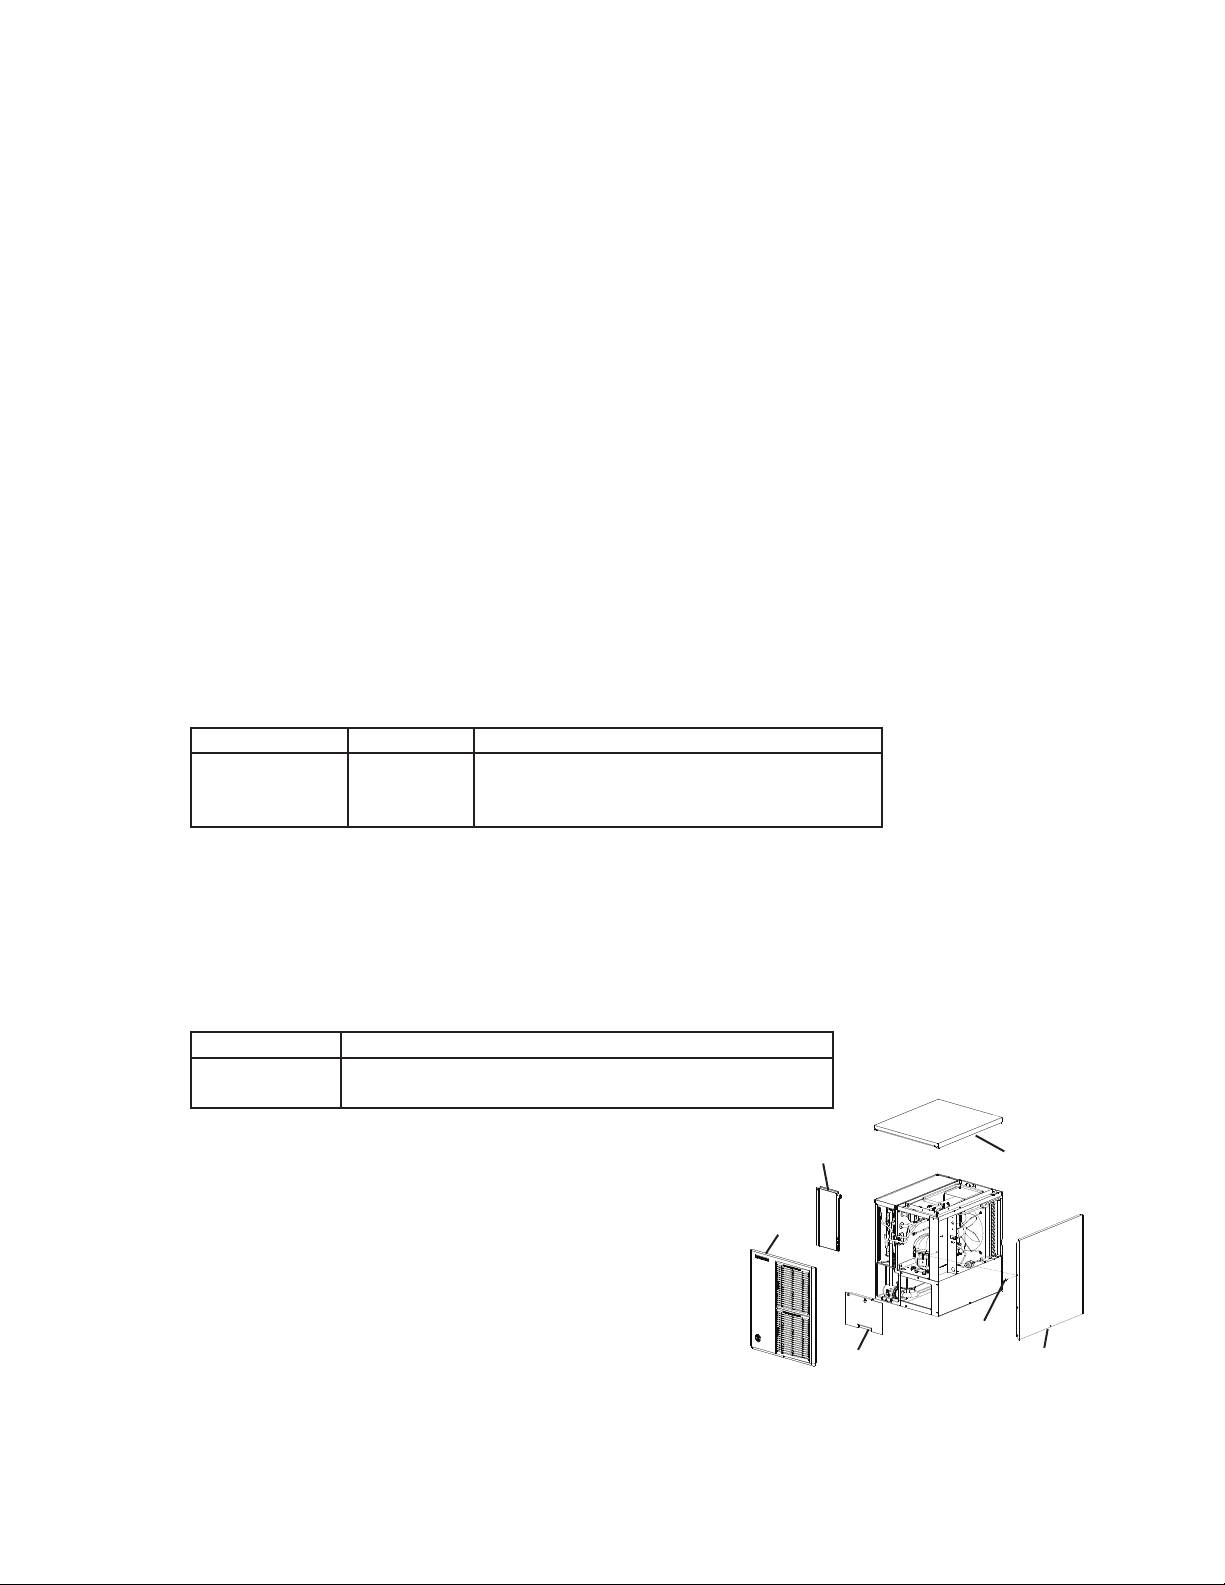
C. How to Remove Panels
See Fig. 1
• Front Panel: Remove the screw. Lift up and
towards you.
• Top Panel: Lift up at front slightly, push rearward
and lift off.
• Right Side Panel: Remove the screw. Slide forward
slightly and lift off.
• Front Insulation Panel: Lift up slightly and pull
towards you.
• Base Cover: Lift up slightly and pull towards you.
Fig. 1
Model Shown: KM-520MAJ
Top Panel
Front Insulation Panel
Front
Panel
Base Cover
Screw
Right Side Panel
Loading ...
Loading ...
Loading ...