
Loading ...
Loading ...
Loading ...
12
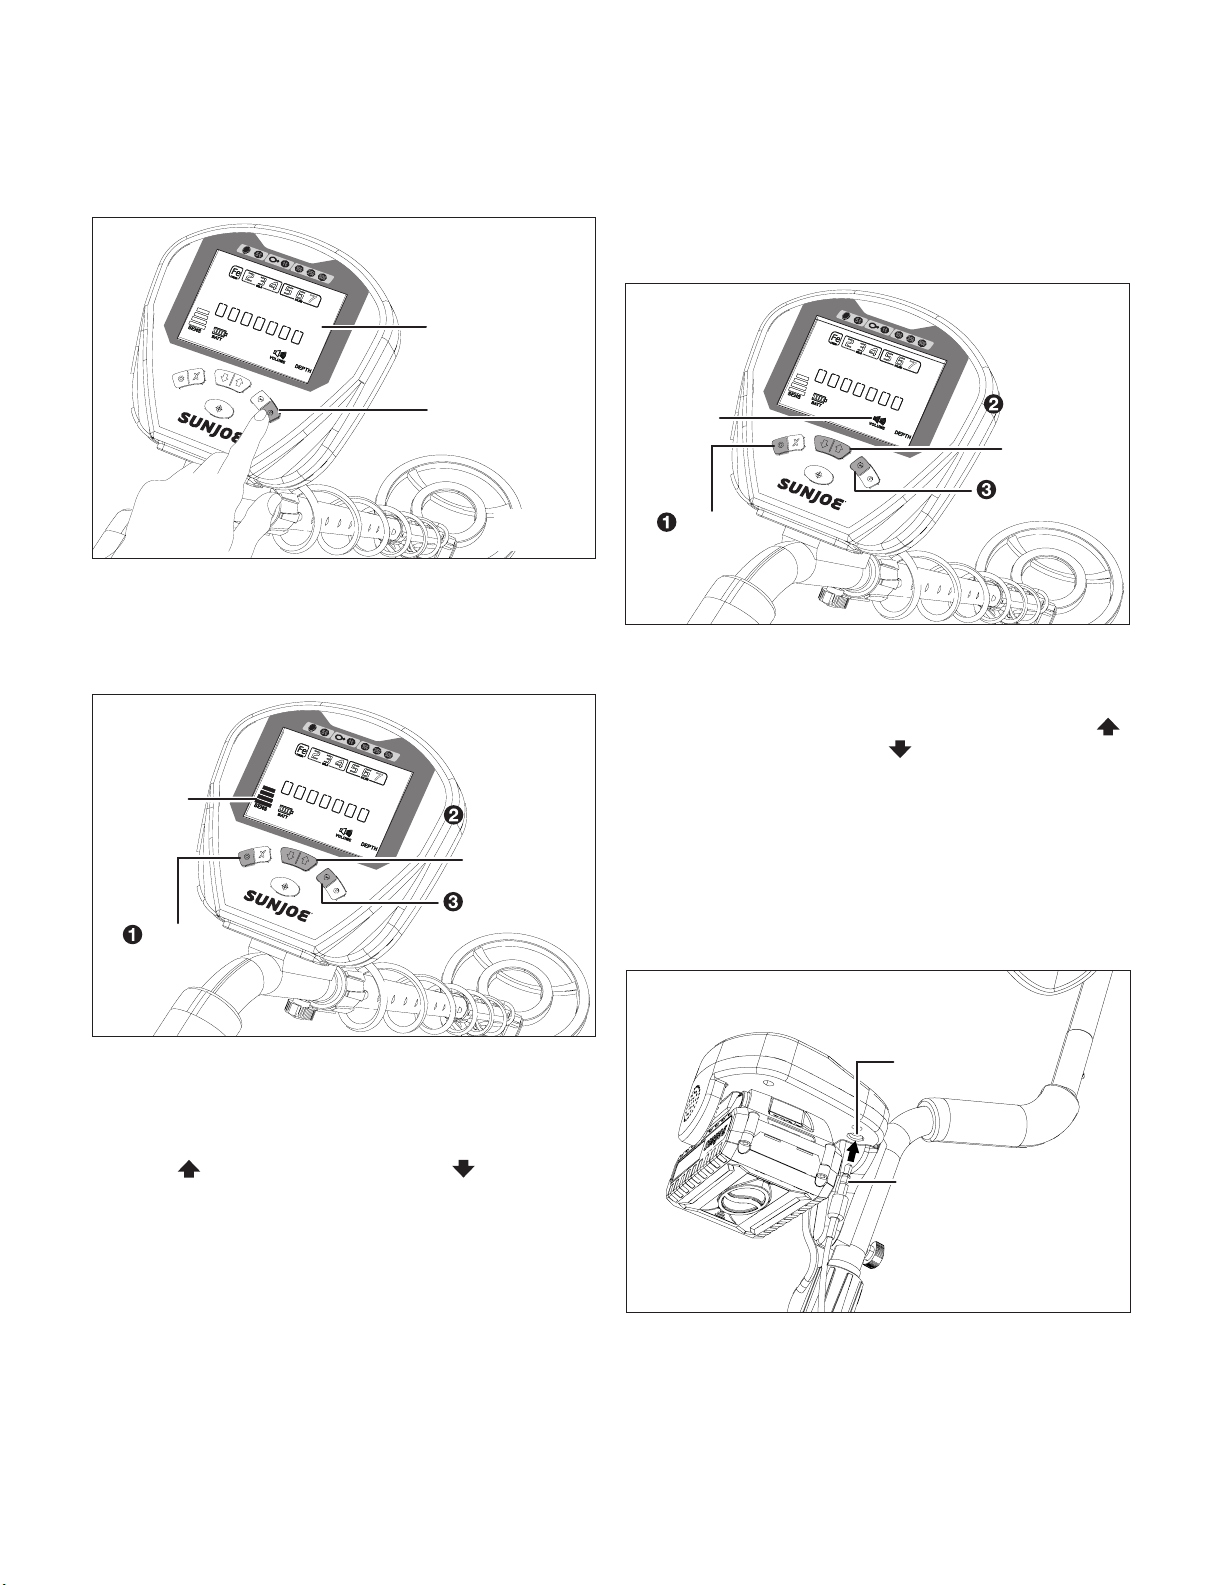
2. Press the power button to turn on the metal detector. The
detector will beep three times and the LCD will illuminate
in standby mode (Fig. 14).
3. To turn o the device, press the power button again.
Remove the battery before storing it away.
Sensitivity Adjustment (Fig. 15)
1. Press the setting button once to enter the sensitivity
settings mode. The sensitivity level indicator will start
ashing.
2. Use the adjustment buttons to set the sensitivity level.
Press
to increase the sensitivity, and to decrease
the sensitivity.
3. Once you have set the desired sensitivity level, press the
enter button to conrm the change.
NOTE: The metal detector works by inducing a magnetic
eld in nearby metallic objects. This magnetic eld is then
detected by the search coil and analyzed by the control
panel. However, this magnetic eld is also susceptible to
electromagnetic interference produced by other electronic
or environmental sources. EMI can interfere with the
detector and cause it to beep erratically.
LCD screen
(standby mode)
Power button
Fig. 14
Fig. 15
Setting
button
x1
Increase/
decrease the
sensitivity
Sensitivity
level
indicator
Conrm the
change
Lowering the metal detector's sensitivity will help reduce
its susceptibility to EMI. If the metal detector experiences
erratic behavior or false signals, reduce the sensitivity.
Volume Adjustment (Fig. 16)
1. Press the setting button three times to enter the volume
setting mode. The volume adjustment indicator will start
ashing.
2. Use the adjusting buttons to adjust the volume. Press
to increase the volume, and
to decrease the volume.
3. Once you have set the desired volume, press the enter
button to conrm the change.
NOTE: This detector has a 3.5mm headphone jack
located on the bottom of the control panel (Fig. 17).
Allowing use of wired headphones with a 3.5mm plug.
When the headphone jack is connected; speaker volume
is disabled. Headphones can help extend battery life and
reduce noise pollution.
mWARNING! For safety reasons, do not use headphones
near trac or dangerous area.
Fig. 16
Volume
adjustment
indicator
Setting
button
x3
Increase/
decrease
the volume
Conrm the
change
Fig. 17
3.5mm
headphone jack
3.5mm
headphone plug
Loading ...
Loading ...
Loading ...