Loading ...
Loading ...
Loading ...
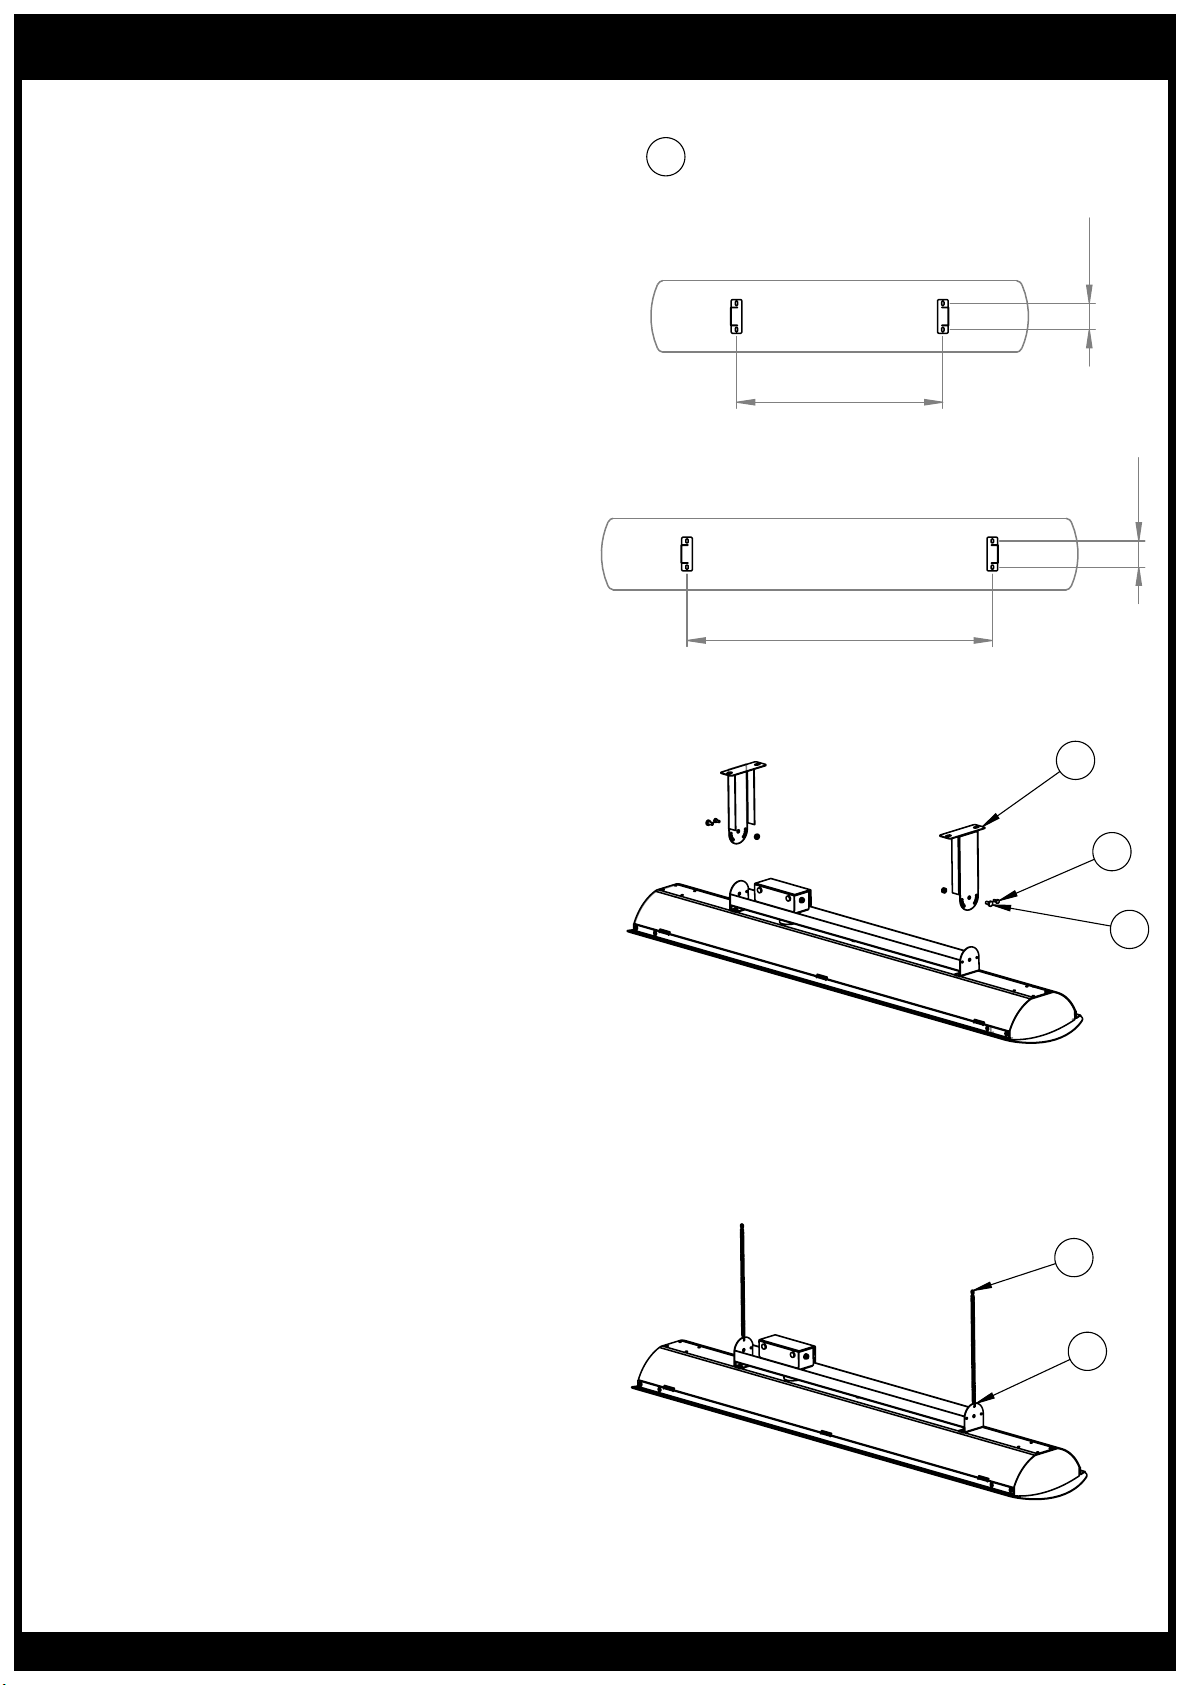
HEATER INSTALLATION CONTINUED...
611
78
904
78
2
3
4
2
3
(1) Mark mounng hole centres on ceiling or wall.
(2) Aach mounng brackets to ceiling or wall
using appropriate fasteners (Not supplied).
(3) Bring heater up to mounng brackets and lock
into posion with M5x10 screw & nut.
(4) Rotate heater to required angle.
Lock into posion with .
(5) Make electrical connecon from heater to
power supply.
(1) Heater must be installed with heater surface
2400mm above the floor level. If required, cut
down length of chain to ensure correct
installaon height.
(2) Aach chains to heater with "S" hooks. Crimp
"S" hooks closed aer assembly.
(3) Prepare ceiling structure for heater. Aach
chains to ceiling structure & suspend heater.
(4) Make electrical connecon from heater to
power supply. If required fix suply power cord to
ceiling chain with cable es.
Mounng Hole Centres & Heater Posion
2620213 (3000W) - 2620215 (6000W)
2620212 (2000W) - 2620214 (4000W)
1
CEILING & WALL MOUNTING
1. Mark mounting hole centres on ceiling or wall.
2. Attach mounting brackets to ceiling or wall using
appropriate fasteners (Not supplied).
3. Bring heater up to mounting brackets and lock
into position with M5x10 screw & nut.
4. Rotate heater to required angle. Lock into position
with self tapping screw.
5. Make electrical connection from heater to power
supply.
CHAIN SUSPENSION (SOLD SEPARATELY)
1. Heater must be installed with heater surface
2400mm above the floor level. If required, cut
down length of chain to ensure correct installation
height.
2. Attach chains to heater with “S” hooks. Crimp “S”
hooks closed after assembly.
3. Prepare ceiling structure for heater. Attach chains
to ceiling structure & suspend heater.
4. Make electrical connection from heater to power
supply. If required fix suply power cord to ceiling
chain with cable ties.
2000W & 4000W Models
3000W & 6000W Models
www.bromic.com/heating-au
8
Loading ...
Loading ...
Loading ...