Loading ...
Loading ...
Loading ...
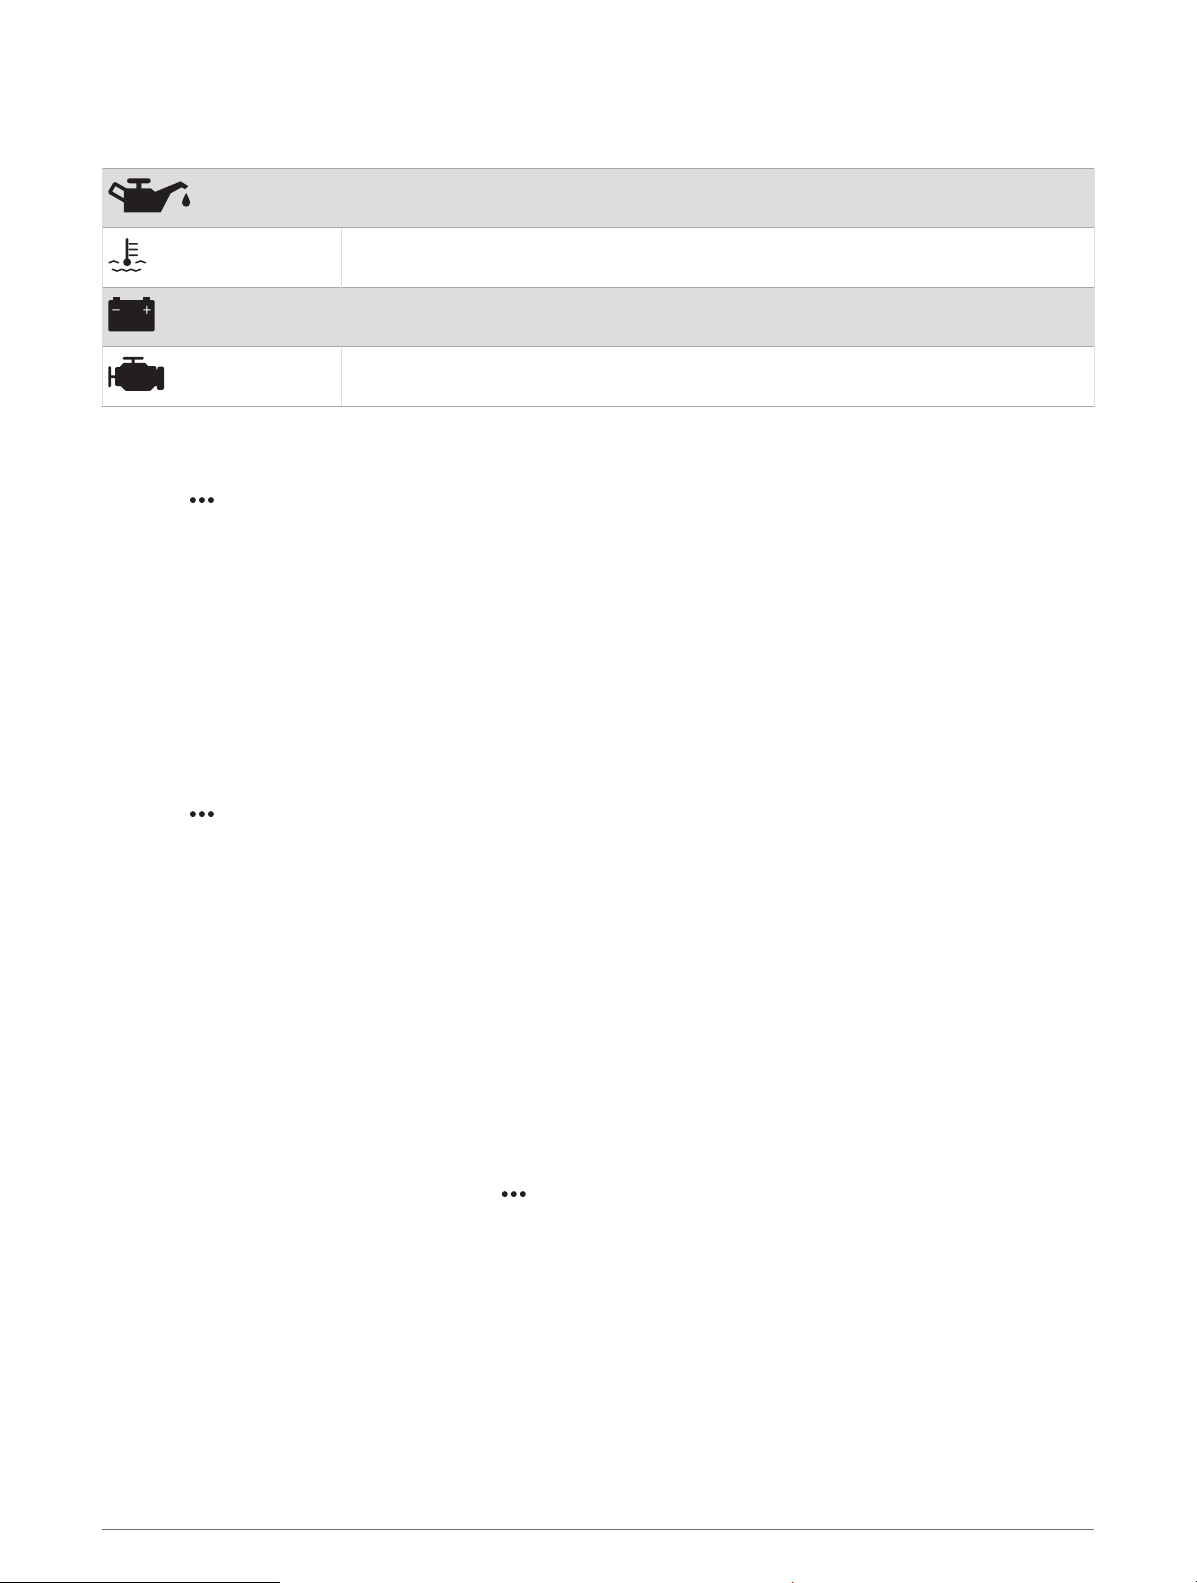
Engine Alert Icons
If an icon lights up on the gauges page, it indicates an issue with the motor.
Low oil level or oil pressure alert
Temperature alert
Battery voltage alert
Check engine alert
Changing the Data Shown in a Gauge
1 Open a gauge page.
2 Select > Edit Gauge Pages.
3 Select a gauge to edit.
TIP: You can hold any gauge to quickly change the data.
4 Select Replace Data.
5 Select a data type.
6 Select the data to display.
Customizing the Gauges
You can add a gauge page, change the layout of the gauge page, change how the gauges are displayed, and
change the data in each gauge.
1 Open a gauge page.
2 Select > Edit Gauge Pages.
3 If necessary, select a gauge view or gauge to edit.
4 Select an option:
• To change the data shown in a gauge, select the gauge and select Replace Data.
• To change the layout of the gauges on the page, select Change Layout.
• To add a page to this set of gauge pages, select Add Page.
• To remove a page from this set of gauge pages, select Remove Page.
• To change the order of this page in the set of gauge pages, select Move Page Left or Move Page Right.
• To restore this page to the original view, select Restore Default View.
Customizing Engine Gauge and Fuel Gauge Limits
You can configure the upper and lower limits and the range of desired standard operation of a gauge.
NOTE: Not all options are available for all gauges.
1 From an applicable gauges screen, select > Installation > Set Gauge Limits.
2 Select a gauge to customize.
3 Select an option:
• To set the minimum value of the standard operating range, select Rated Min..
• To set the maximum value of the standard operating range, select Rated Max..
• To set the lower limit of the gauge lower than the rated minimum, select Scale Min..
• To set the upper limit of the gauge higher than the rated maximum, select Scale Max..
4 Select the limit value.
5 Repeat steps 4 and 5 to set additional gauge limits.
96 Gauges and Graphs
Loading ...
Loading ...
Loading ...