
Loading ...
Loading ...
Loading ...
7
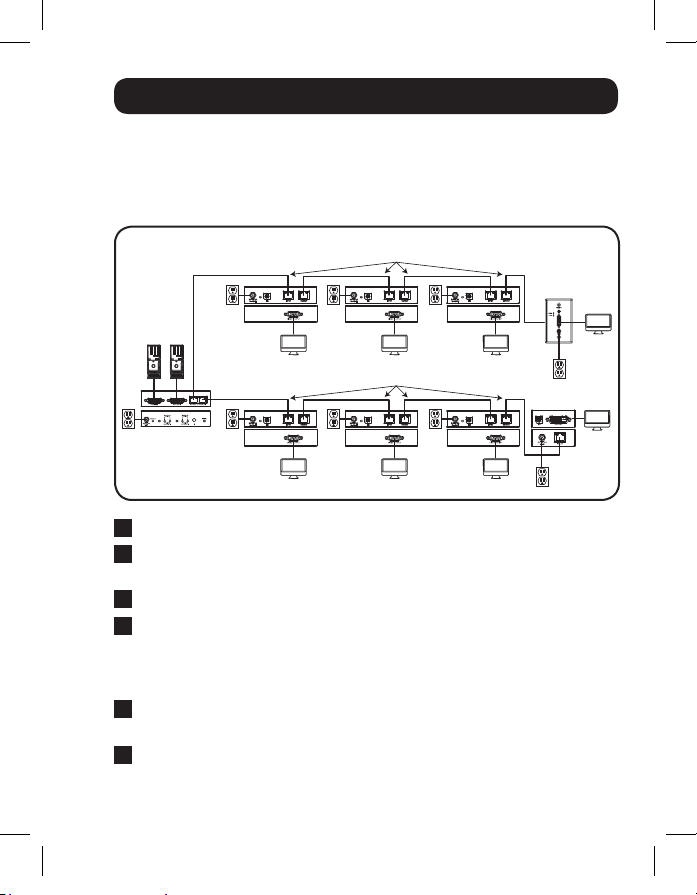
Remote Repeater Installation
Note:
1. Test to make sure that the entire installation works properly before pulling cables through
ceilings/walls.
2. 24AWG, Solid Wire Cat5e/6 cable, such as Tripp Lite’s N202-Series, is required to achieve
maximum distance and resolution.
B140-202
B140-110 B140-110 B140-110
B140-1A0
Up to 175 ft. at 1024 x 768 @ 60Hz
Up to 125 ft. at 1920 x 1080 @ 60Hz
0
1
2
3
4
5
6
7
B140-1A0-WP-1
0
1
2
3
4
5
6
7
0
1
2
3
4
5
6
7
B140-110 B140-110 B140-110
Up to 175 ft. at 1024 x 768 @ 60Hz
Up to 125 ft. at 1920 x 1080 @ 60Hz
0
1
2
3
4
5
6
7
0
1
2
3
4
5
6
7
0
1
2
3
4
5
6
7
1
Make sure the DVI sources are turned off.
2
Connect the first DVI source to the port on the B140-202 marked
Source 1.
3
Connect the second DVI source to the port marked Source 2.
4
Connect the external power supply to the B140-202 and plug it into
a Tripp Lite Surge Suppressor, PDU, or UPS. When receiving power,
the following LEDs will illuminate: The Green Power LED, The Orange
Source LEDs for Output 1 and Output 2, and the Green RJ45 LEDs.
5
Using Cat5e/6 cable, connect the RJ45 port marked Output 1 to the
RJ45 input port of a B140-110 remote repeater unit.
6
Connect a monitor to the DVI output port on the repeater using a
Tripp Lite P561-Series DVI-D Single-Link cable.
12-09-067-93323B.indd 7 11/9/2012 4:50:31 PM
Loading ...
Loading ...
Loading ...