Loading ...
Loading ...
Loading ...
Embroidering
86
c
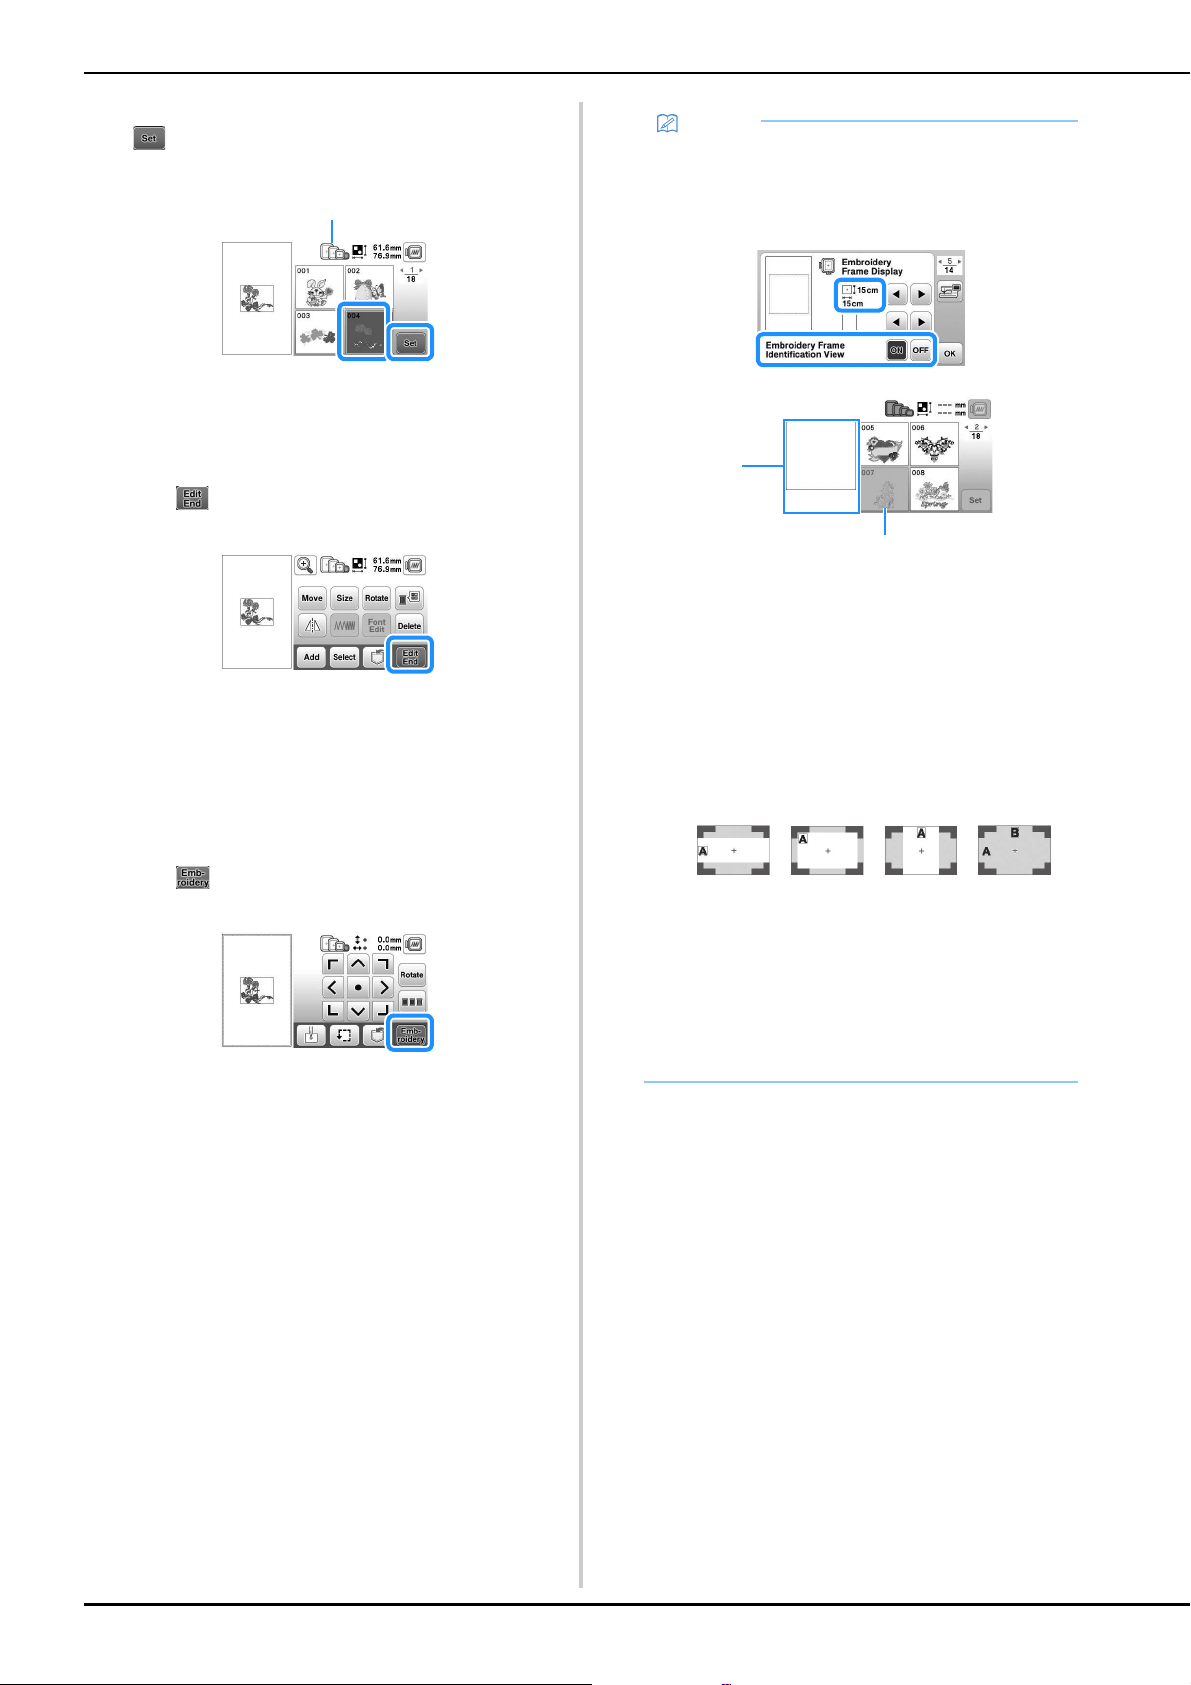
Select a desired embroidery pattern, and then press
.
• Available frame options are displayed on the screen.
1 White: Frame which can be used with the selected
pattern
Gray: Frame which cannot be used with the selected
pattern
Pattern editing screen appears.
d
Press .
• For details on pattern editing screen, refer to “Editing
Patterns (Pattern Editing Screen)” on page 96. You
can move the pattern, change the size of pattern, and
perform many other editing operations.
• The pattern can also be moved by dragging it with
your finger.
Embroidery settings screen appears.
e
Press .
• For details on embroidery settings screen, refer to
“Editing Patterns (Embroidery Settings Screen)” on
page 98.
• Confirm the pattern position to be embroidered,
referring to “Checking the pattern position” on
page 88.
a
Memo
• If [Embroidery Frame Identification View] in the
settings screen is set to [ON], the pattern can be
edited in the screen as if that embroidery frame is
attached.
1 The embroidering area for the selected frame is
displayed.
2 Patterns that will not fit in the selected frame
appear shaded and cannot be selected.
• There are three embroidering area sizes for
embroidery frame (small).
When [Embroidery Frame Identification View] is set
to [ON] for embroidery frame (small), the area for
arranging patterns can more easily be seen. The
area outside of the embroidering area will have a
different background color.
1 2 cm × 6 cm (approx.1 inch (H) × 2-1/2 inches
(W))
2 3 cm × 5 cm (approx.1-1/8 inches (H) × 2 inches
(W))
3 4 cm × 3 cm (approx.1-1/2 inches (H) × 1-1/8
inches (W))
4 Patterns are arranged outside of the
embroidering area.
b
a
1234
Loading ...
Loading ...
Loading ...