Loading ...
Loading ...
Loading ...
Embroidering Preparation
83
EMBROIDERY
4
Q Inserting the fabric
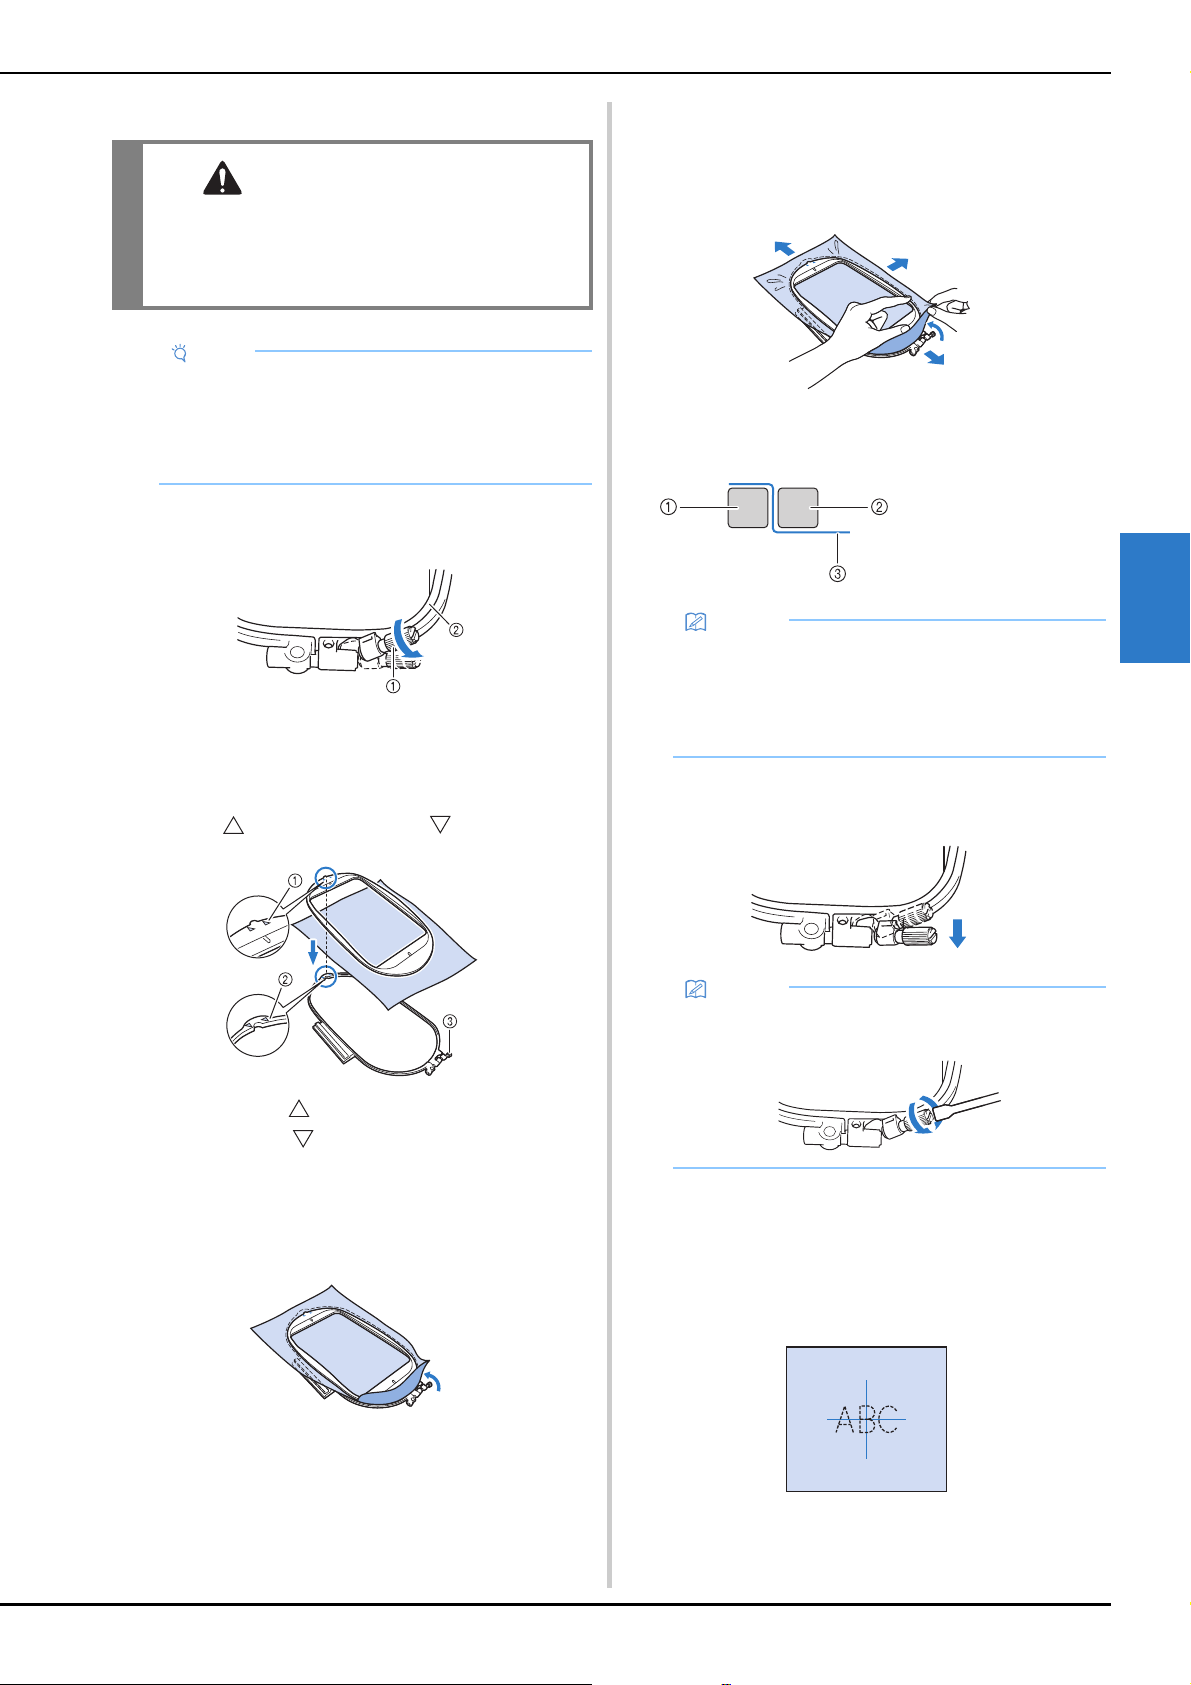
a
Lift-up and loosen the frame adjustment screw and
remove the inner frame.
1 Frame adjustment screw
2 Inner frame
b
Lay the fabric right side up on top of the outer frame.
Re-insert the inner frame making sure to align the inner
frame’s with the outer frame’s .
1 Inner frame’s
2 Outer frame’s
3 Frame adjustment screw
c
Slightly tighten the frame adjustment screw, and then
remove the slack in the fabric by gently pulling on the
edges and corners. Do not loosen the screw.
d
Gently stretch the fabric taut, and tighten the frame
adjustment screw to keep the fabric from loosening
after stretching.
• After stretching the fabric, make sure the fabric is
taut.
• Make sure the inside and outside frames are even
before you start embroidering.
e
Return the frame adjustment screw to its initial
position.
Q Using the embroidery sheet
When you want to embroider the pattern in a particular
place, use the embroidery sheet with the frame.
a
With a chalk pencil, mark the area of the fabric you
want to embroider.
CAUTION
• If you use a frame that is too small, the presser
foot may strike the frame during embroidering
and cause injury or may damage your
machine.
Note
• If the fabric is not securely held in the embroidery
frame, the embroidery pattern will stitch poorly.
Insert the fabric on a level surface, and gently pull
the fabric taut in the frame, being careful not to
distort hooped fabric.
1 Outer frame
2 Inner frame
3 Fabric
Memo
• After stretching the fabric, lightly tapping it should
produce a drum-like sound.
• Stretch the fabric from all four corners and all four
edges. While stretching the fabric, tighten the
frame adjustment screw.
Memo
• You can use the included screwdriver when you
loosen or tighten the frame adjustment screw.
Loading ...
Loading ...
Loading ...