Loading ...
Loading ...
Loading ...
Names of Machine Parts
GETTING READY
11
1
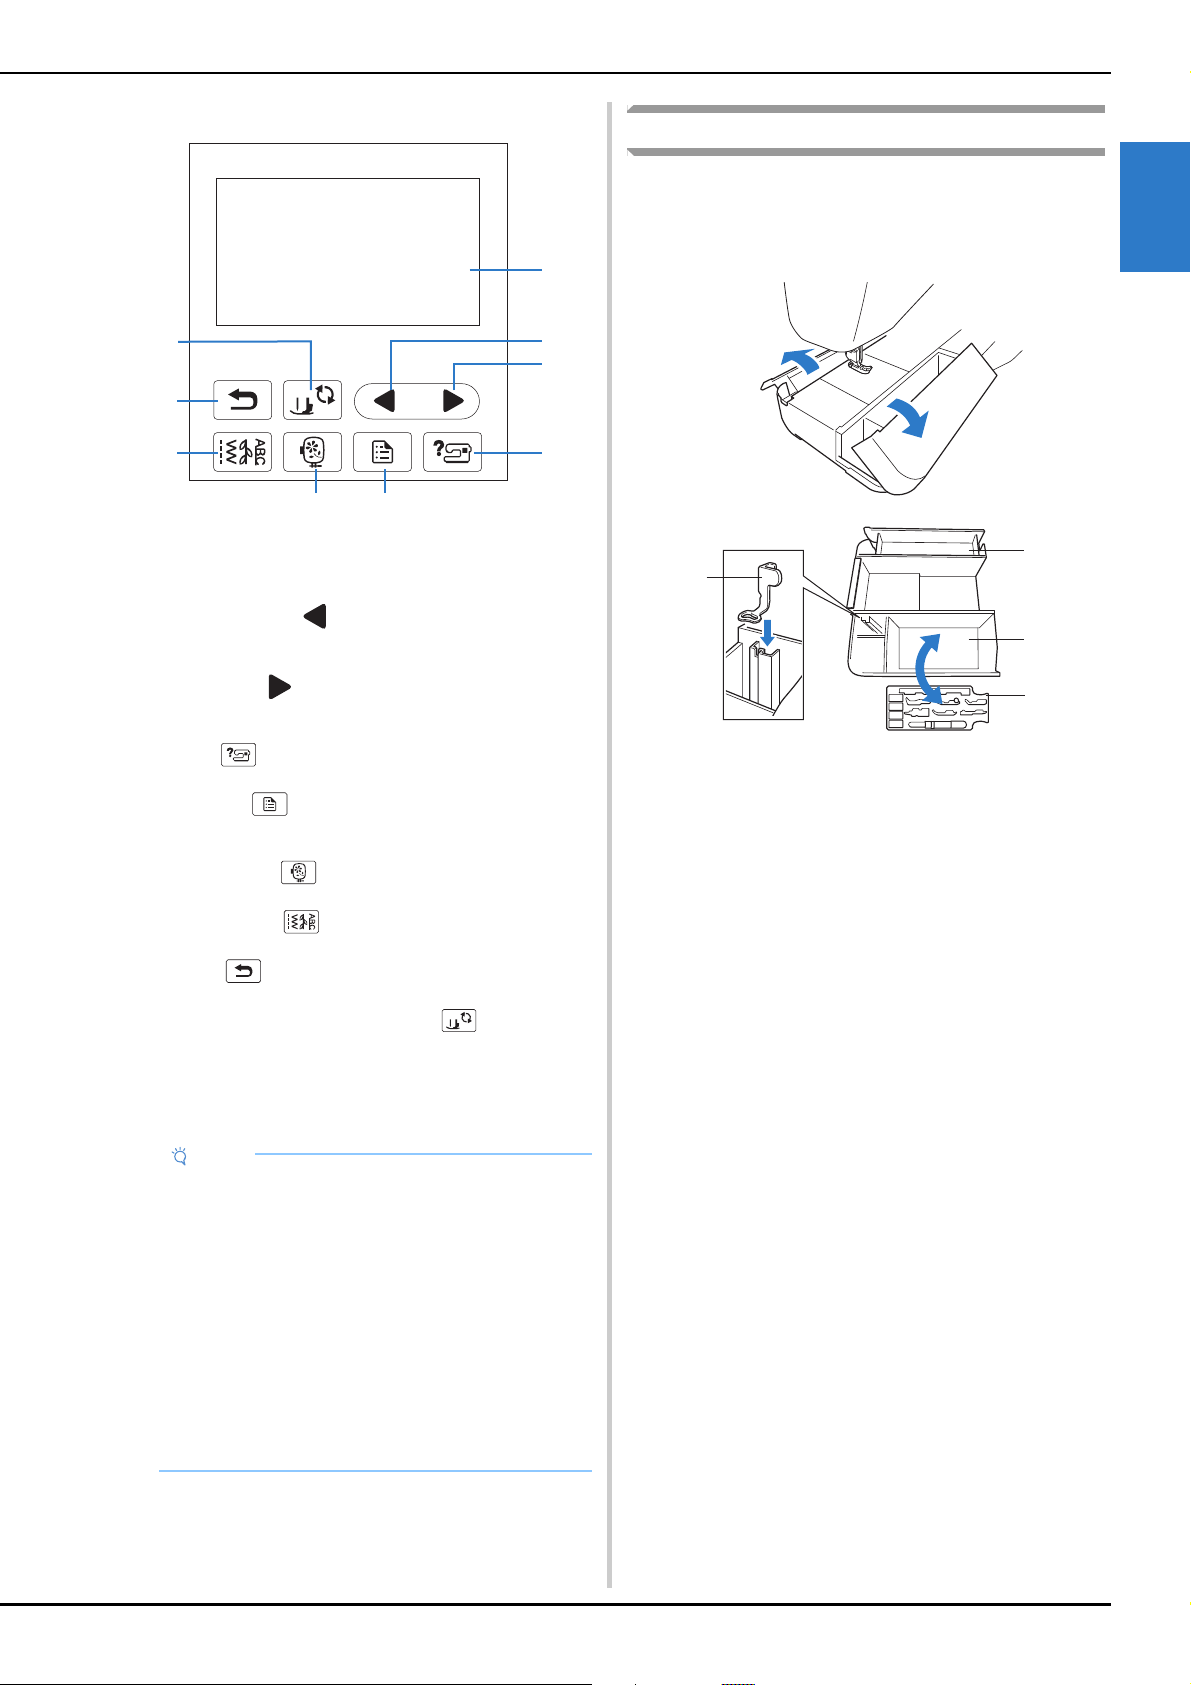
Q Operation panel and operation keys
1 LCD (liquid crystal display) (touch panel)
Selected pattern settings and messages are displayed.
Touch the keys displayed on the LCD to perform operations.
For details, refer to “LCD Operation” on page 13.
2 Previous page key
Displays the previous screen when there are items that are not
displayed on the LCD.
3 Next page key
Displays the next screen when there are items that are not
displayed on the LCD.
4 Help key
Press to get help on using the machine.
5 Settings key
Press to set the needle stop position, the buzzer sound, and
more.
6 Embroidery key
Press to display the pattern type selection screen.
7 Utility stitch key
Press to sew a utility stitch or decorative stitch.
8 Back key
Press to return to the previous screen.
9 Presser foot/Needle exchange key
Press this key before changing the needle, the presser foot,
etc. This key locks all key and button functions to prevent
operation of the machine.
Included accessories
For included accessories of your machine, refer to the
additional sheet “Included Accessories”.
Pull the top of the flat bed attachment to open the accessory
compartments.
1 Storage space of the flat bed attachment
2 Presser foot accessory tray
3 Embroidery foot “U”
Note
• The operation keys of this machine are capacitive
touch sensors. Operate the keys by directly
touching them with your finger.
The response of the keys varies according to the
user. The pressure exerted on the keys does not
affect the response of the keys.
• Since the operation keys react differently
depending on the user, adjust the setting for
“Adjusting input sensitivity for operation keys” on
page 17.
• When using an electrostatic touch pen, make sure
that its point is 8 mm or more. Do not use a touch
pen with a thin point or a unique shape.
a
b
c
d
e
f
g
h
i
1
1
3
2
Loading ...
Loading ...
Loading ...