Loading ...
Loading ...
Loading ...
16
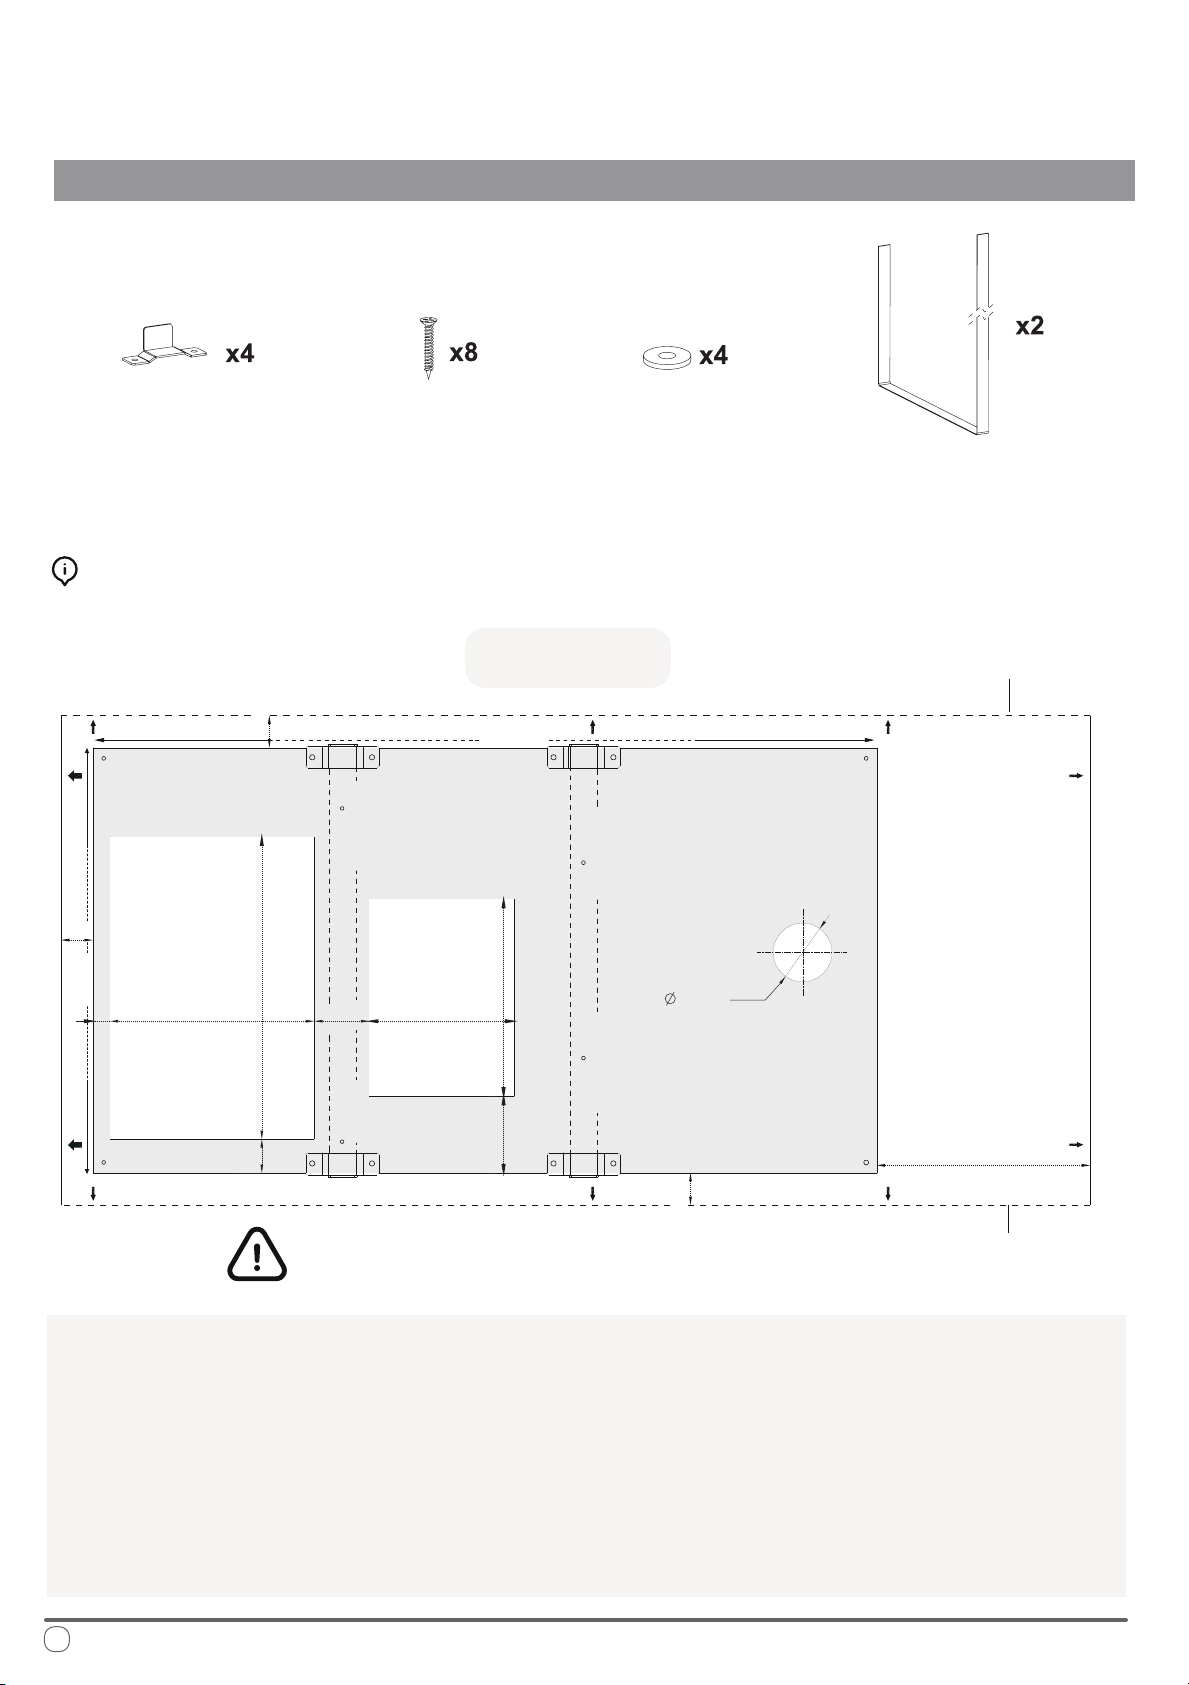
Securing the System to the Floor
INSTALLATION INSTRUCTIONS
e following pieces of hardware (included)
will be used to x the system to the oor:
ere are three dierent methods of xing the system to the oor using dierent
combinations of the above hardware, depending on preference, explained later.
1. Use the included template as depicted above to mark the locations of the openings.
2. Carefully cut out the openings at the bottom using a reciprocating saw or other cutting tool.
3. Drill out the necessary 2”-1/4 diameter condensate drainage hole using a hole saw.
4. Mark the locations of the fastening screws and the brackets using the above template
after selecting the desired method of xing the system to the oor.
Preparing the Bottom Openings (Top View):
Fastener Bracket
Screws
Washer
Belt
2”
2” -7/8
2” - 1/4
DRAIN HOLE
FIXING HOLE
(Method 1)
FIXING HOLE
(Method 1)
FIXING HOLE
(Method 1)
FIXING HOLE
(Method 1)
FRONT
FIXING HOLE
(Method 2)
FIXING HOLE
(Method 2)
FIXING HOLE
(Method 2)
FIXING HOLE
(Method 2)
FIXINGHOLE
(Method 3)
FIXINGHOLE
(Method 3)
FIXING HOLE
(Method 3)
FIXING HOLE
(Method 3)
INLET
11” - 1/8
7” -1/2
5” - 3/8
7” - 1/4
OUTLET
28” - 7/8
15” - 3/4
KEEP AT LEAST 1 INCH BETWEEN THE
UNIT AND THE SURROUNDING WALLS
1” -1/4
7” - 7/8
TOP VIEW
Left Side (A) of
Surrounding Wall
Right Side (B) of
Surrounding Wall
*All measurements in inches
5/8”
1” - 1/4
1” -1/4
1” -1/4
Loading ...
Loading ...
Loading ...