Loading ...
Loading ...
Loading ...
Insert the deck roller brackets up through the
brackets provided on the rear of the deck. It may be
necessary to rotate the deck roller brackets 360 ° to
clear the roll pin stop. Attach with clevis pins and
hairpin clips just removed, using the lowest hole
location on each side of the deck. See Figure 13.
Move the lift lever forward to the lowest position.
Attach the two rear lift links with flat washers and
hairpin clips.
Place deck belt around the engine pulley. Make
certain the deck belt is seated in the deck pulley.
Deck Roller
Hairpinj
Clip
Pin
Figure 13
• Push the idler bracket tothe left and slip the belt
around the idler pulley. Replace the roundbelt
guard by the idler pulley (hex side down). Secure
with hairpin clip.
• Replace the hex bolts (belt keepers) by the engine
pulley. Refer to Figure 8.
• Check all belt guards for clearance. The belt guards
must be between 1/16" and 1/8" away from the belt
when the PTO lever isin the engaged position (be
sure to disengage the PTO lever after checking).
• Secure the brake release cable to the tractor idler
bracket with clevis pin and small hairpin clip, using
the hole in the idler bracket as shown in Figure 14.
_-------- Clevis Pin
__cket
Hairpin Clip -_(_i
Figure 14
AttachingChuteDeflector
,_ WARNING: Do not operate the tractor
unless the chute deflector has been properly
installed.
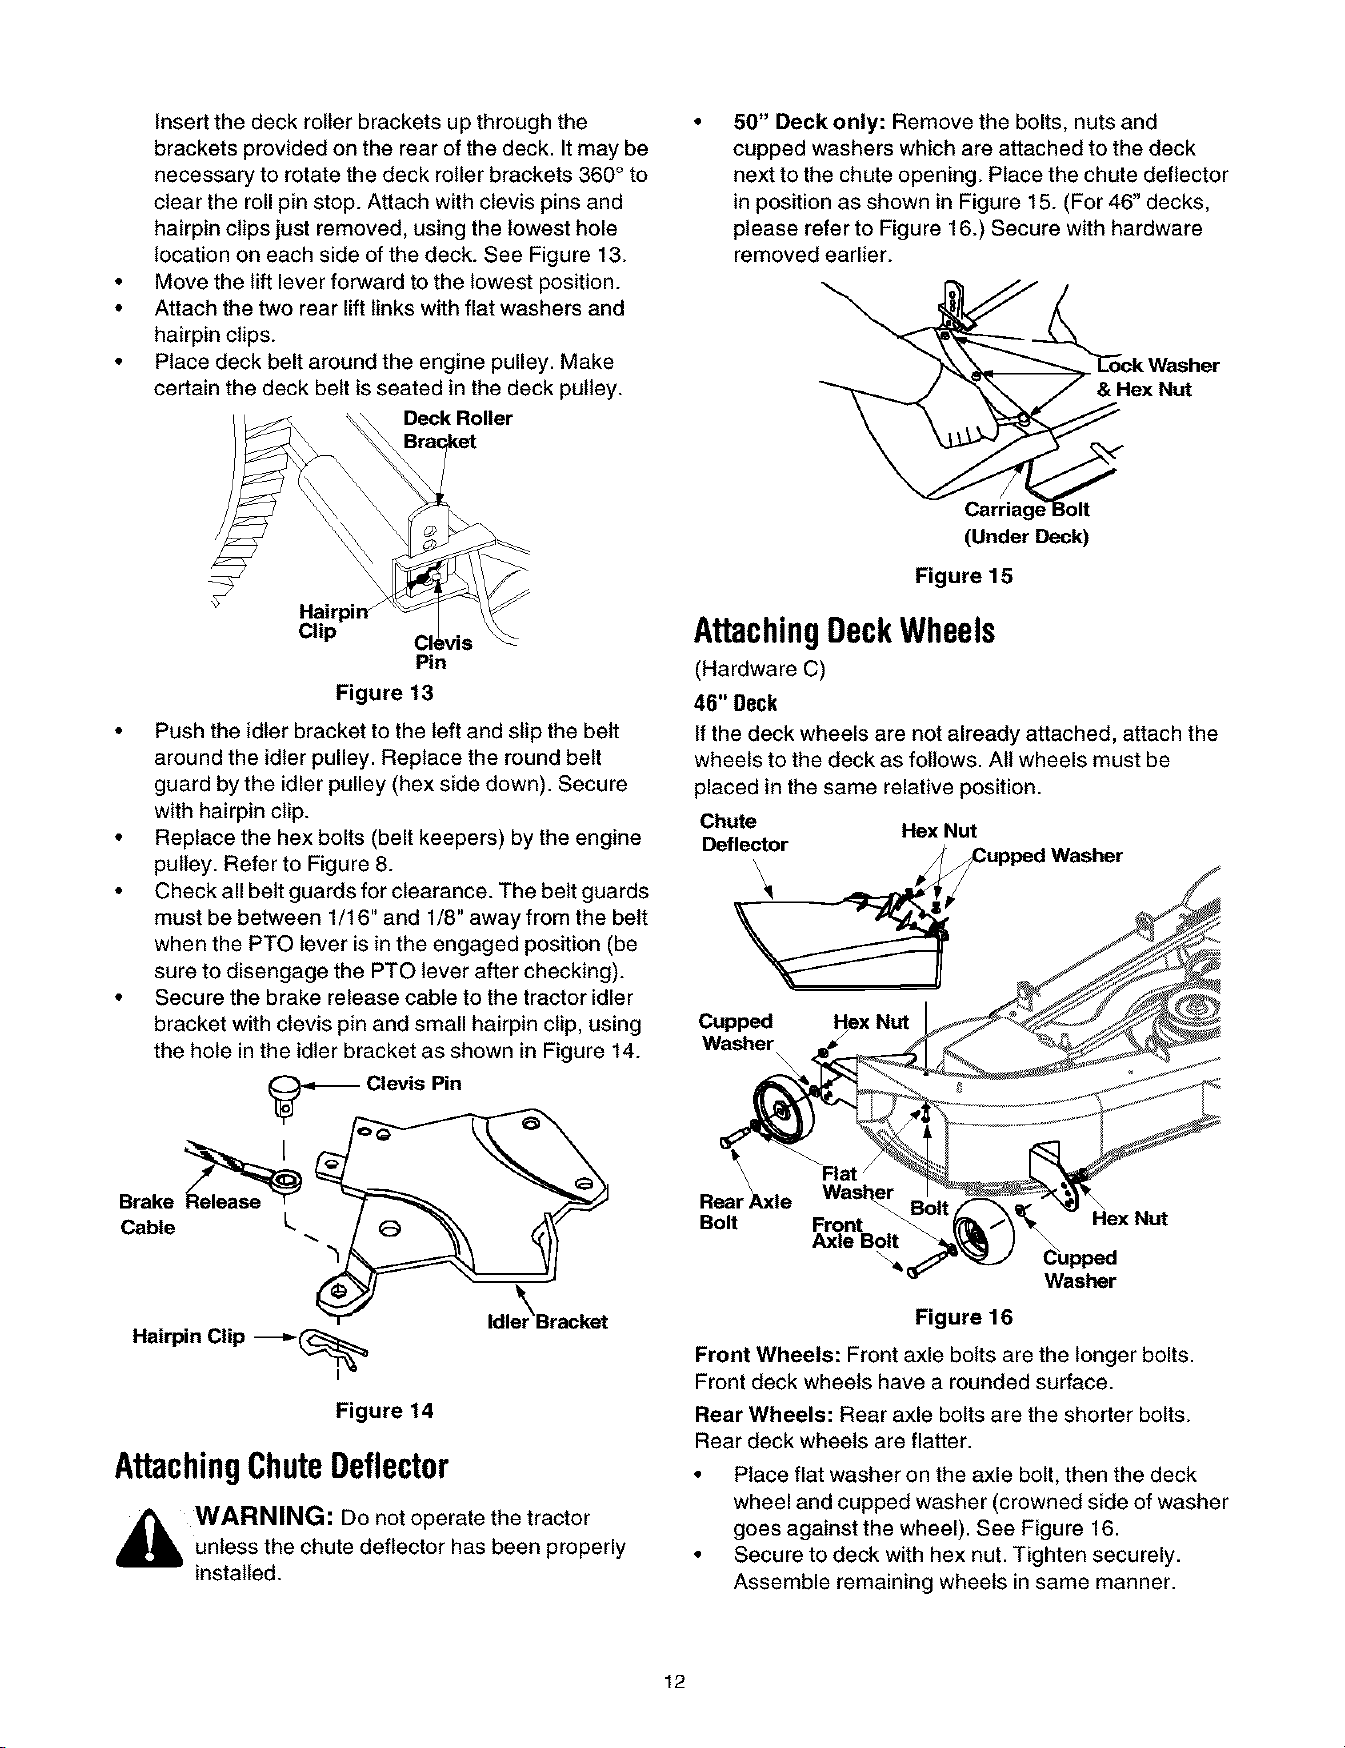
50" Deck only: Remove the bolts, nuts and
cupped washers which are attached to the deck
next to the chute opening. Place the chute deflector
in position as shown in Figure 15. (For 46" decks,
please refer to Figure 16.) Secure with hardware
removed earlier.
Nut
Carriag_
(Under Deck)
Figure 15
AttachingDeckWheels
(Hardware C)
46" Deck
If the deck wheels are not already attached, attach the
wheels to the deck as follows. All wheels must be
placed in the same relative position.
Chute Hex Nut
Deflector
'\
Cupped
Washer
\ _Rat /
Rear_Lxle Wast_
Bolt Front Hex Nut
Axle B_t
Washer
Figure 16
Front Wheels: Front axle bolts are the longer bolts.
Front deck wheels have a rounded surface.
Rear Wheels: Rear axle bolts are the shorter bolts.
Rear deck wheels are flatter.
• Place flat washer on the axle bolt, then the deck
wheel and cupped washer (crowned side of washer
goes against the wheel). See Figure 16.
• Secure to deck with hex nut. Tighten securely.
Assemble remaining wheels in same manner.
12
Loading ...
Loading ...
Loading ...