Loading ...
Loading ...
Loading ...
5
A9. Water tank
A10. Coee grounds container
A11. Drip tray
A12. Drip tray water level indicator
A13. Cup grille
A14. Condensate tray
A15. Coee spouts (adjustable height)
A16. Steam/hot water spout
A17. Cappuccino maker (removable)
A18. Steam/Hot water connection nozzle (removable)
A19. Steam/Hot water dial
A20. Cup shelf
2.2 Description of control panel - B
B1. ON/standby button with built-in Led
B2. X2 button with built-in Led (if pressed and held for 5 sec-
onds, activates rinsing of the coee circuit)
B3. Settings menu button with built-in Led
B4. Descale button with built-in Led
B5. Intensity or Pre-ground selection button
B6. Intensity selection Led
B7. Pre-ground selection Led
B8. Dierent numbers and types of drinks, according to
model.
B9. Indicator permanently alight: lter must be replaced
Indicator ashing: lter replacement in progress
B10. Indicator permanently alight: insucient water in the
tank (A9)
Indicator ashing: tank not in position
B11. General alarm indicator
B12. Indicator permanently alight: grounds container (A10)
needs emptying
Indicator ashing: grounds container not in position
B13. Indicator permanently alight: machine must be descaled
Indicator ashing: descaling in progress
2.3 Description of accessories - C*
(number and type dier according to model)
C1. "Total Hardness Test" indicator paper
C2. Pre-ground coee measure
C3. Descaler
3. SETTING UP THE APPLIANCE
Please note:
• When using the machine for the rst time, all removable
accessories making contact with water or milk should be
rinsed with hot water.
• Possible traces of coee in the mill are the result of op-
erating tests performed on the appliance before sale,
proof of the meticulous care and attention we invest in
our products.
• The rst time the machine is used, the water circuit will
be empty and the appliance could be very noisy.The noise
becomes less as the circuit lls.
• Make sure that the steam dial (A19) stays in the 0 position
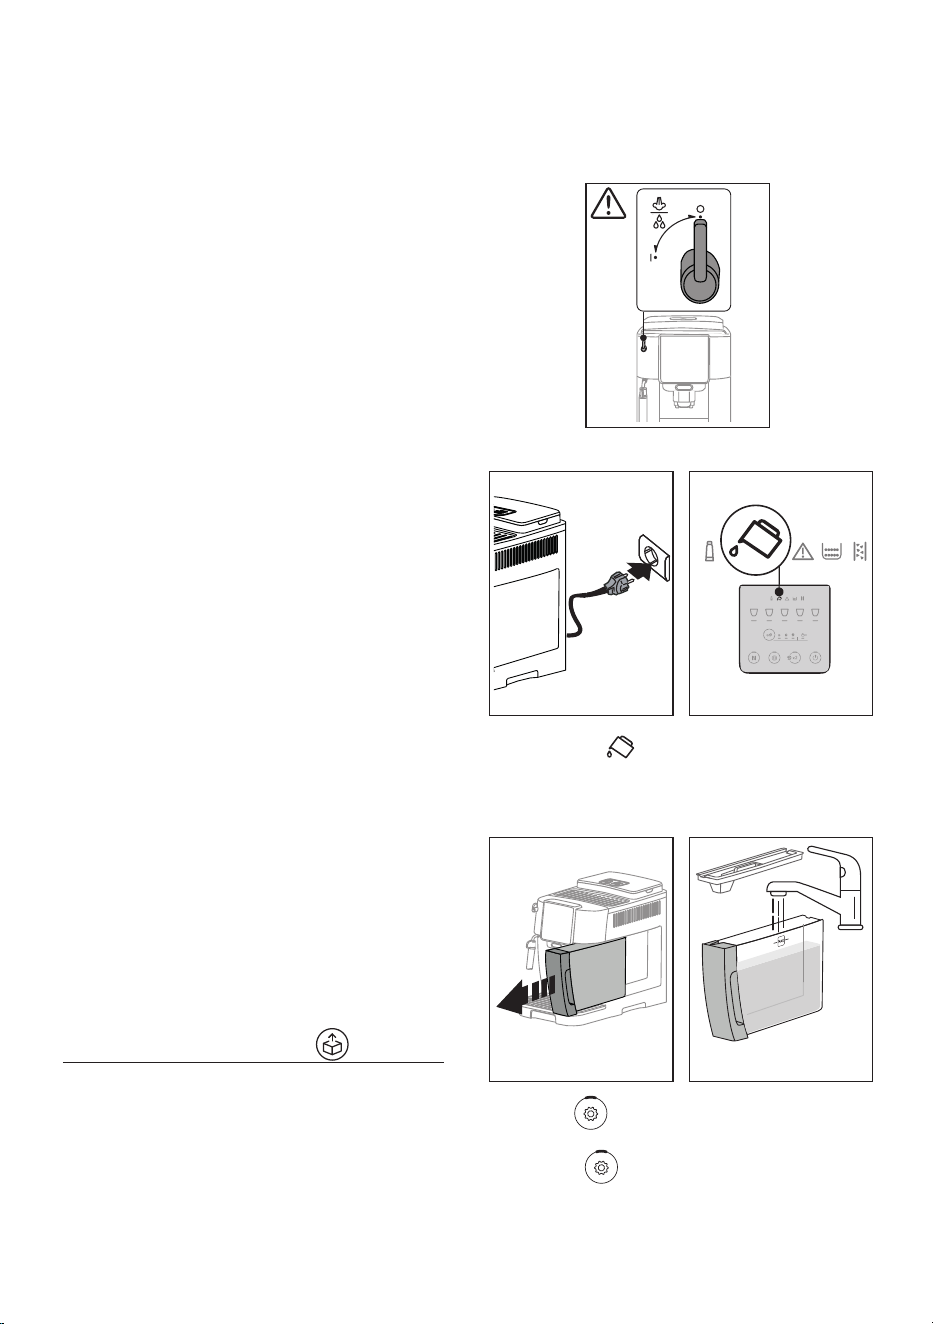
until completion of the rst start-up cycle (g. 1).
1
1. Connect the appliance to the mains supply (g. 2).
2 3
1 2 3 4 5
2. The indicator (B10)
will light up on the control panel
(B) (g. 3)
: remove the water tank (A9)
(g. 4)
, ll up to
the MAX level with fresh water (
g. 5)
, then reposition in
the appliance.
4 5
3. The Led (B3)
on the control panel will ash rapidly.
4. Position a container under the coee spout
(A15) (g. 6).
5. Press the
button(B3) (g. 7): the internal water
circuits start to ll
and the appliance will release hot water
from the coee spout.
Loading ...
Loading ...
Loading ...