1
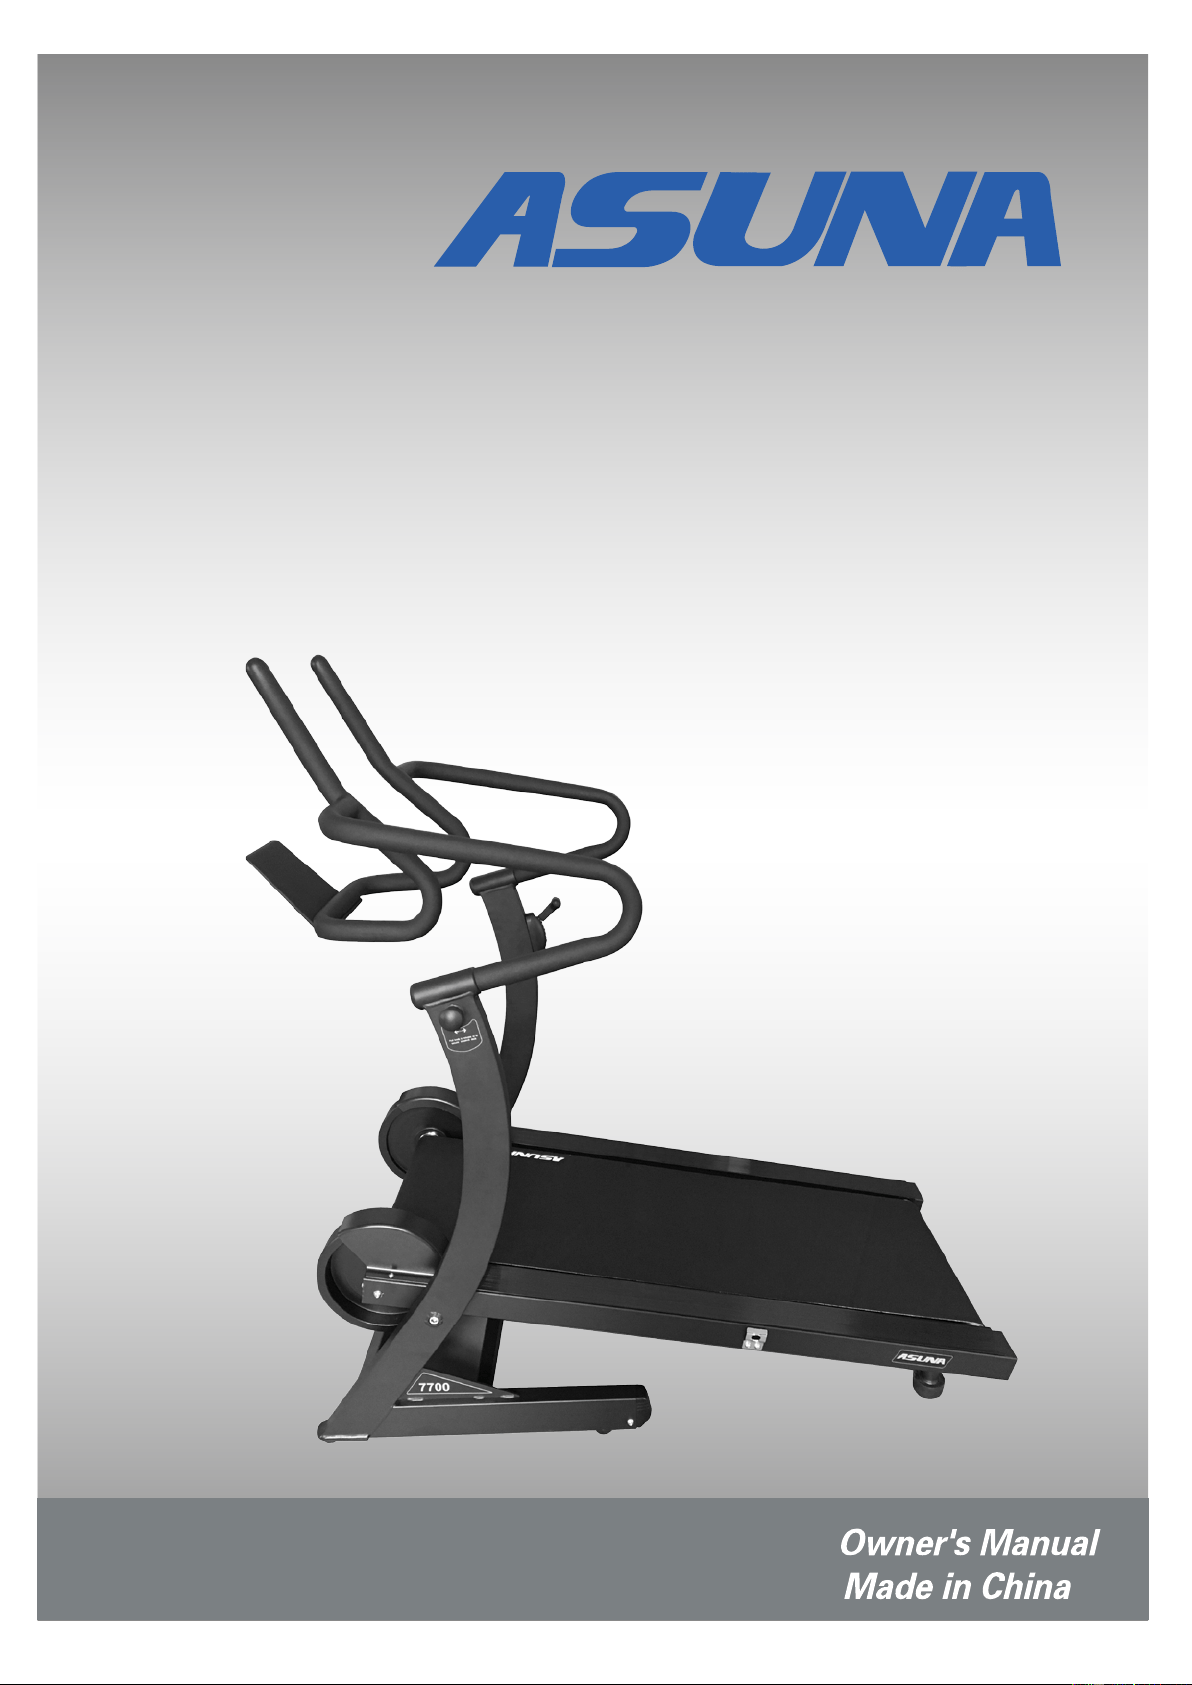
ASUNA 7700
HI-PERFORMANCE
CARDIO TRAINER

INDEX
IMPORTANT SAFETY INFORMATION…………………………………………………………
EXPLODED DIAGRAM…………………………………………………………………………..
PARTS LIST………………………………………………………………………………………..
TOOLS & HARDWARE………………………………………………………………........……..
ASSEMBLY INSTRUCTIONS………………………………………………………………........
FOLDING INSTRUCTIONS……………………………………………………..……………..…
MOVING INSTRUCTIONS……………………………………………………………………..…
ADJUSTMENTS GUIDE………………………………………………………………………….
LUBRICATION……………………………………………………………………………………..
ATTENTION:
Please verify that all parts associated with this product are in good condition
and accounted for.
During the assembly process, please be sure to follow each step accordingly, as it has been
explained within this manual.
WARNING: During assembly, it is recommended that all bolts be tightened by hand. Upon
completing assembly, bolts should be secured using the wrench provided. To avoid injury, check
bolts carefully before use.
IMPORTANT: Read all instructions carefully before using this product. Retain owner's
manual for future reference. For customer service, please contact:
1
2
3
3
4
5
6
6-7
8

IMPORTANT SAFETY INFORMATION
We thank you for choosing our product. To ensure your safety and health, please use this equipment
correctly. It is important to read this entire manual before assembling and using the equipment. Safe
and effective use can only be achieved if the equipment is assembled, maintained, and used
properly. It is your responsibility to ensure that all users of the equipment are informed of all warnings
and precautions.
1. Before starting any exercise program, you should consult your physician to determine if you have
any medical or physical conditions that could put your health and safety at risk or prevent you
from using the equipment properly. Your physician’s advice is essential if you are taking
medication that affects your heart rate, blood pressure, or cholesterol level.
2. Be aware of your body’s signals. Incorrect or excessive exercise can damage your health. Stop
exercising if you experience any of the following symptoms: pain, tightness in your chest,
irregular heartbeat, shortness of breath, lightheadedness, dizziness, or feelings of nausea. If you
do experience any of these conditions, you should consult your physician before continuing with
your exercise program.
3. Keep children and pets away from the equipment. The equipment is designed for adult use only.
4. Use the equipment on a solid, flat level surface with a protective cover for your floor or carpet.
To ensure safety, the equipment should have at least 8 feet (240CM) of free space behind it and
2 feet (60CM) on each side. Do not place the treadmill on any surface that blocks air openings.
To protect the floor or carpet from damage, place a mat under the treadmill.
5. Ensure that all nuts and bolts are securely tightened before using the equipment. The safety of
the equipment can only be maintained if it is regularly examined for damage and/or wear and
tear.
6. Always use the equipment as indicated. If you find any defective components while assembling
or checking the equipment, or if you hear any unusual noises coming from the equipment during
exercise, discontinue use of the equipment immediately and do not use until the problem has
been rectified.
7. Wear suitable clothing while using the equipment. Avoid wearing loose clothing that may become
entangled in the equipment.
8. Do not place fingers or objects into the moving parts of the equipment.
9. The maximum weight capacity of this unit is 440 pounds (200 KG).
10. The equipment is not suitable for therapeutic use.
11. To avoid bodily injury and/or damage to the product or property, proper lifting and moving are
required.
12. Your product is intended for use in cool and dry conditions. You should avoid storage in extreme
cold, hot or damp areas as this may lead to corrosion and other related problems.
13. This equipment is designed for indoor and home use only; it is not intended for commercial use!
Exploded Diagram
NO. DESCRIPTION SPEC. QTY
NO. DESCRIPTION SPEC. QTY
01 Main Frame 1 25 Wire Plug 1
02 Base Frame 1 26 Left Cover 1
03 Handrail 1 27 Right Cover 1
04
Connecting Tube Seat
1
28
Magnetic Box
1
05
Rear Roller Cover
2
29
Screw
M8*70
2
06
Bolt Pinch Plate
1
30
Screw
M8*40
2
07 Sleeve 16*Φ12*40L 2 31 Screw
M8*55 thread length
25mm
2
08 Small Sleeve Φ15*8.2*9.5L 4 32 Screw M8*10 2
09 Front Roller Cover 2 33 Screw
M8*70 thread length
45mm
2
10 Front Axis Sleeve 2 34 Screw M6*25 6
11 Front Roller 1 35 Screw M8*30 2
12 Rear Roller 1 36 Screw M8*15 4
13
Three-In-One Bolt
1
37
Screw
M6*15
8
14
Tension Switch
1
38
Screw
M5*30
2
15
Cylinder
1
39
Screw
M6*20
2
16 Nylon Sleeve 2 40 Screw
M12*55 thread length
30mm
2
17
Cushion
6
41
Washer
Φ8.5*Φ16*T1.5
14
18
Side Rail
2
42
Washer
Φ8.5*Φ16*T1.5
16
19
Running Board
1
43
Nut
M6
6
20
Running Belt
1
44
Nut
M8
4
21 Transportation Wheel 2 45 Tablet Bracket 1
22 Feet Cushion 2 46 Screw M6*20 2
23
Transportation
Wheel Stopper
2 47 Allen Wrench 1
24
Flat Mat
4
Parts List
Tools & Hardware
STEP 1:
Make sure the area on the floor is clear.
Hold the position A of Main Frame (No.
01), then pull the Three-In-One Bolt (No.
13) to release the Running Board (No.
19). Slowly lower the Running Board
(No. 19) to the floor.
STEP 2:
Assemble Tablet Bracket (No. 45) with
2 Washers (No. 42) and 2 Screws (No.
46).
Tighten and secure using Allen Wrench
(No. 47).
Note: The treadmill must be lubricated
before first use. See page 8 for
lubrication instructions.
The assembly is complete!
Assembly Instructions
Hold the bottom of the Main Frame (No. 01) at
Position A and lift up.
Push Main Frame (No. 01) upward gently.
Make sure the Three-In-One Bolt (No.13) is
inserted in
the hole on the side of the
Running Board (No. 19) securely.
Folding Instructions
ADJUSTING RESISTANCE
Adjustments Guide
Hold Handrail (No. 03) at the bend,
then tilt the treadmill toward you.
Once the Transportation Wheels
(No. 21) touch the ground, you can
safely move the treadmill
to your
desired location.
The Tension Switch (No. 14) has 8 levels.
To increase resistance, move the Tension
Switch (No. 14) down. To decrease the
resistance, move the Tension Switch (No.
14) up.
Moving Instructions
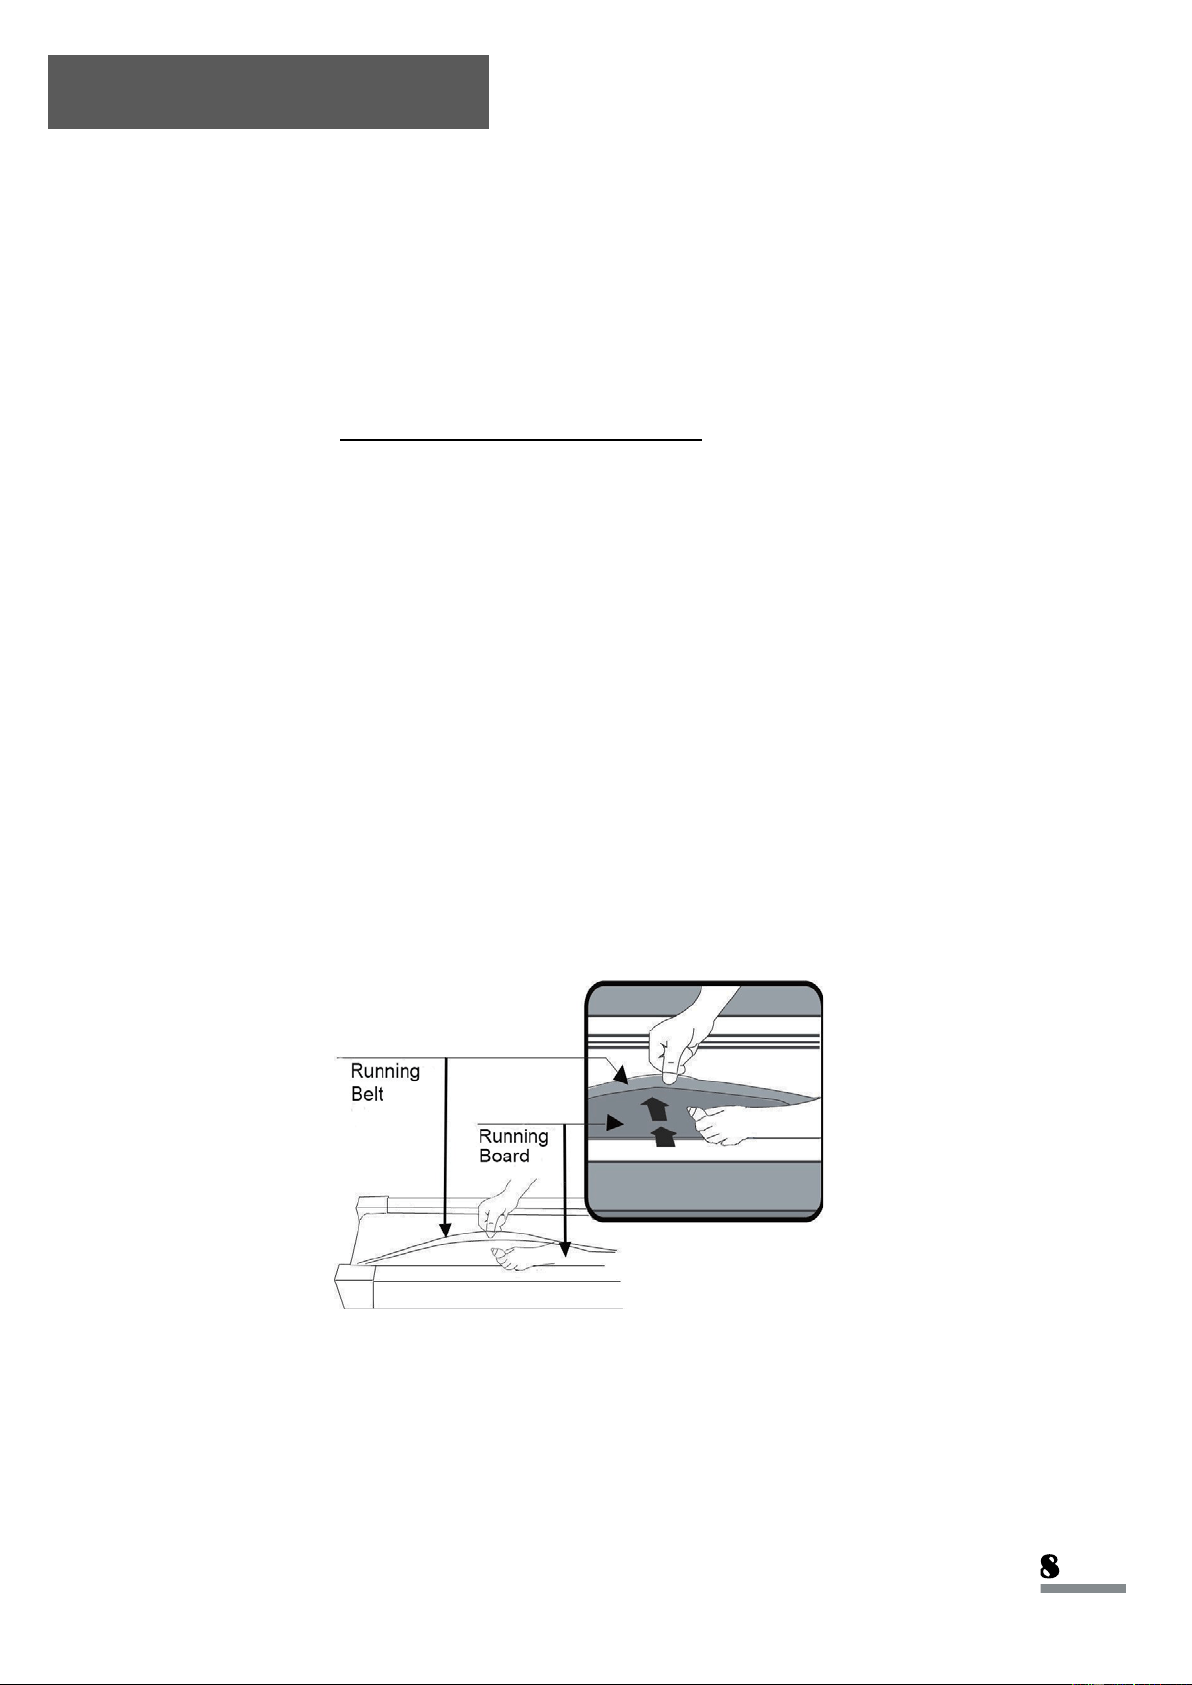
ADJUSTING THE INCLINE
ADJUSTING THE BELT
Picture A Picture B
Use Allen Wrench (No. 47) to adjust the Running Belt (No. 20).
1. If the Running Belt (No. 20) deviates to the right, turn the right side adjusting bolt
clockwise by 1/2 circle, then turn the left side adjusting bolt counter-clockwise
by 1/2 circle (Refer to Picture A).
2. If the Running Belt (No. 20) deviates to the left, turn the left adjusting bolt clockwise by
1/2 circle, then turn the right side adjusting bolt counter-clockwise by 1/2 circle
(Refer to Picture B).
Continue adjusting until the Running Belt (No. 20) is centered.
To adjust the incline, fold the treadmill first.
Adjust the incline of the treadmill by turning the
Feet Cushions (No. 22) at the bottom of the
treadmill. To decrease the incline, turn the Feet
Cushions (No. 22) counter-clockwise
. To
increase the incline, turn the Feet Cushion
(No. 22) clockwise. Make sure the treadmill is
leveled before use.
*IMPORTANT NOTE:
You will need to lubricate your treadmill before the first use.
RUNNING BELTS & TREADMILL LUBRICANT:
Lubricating the Running Board (No. 19) and Running Belt (No. 20) is essential as the friction
affects the life span and operation of the treadmill. It is suggested that the Running Board (No. 19)
and Running Belt (No. 20) be inspected regularly. If you find any wear on the Running Board (No.
19), please contact us at:support@sunnyhealthfitness.com.
HOW TO LUBRICATE:
Raise the Running Belt (No. 20) up on one side and apply lubricant to the Running Board (No.
19). Use a rag to thoroughly wipe the lubricant over the Running Board (No. 19). Repeat this
process for the other side.
The moving parts should turn freely and quietly. Abnormal moving parts will affect the safety of the
equipment. Inspect and tighten bolts regularly.
To better maintain the treadmill and prolong its lifespan, it is suggested that maintenance be done
on a regular basis.
DO NOT LOOSEN OR MAKE ANY ADJUSTMENTS TO THE RUNNING BELT WHILE APPLYING
LUBRICANT. A loose Running Belt (No. 20) will result in the runner sliding off when in use, while
too tight of a Running Belt (No. 20) will decrease to the motor's performance, and also create more
friction between the roller and Running Belt (No. 20). The most suitable tightness for the Running
Belt (No. 20) is when it is pulled out 50-75mm from the Running Board (No. 19).
The following time table is recommended:
Light user (less than 3 hours/week)
Medium user (3-5 hours/week)
Heavy user (more than 5 hours/week)
every six months
every three months
every two months
Lubrication
Version 1.4